Apple Bars: Discover the Best Recipe Everyone Loves!

Introduction to Apple Bars
There’s something magical about the smell of baked apples drifting through your home. It instantly pulls me back to my childhood, where weekends were spent in my grandma’s cozy kitchen, happily surrounded by family. Those delightful memories inspired me to create this easy apple bars recipe, and I know you’ll love them too! Perfect for busy moms and professionals, these delicious homemade apple bars are a sweet solution for dessert or an afternoon snack. They’re simple yet impressive, giving you that warm, fuzzy feeling that only home-cooked treats can provide.
Why You’ll Love This Apple Bars
Imagine sinking your teeth into a warm, gooey apple bar bursting with flavor. Not only are these apple bars incredibly delicious, but they’re also a breeze to make. With simple ingredients and easy steps, you can whip them up in no time. They’re perfect for those busy days when you want to impress your family or treat yourself. Trust me, each bite is a delightful hug from your kitchen!
Ingredients for Apple Bars
To create these delightful apple bars, you’ll need a handful of ingredients that come together like a cozy hug. Here’s what you’ll need:
- All-purpose flour: This forms the base for the crust, giving your bars the perfect structure.
- Old-fashioned oats: They add a rustic texture and a hearty flavor to the crust and topping.
- Brown sugar: Its rich sweetness caramelizes beautifully, enhancing the flavor of your bars.
- Granulated sugar: This balances out the flavors and gives a nice sweetness to the crust.
- Ground cinnamon: A warm spice that complements the apples and makes your kitchen smell heavenly.
- Salt: Just a pinch to enhance all the flavors; trust me, it makes a difference!
- Cold butter: Cut into small cubes, it ensures a flaky and tender crust.
- Fresh apples: Use your favorite variety for that fresh, juicy filling. Tart apples are perfect!
- Cornstarch: This helps thicken the apple juices, giving you that perfect consistency.
- Lemon juice: A splash to brighten up the flavor and prevent apples from browning.
- Vanilla extract: A splash adds depth and warmth to your apple filling.
- Nutmeg (optional): A hint of this can give your bars a lovely spice, but it’s totally your call!
- Powdered sugar: For drizzling on top, it adds a sweet finishing touch.
- Milk: Just a bit to help create a smooth glaze if you choose to make one.
These ingredients blend to create a symphony of flavors! If you’d like to see exact measures, they’re at the bottom of the article, ready for printing. Happy baking!
How to Make Apple Bars
Step 1: Preheat Your Oven
This is an essential step! Preheating your oven to 350°F (175°C) ensures that your apple bars bake evenly. Trust me, there’s nothing worse than a soggy bottom! While the oven warms up, grab a 9×13-inch pan and line it with parchment paper. This will make it a breeze to lift out your delicious bars later. Plus, no sticky mess to deal with! You’ll be on your way to creating those irresistible apple bars in no time.
Step 2: Prepare the Crust Mixture
Now, let’s dive into the crust! In a large mixing bowl, combine all-purpose flour, old-fashioned oats, brown sugar, granulated sugar, salt, and the first portion of ground cinnamon. This blend creates a heavenly, buttery base. Next, cut in the cold butter using a pastry cutter or your fingers until the mixture resembles coarse crumbs. It’s okay if it’s a bit crumbly; that’s how we want it! Reserve 1½ cups of this mixture for the topping. Press the remaining mixture evenly into the prepared pan. This crust is like a cozy bed for the sweet apple filling!
Step 3: Bake the Crust
Time to bake the crust! Pop it into your preheated oven and let it bake for about 10–12 minutes. Keep an eye on it; you’ll know it’s done when it’s lightly golden. This creates a perfect foundation for our luscious apple filling. After baking, let it cool slightly while you prepare the filling. That warm, buttery aroma is just a taste of what’s to come!
Step 4: Prepare the Apple Filling
Grab your chopped fresh apples! In a separate bowl, toss them with cornstarch, lemon juice, vanilla extract, the second portion of ground cinnamon, and optional nutmeg. Give it a gentle stir to coat the apples well. Let it sit for a few minutes. This allows the apples to absorb the flavors, creating a deliciously sweet, spiced filling. The cornstarch will thicken the juices, making that gooey goodness we all love. Get ready for your kitchen to smell like fall!
Step 5: Assemble the Bars
Now for the fun part! Spread the apple filling evenly over the baked crust in your pan. Make sure to cover every inch so each bite is filled with deliciousness. Then, take the reserved crumb mixture and sprinkle it generously over the apples. This topping will get golden and crispy while baking, adding that perfect crunch to complement the soft apples below. It’s like a beautiful blanket of oat goodness!
Step 6: Bake Again
Time to bake the assembled masterpiece! Place your pan back in the oven for 30–35 minutes. Keep an eye on it; you’ll know it’s ready when the topping turns golden and the apples bubble at the edges. This is when the magic happens! The warm scents and sights will have your family eagerly anticipating a taste of these delightful apple bars. You’ll want to resist the urge to dive in immediately!
Step 7: Cool and Glaze
Once your bars are golden and aromatic, it’s time to cool them down. Allow them to cool completely in the pan on a wire rack before lifting them out with the parchment paper. This is crucial for maintaining their structure! If you’re feeling fancy, whip up a quick glaze by mixing powdered sugar and a bit of milk. Drizzle it over the cooled bars for an elegant touch. Or enjoy them plain—either way, they are simply irresistible!
Tips for Success
- Using different apple varieties can enhance flavor; mix tart and sweet for balance.
- For an even easier cleanup, keep a wet paper towel handy to wipe off surfaces.
- Don’t skip chilling the butter; it’s key for a flaky crust.
- If you’re short on time, use pre-made crust; just don’t skip the delicious filling!
- Follow the baking times closely; your oven’s temperature may vary!
Equipment Needed
- 9×13-inch pan: A standard size; you can use any similar-sized baking dish.
- Parchment paper: Perfect for easy removal; foil can work in a pinch.
- Mixing bowls: A big bowl for dry ingredients and a smaller one for the apples.
- Pastry cutter or fork: To cut in butter; your fingers can do the trick too!
- Measuring cups and spoons: Essential for accurate ingredient ratios.
Variations of Apple Bars
- Nutty Delight: Add chopped walnuts or pecans to the oat mixture for a delightful crunch and extra flavor.
- Fruit Fusion: Combine apples with other fruits like pears or berries for a colorful and fruity twist.
- Gluten-Free Option: Substitute all-purpose flour with a gluten-free blend and use certified gluten-free oats.
- Spiced Up: Experiment with spices like ginger or cardamom for a unique flavor profile that will surprise the taste buds.
- Vegan Version: Replace butter with coconut oil or a plant-based alternative and use a flax egg for binding.
- Cheesy Surprise: Spread a layer of cream cheese mixed with a little sugar and vanilla over the crust before adding the apple filling for a rich contrast.
Serving Suggestions for Apple Bars
- Serve warm with a scoop of vanilla ice cream for a classic treat.
- Add a dollop of whipped cream on top for extra indulgence.
- Pair with a cup of hot cider or tea for a cozy vibe.
- Dust with powdered sugar before serving for a beautiful presentation.
- Enjoy alongside a scoop of yogurt for a delightful breakfast option.
FAQs about Apple Bars
As I dive into making these delightful apple bars, I often find myself answering a few common questions. Here are some of the most frequently asked questions that might pop into your mind:
Can I use frozen apples for this recipe?
Absolutely! If you have frozen apples, just thaw them and drain excess moisture before mixing them into the filling. This can be a lifesaver when fresh apples aren’t available!
How do I store leftover apple bars?
Store any leftovers in an airtight container at room temperature for up to two days. If you need to keep them longer, refrigerate them for up to a week. You can also freeze them for up to three months. Just remember to thaw them completely before enjoying!
Can I reduce the sugar in the recipe?
Yes! Feel free to adjust the sugar to suit your taste preferences. Just keep in mind that less sugar might yield a slightly less sweet filling, but adding a splash of lemonade can help balance it out.
What types of apples work best for this recipe?
I recommend using a mix of tart and sweet apples, like Granny Smith and Fuji. This combination creates a balanced flavor and delightful texture that everyone will love!
Can I make these apple bars ahead of time?
Yes! You can prepare them a day in advance. Just bake, let them cool, and store them in the fridge. When ready to serve, reheat gently in the oven or enjoy them chilled. Perfect for busy days!
Final Thoughts on Apple Bars
Making these apple bars brings so much joy into my kitchen—it’s like wrapping my family in a warm blanket of flavor. Each bite transports me back to simpler times, sharing laughter and treats with loved ones. Whether it’s an after-school snack or a surprise dessert at dinner, these bars always bring smiles. Plus, they’re a breeze to whip up, making them ideal for busy parents like us! So grab those fresh apples and let the magic unfold. I promise, you and your family will savor every delicious moment together!
Print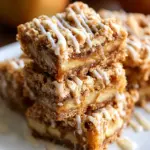
Apple Bars: Discover the Best Recipe Everyone Loves!
- Total Time: 1 hour 5 minutes
- Yield: 12 servings 1x
- Diet: Vegetarian
Description
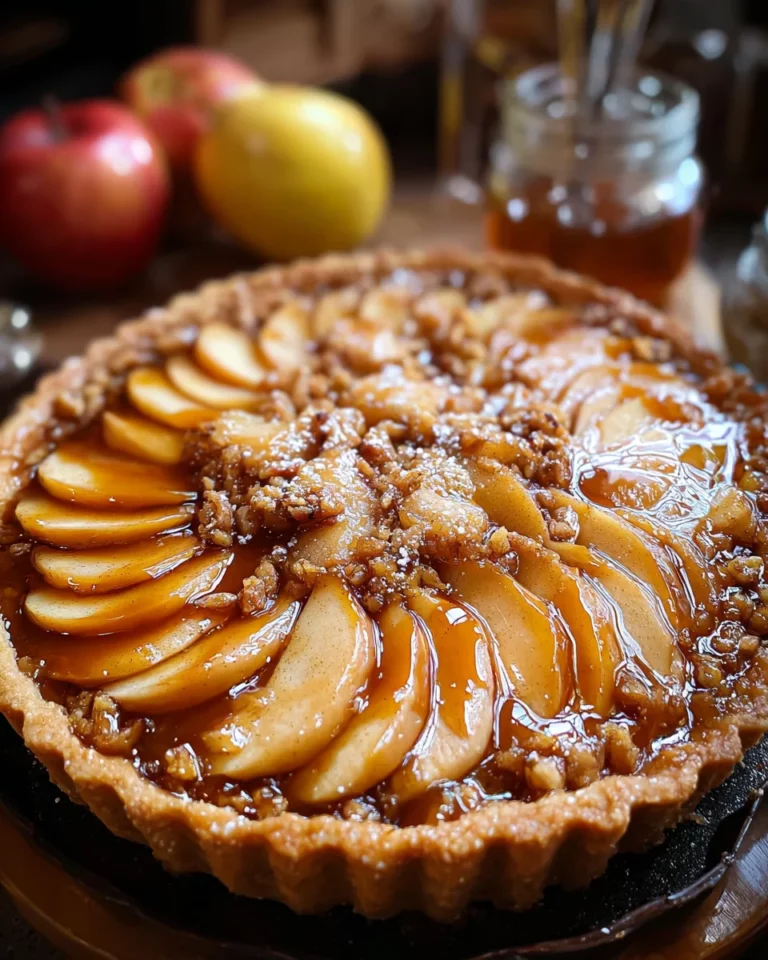
Delicious homemade apple bars with a buttery crust and a sweet apple filling, perfect for dessert or a snack.
Ingredients
- 2 cups all-purpose flour
- 1 cup old-fashioned oats
- 3/4 cup brown sugar
- 1/2 cup granulated sugar
- 1 teaspoon ground cinnamon (for crust and topping)
- 1/2 teaspoon salt
- 1 cup cold butter, cut into small cubes
- 4 cups peeled, chopped fresh apples
- 2 teaspoons cornstarch
- 1 tablespoon lemon juice
- 1 teaspoon vanilla extract
- 1/2 teaspoon ground cinnamon (for apple filling)
- 1/4 teaspoon nutmeg (optional)
- 1/2 cup powdered sugar
- 1–2 tablespoons milk
Instructions
- Preheat the oven to 350°F (175°C) and line a 9×13-inch pan with parchment paper.
- In a large bowl, combine flour, oats, brown sugar, granulated sugar, salt, and the first portion of cinnamon. Cut in the butter until the mixture resembles coarse crumbs. Set aside 1½ cups of this mixture for the topping.
- Press the remaining mixture evenly into the prepared pan and bake for 10–12 minutes until lightly golden.
- Meanwhile, toss the chopped apples with cornstarch, lemon juice, vanilla extract, the second portion of cinnamon, and nutmeg. Let the mixture sit for a few minutes so the flavors combine.
- Spread the apple mixture evenly over the baked crust. Sprinkle the reserved crumb mixture on top.
- Bake again for 30–35 minutes or until the topping is golden and the apples are bubbly around the edges.
- Allow the bars to cool completely before lifting them out of the pan. Drizzle the glaze over the cooled bars or enjoy them plain.
Notes
- For a sweeter filling, add more sugar to the apple mixture.
- Serve warm with ice cream or whipped cream for a delightful dessert.
- Prep Time: 20 minutes
- Cook Time: 45 minutes
- Category: Dessert
- Method: Baking
- Cuisine: American
Nutrition
- Serving Size: 1 bar
- Calories: 200
- Sugar: 15g
- Sodium: 150mg
- Fat: 8g
- Saturated Fat: 5g
- Unsaturated Fat: 3g
- Trans Fat: 0g
- Carbohydrates: 30g
- Fiber: 2g
- Protein: 2g
- Cholesterol: 30mg