Blackberry Pistachio Dream Bars: A Must-Try Delight!

Introduction to Blackberry Pistachio Dream Bars Recipe
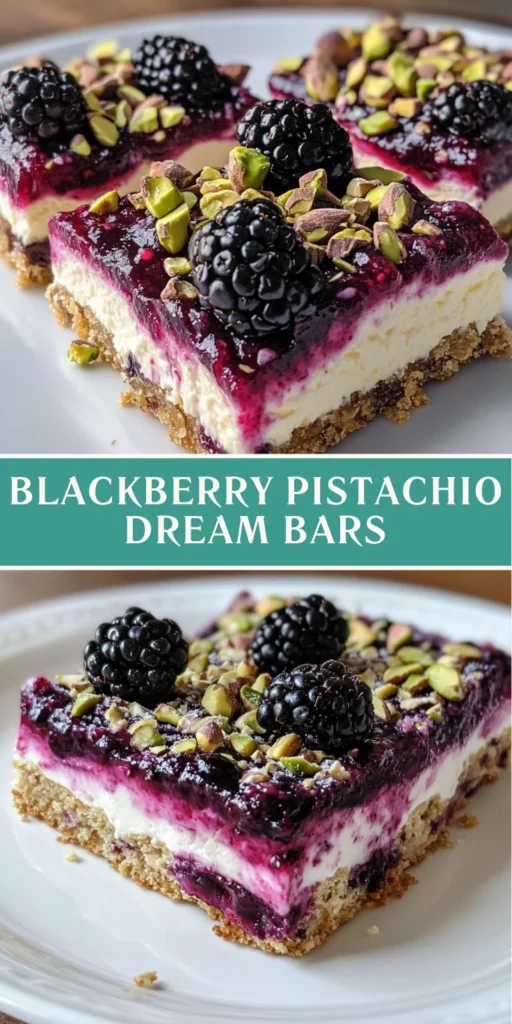
Blackberry Pistachio Dream Bars Recipe. This delightful treat combines the tartness of fresh blackberries with the rich, nutty flavor of pistachios, creating a symphony of tastes that dance on your palate. Every time I make these bars, I’m reminded of summer picnics and family gatherings, where laughter and sweet treats go hand in hand.
It all started one sunny afternoon when I stumbled upon a basket of plump blackberries at my local farmer’s market. Their deep purple hue and juicy texture called out to me, and I knew I had to create something special. I decided to pair them with pistachios, a nut I adore for its vibrant green color and unique crunch. The combination was a match made in heaven! The moment I took my first bite, I was transported to a world of flavor that felt both luxurious and comforting.
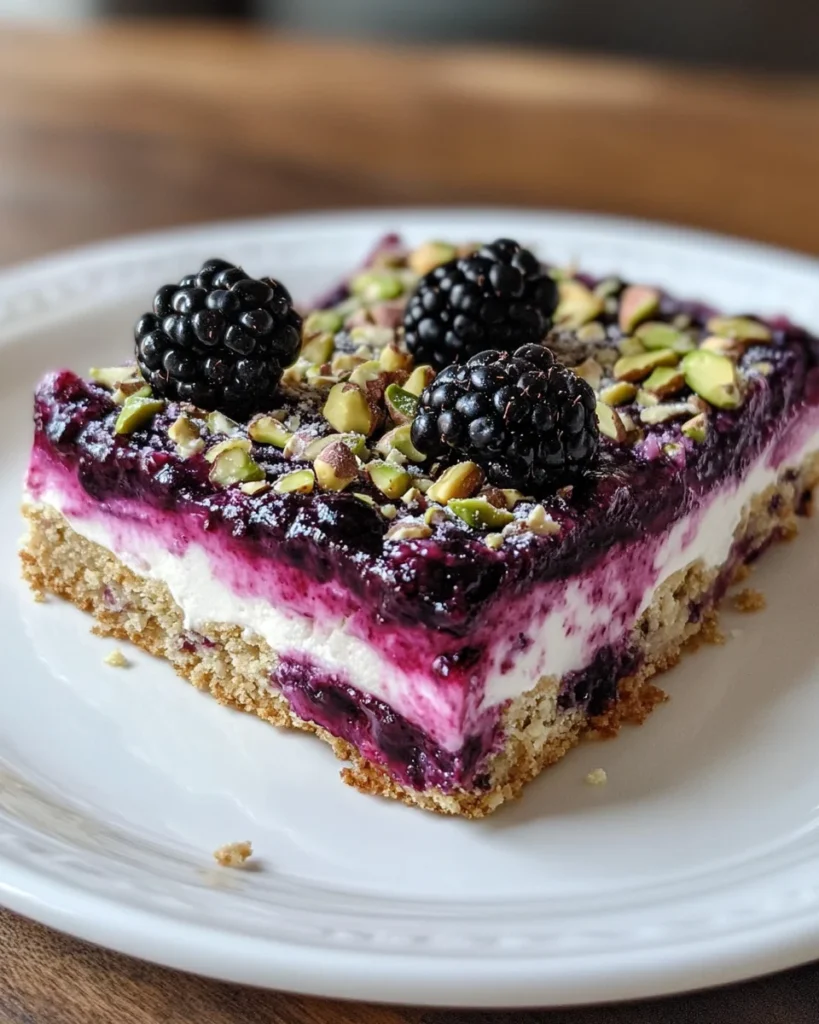
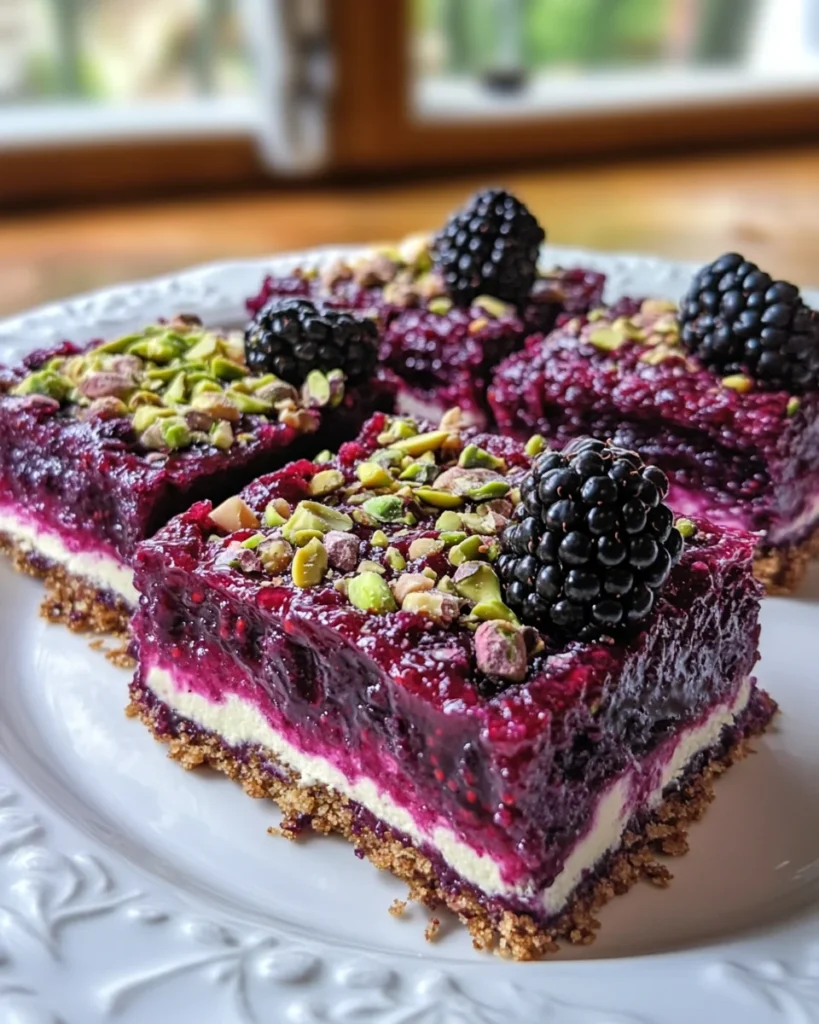
These bars are not just a feast for the taste buds; they are also a visual delight. The layers of creamy pistachio, smooth cream cheese, and luscious blackberry topping create a stunning presentation that will impress your guests. Whether you’re hosting a dinner party or simply treating yourself, these bars are sure to be a hit.
Blackberry Pistachio Dream Bars, you’ll want to make them again and again!
Ingredients for Blackberry Pistachio Dream Bars Recipe
Blackberry Pistachio Dream Bars, let’s gather our ingredients. Having everything ready makes the cooking experience smoother and more enjoyable. I always find that when I have my ingredients prepped, it feels like I’m setting the stage for a beautiful performance in the kitchen!
Main Ingredients
- 1 cup crushed digestive biscuits
- 1/4 cup unsalted butter, melted
- 1 cup shelled pistachios, finely ground
- 1/4 cup confectioners’ sugar
- 1/4 cup heavy cream
- 1 cup cream cheese, softened
- 1/2 cup confectioners’ sugar
- 1 teaspoon vanilla extract
- 2 cups fresh blackberries
- 1/2 cup granulated sugar
- 1 tablespoon lemon juice
- 2 teaspoons cornstarch
- 1/4 cup shelled pistachios, chopped (for topping)
- Fresh blackberries for garnish
When selecting your ingredients, I recommend using fresh blackberries if possible. They add a burst of flavor that frozen ones just can’t match. Also, opt for high-quality pistachios; their nutty essence is the star of this recipe. I often buy them from local markets or specialty stores to ensure freshness.
Optional Add-ons
- For a touch of extra sweetness, consider adding a drizzle of honey over the top before serving.
- If you want a bit of crunch, sprinkle some crushed graham crackers on top of the cream cheese layer.
- For a twist, you can substitute the blackberries with raspberries or blueberries, depending on your preference.
Blackberry Pistachio Dream Bars to new heights, making them even more delightful. Feel free to get creative and make this recipe your own!
How to Prepare Blackberry Pistachio Dream Bars Recipe
Blackberry Pistachio Dream Bars! I love this part because it’s where the magic happens. Each step brings us closer to that delicious moment when we can finally take a bite. Let’s get started!
Step 1: Preheat the Oven and Prepare the Baking Dish
First things first, let’s preheat the oven to 350°F (175°C). While that’s warming up, grab an 8×8 inch baking pan and line it with parchment paper. This will make it super easy to lift the bars out later.
Tips for Step 1
- Make sure to leave some overhang with the parchment paper. It acts like a little handle when you’re ready to lift the bars out.
- Double-check that your oven is fully preheated before moving on to the next step. This ensures even baking!
Step 2: Make the Crust
Next, let’s create the crust. In a mixing bowl, combine the crushed digestive biscuits with the melted butter. Mix until the crumbs are well-coated and resemble wet sand. Then, press this mixture firmly into the bottom of your prepared baking pan.
Tips for Step 2
- Use the back of a measuring cup to press the crust down evenly. This helps it hold together better when baked.
- Don’t skip the chilling step! Pop the crust in the fridge for about 20 minutes to firm it up before adding the next layer.
Step 3: Prepare the Blackberry Filling
While the crust is chilling, let’s whip up the blackberry filling. In a saucepan over medium heat, combine the fresh blackberries, granulated sugar, lemon juice, and cornstarch. Stir gently until the mixture starts to bubble and thicken. This usually takes about 5-7 minutes.
Tips for Step 3
- Be careful not to mash the blackberries too much; we want some lovely chunks for texture!
- Once thickened, let the filling cool slightly before spreading it over the cream cheese layer later. This prevents it from melting the layers below.
Step 4: Create the Pistachio Topping
Now, let’s make the creamy pistachio layer. In a mixing bowl, blend the finely ground pistachios with confectioners’ sugar and heavy cream. Mix until smooth and creamy. This layer is where the magic truly happens!
Tips for Step 4
- If you don’t have a food processor, you can use a zip-top bag and a rolling pin to crush the pistachios. Just make sure they’re finely ground for a smooth texture.
- Don’t rush this step! Take your time to blend until it’s perfectly creamy. It makes a world of difference in the final taste.
Step 5: Assemble and Bake
With all our layers ready, it’s time to assemble! Spread the pistachio mixture over the chilled biscuit crust, smoothing it out evenly. Then, add the cream cheese layer by beating the softened cream cheese with confectioners’ sugar and vanilla extract until creamy. Spread this over the pistachio layer.
Tips for Step 5
- Use an offset spatula for spreading the layers. It makes it easier to get an even surface.
- After layering, chill the bars in the fridge for about 20 minutes before adding the blackberry filling. This helps each layer set nicely.
Step 6: Cool and Slice
Finally, it’s time to add the blackberry filling on top! Once it’s cooled, spread it evenly over the cream cheese layer. Chill the entire pan in the fridge for at least 2 hours, or until set. When you’re ready to serve, lift the bars out using the parchment paper and slice them into squares.
Tips for Step 6
- For clean cuts, use a sharp knife and wipe it with a damp cloth between slices.
- These bars can be stored in the fridge for up to a week, but I doubt they’ll last that long!
Blackberry Pistachio Dream Bars are ready to be enjoyed. I can already imagine the smiles on everyone’s faces as they take their first bite. Let’s move on to the next section, where I’ll share the equipment you’ll need for this delightful recipe!
Equipment Needed for Blackberry Pistachio Dream Bars Recipe
Blackberry Pistachio Dream Bars. Having the right tools on hand makes the cooking process smoother and more enjoyable. Trust me, it’s like having the perfect paintbrush when you’re about to create a masterpiece!
- 8×8 inch baking pan: This is the perfect size for our bars. If you don’t have one, a 9×9 inch pan will work too; just keep an eye on the baking time.
- Parchment paper: Lining your baking pan with parchment paper is a game-changer. It helps with easy removal and keeps the bars from sticking.
- Mixing bowls: You’ll need a few of these for mixing different layers. I recommend having at least two medium-sized bowls and one large bowl.
- Measuring cups and spoons: Accurate measurements are key to baking success! Make sure you have both dry and liquid measuring cups.
- Food processor or blender: This is essential for finely grinding the pistachios. If you don’t have one, a zip-top bag and a rolling pin can do the trick—just crush those nuts until they’re finely ground!
- Spatula: An offset spatula is perfect for spreading layers evenly. If you don’t have one, a regular spatula will work just fine.
- Saucepan: You’ll need this for cooking the blackberry filling. A medium-sized saucepan is ideal for even heating.
- Whisk or electric mixer: For mixing the cream cheese layer, a whisk works well, but an electric mixer makes it super easy and creamy.
- Sharp knife: This is crucial for slicing the bars into perfect squares. A clean cut makes for a beautiful presentation!
- Cooling rack: While not absolutely necessary, a cooling rack can help your bars cool evenly if you choose to bake them.
Blackberry Pistachio Dream Bars. Remember, the right equipment can make all the difference in your cooking experience. Now, let’s move on to the delicious variations you can try with this recipe!
Variations of Blackberry Pistachio Dream Bars Recipe
Blackberry Pistachio Dream Bars Recipe is a fantastic base that invites creativity. Whether you want to switch things up for dietary preferences or simply explore new flavor combinations, there are plenty of ways to make this recipe your own. Let me share some of my favorite variations that I’ve tried over the years!
Berry Bliss Bars
If you’re a fan of mixed berries, why not swap out the blackberries for a medley of raspberries, blueberries, and strawberries? The tartness of raspberries pairs beautifully with the creamy layers, while blueberries add a burst of sweetness. I once made these for a summer barbecue, and they disappeared faster than I could say “dessert!”
Nutty Delight
For those who adore nuts, consider adding a layer of chopped walnuts or almonds along with the pistachios. This adds an extra crunch and a delightful nutty flavor. You can even toast the nuts lightly before adding them to enhance their flavor. I remember the first time I did this; the aroma filled my kitchen, and I couldn’t wait to dig in!
Chocolate Indulgence
For a chocolate twist, try adding a layer of melted dark chocolate over the cream cheese layer before spreading the blackberry filling. The rich chocolate complements the tart blackberries perfectly. I often find myself sneaking a piece of this variation late at night, savoring the combination of flavors. It’s pure bliss!
Vegan Version
If you’re looking for a vegan adaptation, you can easily substitute the cream cheese with a plant-based alternative. Use coconut cream or cashew cream for the creamy layer. For the crust, swap the butter with coconut oil or vegan butter. I made this version for a friend’s birthday, and it was a hit! No one could tell it was vegan!
Gluten-Free Option
For a gluten-free version, simply replace the digestive biscuits with gluten-free graham crackers or almond flour. This way, everyone can enjoy these delicious bars without worry. I’ve had friends with gluten sensitivities rave about this adaptation, and it warms my heart to see them enjoy dessert!
Blackberry Pistachio Dream Bars Recipe not only keep things exciting but also allow you to cater to different tastes and dietary needs. I encourage you to get creative and try out your own combinations. After all, cooking is all about exploration and joy! Now, let’s move on to some essential cooking notes to ensure your bars turn out perfectly every time.
Cooking Notes for Blackberry Pistachio Dream Bars Recipe
Blackberry Pistachio Dream Bars. These tips are like little nuggets of wisdom that help ensure your bars turn out perfectly every time. Let me share some of my favorite insights with you!
Ingredient Quality Matters
When it comes to baking, the quality of your ingredients can significantly impact the final result. I always recommend using fresh blackberries, as their vibrant flavor is the star of this recipe. If you can, buy them from a local farmer’s market. The same goes for pistachios—opt for high-quality, unsalted nuts. Trust me, it makes a world of difference!
Chill Time is Key
Don’t rush the chilling steps! Each layer needs time to set properly. I often find that when I’m patient and allow the layers to chill, the bars hold together beautifully when sliced. It’s tempting to skip this step, but I promise it’s worth the wait!
Layering Technique
When spreading each layer, take your time to ensure even distribution. I like to use an offset spatula for this, as it helps create a smooth surface. If you’re not careful, the layers can mix, and we want to keep those beautiful colors and textures intact!
Storage Tips
These bars can be stored in the fridge for up to a week, but I recommend keeping them in an airtight container. This helps maintain their freshness and prevents them from drying out. I often find myself sneaking a piece every day, and they still taste just as good as the first day!
Common Pitfalls to Avoid
- Overmixing the Cream Cheese: When mixing the cream cheese layer, be careful not to overmix. This can lead to a grainy texture. Just mix until creamy and smooth.
- Not Cooling the Blackberry Filling: If you spread the blackberry filling while it’s still hot, it can melt the layers below. Allow it to cool slightly before adding it to the bars.
- Skipping the Parchment Paper: Trust me, lining your baking pan with parchment paper is a must! It makes removing the bars so much easier.
Blackberry Pistachio Dream Bars. I can’t wait for you to experience the joy of making these delightful treats. Now, let’s explore some serving suggestions that will elevate your dessert presentation!
Serving Suggestions for Blackberry Pistachio Dream Bars Recipe
Blackberry Pistachio Dream Bars, it’s time to think about how to serve them. Presentation can elevate a simple dessert into something truly special. I love to get creative when it comes to serving these bars, and I can’t wait to share some of my favorite ideas with you!
Plating with Style
When I serve these bars, I like to place them on a beautiful platter. A white or light-colored plate makes the vibrant colors of the blackberries and pistachios pop! You can cut the bars into neat squares or rectangles, arranging them in a way that looks inviting. A sprinkle of chopped pistachios on top adds a lovely touch of color and texture.
Garnishing for Extra Flair
Garnishing is where you can really let your creativity shine! I often add a few fresh blackberries on top of each bar for a burst of color. A light dusting of confectioners’ sugar can also create a beautiful snowy effect. If you want to take it a step further, consider drizzling a bit of honey or chocolate sauce over the top. It adds a touch of sweetness and makes the bars look even more decadent!
Pairing with Beverages
Blackberry Pistachio Dream Bars, I love to serve them with a refreshing beverage. A chilled glass of lemonade or iced tea pairs wonderfully with the tartness of the blackberries. If you’re feeling fancy, a sparkling wine or a fruity cocktail can elevate your dessert experience to a whole new level!
Serving at Gatherings
If you’re hosting a gathering, consider cutting the bars into smaller bite-sized pieces. This way, guests can enjoy a taste without feeling too full. I often place them on a dessert table alongside other treats, creating a delightful spread that invites everyone to indulge. Trust me, these bars will be the star of the show!
Storing Leftovers
If you happen to have any leftovers (which is rare in my house!), store them in an airtight container in the fridge. They can last up to a week, but I recommend enjoying them within a few days for the best flavor and texture. I often find myself sneaking a piece every evening, savoring the delightful combination of flavors!
Blackberry Pistachio Dream Bars will not only taste amazing but also look stunning on any table. I can’t wait for you to share these delightful treats with your friends and family. Now, let’s move on to some expert tips for perfecting this recipe!
Tips for Perfecting Blackberry Pistachio Dream Bars Recipe
Blackberry Pistachio Dream Bars, I’ve gathered a treasure trove of tips that can help you achieve the best results. These little nuggets of wisdom are like secret ingredients that can elevate your baking game. Let’s dive into some expert advice that I’ve learned along the way!
Use Room Temperature Ingredients
One of the best tips I can share is to ensure your cream cheese and heavy cream are at room temperature before you start mixing. This helps them blend more smoothly, resulting in a creamier texture. I often take them out of the fridge an hour before I begin baking. It makes a noticeable difference!
Don’t Rush the Chilling Process
Patience is key when it comes to chilling the layers. Each layer needs time to set properly, so resist the urge to skip this step. I usually set a timer and use this time to clean up my kitchen or prepare my serving platter. It’s a win-win!
Experiment with Flavors
Feel free to get creative with flavors! While I adore the classic combination of blackberries and pistachios, you can try different fruits or nuts. I once made a version with strawberries and almonds, and it was a hit! Don’t be afraid to explore and find your favorite flavor combinations.
Perfect Your Slicing Technique
For beautifully sliced bars, use a sharp knife and wipe it clean between cuts. This prevents the layers from smudging together. I like to dip my knife in hot water, wipe it dry, and then slice. It makes for clean, professional-looking edges!
Serve with a Side of Whipped Cream
Blackberry Pistachio Dream Bars with a dollop of freshly whipped cream. The lightness of the cream complements the richness of the bars beautifully. I often whip up a batch just before serving, and it adds a lovely finishing touch!
Blackberry Pistachio Dream Bars. I can’t wait for you to experience the joy of sharing these treats with your loved ones. Now, let’s break down the time it takes to make these delicious bars!
Frequently Asked Questions about Blackberry Pistachio Dream Bars Recipe
Blackberry Pistachio Dream Bars recipe with friends and family, I’ve noticed a few common questions popping up. It’s always great to clarify any doubts, especially when it comes to baking. So, let’s dive into some frequently asked questions to help you on your culinary journey!
Can I use frozen blackberries instead of fresh ones?
While fresh blackberries are ideal for this recipe, you can use frozen ones in a pinch. Just be aware that they may release more moisture, which can affect the texture of your bars. If you go this route, I recommend thawing and draining them before use to minimize excess liquid.
How do I store the leftover bars?
Blackberry Pistachio Dream Bars fresh, store them in an airtight container in the fridge. They can last up to a week, but I doubt they’ll last that long in my house! Just make sure to separate layers with parchment paper if you stack them to prevent sticking.
Can I make these bars ahead of time?
Absolutely! These bars are perfect for making ahead of time. In fact, they taste even better after a day in the fridge as the flavors meld together. Just be sure to cover them well to keep them fresh.
What can I substitute for cream cheese?
If you’re looking for a dairy-free option, you can use a plant-based cream cheese alternative. I’ve also had success with cashew cream or coconut cream for a vegan version. Just make sure to adjust the sweetness to your liking!
Blackberry Pistachio Dream Bars even more enjoyable. If you have any other questions, feel free to reach out! Now, let’s wrap up this delightful recipe with a conclusion that highlights its appeal.
Conclusion on Blackberry Pistachio Dream Bars Recipe
Blackberry Pistachio Dream Bars, I can’t help but feel a sense of joy and accomplishment. This recipe is more than just a collection of ingredients and steps; it’s a celebration of flavors, memories, and the simple pleasure of sharing something sweet with loved ones. Each layer tells a story, from the crunchy biscuit base to the creamy pistachio topping and the vibrant blackberry layer that brings it all together.
What I love most about these bars is their versatility. Whether you’re hosting a gathering, celebrating a special occasion, or simply treating yourself after a long day, they fit perfectly into any scenario. The combination of textures and flavors creates a delightful experience that leaves everyone wanting more. I often find myself reminiscing about the laughter and joy that fills the room when I serve these bars to friends and family.
Blackberry Pistachio Dream Bars.
So, what are you waiting for? Let’s get baking! I can’t wait for you to experience the joy and satisfaction that comes from creating these delightful treats. Trust me, once you take that first bite, you’ll understand why they hold a special place in my heart. Happy baking!
Print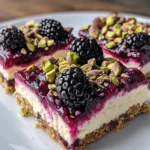
Blackberry Pistachio Dream Bars
- Total Time: 3 hours 40 minutes
- Yield: 12 bars 1x
- Diet: Vegetarian
Description
A delightful dessert combining the tartness of fresh blackberries with the rich, nutty flavor of pistachios, creating a symphony of tastes.
Ingredients
- 1 cup crushed digestive biscuits
- 1/4 cup unsalted butter, melted
- 1 cup shelled pistachios, finely ground
- 1/4 cup confectioners’ sugar
- 1/4 cup heavy cream
- 1 cup cream cheese, softened
- 1/2 cup confectioners’ sugar
- 1 teaspoon vanilla extract
- 2 cups fresh blackberries
- 1/2 cup granulated sugar
- 1 tablespoon lemon juice
- 2 teaspoons cornstarch
- 1/4 cup shelled pistachios, chopped (for topping)
- Fresh blackberries for garnish
Instructions
- Preheat the oven to 350°F (175°C) and prepare an 8×8 inch baking pan lined with parchment paper.
- Make the crust by combining crushed digestive biscuits with melted butter and pressing it into the bottom of the pan.
- Prepare the blackberry filling by cooking blackberries, granulated sugar, lemon juice, and cornstarch in a saucepan until thickened.
- Create the pistachio topping by blending finely ground pistachios with confectioners’ sugar and heavy cream until smooth.
- Assemble the bars by layering the pistachio mixture over the crust, followed by the cream cheese layer, and then the blackberry filling.
- Chill the assembled bars in the fridge for at least 2 hours before slicing and serving.
Notes
- Use fresh blackberries for the best flavor.
- Chill each layer properly to ensure the bars hold together when sliced.
- Store leftovers in an airtight container in the fridge for up to a week.
- Prep Time: 30 minutes
- Cook Time: 10 minutes
- Category: Dessert
- Method: Baking
- Cuisine: American
Nutrition
- Serving Size: 1 bar
- Calories: 210
- Sugar: 12g
- Sodium: 50mg
- Fat: 12g
- Saturated Fat: 5g
- Carbohydrates: 24g
- Fiber: 2g
- Protein: 3g
- Cholesterol: 30mg