Chocolate Covered Cherry Brownie Bombs

Introduction to Chocolate Covered Cherry Brownie Bombs
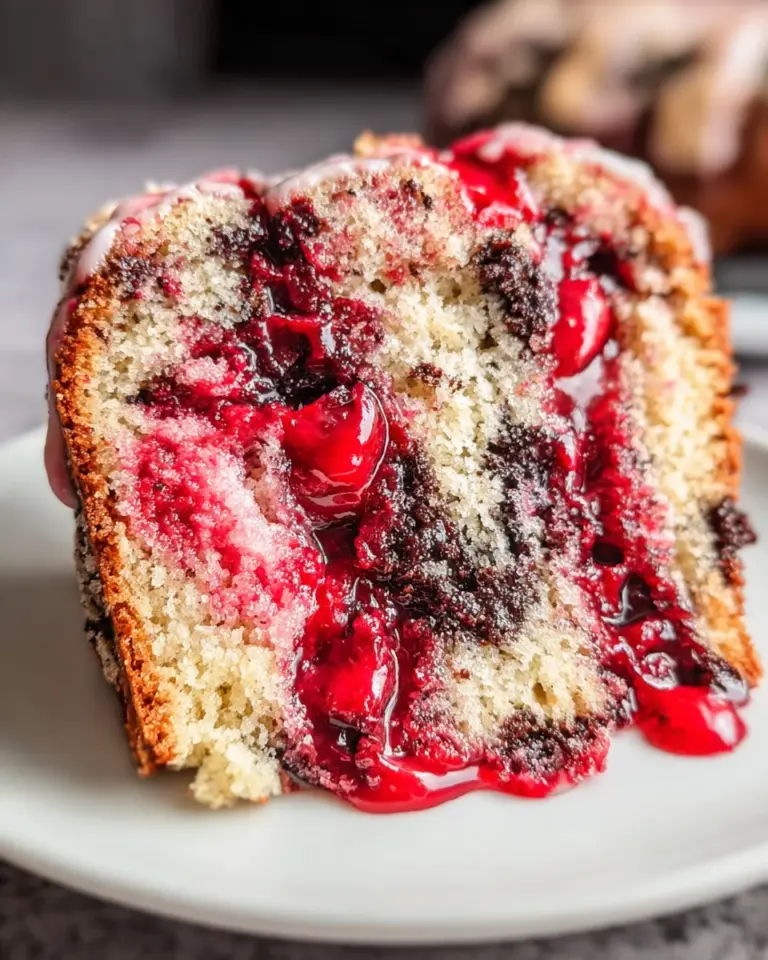
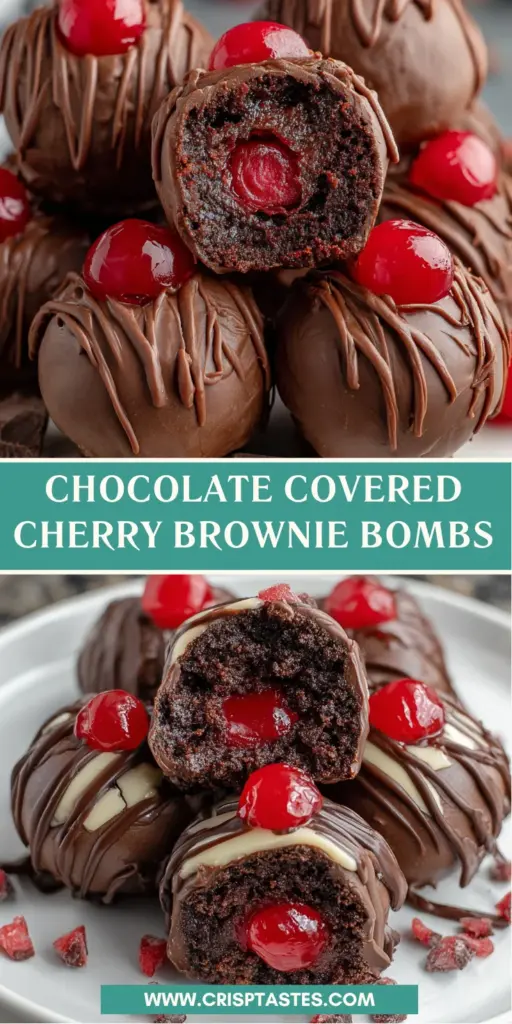
There’s something simply magical about indulging in Chocolate Covered Cherry Brownie Bombs. These little delights combine the rich, fudgy goodness of brownies with a luscious cherry filling, coated in glossy chocolate. Perfect for those busy days when you need a sweet pick-me-up or when you want to impress loved ones at a gathering. I often find myself reaching for this recipe because, let’s face it, who doesn’t love a treat that’s both delicious and easy to make? Get ready to bring joy to your kitchen with these delectable bombs!
Why You’ll Love This Chocolate Covered Cherry Brownie Bombs
You’ll adore these Chocolate Covered Cherry Brownie Bombs for so many reasons! First off, they’re a breeze to whip up, making them perfect for my busy schedule. Plus, the combination of rich brownie, sweet cherry, and creamy chocolate is a flavor explosion! Whether you’re treating family or surprising friends, these little bites of joy are sure to bring smiles all around. You might just find them becoming your go-to dessert!
Ingredients for Chocolate Covered Cherry Brownie Bombs
Let’s gather all the delicious components to create these heavenly Chocolate Covered Cherry Brownie Bombs. I love how each part plays a vital role in building flavor and texture.
- Chewy fudge brownie mix: This forms the base of our treats, delivering rich, chocolatey goodness.
- Vegetable oil: This keeps our brownies moist and adds density, helping them hold together perfectly.
- Water: A splash of water aids in mixing the brownie mix, making for a smooth batter.
- Large eggs: They provide structure and lift, ensuring our brownies rise beautifully during baking.
- Whipped chocolate frosting: This creamy delight blends with the crumbled brownies, enhancing the overall flavor.
- Maraschino cherries: These sweet gems are the star of the show, providing a juicy burst of flavor in each bite.
- Chocolate almond bark: This decadent coating adds a rich chocolate layer that ties the entire treat together.
Feel free to get creative! You might substitute different types of frosting like cream cheese or vanilla buttercream for a twist. Also, the ingredients with specific amounts can be found at the bottom of the article for easy printing. Now let’s dive into the fun part – making these delightful bombs!
How to Make Chocolate Covered Cherry Brownie Bombs
Step 1: Preheat and Prepare
Let’s get cooking! Start by preheating your oven to 175°C. While that’s heating up, grab a 22×33 cm baking dish and give it a generous spray with nonstick baker’s spray. This is essential for ensuring our brownies come out perfectly without sticking. Just imagine those delicious brownie bombs, free and smooth, ready to delight your taste buds!
Step 2: Make the Brownie Base
In a medium mixing bowl, combine the chewy fudge brownie mix, vegetable oil, water, and large eggs. Stir gently until everything is just combined. Be careful not to overmix, as we want our brownies to maintain that rich, fudgy texture. Spread the batter evenly into your prepared dish and bake according to the package instructions, typically for about 30 minutes. Keep an eye on them; your kitchen will fill with the warm, chocolaty aroma that’s simply irresistible! Once baked, allow them to cool completely before moving on.
Step 3: Prepare the Brownie Filling
Once the brownies are cool, it’s time to crumble! Use your hands to break half of the brownies into a large bowl. Add half of the whipped chocolate frosting and mix it with a large spoon until well combined. Next, crumble the remaining brownies on top and add the rest of the frosting. Mix everything together until you have a delicious, cohesive filling. This step is pure joy—your hands will be messy, but the end result is worth it!
Step 4: Shape the Brownie Bombs
Now, let’s make these bites of happiness! Line a baking sheet with parchment paper for easy cleanup. Using a 22 ml (1½ tablespoon) scoop, scoop out the brownie mixture and roll it into a ball. Flatten each ball slightly and create an indentation with your thumb. This is where the magic happens! Place a maraschino cherry in the center, then close the brownie around it, rolling to seal. Arrange all the brownie bombs on the lined sheet, then let them chill in the refrigerator for about 60 minutes. This makes them easier to coat later.
Step 5: Melt the Coating
It’s time for the chocolate coating! Break the almond bark into smaller pieces and place them in a microwave-safe bowl. Heat it in the microwave, using 1-minute intervals and stirring each time to ensure it melts evenly. The goal is a smooth, glossy mixture that will coat our brownie bombs perfectly. Don’t rush this step, as we want to maintain that luscious chocolate texture!
Step 6: Coat the Brownie Bombs
Once your almond bark is melted and smooth, it’s coating time! Using a spoon, carefully submerge each chilled brownie bomb into the melted almond bark. Lift it out with a fork, tapping gently to remove any excess coating. Set each coated ball back onto the parchment paper and admire your work! It’s like giving each bomb a shiny, chocolatey coat of armor. Allow all the bombs to refrigerate until fully set. Trust me, the wait is worth it!
Tips for Success
- Ensure your maraschino cherries are well-dried to avoid excess moisture in the brownie bombs.
- For an extra touch, sprinkle some sea salt on top of the chocolate coating for a delightful contrast.
- Keep your chocolate almond bark at room temperature before melting for smoother results.
- Don’t rush the chilling process; it helps the brownie bombs maintain their shape.
- Make a double batch to enjoy later; they store wonderfully!
Equipment Needed
- Baking dish: A 22×33 cm pan works best, but any similar-sized dish will suffice.
- Mixing bowls: Use medium and large bowls for mixing brownie batter and filling.
- Scoop: A 22 ml (1½ tablespoon) scoop helps in portioning, but a regular tablespoon works too.
- Parchment paper: Line your baking sheet for easy cleanup; aluminum foil can also do the trick.
- Microwave-safe bowl: Perfect for melting almond bark; a regular bowl with low sides will work as well.
Variations
- Flavorful Frosting: Swap the whipped chocolate frosting with flavors like raspberry, vanilla, or espresso for a unique twist.
- Nutty Delight: Add crushed nuts, such as walnuts or pecans, to the brownie filling for an added crunch.
- Gluten-Free Option: Use gluten-free brownie mix to make this dessert suitable for those with dietary restrictions.
- Fruit Filling: Experiment with different fruit fillings, like strawberry or orange, to surprise your taste buds!
- Vegan Version: Substitute eggs with flax eggs and use vegan chocolate almond bark to make these bombs dairy-free.
Serving Suggestions
- Pair these Chocolate Covered Cherry Brownie Bombs with a scoop of vanilla ice cream for an indulgent dessert experience.
- Serve alongside fresh berries for a refreshing contrast that balances the sweetness.
- Presentation tip: Arrange the brownie bombs on a cute platter and drizzle with extra chocolate for a stunning effect.
- A cup of rich coffee or hot cocoa makes the perfect drink pairing to complement these treats.
FAQs about Chocolate Covered Cherry Brownie Bombs
As you embark on your journey to create these delightful Chocolate Covered Cherry Brownie Bombs, you might have some questions in mind. Let me answer a few common ones that pop up frequently!
How do I store these brownie bombs?
To keep your brownie bombs fresh, place them in an airtight container in the refrigerator. They can last up to a week, but I bet they won’t last that long!
Can I freeze Chocolate Covered Cherry Brownie Bombs?
Absolutely! These sweet treats freeze well. Just ensure they’re in a freezer-safe container. Thaw them in the fridge when you’re ready to enjoy.
What can I substitute for almond bark?
If you want a twist, you can use chocolate chips or melting chocolate. Just melt them following the same method, and you’ll have a gorgeous coating!
Can I use other fruits instead of cherries?
Definitely! Feel free to get creative. Strawberries, raspberries, or even diced peaches make delightful fillings. The possibilities are endless!
Is there a way to make the brownie bombs less sweet?
If you prefer a less sweet treat, consider reducing the frosting quantity or using semi-sweet or dark chocolate for the coating. Balance is key!
Final Thoughts
Creating Chocolate Covered Cherry Brownie Bombs is like wrapping love in chocolate! Each bite perfectly marries the decadence of brownie with the juicy surprise of cherry, all while being incredibly easy to make. Whether you’re gearing up for a sweet treat buffet or just need a pick-me-up after a long day, these delightful bombs will surely lift your spirits. I cherish the smiles they bring to family gatherings and the joy of sharing them with friends. So grab your ingredients and dive into this delicious adventure—you won’t regret it!
Print
Chocolate Covered Cherry Brownie Bombs
- Total Time: 2 hours
- Yield: 24 brownie bombs 1x
- Diet: Vegetarian
Description
Chocolate Covered Cherry Brownie Bombs are a delightful treat combining fudgy brownies and sweet cherry filling, all coated in chocolate.
Ingredients
- Brownie Base
520 g chewy fudge brownie mix - 120 ml vegetable oil
- 60 ml water
- 2 large eggs, at room temperature
- Filling & Assembly
340 g whipped chocolate frosting - 285 g maraschino cherries, drained, stems removed, patted dry
- Coating
510 g chocolate almond bark
Instructions
- Preheat oven to 175°C. Generously spray a 22×33 cm baking dish with nonstick baker’s spray.
- Combine brownie mix, vegetable oil, water, and eggs in a medium mixing bowl. Stir until just combined. Spread batter evenly in the prepared dish. Bake per package instructions. Cool completely.
- Crumble half the cooled brownies into a large bowl. Spoon half the whipped frosting over crumbs. Crumble remaining brownies on top; add remaining frosting. Mix with a large spoon until evenly combined.
- Line a baking sheet with parchment paper. Using a 22 ml (1½ tablespoon) scoop, portion the brownie mixture. Roll into a ball, flatten slightly, and create an indentation with your thumb. Place a maraschino cherry in the center, then enclose and roll to seal. Arrange on the lined baking sheet. Repeat with remaining mixture. Chill for 60 minutes in the refrigerator.
- Break almond bark into pieces and place in a microwave-safe bowl. Microwave in 1-minute intervals, stirring each time, until thoroughly melted and smooth.
- Using a spoon, submerge each chilled brownie ball in melted almond bark to coat. Lift with a fork, tapping gently to remove excess coating. Set coated balls back onto parchment. Repeat for all pieces. Refrigerate until fully set and ready to serve.
Notes
- Ensure cherries are well-dried to prevent excess moisture in the brownie bombs.
- Experiment with different types of frosting for added flavor.
- Store in an airtight container in the refrigerator for up to one week.
- Prep Time: 30 minutes
- Cook Time: 30 minutes
- Category: Dessert
- Method: Baking and Chilling
- Cuisine: American
Nutrition
- Serving Size: 1 brownie bomb
- Calories: 150
- Sugar: 15 g
- Sodium: 100 mg
- Fat: 7 g
- Saturated Fat: 3 g
- Unsaturated Fat: 4 g
- Trans Fat: 0 g
- Carbohydrates: 20 g
- Fiber: 1 g
- Protein: 2 g
- Cholesterol: 30 mg