Chocolate Mint Cream Cheese Buttons: A Sweet Delight!

Introduction to Chocolate Mint Cream Cheese Buttons
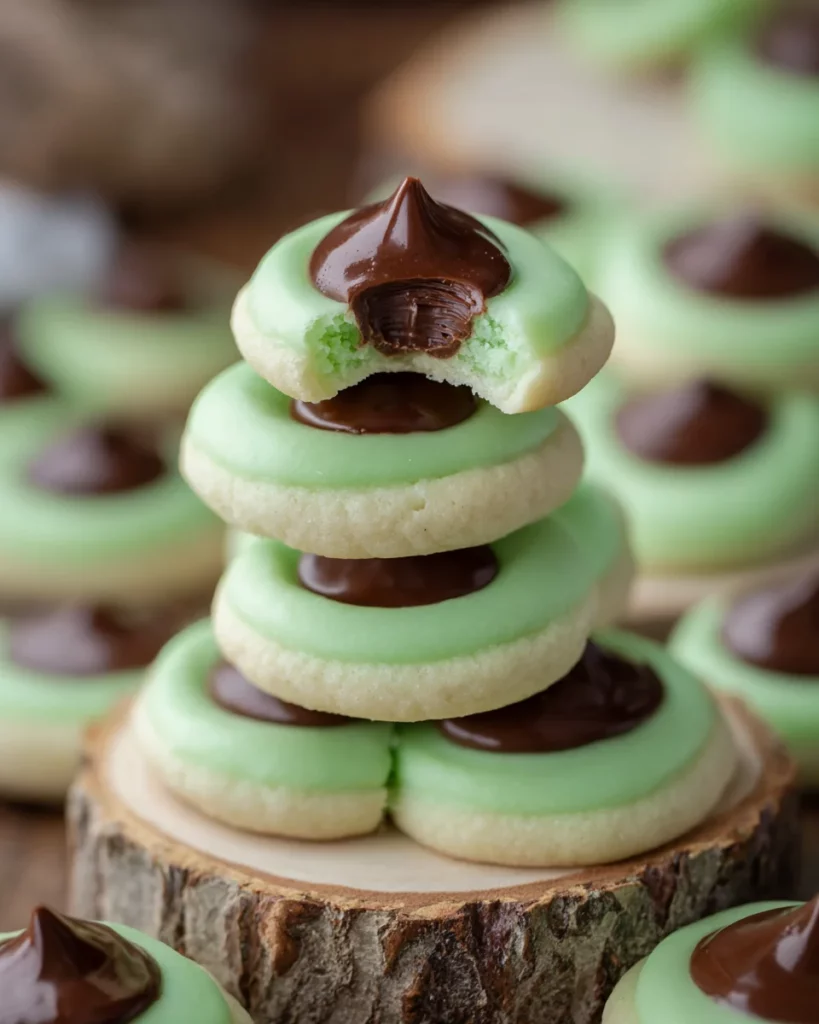
Hey there, fellow food explorers! If there’s one thing we can all agree on, it’s how challenging it can be to whip up delightful treats amidst our bustling lives. That’s where my Chocolate Mint Cream Cheese Buttons come into play. These bite-sized gems are not just adorable; they’re a heavenly combination of creamy mint and rich chocolate that your loved ones will absolutely adore. Perfect for family get-togethers or a little self-indulgence, they offer a sweet escape from the daily grind. Let’s dive in and bring a little magic back to our kitchens together!
Why You’ll Love This Chocolate Mint Cream Cheese Buttons
These Chocolate Mint Cream Cheese Buttons are a dream come true for anyone short on time. They come together quickly, making them an easy choice for busy weekdays or surprise gatherings. The taste? Absolute bliss! Each bite is a refreshing burst of mint wrapped in luscious chocolate, bringing back that nostalgic flavor of childhood treats. Plus, who doesn’t love a dessert that impresses without the fuss? You’re going to adore these!
Ingredients for Chocolate Mint Cream Cheese Buttons
Let’s talk about the magic makers behind these Chocolate Mint Cream Cheese Buttons. Each ingredient plays a crucial role in creating these delectable delights. Here’s what you’ll need:
- Cream cheese: This is the base of your buttons, providing a creamy texture and tangy flavor that balances beautifully with mint and chocolate.
- Powdered sugar: Sweetness alert! This will sweeten your cream cheese and help achieve the right consistency for rolling.
- Mint extract: The star flavor! It adds a refreshing minty taste that is sure to transport you back to your favorite minty confections.
- Green gel food color: A splash of color that brings fun to your treats. You can adjust this to make your buttons as vibrant as you like.
- Heavy whipping cream: This makes the chocolate ganache smooth and rich. It’s essential for that velvety goodness!
- Semi-sweet chocolate chips: Rich and slightly sweet, these chips are perfect for melting into a luscious ganache that completes your buttons.
For those exploring alternatives, feel free to use light cream cheese for a lower-fat option or a sugar substitute if you’re watching your sugar intake. Check out the full list of ingredients with exact measurements at the end of the article, ready for your next culinary adventure!
How to Make Chocolate Mint Cream Cheese Buttons
Making these delightful Chocolate Mint Cream Cheese Buttons is a blend of simple techniques and delightful flavors. Let’s roll up our sleeves and get started on this sweet journey!
Step 1: Prepare the Cream Cheese Mixture
First things first, grab your softened cream cheese and toss it into a large bowl. With your stand mixer or hand mixer on medium speed, add a cup of powdered sugar. Blend until smooth; the mixture should be creamy and free of lumps. This is crucial for texture, as a velvety consistency will ensure your buttons have that melt-in-your-mouth charm!
Step 2: Add Mint and Color
Once your cream cheese is perfectly blended, it’s time to add the magic! Pour in the mint extract and a few drops of your green gel food color. The mint extract is adjustable, so taste it as you go. Mix until combined. That pop of green will not only make everything festive but will also catch the eye of your family and friends!
Step 3: Forming the Buttons
Now, it’s time for some fun! Scoop out a teaspoon of your minty mixture and roll it into a ball between your palms. Aim for uniform sizes, like little gems! Place each ball on a lined baking sheet. Use the end of a wooden spoon or small measuring spoon to create a charming indentation in each. If the mixture sticks, just dust your spoon with a little powdered sugar. It makes life easier!
Step 4: Chill the Mixture
The next step calls for a bit of patience. Pop your baking sheet into the fridge and chill those buttons for about an hour. This helps them firm up before we give them their decadent chocolate dressing. Trust me, the wait is worth it!
Step 5: Prepare the Ganache
While your buttons chill, let’s whip up the ganache! Put your semi-sweet chocolate chips in a heat-proof bowl. Heat the heavy whipping cream in a saucepan just until it simmers, then pour it over the chocolate chips. Give it a gentle stir, then let it sit for about two minutes. This simple method avoids burning the chocolate and ensures it melts perfectly.
Step 6: Pipe the Ganache
After your ganache has cooled and thickened just a bit, it’s time to fill those shiny mint centers! Transfer the ganache to a zip-top bag and cut off a corner. Pipe the silky chocolate into the indentations of your chilled buttons. Don’t worry if it takes practice to get just the right amount in each — I’ve spilled my fair share too!
Step 7: Final Chill and Store
Lastly, place your beautifully filled buttons back in the fridge for another hour so the ganache can set. Once they are firm, store them in an airtight container in the refrigerator. They can last for several days, but I bet they won’t last long once your family discovers them!
Tips for Success
- Ensure your cream cheese is softened to room temperature for seamless blending.
- Customize the mint extract to match your personal taste — you can go stronger or milder!
- For flakiness, dust your hands with powdered sugar when rolling the buttons.
- When making ganache, stir gently to avoid incorporating too much air but mix thoroughly for smoothness.
- Practice your piping technique to achieve those beautifully filled centers — it gets easier with time!
Equipment Needed
- Mixing bowl: A large bowl for combining your ingredients. Any medium to large bowl will do!
- Hand mixer or stand mixer: Handy for quicker mixing, but a good old-fashioned whisk works just fine!
- Baking sheet: A flat surface for chilling your buttons; any cookie sheet will work!
- Parchment paper: To line your baking sheet for easy cleanup — aluminum foil can be a substitute.
- Zip-top bag: Perfect for piping ganache, but you can use a piping bag if available!
Variations on Chocolate Mint Cream Cheese Buttons
- Dark Chocolate Ganache: Swap semi-sweet chocolate chips for dark chocolate for a richer taste that pairs beautifully with mint.
- White Chocolate Drizzle: Top your buttons with melted white chocolate for a sweet contrast and striking visual appeal.
- Nutty Twist: Add crushed nuts like walnuts or almonds into the cream cheese mixture for added texture and flavor.
- Gluten-Free Option: Use gluten-free powdered sugar to make this dessert accommodating for gluten sensitivities.
- Mint Chip Version: Fold in mini chocolate chips into the cream cheese mixture for a delightful surprise in every button!
Serving Suggestions for Chocolate Mint Cream Cheese Buttons
- Pair them with a warm cup of peppermint tea for a cozy afternoon treat.
- Serve alongside vanilla ice cream to create a delightful dessert duo.
- Garnish with fresh mint leaves for a vibrant, fresh touch on your platter.
- Stack them nicely in a decorative jar for a charming homemade gift.
- Enjoy them during family movie night for a fun and tasty snack!
FAQs about Chocolate Mint Cream Cheese Buttons
Have questions about these delightful Chocolate Mint Cream Cheese Buttons? You’re not alone! Here are some commonly asked questions that might answer your curiosities:
Can I use a different flavor extract instead of mint?
Absolutely! You can swap out the mint extract for other flavors like almond or even vanilla to create a unique twist! Just keep in mind that this will change the overall flavor profile.
How long can I store these buttons?
These scrumptious treats typically last up to a week when stored in an airtight container in the refrigerator. If they last that long, you have incredible willpower!
Can I freeze Chocolate Mint Cream Cheese Buttons?
Yes, you can freeze them! Just ensure they’re well wrapped in an airtight container. They can be stored in the freezer for up to three months!
What’s the best way to serve these buttons to guests?
For an eye-catching presentation, arrange them on a decorative plate and garnish with fresh mint leaves. This adds a beautiful touch and makes them irresistible!
Can kids help in making these buttons?
Definitely! This recipe is great for kids to lend a hand. They’ll enjoy rolling the buttons and piping the ganache. Plus, it’s a sweet way to bond over baking!
Final Thoughts
Making Chocolate Mint Cream Cheese Buttons is more than just a simple recipe; it’s a delightful experience that fills your home with sweet aromas and creates lasting memories. The joy of crafting these treats is only matched by the joy on your loved ones’ faces when they take their first bite. Each button is a little piece of happiness, perfect for sharing or savoring alone. So grab your ingredients and embrace the magic of baking! You’ll quickly discover that these delightful bites hold the power to brighten even the busiest of days.
Print
Chocolate Mint Cream Cheese Buttons
- Total Time: 1 hour 45 minutes
- Yield: Approximately 30 buttons 1x
- Diet: Vegetarian
Description
Chocolate Mint Cream Cheese Buttons are delightful bite-sized treats filled with a creamy mint center and topped with a rich chocolate ganache.
Ingredients
- 4 oz cream cheese, softened
- 4 1/2 cups powdered sugar
- 1/2 teaspoon mint extract
- several drops of green gel food color
- 1 cup heavy whipping cream
- 10 oz semi-sweet chocolate chips
Instructions
- Combine cream cheese and one cup of powdered sugar in a large bowl and use a stand mixer or hand mixer to combine.
- Add the extract and gel food color and mix until combined.
- Gradually add the rest of the powdered sugar and mix until combined, scraping down the sides of the bowl as needed. Use your hands to combine the ingredients if your mixer is not up to the task.
- Line a large baking sheet with parchment paper.
- Scoop out a teaspoon of the dough and form into a ball using the palm of your hands. Place it on the prepared baking sheet. Repeat with the rest of the dough.
- Use the end of a wooden spoon or a small measuring spoon to create indentions in each bowl. Dust the measuring spoon with powdered sugar if it sticks at all.
- Chill the mints until firm, about 1 hour.
- Place chocolate chips in a heat-proof bowl or large measuring cup.
- Bring heavy whipping cream just to a simmer and then pour over the top of the chocolate chips. Stir once or twice and then let sit for 2 minutes.
- Continue stirring until the chocolate is fully melted and incorporated.
- Transfer the ganache to a ziploc bag and let it set for 30 minutes or so until it has thickened up.
- Cut the corner off of the bag and pipe the ganache into the center of each mint.
- Chill for about an hour, or until the ganache has set up.
- Store in refrigerator.
Notes
- You can adjust the mint extract to taste if you prefer a stronger mint flavor.
- Keep an eye on the ganache while it thickens to ensure it doesn’t harden too much.
- These treats can be stored in the refrigerator for several days.
- Prep Time: 30 minutes
- Cook Time: 15 minutes
- Category: Dessert
- Method: Chilling and mixing
- Cuisine: American
Nutrition
- Serving Size: 1 button
- Calories: 120
- Sugar: 12g
- Sodium: 50mg
- Fat: 7g
- Saturated Fat: 4g
- Unsaturated Fat: 2g
- Trans Fat: 0g
- Carbohydrates: 14g
- Fiber: 0g
- Protein: 1g
- Cholesterol: 10mg