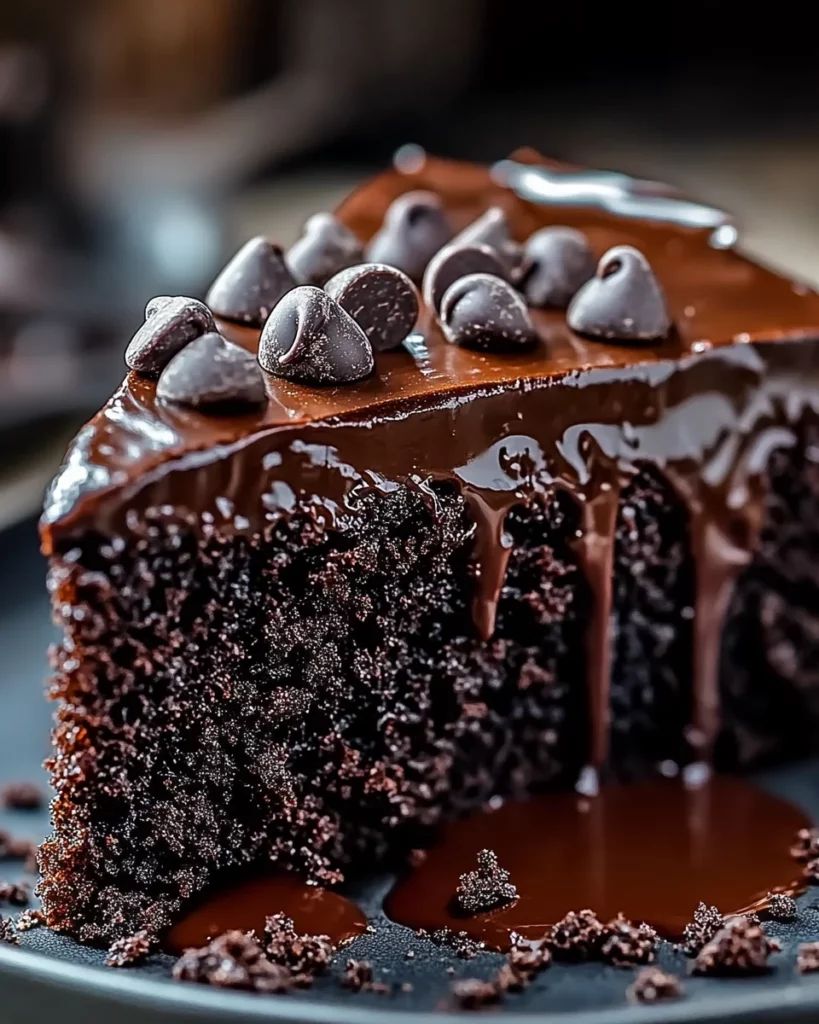
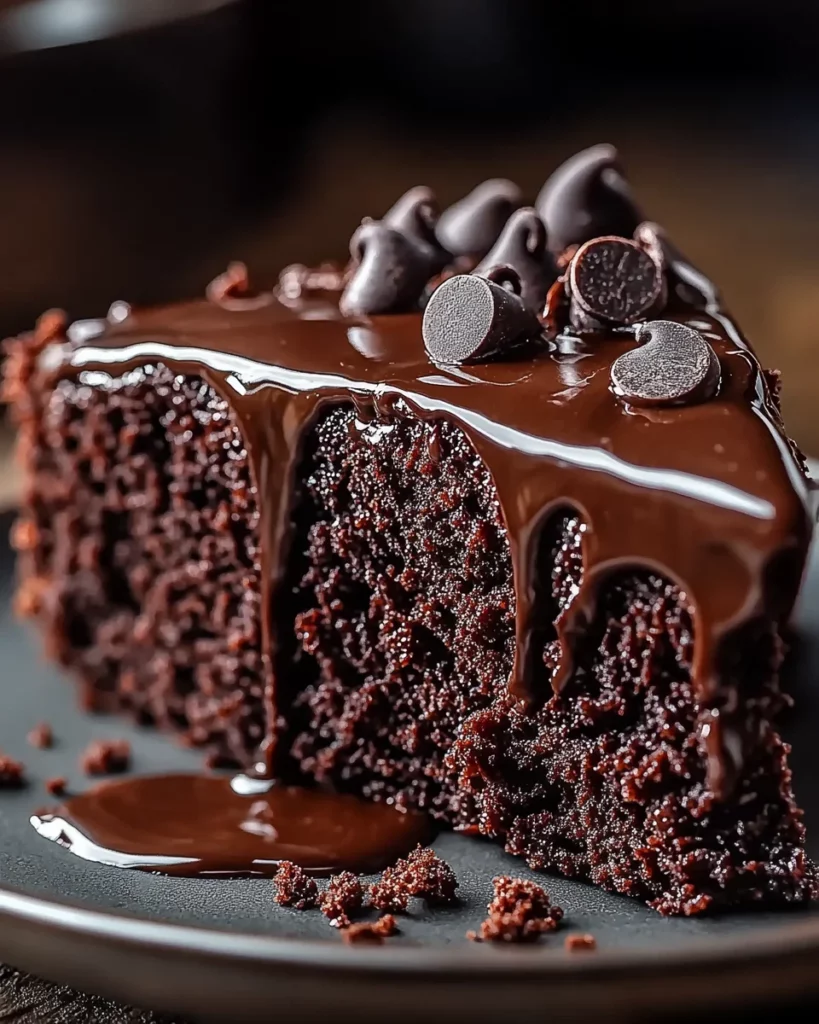
Chocolate Ooey Gooey Cake: Indulge in This Delight!

Introduction to Chocolate Ooey Gooey Cake
Ah, the sweet embrace of chocolate! There’s something undeniably comforting about a slice of Chocolate Ooey Gooey Cake. It’s like a warm hug for your taste buds, perfect for a busy day when you need a quick dessert that delights. Every bite is rich, indulgent, and oh-so-satisfying! This recipe brings together the ease of a box mix with the magic of a homemade dessert, making it a crowd-pleaser at family gatherings or a cozy treat after a long day. Trust me, your loved ones will swoon with every gooey forkful!
Why You’ll Love This Chocolate Ooey Gooey Cake
This Chocolate Ooey Gooey Cake is your ideal dessert ally! It’s incredibly easy to whip up, taking just about an hour from start to serve. The rich chocolate flavor combined with a luscious, gooey filling guarantees smiles all around. Perfect for busy moms or professionals, it’s an indulgent treat that transforms an ordinary day into a sweet celebration. Plus, who can resist that melt-in-your-mouth texture? It’s truly a dessert that caters to your craving for comfort!
Ingredients for Chocolate Ooey Gooey Cake
Making this Chocolate Ooey Gooey Cake is simple, thanks to a few key ingredients that work together to create magic. Here’s what you’ll need:
- Chocolate cake mix: The base of our dessert; it adds sweetness and structure with minimal effort.
- Egg: Just one egg brings moisture and helps bind the dry ingredients, making the cake richer.
- Butter: Melting it ensures a moist cake layer with a lovely buttery flavor. Who can say no to butter?
- Cream cheese: This is where the gooey magic happens! Softened cream cheese creates a lush, creamy filling that’s irresistible.
- Vanilla extract: A splash of this golden liquid brings warmth and depth, enhancing the overall chocolate flavor.
- Powdered sugar: Essential for that sweet, sweet filling. It’s smooth and blends beautifully with the cream cheese.
- Cocoa powder: This tiny ingredient packs a punch! It intensifies the chocolate flavor, making every bite delightfully rich.
Thinking of substituting an ingredient? You can use Greek yogurt instead of butter for a lighter version, or opt for a gluten-free cake mix if that suits your family’s needs. I’ve found that adding a pinch of espresso powder can elevate the chocolate flavor even more. Get those taste buds ready!
Exact measurements for these ingredients are conveniently located at the bottom of the article, available for printing when you’re ready to bake!
How to Make Chocolate Ooey Gooey Cake
Now that you have gathered your ingredients, it’s time to dive into the world of baking this delightful Chocolate Ooey Gooey Cake! Don’t worry; I’ll guide you through the process, step by step. With each step, you’ll see how easy it is to create a dessert that delights your senses and impresses your family.
Step 1: Preheat the Oven
Start by preheating your oven to 350°F (175°C). This step ensures that your cake bakes evenly and turns out perfectly fluffy. While the oven gets hot, grab your baking pan and grease it well. You can use butter, cooking spray, or even parchment paper. The last thing you want is your gooey creation to stick to the pan!
Step 2: Prepare the Cake Layer
In a large mixing bowl, combine the chocolate cake mix, one egg, and melted butter. I feel like a chef when I see that mixture come together! Stir it until everything is well combined; it should be smooth but thick enough to hold its shape. Press this delightful mixture firmly into the bottom of your prepared pan. This creates the cake layer that will hold all that luscious cream cheese filling. Don’t be shy—make it nice and even!
Step 3: Make the Cream Cheese Filling
In another bowl, beat the softened cream cheese, two eggs, and vanilla extract until it’s spectacularly smooth. I recommend using a handheld mixer for this part because, believe me, smoothness is key! You don’t want any lumps ruining the texture of your ooey gooey filling. Just imagine that silky cream cheese dancing with the eggs—it’s a party in a bowl!
Step 4: Combine the Fillings
Next, add the melted butter, powdered sugar, and cocoa powder to the creamy mixture. Mix everything together until thoroughly combined. The texture should be rich and velvety—like a chocolate cloud! Ensure no dry spots remain. When you pour this heavenly filling onto the cake layer, you’ll know your Chocolate Ooey Gooey Cake is well on its way to being a hit!
Step 5: Layer and Bake
Pour the cream cheese filling over the cake layer that you just pressed into the pan. Smooth it out gently with a spatula. Then, it’s time to slide it into the preheated oven. Bake for 35-40 minutes, keeping an eye on it as it cooks. The top should be set and slightly golden, but do not worry if the center looks soft and gooey! That’s the magic of this cake. Check for doneness with a toothpick; it should come out with a few moist crumbs, indicating the perfect texture.
Tips for Success
- Always preheat your oven. A properly heated oven helps your cake rise evenly.
- Don’t skip greasing the pan! It prevents sticking and keeps your cake intact.
- Let your cream cheese soften to room temperature for a smoother filling.
- Keep an eye on the baking time; every oven is a little different.
- Serve warm for the ultimate gooey experience! Trust me, it’s worth it.
Equipment Needed for Chocolate Ooey Gooey Cake
- Baking pan: A 9×13 inch pan works wonders. If unavailable, any similar-sized ovenproof dish will do.
- Mixing bowls: Use two medium bowls; they’re perfect for combining your ingredients.
- Handheld mixer: A lifesaver for achieving that creamy filling. A whisk works too, but it requires more elbow grease!
- Spatula: For effortlessly smoothing out those layers and scraping every delicious bit.
Variations on Chocolate Ooey Gooey Cake
- Peanut Butter Swirl: Add dollops of creamy peanut butter to the filling before baking. Swirl it with a knife for a nutty twist that complements the chocolate beautifully.
- Mint Chocolate Delight: Stir in peppermint extract to the filling for a refreshing minty flavor. Top with crushed peppermint candies for an extra festive touch.
- Nutty Topping: Sprinkle chopped nuts like walnuts or pecans on top of the filling before baking. This adds a delightful crunch to every gooey bite.
- Mexican Chocolate: Add a pinch of cinnamon and a dash of cayenne pepper to the cocoa powder for a warm, spicy kick. It elevates the chocolate flavor to a whole new level.
- Gluten-Free Option: Substitute the chocolate cake mix with a gluten-free variety. This way, everyone can indulge in the gooey goodness without worry!
Serving Suggestions for Chocolate Ooey Gooey Cake
- Whipped Cream: A dollop on top adds a light, airy contrast to the dense cake.
- Vanilla Ice Cream: Serve warm cake with a scoop for an indulgent treat.
- Fresh Berries: Strawberries or raspberries add a pop of color and tartness to balance the sweetness.
- Chocolate Drizzle: Enhance the chocolate experience with a drizzle of melted chocolate over the top.
- Coffee: A cup of coffee or espresso pairs beautifully, bringing out the flavors in the chocolate.
FAQs about Chocolate Ooey Gooey Cake
Curious about this delightful Chocolate Ooey Gooey Cake? Here are some common questions that eager bakers like you often ask!
Can I use a different type of cake mix?
Absolutely! While chocolate is divine, you can experiment with other flavors like vanilla or red velvet. Just remember, the gooey filling pairs wonderfully with any cake base!
How do I store leftovers?
Keep any leftover Chocolate Ooey Gooey Cake in the refrigerator for up to three days. Just cover it tightly; it’ll stay deliciously gooey and moist!
Can I freeze the cake?
You can freeze this cake, but I recommend freezing it without the filling. Wrap it in plastic wrap and foil, then store it in the freezer for up to three months. Thaw it in the fridge before enjoying!
What if I don’t have cream cheese on hand?
No worries! You can use mascarpone cheese as a delightful substitute. It’ll give you that luscious texture with a slightly different flavor twist!
How can I make this cake healthier?
Try swapping regular butter for unsweetened applesauce, and opt for a sugar substitute. This way, you can indulge in this Chocolate Ooey Gooey Cake with a little less guilt!
Final Thoughts
As you take that first heavenly bite of this Chocolate Ooey Gooey Cake, you’ll realize it’s not just a dessert—it’s an experience filled with joy and comfort. The warm, gooey chocolate filling embraced by a soft cake layer creates a symphony of flavors that dances on your palate. This delightful treat is perfect for busy days or special occasions when you want to spread happiness through food. So, roll up your sleeves, gather your loved ones, and cherish the moments created around this indulgent cake. After all, life’s too short not to enjoy the gooey sweetness!
Print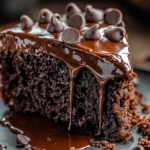
Chocolate Ooey Gooey Cake
- Total Time: 55-60 minutes
- Yield: 8–10 servings 1x
- Diet: Vegetarian
Description
A rich and indulgent chocolate cake with a gooey filling that is sure to satisfy any sweet tooth.
Ingredients
- 1 box chocolate cake mix
- 1 egg
- 1/2 cup butter, melted
- 8 oz cream cheese, softened
- 2 eggs
- 1 tsp vanilla extract
- 1/2 cup butter, melted
- 16 oz powdered sugar
- 1/4 cup cocoa powder
Instructions
- Preheat the oven to 350°F (175°C). Grease a baking pan.
- In a mixing bowl, combine the chocolate cake mix, egg, and melted butter. Press the mixture into the bottom of the prepared pan.
- In a separate bowl, beat together the softened cream cheese, eggs, and vanilla extract until smooth.
- Add the melted butter, powdered sugar, and cocoa powder to the cream cheese mixture, and beat until well combined.
- Pour the filling over the cake layer in the pan.
- Bake in the preheated oven for 35-40 minutes, or until the top is set and slightly golden. The center should remain soft and gooey.
- Let it cool for a few minutes before serving.
Notes
- Serve warm for best flavor.
- Store leftovers in the refrigerator for up to 3 days.
- This cake pairs well with whipped cream or ice cream.
- Prep Time: 15 minutes
- Cook Time: 35-40 minutes
- Category: Dessert
- Method: Baking
- Cuisine: American
Nutrition
- Serving Size: 1 piece
- Calories: 350
- Sugar: 28g
- Sodium: 200mg
- Fat: 18g
- Saturated Fat: 10g
- Unsaturated Fat: 6g
- Trans Fat: 0g
- Carbohydrates: 46g
- Fiber: 2g
- Protein: 4g
- Cholesterol: 60mg