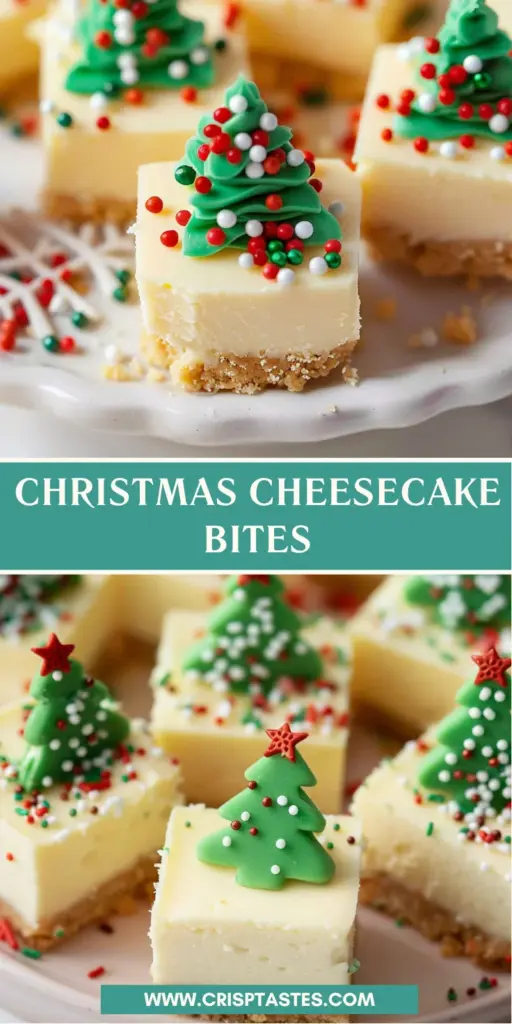
Christmas Cheesecake Bites

Introduction to Christmas Cheesecake Bites
The holidays are a beautiful time of year, filled with joy, laughter, and the delightful aroma of baked treats wafting through the house. If you’re like me, the thought of whipping up something sweet can feel overwhelming, especially during hectic holiday weeks. That’s where these Christmas Cheesecake Bites come in. They’re the perfect solution for busy days, offering a pop of festive flavor without the fuss. Plus, they make excellent gifts or treats for gatherings, ensuring you spread the holiday cheer with every bite. Trust me; your loved ones will adore these little delights!
Why You’ll Love This Christmas Cheesecake Bites
These Christmas Cheesecake Bites are a game changer for busy moms and professionals. They’re incredibly easy to make, requiring minimal effort while delivering maximum flavor. In just a few steps, you can whip up a dessert that captures the essence of the season. Plus, their bite-sized goodness makes them perfect for sharing at holiday parties or cozy family gatherings. Trust me, your taste buds will thank you!
Ingredients for Christmas Cheesecake Bites
Gathering the right ingredients is the first step to achieving heavenly Christmas Cheesecake Bites. Here’s what you’ll need:
- Graham Cracker Crumbs: These form the base of your cheesecake bites, providing a sweet, crunchy texture. You can substitute with crushed shortbread or vanilla wafers for a twist.
- Butter: It brings richness and helps bind the crust together. For a lighter option, you can use coconut oil or a buttery spread.
- Sugar: Granulated sugar sweetens your cheesecake filling. For a unique flavor, try using brown sugar.
- Cream Cheese: Make sure it’s at room temperature for easy mixing! This is the heart of your cheesecake, delivering that rich, creamy goodness.
- Sour Cream: This adds a delightful tanginess, balancing the sweetness. For a healthier swap, Greek yogurt works well.
- Eggs: They provide structure and help set your cheesecake. Just two large eggs will do the trick!
- Pure Vanilla Extract: This adds depth to the flavor profile. If you’re in a pinch, vanilla essence can be a suitable substitute.
- White Almond Bark or Candy Melts: These are used for drizzling over your cheesecake bites, adding a festive touch. You can use white chocolate as a fun alternative.
- Green Candy Melts: Perfect for adding a pop of color and decoration. Feel free to switch them with red or any color for a beautiful presentation.
- Mini Ball Sprinkles: These fun toppings bring that holiday cheer to each bite. You could use any festive sprinkle variety to customize your treats!
For exact quantities and to make things easier, check the bottom of the article. Happy baking!
How to Make Christmas Cheesecake Bites
Now that you’ve gathered your ingredients, let’s dive into the magic of creating these Christmas Cheesecake Bites. Follow these simple steps for a festive treat that will wow your family and friends!
Step 1: Preheat the Oven and Prepare the Pan
Start by preheating your oven to 325℉. This ensures it’s hot enough to bake your cheesecake bites evenly.
Next, grab a 9″x9″ square baking pan. Line it with parchment paper, leaving some paper hanging over the edges. This little trick makes it easy to lift out your cheesecake later. Trust me, you’ll appreciate this step!
Step 2: Make the Crust
In a bowl, combine your graham cracker crumbs, melted butter, and sugar. Mix until it resembles a sandy texture.
Then, press this mixture into the bottom of your prepared pan. Make sure it’s evenly spread and compact. This will be the delicious foundation for your cheesecake bites!
Step 3: Prepare the Cheesecake Filling
In another medium-sized bowl, blend the cream cheese, sour cream, sugar, and vanilla. Use an electric mixer to whip it until it’s light and fluffy.
Remember, for the best results, your cream cheese should be at room temperature—this makes mixing a breeze!
Once fluffy, add the eggs one at a time. Mix gently; overbeating can create cracks later. Pour this creamy filling over your crust, spreading it gently.
Step 4: Bake the Cheesecake
Time to pop those bites into the oven! Bake for about 30 minutes.
To check for doneness, gently shake the pan. If the center no longer jiggles, it’s ready. However, if it still wobbles, give it a few more minutes.
Don’t worry; a slight golden edge is a sign of success!
Step 5: Chill the Cheesecake
Once out of the oven, let your cheesecake cool on a wire rack. After it’s at room temperature, wrap it up in plastic wrap.
Then, place it in the refrigerator for at least 4 hours. This chilling time is crucial to achieving that perfect firmness for your bites.
If they’re not quite firm enough after 4 hours, feel free to chill them longer.
Step 6: Cut and Decorate the Squares
When ready to serve, lift the cheesecake from the pan using the parchment paper.
Carefully cut the cheesecake into 64 small squares—8 rows by 8 rows. Cleaning your knife after each cut will keep those edges nice and tidy.
Now for the fun part! Melt your almond bark or candy melts in the microwave, stirring every 30 seconds.
Pour the melted chocolate into a piping bag or a Ziploc bag with the corner snipped off. Drizzle it over each square, creating a festive tree shape.
Finally, while the drizzle is still warm, sprinkle those mini balls on top for holiday flair!
Tips for Success
- Always use room temperature cream cheese for smoother mixing.
- Choose a non-stick pan for easier removal, or use parchment paper.
- To avoid cracks, mix the filling gently once the eggs are added.
- Chill the cheesecake bites overnight for the best texture.
- Experiment with different toppings to customize your festive treats.
Equipment Needed
- 9″x9″ square baking pan: If you don’t have one, an 8″x8″ pan works in a pinch.
- Electric mixer: A whisk can be used, but it will take more effort.
- Parchment paper: If unavailable, use cooking spray to grease the pan.
- Microwave-safe bowl: Any heatproof bowl will do for melting candy melts.
- Cooling rack: If you don’t have one, simply let it cool in the pan.
Variations of Christmas Cheesecake Bites
- Chocolate Peppermint Cheesecake Bites: Add crushed peppermint candies to the filling for a festive twist, or swirl in some melted chocolate for that classic holiday flavor.
- Fruit-Topped Cheesecake Bites: Top your bites with fresh cranberries or cherry preserves for a tangy contrast. It’s like a mini fruit tart explosion!
- Gluten-Free Option: Substitute graham cracker crumbs with gluten-free cookies or almond flour for those avoiding gluten. You can still enjoy all the deliciousness!
- Vegan Cheesecake Bites: Replace cream cheese with a vegan cream cheese alternative and use flax eggs instead. The flavor remains rich, while accommodating dietary preferences.
- Chocolate-Covered Christmas Cheesecake Bites: Dip each square in melted dark chocolate for a decadent treat. You’ll experience a chocolate-covered explosion of flavors!
Serving Suggestions for Christmas Cheesecake Bites
- Pair with a dollop of whipped cream for added creaminess.
- Serve alongside a warm cup of hot cocoa or spiced cider for a festive touch.
- Display on a decorative platter, garnished with fresh mint leaves or seasonal fruits.
- Offer with coffee or tea to balance the sweetness.
- Package in festive boxes for delightful homemade gifts!
FAQs about Christmas Cheesecake Bites
As the holidays approach, you might have some questions bubbling up about making these delightful Christmas Cheesecake Bites. Let’s dive into some of the most common queries I’ve encountered!
Can I make these Christmas Cheesecake Bites ahead of time?
Absolutely! In fact, making them a day or two in advance can enhance the flavors. Just keep them refrigerated, and they’ll stay fresh.
Can I freeze the cheesecake bites?
Yes, you can! After they cool and set, wrap them tightly in plastic wrap and place them in an airtight container. They’ll be good for up to three months. Just thaw them in the fridge before serving.
What can I use instead of cream cheese?
If you’re looking for an alternative, vegan cream cheese works wonderfully. While the flavor might be slightly different, it still yields a creamy texture!
How do I store the leftover cheesecake bites?
Simply place them in an airtight container and store them in the refrigerator. They’ll last about a week, but I doubt they’ll last that long!
Can I customize the toppings for my cheesecake bites?
Definitely! Feel free to switch up the toppings with different colored melts, sprinkles, or even fresh fruit. It’s a fun way to make each batch unique!
Final Thoughts
Bringing these Christmas Cheesecake Bites to life is more than just baking; it’s a celebration of flavors and laughter. As each square melts in your mouth, you can almost hear the joy of family gatherings and holiday cheer echoing in the background.
This recipe is my secret weapon for busy days, and I love how it transforms into a festive plate of happiness.
Whether shared with loved ones or enjoyed during cozy nights in, these bites are sure to create sweet memories. So roll up your sleeves, spread some joy, and dive into this delightful holiday treat!
Print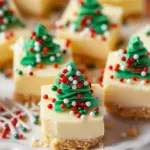
Christmas Cheesecake Bites
- Total Time: 4 hours 50 minutes
- Yield: 64 squares 1x
- Diet: Vegetarian
Description
Deliciously rich and festive Christmas Cheesecake Bites topped with holiday decorations.
Ingredients
- 1 ½ cups Graham Cracker Crumbs
- 5 tablespoons Butter
- 2 tablespoons Sugar
- 16 ounces Cream Cheese (room temperature)
- ⅔ cup Sour Cream
- ⅔ cup White Granulated Sugar
- 2 Large Eggs
- 1 teaspoon Pure Vanilla Extract
- White Almond Bark, White Candy Melts, or White Chocolate for topping
- Green Candy Melts
- Mini Ball Sprinkles
Instructions
- Preheat the oven to 325℉. Line a 9″x9″ square baking pan with parchment paper so that the paper hangs over the sides for easy lifting later.
- Mix together graham cracker crumbs, melted butter, and sugar so that it is a sandy consistency. Press onto the bottom of the parchment paper in the pan.
- In a medium-sized bowl, combine cream cheese, sour cream, sugar, and vanilla until light and fluffy. Add eggs and mix, do not overbeat the eggs. Pour on top of the crust.
- Bake in the oven for about 30 minutes until it is no longer jiggly in the center. Let cool on a wire rack. Wrap in plastic wrap and place in the refrigerator for 4 hours until it is very firm.
- Remove the plastic wrap and lift the cheesecake from the pan with the parchment paper. Cut the cheesecake into 8 rows by 8 rows to make 64 squares. Clean the knife after each cut to keep clean rows.
- Heat the almond bark or candy melts in the microwave and stir at 30-second intervals until melted through. Pour the melted almond bark into an icing bag or Ziploc bag with the corner cut. Drizzle a tree shape on top of each square and add sprinkles before each one dries.
Notes
- Make sure the cream cheese is at room temperature for easier mixing.
- Chill the cheesecake bites for longer if they are not firm enough after 4 hours.
- Feel free to customize the toppings with colored chocolate or different sprinkles.
- Prep Time: 20 minutes
- Cook Time: 30 minutes
- Category: Dessert
- Method: Baking
- Cuisine: American
Nutrition
- Serving Size: 1 square
- Calories: 120
- Sugar: 8g
- Sodium: 90mg
- Fat: 8g
- Saturated Fat: 5g
- Unsaturated Fat: 1g
- Trans Fat: 0g
- Carbohydrates: 10g
- Fiber: 0g
- Protein: 2g
- Cholesterol: 30mg