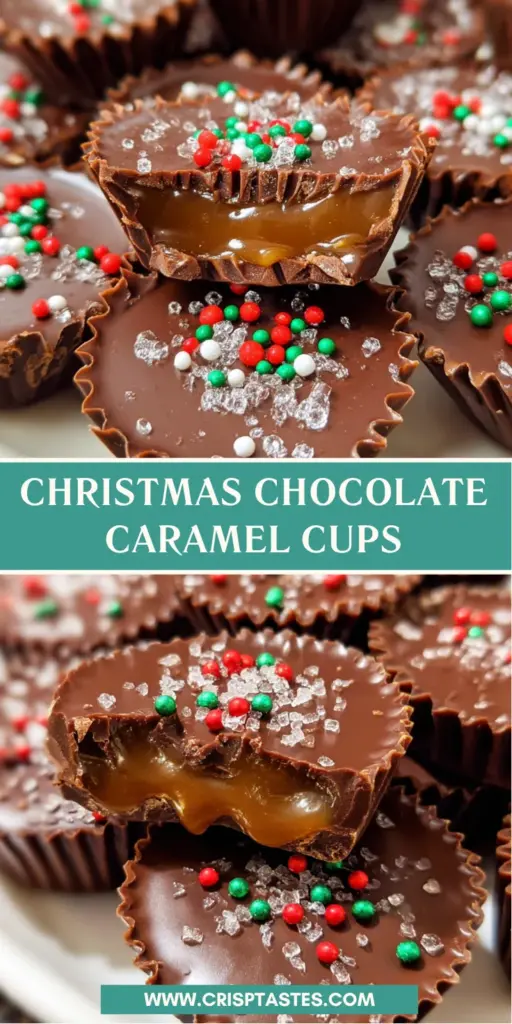
Christmas Chocolate Caramel Cups

Introduction to Christmas Chocolate Caramel Cups
Ah, the holiday season! It’s a magical time filled with cheer and delicious treats. One of my favorite go-to delights is the Christmas Chocolate Caramel Cups. These sweet little gems bring smiles to my family, making any gathering a special occasion. If you’re a busy mom or professional like me, this recipe is a lifesaver. It’s simple enough to whip up after a hectic day, but impressive enough to wow your loved ones. Trust me, once you try these chocolaty, caramel-infused cups, they’ll quickly become a cherished tradition!
Why You’ll Love This Christmas Chocolate Caramel Cups
These Christmas Chocolate Caramel Cups are not just delicious; they’re a breeze to make! With minimal effort, you’ll create a sweet masterpiece that delights everyone. They look stunning on a dessert table and disappear in seconds! Plus, they can be prepared ahead of time, freeing up your schedule for all those holiday activities. Who can resist the creamy caramel wrapped in rich chocolate? Trust me, you’re going to love these!
Ingredients for Christmas Chocolate Caramel Cups
Gathering the perfect ingredients is half the fun! Here’s what you’ll need to create your delightful Christmas Chocolate Caramel Cups:
- Sugar: The backbone of your caramel. Use granulated sugar for the best results.
- Heavy Cream: This luscious cream adds richness and smoothness to your caramel.
- Chocolate Almond Bark: A sweet and creamy choice, this bark gives you that perfect chocolate layer. If you can’t find it, feel free to use chocolate chips instead!
- Holiday Sprinkles: These add a festive touch. Feel free to get creative! Mix in various colors while pleasing the eye.
If you’d like to give it your personal spin, consider adding a pinch of sea salt on top for a sweet and salty experience or experimenting with flavored extracts for a unique twist. For exact measurements, just check the end of this article where you’ll find everything detailed and ready for printing!
How to Make Christmas Chocolate Caramel Cups
Now, let’s roll up our sleeves and dive into making these luscious Christmas Chocolate Caramel Cups. Trust me; it’s easier than you think! Follow these steps, and you’ll have sweet treats ready to impress in no time.
Step 1: Prepare the Cupcake Liners
Start by placing 36 mini cupcake liners in a mini cupcake tin. This step is crucial because it sets up your cups perfectly to hold all that chocolatey goodness. Make sure they’re nestled snugly. This way, they won’t tip over or spill during the filling process!
Step 2: Create the Bottom Chocolate Layer
Next, melt half of the chocolate almond bark in a large bowl. Use a microwave, heating it in 30-second increments. Stir in between until it’s smooth and heavenly. Once melted, spoon a little bit of this chocolate into each cupcake liner. But wait, there’s more! Use a small spoon or a paintbrush to spread the chocolate up the sides of the liners. This ensures a delightful shell you’ll love!
Step 3: Hardening the Chocolate Cups
After filling the liners, set them aside for a bit while they harden. You can pop them in the fridge for quicker results. Just a little patience is key! Once they feel firm to the touch, you’re ready to move on to the caramel layer.
Step 4: Making the Caramel
Now comes the fun part—making the caramel! In a heavy-bottomed pot, add your sugar over medium heat. Stir as little as possible, letting the sugar melt slowly. Keep an eye on it! It should turn lovely amber color without burning. Take it off the heat and slowly whisk in the heavy cream until the mixture is fully combined. This will create that luscious caramel we all crave.
Step 5: Fill Chocolate Cups with Caramel
Once your caramel has cooled a bit, pour it into a bowl and refrigerate for about 30 minutes. This allows it to thicken, making it perfect for scooping! After that, spoon the caramel into the chocolate-lined muffin liners. Fill them almost to the top. The golden sweetness should look divine sitting in that chocolate shell!
Step 6: Top with Chocolate
Now, it’s time to melt the remaining chocolate almond bark. Once melted and smooth, carefully spoon it over the tops of the caramel cups. Spread it right to the edges of the liners, sealing in all that deliciousness. Picture the chocolate forming a protective layer over the caramel—it’s pure bliss!
Step 7: Add Holiday Sprinkles
Let’s add some festive flair! Sprinkle your holiday sprinkles over the tops while the chocolate is still soft. This little detail gives your Christmas Chocolate Caramel Cups an extra touch of cheer. Your kids will love helping with this task, too!
Step 8: Final Chilling
Finally, place the cups back in the fridge for about an hour. This ensures everything sets beautifully. Once they’re firm and ready, take a moment to admire your creations. You’ve just whipped up something truly special!
Tips for Success
- Keep an eye on the sugar while melting. It burns quickly!
- Ensure the bottom chocolate layer is thick enough to hold the caramel without leaking.
- Use a small spoon or piping bag for precise caramel filling.
- Experiment with different holiday sprinkles for a personalized touch.
- If you’re short on time, prepare in batches and freeze for later enjoyment!
Equipment Needed
- Mini Cupcake Tin: Essential for holding your liners. If you don’t have one, use a regular muffin tin with larger liners.
- Microwave-Safe Bowl: Perfect for melting chocolate. A heatproof glass bowl works, too!
- Heavy-Bottomed Pot: Best for making caramel. A non-stick saucepan can also do the job.
- Spoon or Paintbrush: For spreading chocolate; just grab a small kitchen brush if you have it.
- Refrigerator: Vital for chilling and setting your delightful creations!
Variations of Christmas Chocolate Caramel Cups
- Nutty Delight: Add crushed nuts like pecans or almonds into the caramel for an extra crunch. It adds a lovely texture contrast!
- Flavored Extracts: Mix in a few drops of peppermint or vanilla extract into your chocolate for a unique twist that enhances the flavor profile.
- Dark Chocolate Option: If you prefer a richer taste, substitute with dark chocolate almond bark. It pairs beautifully with the sweetness of the caramel.
- Vegan Version: Use dairy-free chocolate almond bark and substitute coconut cream for the heavy cream. You’ll have a plant-based treat!
- Gluten-Free Delight: This recipe is already gluten-free! Ensure your chocolate doesn’t contain any gluten-based ingredients, and you’re all set.
Serving Suggestions for Christmas Chocolate Caramel Cups
- Festive Platter: Arrange your Christmas Chocolate Caramel Cups on a colorful holiday platter for a stunning centerpiece.
- Accompany with Hot Cocoa: Serve these treats with a warm mug of hot cocoa or spiced cider for a cozy pairing.
- Gift in Jars: Bundle a few in a glass jar tied with ribbon for a lovely homemade gift.
- Mix with Other Treats: Pair with cookies or other holiday candies for a delightful dessert spread.
- Garnish with Mint: A sprig of fresh mint atop each cup adds a nice pop of color and flavor!
FAQs about Christmas Chocolate Caramel Cups
Are you wondering more about these delightful Christmas Chocolate Caramel Cups? Let me answer some common questions that pop up when making these sweet treats!
Can I make these cups ahead of time?
Absolutely! These delicious cups can be made a few days in advance. Just store them in the fridge in an airtight container, and they’ll stay fresh and tasty!
What chocolate can I use if I can’t find almond bark?
No worries! You can substitute chocolate chips or any melting chocolate. Just make sure it’s a variety that melts smoothly for the perfect coating.
Can I use store-bought caramel instead of making my own?
Sure! Store-bought caramel can save you time. Just heat it up slightly to make it easier to fill the cups without any hassle!
How can I store leftovers?
Keep your leftover Christmas Chocolate Caramel Cups in the fridge. They should stay good for about a week—if they last that long!
Can I freeze these treats for later?
Yes! These treats can be frozen for up to a month. Just make sure to let them thaw in the fridge before enjoying them again!
Final Thoughts
Making these Christmas Chocolate Caramel Cups truly brings joy into my kitchen. The sweet scents of melting chocolate and caramel whisk me away to cherished holiday memories. These little delights are not just treats; they’re tokens of love shared with family and friends. Whether you’re preparing them for a festive gathering or enjoying them during cozy nights by the fire, they’re bound to spark smiles. So, roll up your sleeves, embrace the spirit of the season, and create these sweet gems. I promise they’ll bring a dash of happiness that’ll be savored long after the holidays!
Print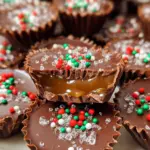
Christmas Chocolate Caramel Cups
- Total Time: 1 hour
- Yield: 36 cups 1x
- Diet: Vegetarian
Description
Delicious chocolate and caramel cups perfect for Christmas celebrations.
Ingredients
- 1 cup sugar
- ⅔ cup heavy cream
- 1 pound chocolate almond bark
- holiday sprinkles
Instructions
- Place 36 mini cupcake liners in a mini cupcake tin. Set aside.
- Make the bottom chocolate layer: In a large bowl melt half of the chocolate almond bark in 30-second increments in the microwave until melted and smooth.
- Spoon a little bit of the chocolate into each cupcake liner.
- Using a small spoon or a paintbrush, spread the chocolate up the sides of the liners. Ensure you cannot see the bottom of the liner.
- Set the chocolate cups aside to harden.
- Make the caramel: Add the sugar to a heavy-bottomed pot over medium heat.
- Let the sugar slowly melt, stirring as little as possible. It will melt until there are no lumps and turns amber in color.
- Once the sugar is the correct color, remove from heat and slowly whisk in the heavy cream until combined.
- Pour the caramel into a bowl and refrigerate for 30 minutes to thicken.
- Once thicker, spoon the caramel into the chocolate lined muffin liners, filling them almost to the top.
- Melt the remaining chocolate almond bark.
- Spoon chocolate over the tops of the caramel cups and spread to the edges of the liners.
- Sprinkle with holiday sprinkles.
- Place the cups in the fridge for another hour to fully set.
Notes
- Be careful not to let the sugar burn while making the caramel.
- Ensure the chocolate layer is thick enough to hold the caramel.
- Use different holiday sprinkles for a festive touch.
- Prep Time: 30 minutes
- Cook Time: 30 minutes
- Category: Dessert
- Method: No-Bake
- Cuisine: American
Nutrition
- Serving Size: 1 cup
- Calories: 150
- Sugar: 15g
- Sodium: 10mg
- Fat: 7g
- Saturated Fat: 4g
- Unsaturated Fat: 2g
- Trans Fat: 0g
- Carbohydrates: 22g
- Fiber: 0g
- Protein: 1g
- Cholesterol: 5mg