Christmas Cookie Bars: Bake Joyful Treats This Holiday!

Introduction to Christmas Cookie Bars
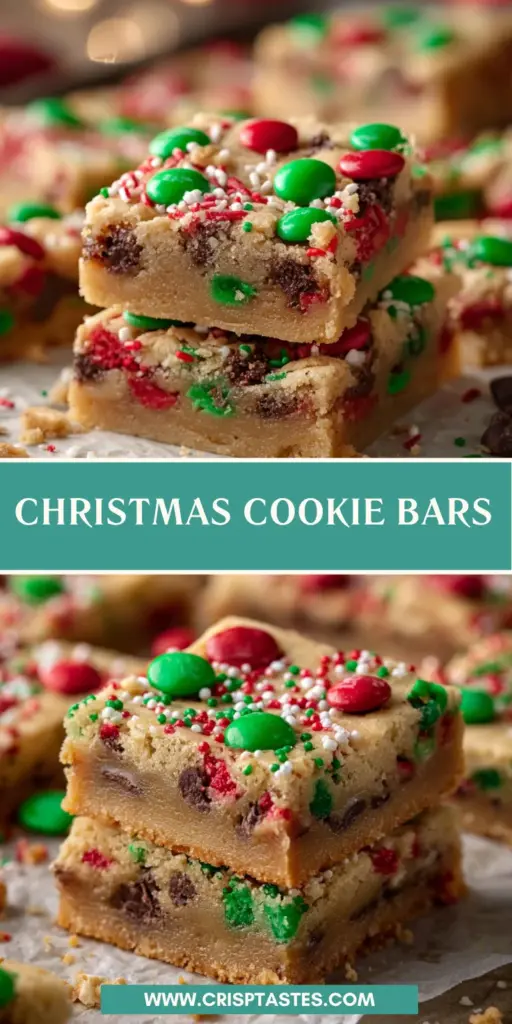
There’s something magical about Christmas Cookie Bars that brings us all together. As a busy mom, I totally understand how the holiday season can be both exciting and overwhelming. Between shopping, decorating, and juggling family activities, finding time to bake can feel impossible. That’s why I adore this festive recipe! They’re a quick treat that not only satisfies sweet cravings but also impresses your loved ones. Imagine the joy when you serve these colorful bars at your holiday gatherings. Trust me; everyone will be reaching for seconds!
Why You’ll Love These Christmas Cookie Bars
These Christmas Cookie Bars are the perfect solution for busy holiday schedules. They come together in about 40 minutes, giving you more time to sip cocoa and enjoy the festivities. The combination of melting chocolate, crunchy M&Ms, and sprinkles creates a delightful explosion of flavors in every bite. Plus, they’re super easy to customize, making them ideal for family preferences. Who could resist a tasty treat that spreads holiday cheer?
Ingredients for Christmas Cookie Bars
For these delightful Christmas Cookie Bars, you’ll need a few simple ingredients that come together to create pure magic. Here’s what you’ll be gathering:
- Unsalted butter: The base of our bars, giving them that rich, indulgent flavor.
- Brown sugar: Adds warmth and a hint of caramel sweetness that complements the festive spirit.
- Granulated sugar: Balances the sweetness while helping to achieve a lovely texture.
- Large eggs: These bind everything together for a chewy, satisfying bite.
- Vanilla extract: A few teaspoons bring out the warmth, making each bite taste like holiday bliss.
- All-purpose flour: The backbone of our cookie bars, ensuring they hold together just right.
- Baking soda: This little powerhouse helps the bars rise, delivering that perfect fluffy texture.
- Salt: Just a pinch enhances flavors and balances the sweetness.
- Holiday M&Ms: Not only are they colorful, but they also add a crunch and burst of sweetness.
- Chocolate chips: Because who doesn’t love melted chocolate in their treats? They make everything better!
- Festive sprinkles: A fun finishing touch that adds that magical holiday sparkle.
Feel free to mix and match any optional ingredients to suit your family’s taste. Want peanut butter chips instead of chocolate? Go for it! The ingredients are at the bottom of the article in a printable format, ready for your holiday baking adventure!
How to Make Christmas Cookie Bars
Step 1: Preheat and Prepare Your Baking Dish
Start by preheating your oven to 350°F (175°C). This ensures even baking as your delicious Christmas Cookie Bars will soon fill your kitchen with aromas that say “holiday cheer.” Line a 9×13-inch baking dish with parchment paper, leaving some overhang. This makes lifting them out later so much easier!
Step 2: Mix the Wet Ingredients
In a large mixing bowl, whisk together the melted butter, brown sugar, and granulated sugar. Take your time; you want a smooth and creamy mixture. Next, crack in the eggs and pour in the vanilla extract, stirring until it’s all well combined. This step is key for that rich flavor we crave in cookie bars!
Step 3: Combine Dry Ingredients
In another bowl, whisk together the all-purpose flour, baking soda, and salt. This simple mix of dry ingredients creates the foundation for our cookie bars. Once combined, gradually add this to the wet mixture, stirring just until everything comes together. It’s important not to overmix; we want chewy bars, not dry cookies!
Step 4: Add Festive Mix-Ins
Now comes the fun part! Gently fold in the holiday M&Ms, chocolate chips, and festive sprinkles. These colorful additions not only bring joy but also plenty of texture. Imagine biting into those vibrant morsels—such a treat! Be careful not to mix too much; we want those candies to stay whole and gorgeous!
Step 5: Spread and Bake
Transfer your colorful cookie dough to the prepared baking dish, spreading it evenly into the corners. Bake in your preheated oven for about 25 minutes, or until the tops are golden brown. Keep an eye out; you want that perfect balance of soft and slightly chewy!
Step 6: Cool Before Slicing
Once baked, remove your tray from the oven and let it cool completely in the dish. This step is crucial for getting the best texture before cutting your delicious Christmas Cookie Bars. Patience is key—slice them too soon, and they may crumble!
Tips for Success
- Always use room temperature eggs for better mixing.
- Measure flour correctly; too much can lead to dry bars.
- Don’t skip lining the baking dish; it makes cleanup a breeze!
- Allow the bars to cool completely before cutting for clean slices.
- Consider adding nuts or dried fruit for an extra layer of flavor.
Equipment Needed
- Baking Dish: A 9×13-inch baking dish works perfectly. If you don’t have one, any similarly sized pan will do.
- Parchment Paper: Essential for easy removal. Aluminum foil can be a good alternative if you’re in a pinch.
- Mixing Bowls: Two medium bowls—one for wet, one for dry ingredients. Any size works; just ensure they’re sturdy!
- Whisk: For mixing wet ingredients. A fork can also do the trick in a hurry.
- Spatula: To fold in mix-ins. A wooden spoon can be used if that’s what you’ve got.
Variations for Christmas Cookie Bars
- Nutty Delight: Add chopped walnuts or pecans for a crunchy texture that enhances the flavor profile.
- Peanut Butter Swirl: Incorporate peanut butter chips or swirl in some creamy peanut butter before baking for a nutty twist.
- Gluten-Free Option: Substitute all-purpose flour with a 1:1 gluten-free baking blend to accommodate gluten sensitivities.
- Minty Fresh: Swap out half the chocolate chips for mint chocolate chips and add a touch of peppermint extract for a festive flavor.
- Dried Fruit Fusion: Mix in dried cranberries or chopped dried apricots for a chewiness that pairs beautifully with chocolate.
Serving Suggestions for Christmas Cookie Bars
- Pair with Milk: A classic! Serve with a tall glass of cold milk for a comforting treat.
- Festive Platter: Arrange bars on a colorful platter, topped with holiday-themed decorations for an eye-catching display.
- Cocoa Delight: Enjoy alongside a warm cup of hot cocoa to make the experience even cozier.
- Wrap for Gifts: Slice and wrap in cellophane bags for tasty holiday gifts or dessert swaps.
- Top with Ice Cream: A scoop of vanilla ice cream elevates these bars to a delightful dessert.
FAQs about Christmas Cookie Bars
Can I freeze Christmas Cookie Bars?
Absolutely! These delightful bars freeze well. Just wrap them tightly in plastic wrap or aluminum foil after they’ve cooled. They can last up to three months in the freezer. When you’re ready to enjoy, let them thaw at room temperature.
How do I store leftover Christmas Cookie Bars?
Store any leftover cookie bars in an airtight container at room temperature. They should stay fresh for up to a week. You can also pop them in the fridge for an extended shelf life, but they might lose some of that fresh-baked taste.
Can I substitute the M&Ms for other mix-ins?
Sure! Feel free to get creative. You can replace holiday M&Ms with chocolate chunks, nuts, or even dried fruit. Just keep in mind that the flavors will change, but that’s part of the fun!
What if I don’t have all-purpose flour?
If you’re out of all-purpose flour, you can use a 1:1 gluten-free flour blend. You can also substitute with whole wheat flour for a different texture and taste, but the bars may turn out denser.
Are these cookie bars versatile for other occasions?
Definitely! While they’re perfect for Christmas, these cookie bars can brighten up any gathering. Feel free to customize them for birthdays, school events, or just a cozy afternoon treat. Their adaptable nature makes them a year-round favorite!
Final Thoughts on Christmas Cookie Bars
As the holiday season unfolds, these Christmas Cookie Bars become more than just a dessert—they’re a part of joy-filled memories waiting to happen. Imagine sweet aromas wafting through the kitchen while laughter and stories fill the air. Each bar is a colorful reminder of warmth and togetherness. Plus, they’re incredibly easy to prepare, allowing you to focus on what truly matters—spending time with loved ones. So, whether you’re sharing them at a gathering or enjoying them with a cozy cup of cocoa, these bars will undoubtedly sweeten your holiday celebrations and create delightful moments to cherish.
Print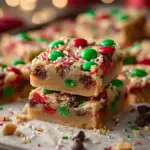
Christmas Cookie Bars
- Total Time: 40 minutes
- Yield: 24 cookie bars 1x
- Diet: Vegetarian
Description
Delicious and festive Christmas Cookie Bars perfect for holiday celebrations.
Ingredients
- 1 cup unsalted butter, melted
- 1 cup brown sugar
- ½ cup granulated sugar
- 2 large eggs
- 2 tsp vanilla extract
- 2 ½ cups all-purpose flour
- 1 tsp baking soda
- ½ tsp salt
- 1 cup holiday M&Ms
- ½ cup chocolate chips
- ½ cup festive sprinkles
Instructions
- Preheat oven to 350°F (175°C) and line a 9×13-inch baking dish with parchment paper.
- In a large bowl, whisk melted butter, brown sugar, and granulated sugar until combined.
- Add eggs and vanilla, mixing until smooth.
- Stir in flour, baking soda, and salt until just combined.
- Fold in M&Ms, chocolate chips, and sprinkles.
- Spread dough evenly into the baking dish and bake for 25 minutes or until golden brown.
- Cool completely before slicing into bars.
Notes
- Make sure to let the bars cool completely for easier slicing.
- Feel free to customize with your favorite mix-ins.
- Prep Time: 15 minutes
- Cook Time: 25 minutes
- Category: Dessert
- Method: Baking
- Cuisine: American
Nutrition
- Serving Size: 1 bar
- Calories: 250
- Sugar: 18g
- Sodium: 150mg
- Fat: 10g
- Saturated Fat: 6g
- Unsaturated Fat: 4g
- Trans Fat: 0g
- Carbohydrates: 36g
- Fiber: 1g
- Protein: 2g
- Cholesterol: 40mg