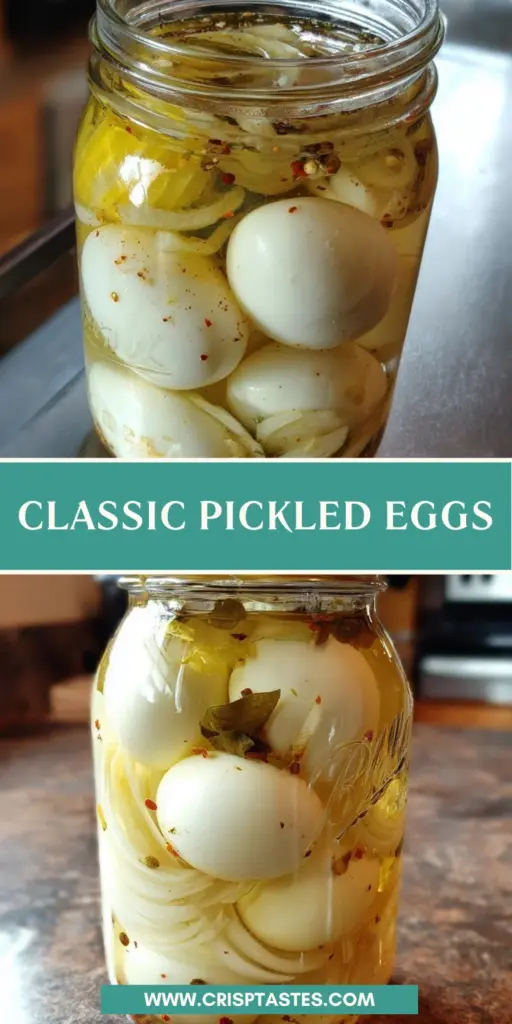
Classic Pickled Eggs

Introduction to Classic Pickled Eggs
Hey there, fellow food lovers! If you’re looking for a tasty treat that packs a punch of flavor, then look no further than classic pickled eggs. These delightful bites are not only delicious but also super simple to make. Perfect for busy days when you need a quick snack or a surefire way to impress your friends at a gathering, pickled eggs are versatile and fun. I remember the first time I took a batch to a picnic; they were gone in minutes! Trust me, you’re going to want to make these.
Why You’ll Love This Classic Pickled Eggs
There’s something truly magical about classic pickled eggs. They’re not just easy to prepare; they’re also a fantastic make-ahead snack. With minimal effort, you can elevate your culinary game and treat your family or guests. These little gems pack a tangy flavor that keeps you coming back for more. Plus, they’re perfect for any occasion—game day, brunch, or a quiet night at home with a good book.
Ingredients for Classic Pickled Eggs
To whip up these classic pickled eggs, you’ll need a handful of simple ingredients that you likely have on hand already. Here’s what you’ll need:
- Eggs: Fresh eggs are key for a smooth texture and bright flavor. They’re the star of this dish!
- White vinegar: This is the main brining agent, giving the eggs that wonderful tangy taste. Opt for vinegar that has 5-7% acetic acid for the best results.
- Water: Used to dilute the vinegar, balancing the acidity nicely.
- Salt: A half teaspoon adds just the right amount of seasoning to elevate the flavors.
- Pickling spice: This blend includes mustard seeds, bay leaves, peppercorns, coriander seeds, and allspice. Each spice brings its own punch, creating a bold flavor profile. Feel free to experiment with your favorite spices!
- Onion (optional): Thinly sliced yellow onion adds a lovely sweet flavor and a pop of color. It’s not necessary, but I highly recommend it for that extra zing.
For exact measurements, check the bottom of the article where they’re listed for easy printing.
How to Make Classic Pickled Eggs
Making classic pickled eggs is a fun and rewarding task. Once you’ve gathered your ingredients, the process is straightforward. Here’s how to get those vibrant, tangy eggs ready for your snack time or a gathering.
Prepare Hard-Boiled Eggs
Start by cooking your eggs to perfection. I love using my Instant Pot for this. Place a rack at the bottom of the pot and add one cup of water. Then, carefully place your eggs on the rack. Make sure to close the lid and set the valve to seal. Cook the eggs on high pressure for just five minutes. When the time is up, let the pressure naturally release for three minutes before flipping the valve. This method gets eggs perfectly hard-boiled every time!
Packing the Jar
Once your eggs have cooled in a cold water bath, it’s time to pack them in a jar. Choose a clean, quart-sized mason jar or larger, depending on how many eggs you want to pickle. Layer the eggs carefully, adding thin slices of onion if you’re using them. It creates a beautiful mix and a hint of sweetness. You want to stack them neatly but allow for some room for the brine to circulate.
Mixing the Brine
Next, it’s time to mix the brine. In a separate bowl, combine your pickling spice and salt. Fill the jar with about a quarter water and then top it up with white vinegar. This gives the eggs that punchy flavor that we adore. After adding the spices and salt, gently shake or invert the jar. This helps to mix everything together, ensuring the flavors meld nicely.
Brining the Eggs
Finally, it’s all about patience! Seal your jar tightly and place it in the fridge. Allow the eggs to brine for about four to five days. This is where the magic happens! Each day, shake the jar gently to distribute the brine. By the end of this period, you’ll be rewarded with beautifully flavored classic pickled eggs, ready to enjoy at home or at your next picnic.
Tips for Success
- Use fresh eggs for the best taste and texture.
- Don’t skip the cold water bath after boiling; it makes peeling easier.
- Feel free to adjust the pickling spices to your liking; garlic, dill, or chili flakes add an amazing twist!
- Remember to give the jar a gentle shake every day during the brining process.
- Try these eggs on salads or as a protein-packed snack—they’re versatile!
Equipment Needed
- Instant Pot: A great tool for perfectly hard-boiled eggs; you can also use a traditional pot on the stove.
- Mason Jar: Any clean jar will work, but mason jars are perfect for pickling.
- Measuring Cup: For accurate liquid measurements; a simple kitchen cup will do.
- Mixing Bowl: To combine your spices and salt; any bowl you have on hand will suffice.
Variations of Classic Pickled Eggs
- Spicy Pickled Eggs: Add some heat by incorporating sliced jalapeños or red pepper flakes into the brine. Perfect for those who love a kick!
- Herb-Infused Pickled Eggs: Toss in fresh dill, thyme, or rosemary with the pickling spices for an aromatic twist that brightens the flavor.
- Beet-Red Pickled Eggs: Add cooked beet juice to the brine for a stunning color and a subtle sweetness. This variation is as beautiful as it is tasty!
- Sweeter Pickled Eggs: Sprinkle in a touch of sugar or honey to balance the acidity, creating a milder and sweeter treat that everyone will enjoy.
- Vinegar Swap: Experiment with apple cider vinegar or rice vinegar for different flavor notes. Each vinegar brings its own unique taste to the table.
Serving Suggestions for Classic Pickled Eggs
- Pair pickled eggs with a crisp salad for a refreshing side.
- Serve them alongside your favorite charcuterie board for added color and taste.
- Enjoy with a cold glass of beer or a zesty cocktail; they complement so well!
- Present them in a mason jar on your buffet table for a rustic look.
- Slice and add them to sandwiches for a punchy twist!
FAQs about Classic Pickled Eggs
How long do pickled eggs last in the fridge?
Once prepared, classic pickled eggs can last up to several weeks in the fridge. Just make sure they stay submerged in the brine to keep them fresh!
Can I use brown eggs instead of white eggs?
Absolutely! The type of eggs you use doesn’t affect the pickling process. Brown eggs will yield the same delicious flavor, just with a slightly different appearance.
Can I make pickled eggs without an Instant Pot?
Yes, you can boil the eggs on the stove-top. Just bring water to a boil, add the eggs, and cook for about 10-12 minutes. Then, follow the same cooling and packing process for pickling.
What can I do if the eggs don’t peel easily?
If you find peeling a challenge, try using older eggs or giving your cooked eggs a good crack and letting them sit in cold water longer. You might be surprised how well this helps!
What are some creative ways to enjoy pickled eggs?
Pickled eggs are a fantastic addition to salads, sandwiches, or even as a bold appetizer on antipasto platters. You can also slice them up and toss them in a stir-fry for an unexpected twist!
Final Thoughts on Classic Pickled Eggs
Creating classic pickled eggs is more than just a culinary task; it’s an adventure filled with flavor and nostalgia. I cherish the joy these tangy treats bring to my family gatherings and quiet evenings alike. With simple ingredients and a dash of patience, you’re not just whipping up a snack; you’re crafting memories. The vibrant colors and bold tastes transform even the most mundane meals into exciting experiences. So, roll up your sleeves, dive into this recipe, and let these classic pickled eggs brighten your kitchen and your heart. You won’t regret it!
Print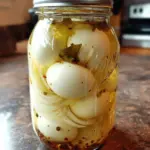
Classic Pickled Eggs
- Total Time: 4-5 days (for brining)
- Yield: 8–12 pickled eggs 1x
- Diet: Gluten Free
Description
This classic pickled egg recipe is simple and results in delicious, tangy eggs that are perfect for snacks or salads.
Ingredients
- 8–12 eggs
- White vinegar (5-7% acetic acid)
- water
- 1/2 tsp salt
- 1 tbsp pickling spice (includes mustard seed, bay leaves, peppercorns, coriander seeds, allspice, etc.)
- 1/3 to 1/2 yellow onion; thinly sliced in rounds (optional)
Instructions
- INSTANT POT HARD COOKED EGGS: Position the rack in the bottom of the Instant Pot insert. Add 1 cup of water and place as many eggs as you like on the rack.
- Place the lid on, ensure the valve is closed and set the timer for 5 minutes on high pressure.
- Once the eggs have been cooking for 5 minutes, allow them to sit a further three minutes then release the pressure by moving the valve.
- Remove the eggs and place them in a bowl of cold water.
- FOR THE PICKLED EGGS: Pack eggs and onions (if using) in clean quart size or larger jar depending on how many you are using.
- Add pickling spice and salt.
- Fill 1/4 jar with water, then top up with vinegar.
- Seal with the jar lid, then gently invert the jar a couple of times so the vinegar and water are mixed and the salt dissolves.
- Place in the fridge for 4-5 days to allow the brine to penetrate the eggs, then enjoy!
Notes
- Make sure to use fresh eggs for the best results.
- Experiment with different spices for unique flavor variations.
- These eggs can be stored for up to several weeks in the fridge.
- Prep Time: 15 minutes
- Cook Time: 5 minutes
- Category: Snack
- Method: Pressure Cooking, Pickling
- Cuisine: American
Nutrition
- Serving Size: 1 egg
- Calories: 70
- Sugar: 0 g
- Sodium: 120 mg
- Fat: 5 g
- Saturated Fat: 1.5 g
- Unsaturated Fat: 3.5 g
- Trans Fat: 0 g
- Carbohydrates: 1 g
- Fiber: 0 g
- Protein: 6 g
- Cholesterol: 186 mg