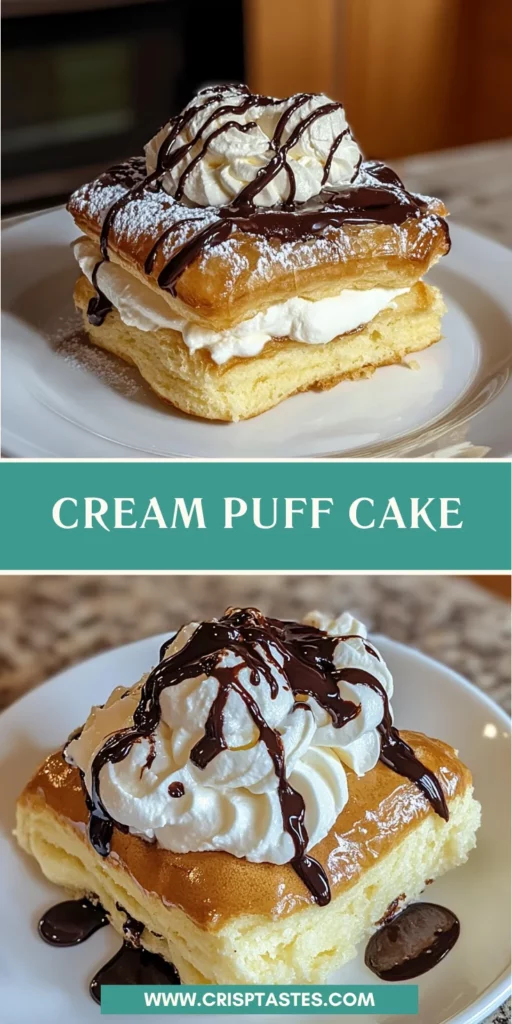
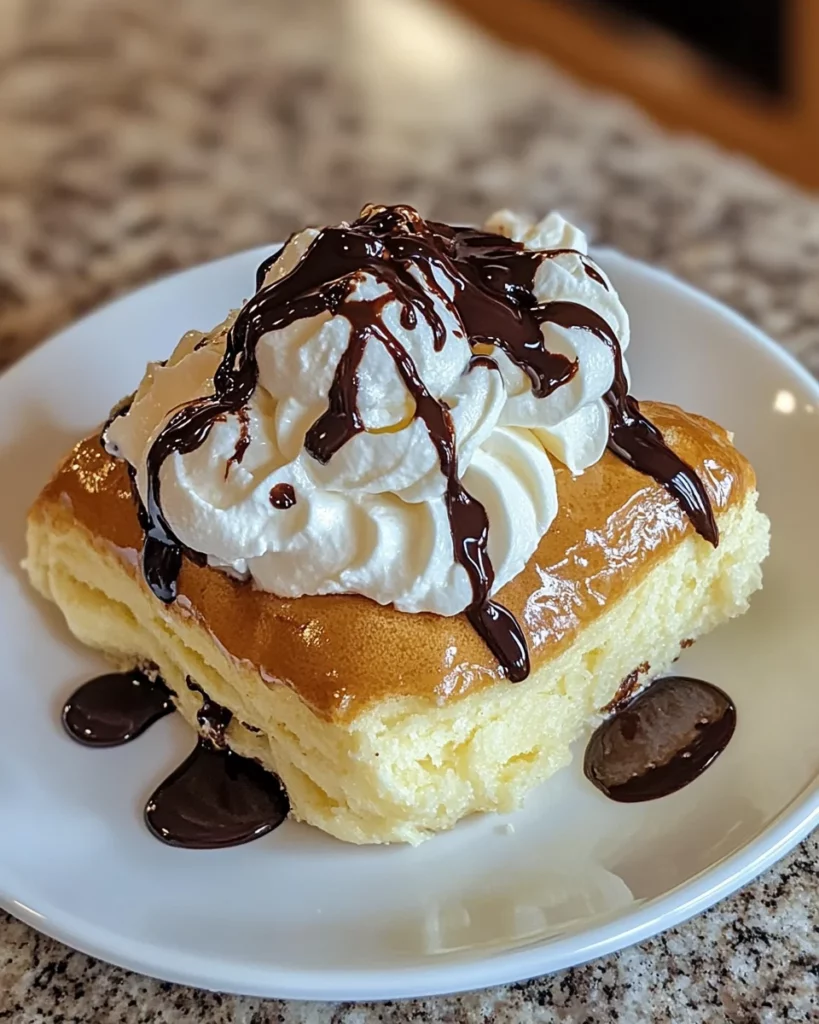
Cream puff cake

Introduction to Cream Puff Cake
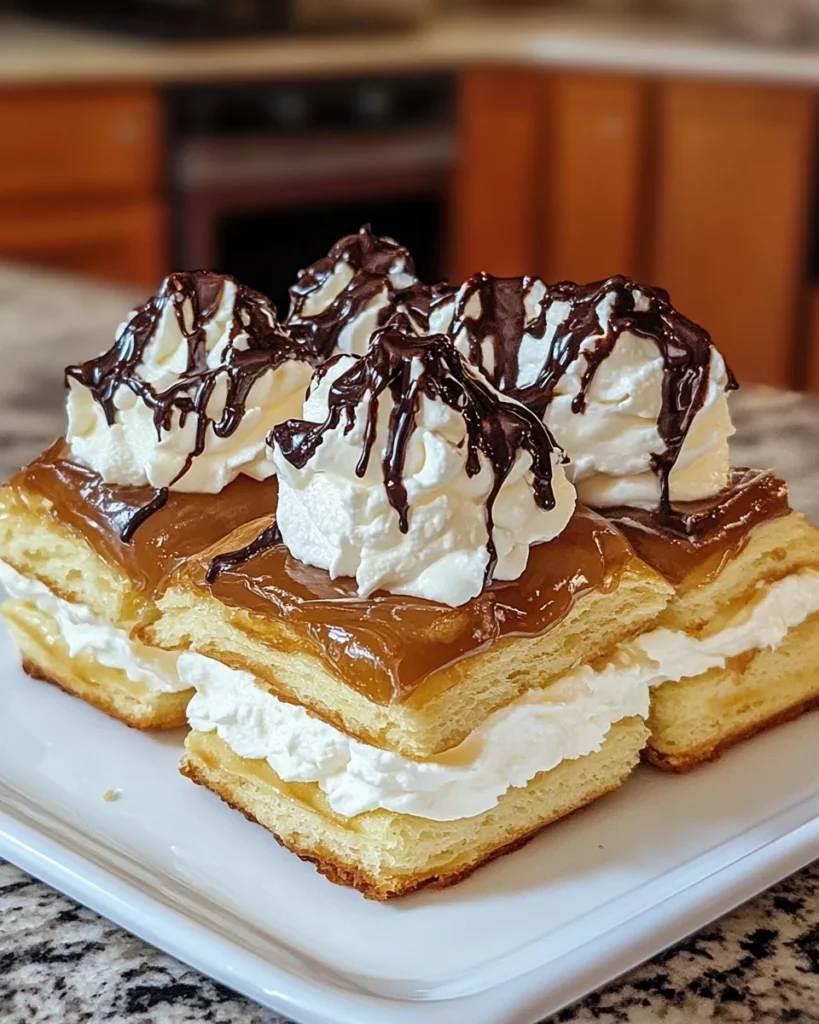
As a busy mom, I know how precious time can be, especially when it comes to whipping up something special for family or friends. That’s why I adore this cream puff cake! It’s a delightful dessert that combines a light, fluffy texture with a creamy vanilla filling, all topped with luscious chocolate syrup. Perfect for any occasion, this cake is not just a treat for the taste buds but also a feast for the eyes. Whether you’re hosting a gathering or simply want to impress your loved ones, this cream puff cake is the answer to your dessert dreams!
Why You’ll Love This Cream Puff Cake
This cream puff cake is a game-changer for busy days. It’s incredibly easy to make, requiring just a handful of ingredients and minimal prep time. The taste? Oh, it’s heavenly! The combination of fluffy pastry and creamy filling will have your guests raving. Plus, it’s versatile enough for any occasion, from birthday parties to casual family dinners. Trust me, this dessert will quickly become a favorite in your home!
Ingredients for Cream Puff Cake
Gathering the right ingredients is the first step to creating this delightful cream puff cake. Here’s what you’ll need:
- Water: The base for your dough, it helps create that perfect puff.
- Salt: Just a pinch enhances the flavors and balances the sweetness.
- Butter: Adds richness and helps achieve that light, airy texture.
- All-purpose flour: The backbone of the cake, providing structure and stability.
- Eggs: Essential for binding and giving the dough its lovely rise.
- Instant vanilla pudding: This is the star of the filling, bringing creamy sweetness and flavor.
- Cream cheese: Adds a rich, tangy element to the filling, making it extra special.
- Milk: Used to prepare the pudding, it adds creaminess to the filling.
- Whipped topping: A light and fluffy layer that crowns the cake beautifully.
- Chocolate syrup: The finishing touch that adds a decadent drizzle on top.
For those looking to switch things up, consider using flavored pudding or even a fruit topping instead of chocolate syrup. You can find the exact measurements for each ingredient at the bottom of the article, ready for printing!
How to Make Cream Puff Cake
Now that you have your ingredients ready, let’s dive into the fun part—making this delightful cream puff cake! Follow these simple steps, and you’ll have a show-stopping dessert in no time.
Step 1: Preheat and Prepare
First things first, preheat your oven to 450°F. This high temperature is crucial for getting that perfect puff. While the oven heats up, grease a 9×13″ baking pan. A little butter or cooking spray will do the trick!
Step 2: Boil and Mix
In a saucepan, bring water, butter, and salt to a boil. Once it’s bubbling, remove it from the heat and pour the mixture into a mixing bowl. The aroma of melted butter is simply irresistible!
Step 3: Combine Flour
Next, add the all-purpose flour to the hot mixture. Now, here’s where the magic happens! Beat the mixture by hand until it forms a ball. If you prefer, you can use an electric mixer for about two minutes until it’s well combined. Your dough should be smooth and cohesive.
Step 4: Cool the Dough
Let the dough cool for about 10 minutes. This step is important because it prevents the eggs from cooking when you add them. Patience is key here!
Step 5: Add Eggs
Now, it’s time to add the eggs. Beat them into the dough until it’s thick and smooth. The surface should have a lovely satin sheen. This is what gives your cream puff cake that airy texture!
Step 6: Cool Again
Allow the dough to cool for another 5 minutes. This brief pause helps ensure everything blends perfectly when you bake it.
Step 7: Bake the Dough
Transfer the dough into your greased pan and press it out until it’s flat. Bake it in the preheated oven for 15 minutes at 450°F. You’ll see it puff up beautifully!
Step 8: Prick and Reduce Heat
Once the dough is puffed, take a knife and prick it about 15 times in the center. This allows steam to escape. Then, reduce the oven heat to 350°F and bake for another 20 minutes. Your kitchen will smell heavenly!
Step 9: Cool Before Filling
After baking, let the pan and dough cool for about 30 to 45 minutes. This cooling time is crucial before adding the cream filling. Trust me, you don’t want a melted mess!
Step 10: Prepare Cream Filling
While the dough cools, beat the softened cream cheese in a mixing bowl. This will create a smooth base for your delicious filling.
Step 11: Mix Pudding and Milk
In another bowl, whisk together the instant vanilla pudding and milk. Mix well until it’s smooth. Then, add this mixture to the cream cheese. Start mixing slowly, then beat well until everything is combined. Pour this creamy goodness over your baked cream puff.
Step 12: Top and Store
Finally, cover your masterpiece with Cool Whip and drizzle it with chocolate syrup. It’s the cherry on top! Store your cream puff cake in the refrigerator until you’re ready to serve. Enjoy every bite!
Tips for Success
- Make sure your cream cheese is very soft for easy mixing.
- Let the cake cool completely before adding the filling to avoid melting.
- Use a spatula to spread the Cool Whip evenly for a beautiful finish.
- For extra flavor, consider adding a splash of vanilla extract to the cream filling.
- Store leftovers in the refrigerator for best freshness and flavor.
Equipment Needed
- 9×13″ baking pan: A standard size for this recipe; you can use a glass or metal pan.
- Mixing bowls: Essential for combining ingredients; any size will do.
- Electric mixer: Helpful for beating the dough and cream filling; a whisk works too.
- Spatula: Perfect for spreading the Cool Whip evenly.
- Measuring cups and spoons: Necessary for accurate ingredient measurements.
Variations
- Fruit Topping: Swap the chocolate syrup for fresh berries or sliced bananas for a fruity twist.
- Flavored Pudding: Experiment with different pudding flavors like chocolate or butterscotch for a unique filling.
- Gluten-Free Option: Use a gluten-free all-purpose flour blend to make this dessert suitable for gluten-sensitive guests.
- Reduced Sugar: Opt for sugar-free pudding and whipped topping to cut down on sweetness without sacrificing flavor.
- Nutty Addition: Sprinkle chopped nuts like almonds or pecans on top for added crunch and flavor.
Serving Suggestions
- Pair with Coffee: A warm cup of coffee or tea complements the cream puff cake beautifully.
- Fresh Fruit: Serve with a side of fresh berries for a refreshing contrast.
- Elegant Presentation: Garnish with mint leaves for a pop of color and freshness.
- Ice Cream: A scoop of vanilla ice cream on the side adds extra indulgence.
FAQs about Cream Puff Cake
As you embark on your journey to create this delightful cream puff cake, you might have a few questions. Here are some common queries I’ve encountered, along with helpful answers to guide you along the way.
Can I make cream puff cake ahead of time?
Absolutely! You can prepare the cake a day in advance. Just store it in the refrigerator after adding the filling and topping. This allows the flavors to meld beautifully!
What can I substitute for the cream cheese?
If you’re looking for a lighter option, consider using Greek yogurt or mascarpone cheese. Both will give you a creamy texture without compromising flavor.
How do I store leftovers?
Store any leftover cream puff cake in an airtight container in the refrigerator. It’s best enjoyed within a few days for optimal freshness.
Can I freeze cream puff cake?
While the baked dough can be frozen, I recommend freezing it without the filling. Once thawed, you can add the cream filling and toppings for the best texture.
What’s the best way to serve cream puff cake?
For a stunning presentation, slice the cake into squares and serve on a decorative plate. A drizzle of chocolate syrup on each slice adds a touch of elegance!
Final Thoughts
Creating this cream puff cake is more than just baking; it’s about bringing joy to your table. The light, fluffy texture combined with the creamy filling is a delightful experience that will have your family and friends asking for seconds. I love how this dessert can transform an ordinary day into something special. Plus, it’s a fantastic way to bond with your loved ones while sharing a delicious treat. So, roll up your sleeves, embrace the process, and enjoy every moment of making this delightful cake. Trust me, the smiles it brings are worth every effort!
Print
Cream puff cake
- Total Time: 1 hour 5 minutes
- Yield: 12 servings 1x
- Diet: Vegetarian
Description
A delightful cream puff cake that is sure to impress your guests with its light and fluffy texture, filled with a creamy vanilla pudding and topped with chocolate syrup.
Ingredients
- 1 cup water
- 1/4 teaspoon salt
- 1/2 cup butter
- 1 cup all-purpose flour
- 4 eggs
- 2 (3.9 oz) boxes instant vanilla pudding
- 8 ounces cream cheese, very soft
- 3 1/2 cups milk
- 8 ounces whipped topping, defrosted
- 1/4 cup chocolate syrup
Instructions
- Preheat oven to 450°F and grease a 9×13″ baking pan.
- Boil together water, butter, and salt. Remove from heat and pour into a mixing bowl.
- Add flour and beat by hand until it forms a ball or beat for a couple of minutes with an electric mixer until very well mixed.
- Cool dough for 10 minutes.
- Add eggs to dough and beat until thick and smooth. Dough surface should have a satin sheen.
- Cool again for about 5 minutes.
- Transfer into a greased pan and press out until flat. Bake for 15 minutes at 450°F.
- Prick with a knife about 15 times in the center that is puffed up to allow air to escape. Reduce oven heat to 350°F and bake another 20 minutes.
- Allow pan and dough to cool for about 30 – 45 minutes before adding cream filling.
- Beat softened cream cheese in a mixing bowl.
- Whisk together pudding and milk. Mix well. Add to cream cheese and mix slowly at first and then beat well. Pour over baked cream puff.
- Cover with Cool Whip and drizzle with chocolate syrup. Store in the refrigerator.
Notes
- Ensure the cream cheese is very soft for easy mixing.
- Let the cake cool completely before adding the filling to prevent it from melting.
- Store leftovers in the refrigerator for best freshness.
- Prep Time: 30 minutes
- Cook Time: 35 minutes
- Category: Dessert
- Method: Baking
- Cuisine: American
Nutrition
- Serving Size: 1 slice
- Calories: 350
- Sugar: 20g
- Sodium: 200mg
- Fat: 18g
- Saturated Fat: 10g
- Unsaturated Fat: 5g
- Trans Fat: 0g
- Carbohydrates: 40g
- Fiber: 1g
- Protein: 5g
- Cholesterol: 80mg