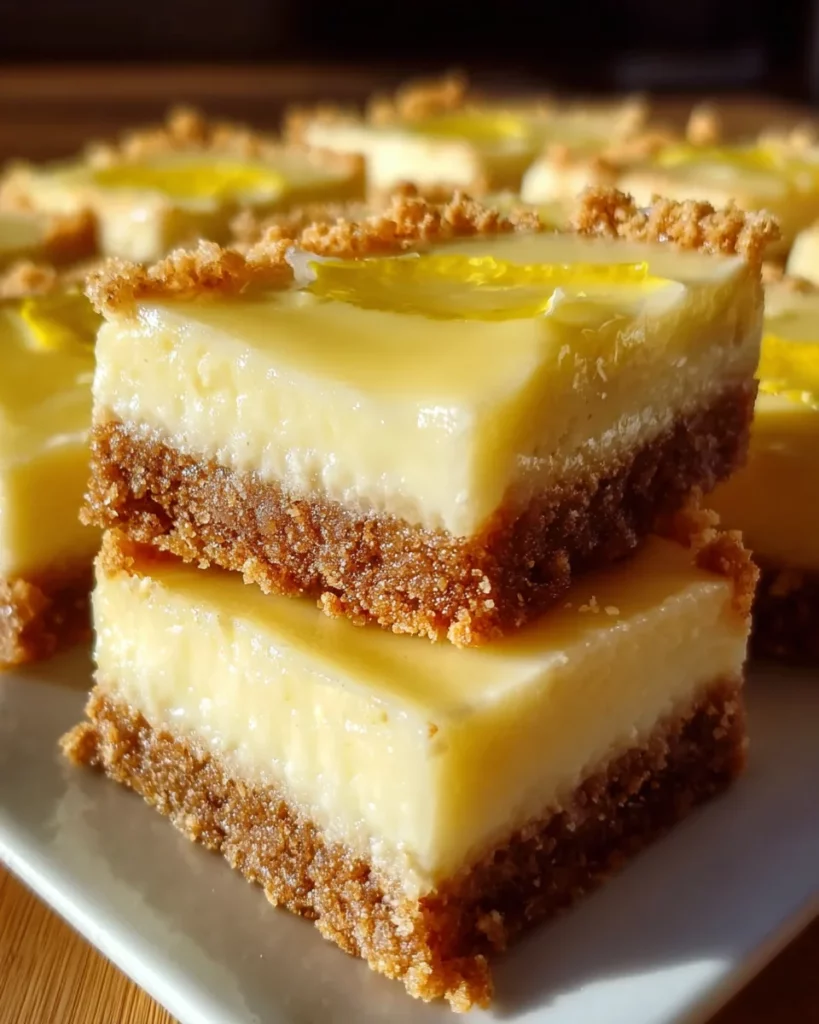
Creamy Lemon Squares

Introduction to Creamy Lemon Squares
Ah, the joys of baking! There’s something truly magical about the aroma of fresh lemon wafting through your kitchen. Creamy Lemon Squares are one of those desserts that not only delight your senses but also transform any gathering into a special occasion. Busy moms and professionals alike will appreciate this recipe for its simplicity and quick prep time. Trust me, when your loved ones take that first bite, their faces will light up with happiness. So, let’s dive into this zesty delight and make your dessert dreams come true!
Why You’ll Love This Creamy Lemon Squares
These Creamy Lemon Squares are like a burst of sunshine on a plate. They’re easy to make, requiring minimal effort for maximum flavor. In just under an hour, you can create a dessert that’s both refreshing and indulgent. The sweet and tangy lemon filling paired with a crunchy crust satisfies any sweet tooth. Plus, they’re an ideal treat to whip up for busy days or unexpected guests!
Ingredients for Creamy Lemon Squares
Gathering the right ingredients is half the fun of making Creamy Lemon Squares. Each one plays a role in creating that tantalizing flavor and memorable texture. Here’s what you’ll need:
- Graham cracker crumbs: These are the secret behind the crunchy crust. They add a subtle sweetness and a pleasant crunch. You can also use digestive biscuits for a different flavor twist.
- Unsalted butter: This helps bind the crust together, imparting a rich flavor. Make sure it’s melted for smoother mixing.
- Granulated sugar: A must for sweetening the crust just right. It balances the zesty filling beautifully.
- Sweetened condensed milk: This is the creamy backbone of the filling. Its sweetness and richness create that luscious texture we all want in a dessert.
- Sour cream: Adding a tangy depth to the filling, sour cream enhances the creaminess. It’s the ingredient that steals the show!
- Freshly squeezed lemon juice: This is where the magic happens. Fresh lemon juice ensures your bars are bursting with bright, zesty flavor. Store-bought juice just won’t cut it!
- Lemon zest: A sprinkle of zest brightens the filling and adds aromatic oils that elevate the dish further.
The quantities needed for each ingredient can be found at the bottom of the article. Feel free to print the recipe for your convenience!
How to Make Creamy Lemon Squares
Now that we have our ingredients ready, the fun part begins! Making Creamy Lemon Squares is a straightforward process that anyone can master. Let’s go through it step-by-step.
Preheat Your Oven
Set the Temperature
First things first, we need to preheat the oven to 350°F (175°C). This ensures that your Creamy Lemon Squares start cooking evenly right from the get-go. Place your oven rack in the center so that the heat circulates perfectly. This little step sets the stage for baking success!
Prepare the Crust
Mixing the Crust Ingredients
In a medium bowl, mix the graham cracker crumbs, melted butter, and granulated sugar. I like to use a fork to combine everything; it helps break up any clumps. The mixture should resemble damp sand, ready to hold its shape.
Pressing the Mixture
Grab a 9×13-inch baking dish and press the crumb mixture firmly into the bottom. A flat measuring cup works wonders for this! You want a solid layer to keep the filling from leaking. Don’t be shy—press nicely to create a solid foundation!
Bake the Crust
Timing and Cooling
Place your dish in the preheated oven and bake for 8–10 minutes. You’ll know it’s done when the edges start turning golden. Once baked, let it cool slightly while you make the filling. This cooling time is essential for the perfect texture later on.
Make the Creamy Lemon Filling
Whisking the Ingredients Together
In a large mixing bowl, whisk together the sweetened condensed milk, sour cream, lemon juice, and lemon zest. I enjoy using a hand whisk for this; it really incorporates air and creates that smooth texture. Make sure there are no lumps—smooth is the name of the game!
Assemble and Bake
Pouring the Filling
Now, gently pour the creamy filling over the cooled crust. Make sure it spreads evenly; this ensures every bite is as delightful as the last. You want the filling to sit beautifully atop the crust, ready for its baking debut!
Baking Until Set
Place it back in the oven for 15–18 minutes. Look for the edges to be just set but the center to remain a bit soft. Don’t worry if it looks a touch wobbly—it will firm up as it cools!
Cooling and Setting
Room Temperature to Refrigeration
Once baked, remove your dish from the oven and let it cool to room temperature. Patience is key here! Afterward, pop it into the refrigerator for at least three hours, or overnight if you have the time. Chilling helps it set properly and enhances those zesty flavors.
Cutting and Serving
Slicing for Presentation
When you’re ready to serve, use a sharp knife to cut into squares. If you want to make it extra special, dust with powdered sugar or add a sprinkle of lemon zest on top. Trust me; it adds the perfect finishing touch!
Tips for Success
- Use fresh lemons for juice and zest; the flavor is unbeatable!
- Let the crust cool completely before adding the filling for a better texture.
- Make sure your mixing bowls are dry and clean for best results.
- When cutting, wipe the knife with a damp cloth for clean edges.
- Store any leftovers tightly wrapped in the fridge for up to a week.
Equipment Needed
- Baking dish (9×13-inch): A standard size, but you can use a smaller dish for thicker squares.
- Mixing bowls: Any size works; just ensure they are dry.
- Whisk: A hand whisk is perfect, but an electric mixer also shines.
- Measuring cups and spoons: Essentials for accuracy.
- Sharp knife: For clean, beautiful cuts once your Creamy Lemon Squares are ready.
Variations on Creamy Lemon Squares
- Ginger Snap Crust: Swap graham cracker crumbs for crushed ginger snaps for a spicy twist that pairs beautifully with lemon.
- Coconut Cream: Add shredded coconut to the filling for a tropical flair that enhances the creaminess.
- Berry Bliss: Top your Creamy Lemon Squares with fresh berries like raspberries or blueberries for a pop of color and added flavor.
- Gluten-Free Option: Use gluten-free graham cracker crumbs or almond flour for a delicious gluten-free crust.
- Dairy-Free Adaptation: Substitute sour cream with coconut yogurt and skip the butter for a bright and zesty dessert that’s dairy-free.
Serving Suggestions for Creamy Lemon Squares
- Pair with a dollop of whipped cream for added richness and a creamy contrast.
- Serve alongside fresh fruit, like strawberries or blueberries, for a colorful and refreshing plate.
- Complement with a cup of herbal tea or sparkling water for a light, delightful drink.
- Garnish with mint leaves for a pop of color and fresh aroma.
FAQs about Creamy Lemon Squares
As a passionate home cook, I know that questions often pop up while baking your Creamy Lemon Squares. Let’s tackle some of the most common queries, ensuring your lemon squares turn out beautifully!
Can I use bottled lemon juice instead of fresh?
While bottled lemon juice is convenient, I highly recommend using fresh lemon juice for the best flavor. Fresh lemons bring a vibrant zest that bottled juice simply can’t match.
How do I know when my Creamy Lemon Squares are done baking?
Look for the edges to be set while the center remains slightly soft. It will firm up as it cools. A little jiggle in the middle is perfectly fine!
Can I freeze my Creamy Lemon Squares?
Absolutely! Once they are fully set and cooled, wrap them tightly in plastic wrap, then place them in an airtight container. They can be frozen for up to three months.
What can I use instead of sour cream?
If you want a substitute, plain Greek yogurt works beautifully and adds a similar tangy flavor. For a dairy-free option, coconut yogurt is a fantastic choice!
How long do Creamy Lemon Squares last in the refrigerator?
When stored properly in an airtight container, your Creamy Lemon Squares can stay fresh and delightful for up to a week. Enjoy their zesty goodness!
Final Thoughts
Creating these Creamy Lemon Squares is more than just a baking task; it’s an experience that brings joy and zest to your home. The balance of sweet and tart awakens your taste buds, making each bite a delightful adventure. Whether it’s a cozy family dinner or a festive gathering, these squares are bound to impress and brighten the mood. I hope this recipe becomes a cherished addition to your dessert repertoire. Remember, it’s not just about the treats we make but also the beautiful memories we whip up along the way!
Print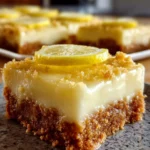
Creamy Lemon Squares
- Total Time: 50 minutes + chill time
- Yield: 12 servings 1x
- Diet: Vegetarian
Description
Deliciously tangy and creamy lemon squares, perfect for any occasion.
Ingredients
- 2 cups (200 g) graham cracker crumbs (or digestive biscuits)
- ½ cup (115 g) unsalted butter, melted
- ¼ cup (50 g) granulated sugar
- 2 cans (14 oz / 395 g each) sweetened condensed milk
- ½ cup (120 g) sour cream
- ¾ cup (180 ml) freshly squeezed lemon juice
- 1 tbsp lemon zest
Instructions
- Preheat oven to 350°F (175°C).
- Mix graham cracker crumbs, melted butter, and sugar in a bowl until combined.
- Press firmly into the bottom of a greased or parchment-lined 9×13-inch baking dish.
- Bake for 8–10 minutes, then remove from oven to cool slightly.
- In a large bowl, whisk together condensed milk, sour cream, lemon juice, and lemon zest until smooth and creamy.
- Pour filling over the baked crust and spread evenly.
- Return to oven and bake for 15–18 minutes, until the edges are just set (center should still look slightly soft).
- Remove and cool to room temperature, then refrigerate for at least 3 hours (or overnight) to set fully.
- Cut into squares using a sharp knife.
- Optionally dust with powdered sugar or garnish with lemon zest before serving.
Notes
- Ensure the squares are thoroughly chilled before cutting for cleaner slices.
- These squares can be stored in the refrigerator for up to 5 days.
- For a stronger lemon flavor, add more lemon zest.
- Prep Time: 20 minutes
- Cook Time: 30 minutes
- Category: Dessert
- Method: Baking
- Cuisine: American
Nutrition
- Serving Size: 1 square
- Calories: 210
- Sugar: 24g
- Sodium: 160mg
- Fat: 10g
- Saturated Fat: 6g
- Unsaturated Fat: 3g
- Trans Fat: 0g
- Carbohydrates: 29g
- Fiber: 1g
- Protein: 2g
- Cholesterol: 30mg