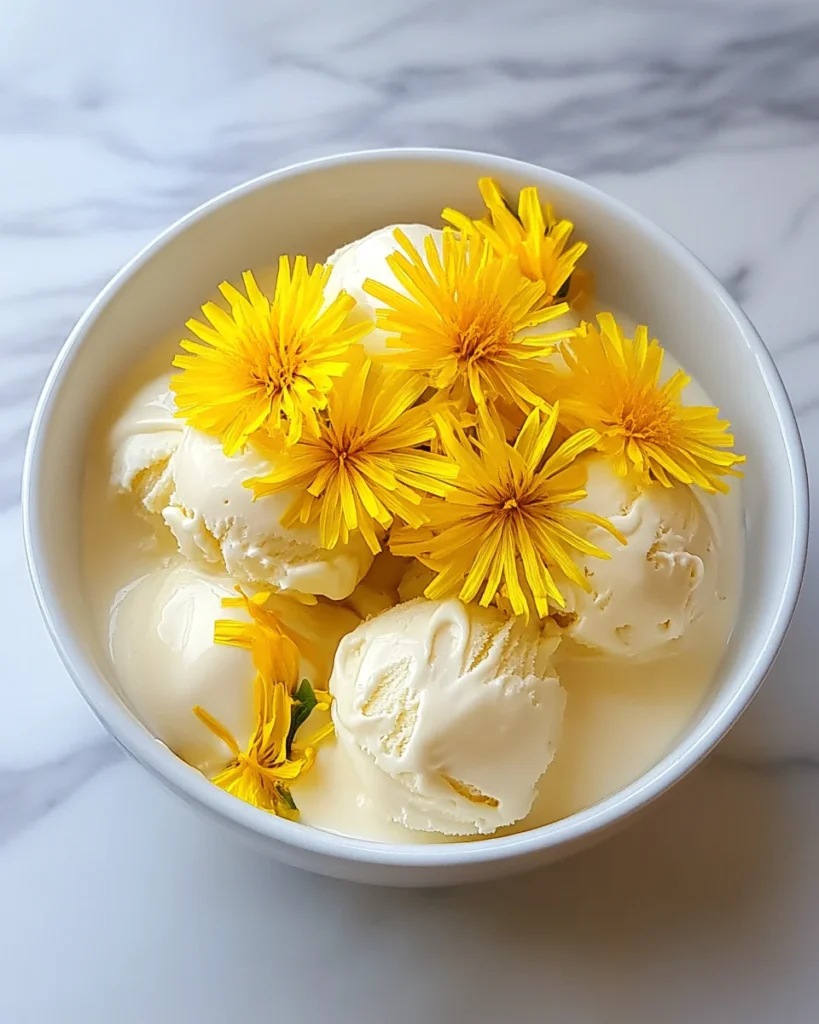
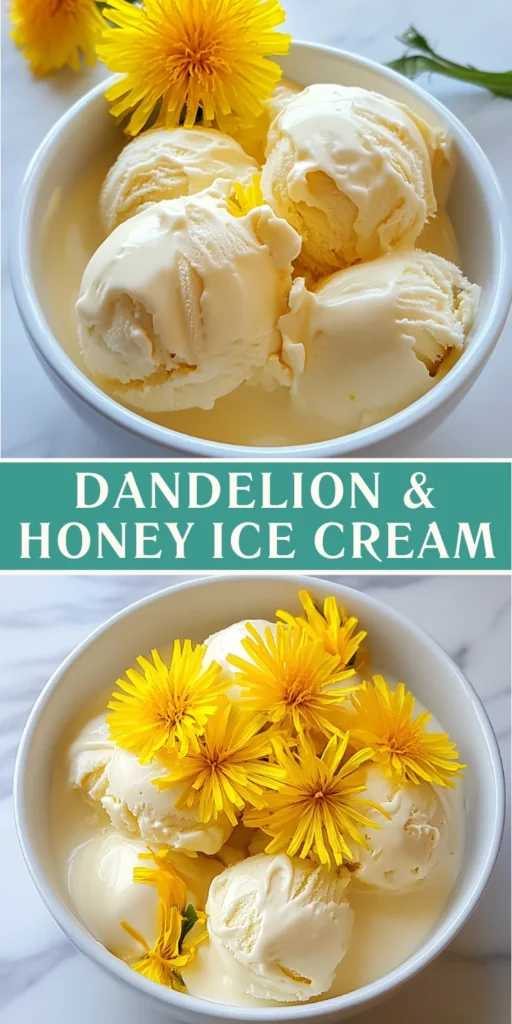
Dandelion & Honey Ice Cream

Introduction to Dandelion & Honey Ice Cream
As a busy mom, I know how precious those moments of joy can be, especially when it comes to treating my family. That’s why I’m excited to share my Dandelion & Honey Ice Cream recipe with you! This delightful dessert captures the essence of spring, bringing a sweet, floral flavor that’s sure to impress. It’s not just a treat; it’s a quick solution for a warm day or a fun way to introduce your loved ones to something unique. Trust me, this ice cream will have everyone asking for seconds!
Why You’ll Love This Dandelion & Honey Ice Cream
This Dandelion & Honey Ice Cream is not just a dessert; it’s a delightful experience! It’s easy to make, requiring minimal ingredients and effort. The sweet, floral notes will transport you to a sunny meadow with every bite. Plus, it’s a fantastic way to impress guests or simply treat yourself after a long day. You’ll love how this unique ice cream brings a touch of spring to your table, no matter the season!
Ingredients for Dandelion & Honey Ice Cream
Gathering the right ingredients is key to making this Dandelion & Honey Ice Cream a success. Here’s what you’ll need:
- Dandelion petals: Fresh, pesticide-free petals are essential. Only use the yellow parts, as the green bits can be bitter. Harvest them from a clean area for the best flavor.
- Whole milk: This adds creaminess to the ice cream. You can substitute with a non-dairy milk if you prefer, but the flavor may vary.
- Heavy cream: This is what gives the ice cream its rich texture. For a lighter version, you could use half-and-half, but it won’t be as creamy.
- Egg yolks: They create a custard base, enriching the ice cream. If you’re looking for an egg-free option, consider using a commercial egg replacer.
- Honey: Preferably wildflower or clover honey, it adds a natural sweetness and floral notes. You can adjust the amount based on your taste preferences.
- Granulated sugar: This is optional. If you like your ice cream sweeter, feel free to add more sugar to taste.
- Pure vanilla extract: A splash of vanilla enhances the overall flavor, making it more aromatic and delicious.
- A pinch of salt: This balances the sweetness and brings out the flavors beautifully.
For exact measurements, check the bottom of the article where you can find everything listed for easy printing. Happy cooking!
How to Make Dandelion & Honey Ice Cream
Now that you have your ingredients ready, let’s dive into the delightful process of making Dandelion & Honey Ice Cream. Each step is simple, and I promise it’s worth every minute. Let’s get started!
Step 1: Prepare the Dandelions
First things first, you need to gather those beautiful dandelion petals. Make sure to pick them from a clean, pesticide-free area. Gently rinse the flowers and pat them dry. Carefully pull out the yellow petals, discarding any green bits, as they can be quite bitter. You’ll need about a cup of these sunny petals for your ice cream.
Step 2: Make the Infusion
Next, let’s create a lovely infusion. In a small saucepan, warm the whole milk over low heat until it’s just steaming—don’t let it boil! Add the dandelion petals and stir gently. Cover the saucepan and let it steep for 30 to 60 minutes. The longer you steep, the more floral flavor you’ll get. After steeping, strain the mixture through a fine mesh sieve, discarding the petals. Set your infused milk aside; it’s going to be the star of the show!
Step 3: Make the Custard Base
Now, let’s whip up the custard base. In a medium saucepan, whisk together the egg yolks, honey, and optional sugar until the mixture is smooth and pale. Slowly whisk in the dandelion-infused milk and heavy cream. This combination is where the magic begins, creating a rich and creamy base for your ice cream.
Step 4: Cook the Custard
Time to cook the custard! Place the saucepan over medium-low heat. Stir constantly with a wooden spoon or silicone spatula. You want to cook the mixture until it thickens enough to coat the back of the spoon—this usually takes about 8 to 10 minutes. Be careful not to let it boil, or you might end up with scrambled eggs, and nobody wants that!
Step 5: Finish and Chill
Once your custard has thickened, remove it from the heat. Stir in the pure vanilla extract and a pinch of salt to enhance the flavors. Pour the custard through a sieve into a clean bowl to catch any curdled bits. Let it cool to room temperature, then cover and chill it in the fridge for at least 4 hours or overnight. Patience is key here!
Step 6: Churn the Ice Cream
After chilling, it’s time to churn! Pour the custard into your ice cream maker and churn according to the manufacturer’s instructions. This usually takes about 20 to 25 minutes. You’re looking for a soft-serve consistency. If you don’t have an ice cream maker, don’t worry! You can still make this by placing the mixture in a lidded container and stirring every 30 minutes until it’s frozen.
Step 7: Freeze to Firm Up
Once churned, transfer the ice cream to a lidded container. Freeze it for at least 2 to 3 hours to firm up. This step is crucial for achieving that perfect scoopable texture. Trust me, the wait will be worth it!
Step 8: Serve and Enjoy
Finally, it’s time to enjoy your homemade Dandelion & Honey Ice Cream! Scoop it into bowls or cones and take a moment to appreciate the unique, sweet, floral flavor. It’s like springtime in a spoon! Share it with your loved ones, or savor it all by yourself—no judgment here!
Tips for Success
- Always use fresh, pesticide-free dandelion petals for the best flavor.
- Adjust the sweetness by tasting the custard before freezing; you can always add more honey or sugar.
- For a creamier texture, churn the ice cream a bit longer if needed.
- Let the ice cream sit at room temperature for a few minutes before scooping for easier serving.
- Experiment with different honey varieties to find your favorite flavor profile!
Equipment Needed
- Ice cream maker: Essential for churning. If you don’t have one, a lidded container works too!
- Medium saucepan: For cooking the custard base. A heavy-bottomed one is best to prevent scorching.
- Fine mesh sieve: To strain the dandelion petals from the milk.
- Whisk: For mixing ingredients smoothly.
- Wooden spoon or silicone spatula: Perfect for stirring the custard while cooking.
Variations
- Herbal Infusions: Try adding other edible flowers like lavender or chamomile for a unique twist on the flavor.
- Dairy-Free Option: Substitute whole milk and heavy cream with coconut milk or almond milk for a vegan-friendly version.
- Fruit Add-Ins: Mix in fresh berries or diced peaches during the churning process for a fruity burst.
- Nutty Flavor: Add a tablespoon of almond or hazelnut extract to enhance the nutty notes in the ice cream.
- Chocolate Swirl: Drizzle melted dark chocolate into the churned ice cream for a decadent chocolate-dandelion combination.
Serving Suggestions
- Pair your Dandelion & Honey Ice Cream with a slice of lemon pound cake for a delightful contrast.
- Serve it alongside fresh fruit, like strawberries or raspberries, to enhance the floral notes.
- Drizzle with a bit of honey or a sprinkle of edible flowers for a beautiful presentation.
- Enjoy it with a refreshing herbal tea for a calming afternoon treat.
- For a fun twist, serve in waffle cones topped with crushed nuts!
FAQs about Dandelion & Honey Ice Cream
Can I use store-bought dandelion petals?
While you can find dandelion petals in some specialty stores, I recommend harvesting your own from a clean, pesticide-free area. This ensures freshness and flavor, making your Dandelion & Honey Ice Cream truly special!
What if I can’t find dandelion petals?
No worries! If dandelion petals are hard to come by, you can experiment with other edible flowers like violets or nasturtiums. Just remember to keep the same infusion process for a delightful floral flavor.
How long does the ice cream last in the freezer?
Your Dandelion & Honey Ice Cream can last up to two weeks in the freezer. Just make sure to store it in an airtight container to maintain its creamy texture and flavor.
Can I make this ice cream without an ice cream maker?
Absolutely! If you don’t have an ice cream maker, pour the mixture into a lidded container and freeze it. Stir every 30 minutes for the first few hours to break up ice crystals, ensuring a smooth texture.
Is this ice cream suitable for kids?
<pYes! This Dandelion & Honey Ice Cream is a fun and unique treat for kids. The sweet, floral flavor is sure to delight their taste buds, and it’s a great way to introduce them to the wonders of nature!
Final Thoughts
Making Dandelion & Honey Ice Cream is more than just a recipe; it’s a delightful journey into the flavors of spring. Each scoop is a reminder of sunny days and blooming flowers, bringing joy to both the maker and the eater. I love how this unique ice cream can spark conversations and create memories with family and friends. Whether you’re enjoying it on a warm afternoon or serving it at a gathering, this sweet treat is sure to impress. So, roll up your sleeves, gather those dandelions, and let the magic of homemade ice cream brighten your day!
Print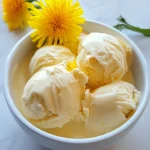
Dandelion & Honey Ice Cream
- Total Time: 4 hours 45 minutes
- Yield: Approximately 1 quart 1x
- Diet: Vegetarian
Description
A unique and delightful ice cream made with dandelion petals and honey, offering a sweet, floral flavor reminiscent of spring.
Ingredients
- 1 cup dandelion petals (fresh, pesticide-free – only yellow parts, no green bits)
- 1 cup whole milk
- 2 cups heavy cream
- 4 large egg yolks
- 1/2 cup honey (preferably wildflower or clover honey)
- 1/4 cup granulated sugar (optional, if you like it sweeter)
- 1 tsp pure vanilla extract
- A pinch of salt
Instructions
- Prepare the dandelions: Harvest dandelion flowers from a clean, pesticide-free area. Gently rinse and pat dry. Pull out the yellow petals, discarding all green parts (they’re bitter). You’ll need about 1 cup of loose petals.
- Make the infusion: In a small saucepan, warm the milk over low heat until just steaming (don’t boil). Add the dandelion petals and stir. Cover and let steep for 30–60 minutes. The longer you steep, the more floral the flavor. After steeping, strain through a fine mesh sieve and discard the petals. Set infused milk aside.
- Make the custard base: In a medium saucepan, whisk together the egg yolks, honey, and optional sugar until smooth and pale. Slowly whisk in the dandelion-infused milk and heavy cream.
- Cook the custard: Place the saucepan over medium-low heat. Cook the mixture, stirring constantly with a wooden spoon or silicone spatula, until it thickens enough to coat the back of the spoon (about 8–10 minutes). Don’t let it boil or the eggs might scramble!
- Finish and chill: Remove from heat. Stir in the vanilla extract and a pinch of salt. Pour the custard through a sieve into a clean bowl to catch any curdled bits. Let it cool to room temperature, then cover and chill in the fridge for at least 4 hours or overnight.
- Churn the ice cream: Once chilled, pour the mixture into your ice cream maker and churn according to the manufacturer’s instructions (usually 20–25 minutes), until it reaches soft-serve consistency.
- Freeze to firm up: Transfer the churned ice cream to a lidded container. Freeze for at least 2–3 hours to firm up before scooping.
- Serve and enjoy: Scoop into bowls or cones, and enjoy that sweet, floral, sunshiney flavor. It’s like springtime in a spoon!
Notes
- Ensure dandelion petals are harvested from a pesticide-free area.
- Adjust the sweetness by adding more or less sugar according to your taste.
- For a creamier texture, churn the ice cream longer if needed.
- Prep Time: 30 minutes
- Cook Time: 15 minutes
- Category: Dessert
- Method: Churning
- Cuisine: American
Nutrition
- Serving Size: 1/2 cup
- Calories: 250
- Sugar: 20g
- Sodium: 50mg
- Fat: 15g
- Saturated Fat: 9g
- Unsaturated Fat: 4g
- Trans Fat: 0g
- Carbohydrates: 28g
- Fiber: 0g
- Protein: 4g
- Cholesterol: 150mg