Danish Butter Cookies Classic

Introduction to Danish Butter Cookies Classic
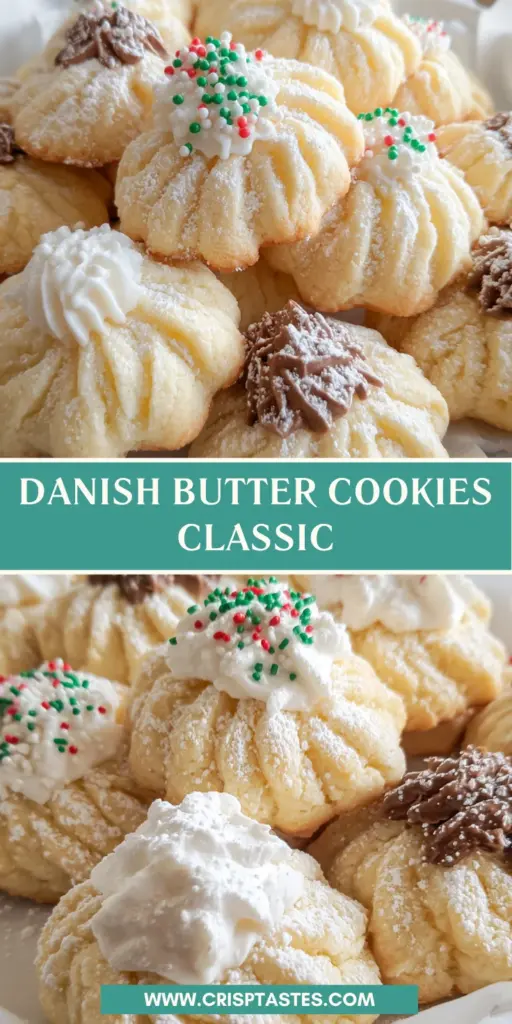
There’s something magical about baking that can bring joy amidst a busy day. When I think of warm, buttery happiness, the first thing that comes to mind is a batch of Danish Butter Cookies Classic. These delightful cookies are not just easy to whip up; they’re a quick solution to sweeten any occasion. Whether you’re looking to impress guests or simply want a treat for your family, this recipe is a perfect fit. With their rich flavor and delicate texture, these cookies are sure to become a beloved favorite in your home.
Why You’ll Love This Danish Butter Cookies Classic
These Danish Butter Cookies Classic are a gem for any kitchen! They come together quickly, making them perfect for busy moms like us. With minimal ingredients, you can whip up a batch in no time. The buttery flavor pairs beautifully with a cup of coffee or tea, turning an ordinary afternoon into something special. Plus, your family will adore the tender texture and sweet aroma that fills your home!
Ingredients for Danish Butter Cookies Classic
Gathering the right ingredients is essential to achieving those delightful Danish Butter Cookies Classic. Here’s what you need:
- Unsalted Butter: This is the star of the show! Softer butter creates that melt-in-your-mouth texture we love.
- Powdered Sugar: It gives the cookies their sweetness and helps achieve that lovely buttery creaminess.
- Vanilla Extract: Vanilla adds warmth and depth. It’s a must for balancing the flavors in baked goods.
- All-Purpose Flour: The foundation for our cookies, it provides structure while keeping them tender.
- Cornstarch: This ingredient ensures a softer bite, enhancing the delicate texture we’re aiming for.
- Heavy Cream: Use it if the dough feels too stiff. It helps achieve the perfect piping consistency.
- Chocolate Chips or Almond Bark (optional): For dipping! Adds a fun and delicious twist to your cookies.
- Candied Sprinkles (optional): These are perfect for decoration, bringing a festive touch to your cookies. Use whatever colors or types you like to match the occasion!
For exact gram measurements, be sure to check below, where you can find a handy print-friendly version of the recipe.
How to Make Danish Butter Cookies Classic
Step 1: Prepare Your Baking Sheet
The first step is a simple yet vital one: lining your baking sheet. Using parchment paper saves you from the hassle of sticky cookie mishaps! It ensures easy removal without losing any of that wonderful buttery flavor. Plus, it helps in cleanup—who needs extra dishwashing when you can slide those cookies right off? So, grab that roll of parchment and lay it down like a canvas for your cookies. You’ll be amazed at how this small step makes a big difference!
Step 2: Cream the Butter and Sugar
Now, let’s talk about creaming the butter and sugar. This crucial step is where the magic begins! Take your softened unsalted butter and beat it in a medium bowl for 2 to 3 minutes. You’ll want it to be pale and creamy. Next, gradually add in the powdered sugar and mix for another 2 minutes. The result? A light and fluffy mixture that’s key to achieving that rich buttery flavor we’re all craving. It’s like creating a cloud of sweetness that will soon turn into delicious cookies!
Step 3: Mix in the Vanilla Extract
In baking, vanilla extract isn’t just an afterthought; it’s a flavor powerhouse. Mixing in that teaspoon of vanilla brings the whole cookie to life. It adds warmth and enhances the buttery goodness, making your kitchen smell heavenly. This little ingredient transforms your cookies into something truly special, ensuring each bite is an indulgent experience. Trust me, your taste buds will thank you!
Step 4: Combine Flour and Cornstarch
Next up, we combine the all-purpose flour and cornstarch. The flour is the backbone of our cookies, giving them structure, while cornstarch is the secret weapon for tenderness. This duo works perfectly to create that melt-in-your-mouth texture we all adore. Stir them gently into your creamy butter mixture until just combined, and avoid overmixing. A soft dough is what you’re after, setting the stage for cookie perfection!
Step 5: Pipe Your Cookies
Now comes the fun part—transferring the dough to a piping bag! Fit your bag with a large open star tip, and scoop in the delicious dough. It’s essential to check the consistency; if it feels too stiff, don’t panic! Just mix in 1 to 2 teaspoons of heavy cream to loosen it up. The perfect piping consistency will make creating adorable shapes effortless. With a little practice, you’ll be piping cookie designs like a pro in no time!
Step 6: Chill the Cookies
Before we bake, we need to chill our piped cookies. This step is crucial for keeping those beautiful shapes intact. Just pop them in the refrigerator for 30 minutes. Chilling not only helps with structure but also enhances the flavors, making every bite just that much better. Take this time to tidy up your kitchen while your cookies rest!
Step 7: Bake to Perfection
With your cookies chilled and ready, it’s time to bake! Preheat your oven to 350°F and keep a close eye on the cookies as they bake. Set your timer for 8 to 10 minutes, watching for the edges to turn lightly golden. You want to resist the urge to brown the tops; we’re after that classic look! Let them cool completely on a rack, and your home will be filled with the heavenly aroma of freshly baked cookies!
Step 8: Dip and Decorate
For that finishing touch, let’s melt some chocolate or almond bark! Use a microwave-safe bowl, heating in 20-second intervals while stirring until it’s smooth. Once your cookies are cool, dip them halfway in the delicious melted chocolate. Before it sets, sprinkle with candied sprinkles for a delightful, festive touch. This adds visual appeal and a fun texture to every delightful bite!
Tips for Success
- Always use softened butter for the best creaminess.
- Don’t skip chilling the dough; it helps keep your cookie shapes intact!
- Experiment with different piping tips for varied cookie shapes and designs.
- Make sure to set a timer to monitor baking closely and avoid burnt cookies.
- Store baked cookies in an airtight container to keep them fresh longer.
Equipment Needed for Danish Butter Cookies Classic
- Mixing Bowl: Any large bowl will work; just ensure it’s easy to mix in.
- Hand Mixer or Stand Mixer: A hand mixer is great, but a stand mixer saves time.
- Piping Bag and Star Tip: A zip-top bag with a corner cut can substitute.
- Baking Sheet: A regular baking sheet will do, but a non-stick one is ideal.
- Parchment Paper: Aluminum foil is a good alternative if you don’t have parchment.
Variations on Danish Butter Cookies Classic
- Chocolate Variation: For a richer taste, mix cocoa powder into the dough for chocolate-flavored cookies.
- Citrus Zest: Add lemon or orange zest for a refreshing twist that brightens the flavor profile.
- Nuts or Seeds: Incorporate finely chopped nuts like almonds or walnuts for added crunch and flavor.
- Gluten-Free Option: Substitute all-purpose flour with a gluten-free blend to make these cookies accessible for those with dietary restrictions.
- Spiced Version: Add ground cinnamon or nutmeg to the dough for a warm, spiced cookie perfect for the holidays.
- Caramel Drizzle: Instead of chocolate, drizzle melted caramel over the cooled cookies for a sweet, gooey alternative!
Serving Suggestions for Danish Butter Cookies Classic
- Pair these cookies with a steaming cup of freshly brewed coffee or a fragrant herbal tea for a delightful afternoon treat.
- For a festive presentation, arrange cookies on a beautiful platter and garnish with seasonal fruits or flowers.
- Wrap a few cookies in cellophane and tie with a ribbon for a lovely homemade gift.
FAQs about Danish Butter Cookies Classic
Can I make Danish Butter Cookies Classic ahead of time?
Absolutely! You can prepare the dough ahead of time and store it in the refrigerator for up to three days. Just pipe the cookies and bake them when you’re ready!
How do I know when my cookies are done baking?
Watch for the edges to turn lightly golden. The tops should remain pale to preserve that classic appearance. You can also do the “smell test”—if your kitchen is filled with a buttery aroma, they’re close!
Can I freeze Danish Butter Cookies Classic?
Yes! Once fully baked, these cookies freeze well. Just place them in an airtight container. When you’re ready to enjoy, let them thaw at room temperature!
How do I store my Danish Butter Cookies Classic?
To keep your cookies fresh, store them in an airtight container at room temperature for up to a week. They’ll still be deliciously tender!
What can I use if I don’t have a piping bag?
No worries! You can use a zip-top plastic bag. Just cut a small corner off the bag, fill it with dough, and squeeze the dough out like a piping bag. Easy peasy!
Final Thoughts
Baking Danish Butter Cookies Classic is more than just following a recipe. It’s about creating warm memories in the kitchen with your family, enjoying the delightful aromas wafting through your home, and sharing sweet moments. Each buttery bite takes you on a journey, reminding you of cozy afternoons or festive gatherings. Whether you’re indulging solo with a cup of tea or sharing with loved ones, these cookies have a unique way of making any day feel special. So, roll up your sleeves, gather your ingredients, and dive into this joyful baking adventure that’s bound to bring smiles!
Print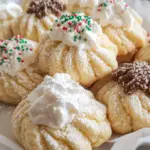
Danish Butter Cookies Classic
- Total Time: 55 minutes
- Yield: 30 cookies 1x
- Diet: Vegetarian
Description
A classic recipe for Danish Butter Cookies that are buttery, tender, and perfect for any occasion.
Ingredients
- 255 g unsalted butter, softened
- 30 g powdered sugar
- 1 teaspoon vanilla extract
- 160 g all-purpose flour
- 8 g cornstarch
- 1–2 teaspoons heavy cream, as needed
- 170 g dark chocolate chips or chocolate almond bark, melted (optional)
- 170 g white chocolate chips or white almond bark, melted (optional)
- Candied sprinkles (optional)
Instructions
- Line a baking sheet with parchment paper to prevent sticking.
- In a medium bowl, beat softened butter for 2-3 minutes until pale and creamy. Add powdered sugar and continue mixing for another 2 minutes until light and fluffy. Incorporate vanilla extract and mix thoroughly.
- Add all-purpose flour and cornstarch to the butter mixture. Mix just until the flour is incorporated and a soft dough forms.
- Transfer dough to a piping bag fitted with a large open star tip. Test the consistency; if the dough is too stiff, return to bowl and mix in 1–2 teaspoons heavy cream to achieve proper piping texture. Pipe desired shapes onto the prepared baking sheet.
- Chill piped cookies in the refrigerator for 30 minutes. Meanwhile, preheat the oven to 175°C (350°F).
- Bake cookies for 8–10 minutes until edges are lightly golden. Avoid browning the tops to preserve classic appearance. Allow cookies to cool completely on a rack.
- If desired, melt chocolate or almond bark in a microwave-safe bowl, heating in 20-second intervals and stirring until smooth. Avoid overheating to prevent seizing.
- Dip cooled cookies halfway in melted chocolate, then place on parchment-lined tray. Decorate with candied sprinkles before chocolate sets. Let set until firm before serving.
Notes
- Make sure to use softened butter for the best texture.
- Chilling the dough before baking helps maintain the cookie shapes.
- Feel free to use any type of sprinkles or toppings according to your preference.
- Prep Time: 15 minutes
- Cook Time: 10 minutes
- Category: Dessert
- Method: Baking
- Cuisine: Danish
Nutrition
- Serving Size: 1 cookie
- Calories: 110
- Sugar: 6 g
- Sodium: 30 mg
- Fat: 6 g
- Saturated Fat: 4 g
- Unsaturated Fat: 2 g
- Trans Fat: 0 g
- Carbohydrates: 14 g
- Fiber: 0 g
- Protein: 1 g
- Cholesterol: 15 mg