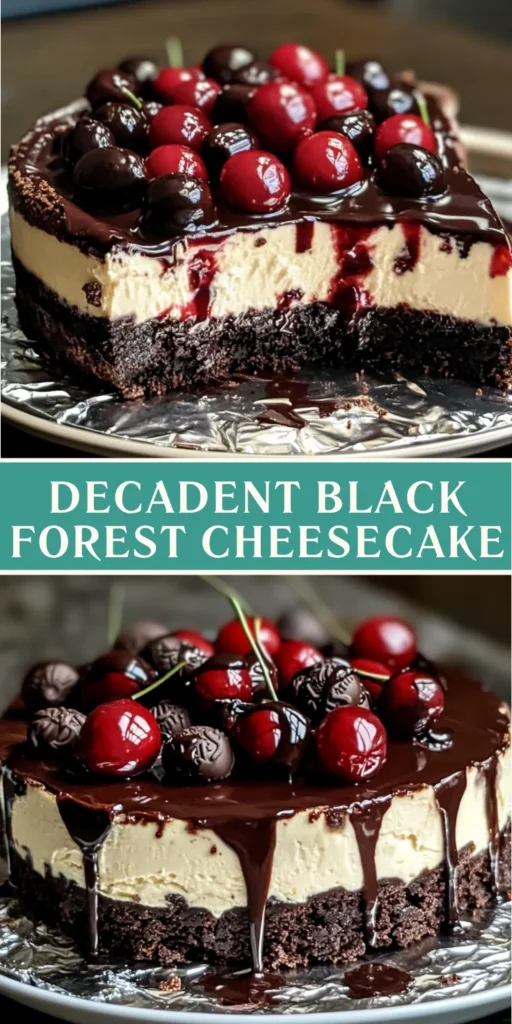
Decadent Black Forest Cheesecake Recipe

Introduction to Decadent Black Forest Cheesecake
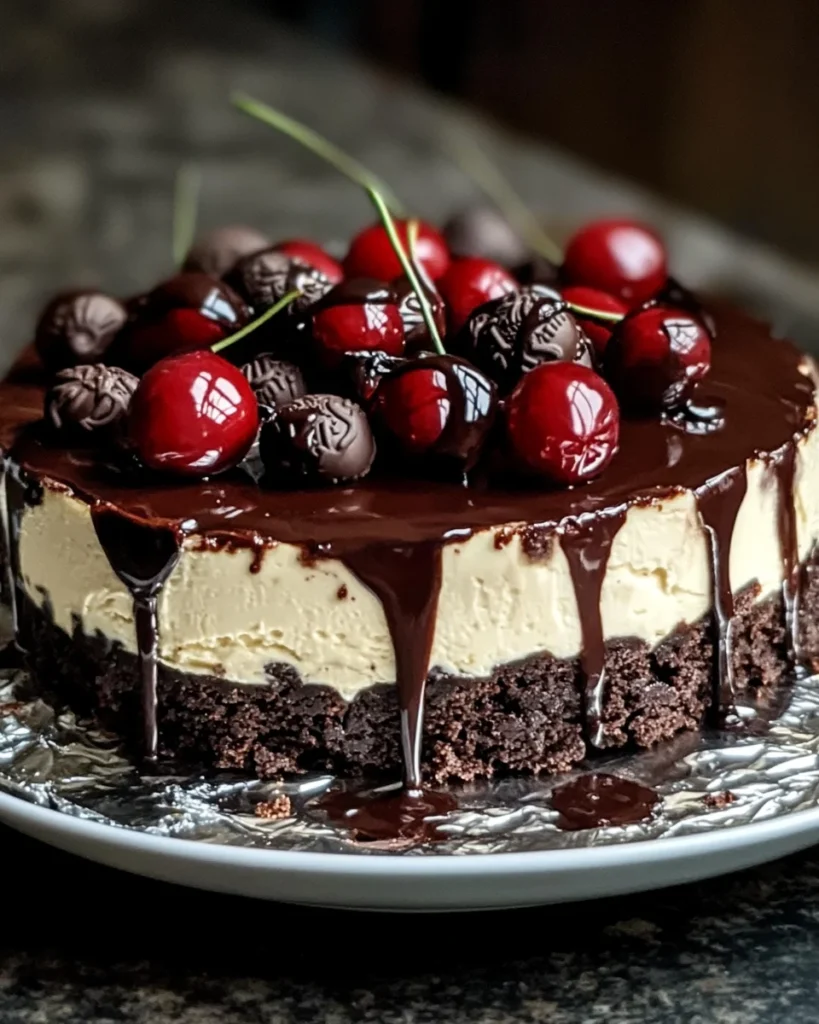
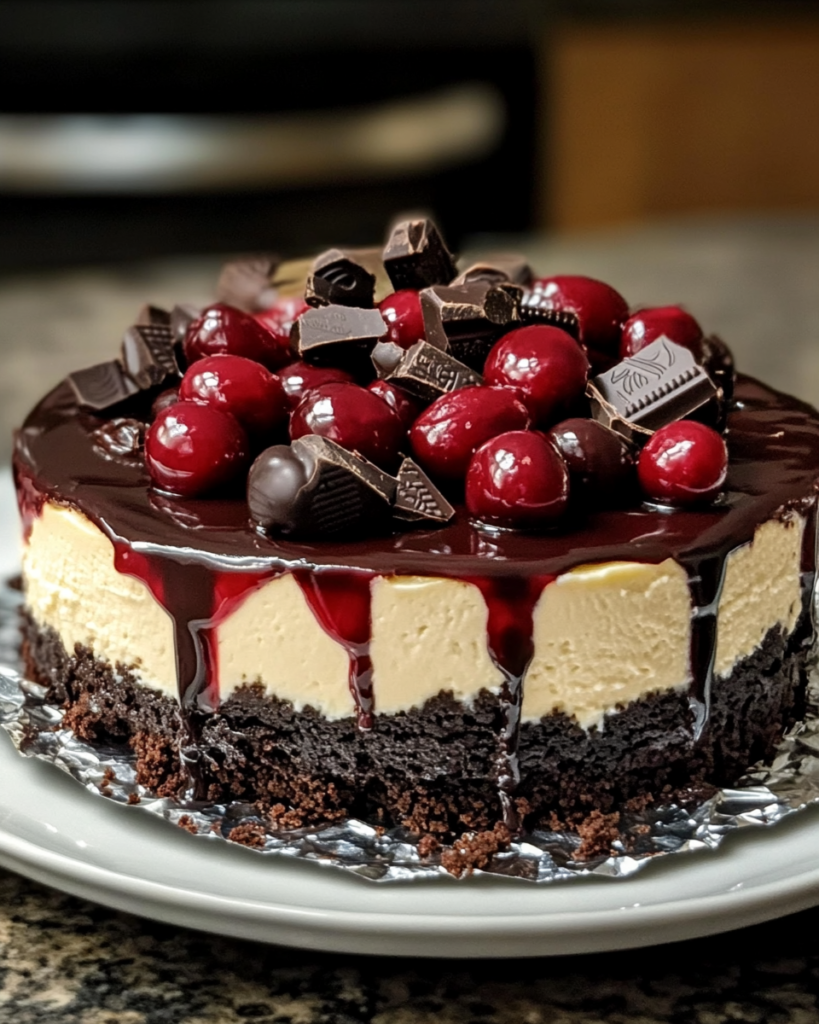
Decadent Black Forest Cheesecake. This delightful dessert combines the rich, creamy texture of cheesecake with the luscious flavors of chocolate and cherries. It’s like a sweet hug on a plate, perfect for any occasion!
My love for this cheesecake began during a family gathering. I remember the moment vividly: the aroma of chocolate wafting through the kitchen, mingling with the sweet scent of cherries. As I took my first bite, the creamy filling melted in my mouth, and the tart cherries danced on my taste buds. It was pure bliss! Since then, I’ve made it countless times, each time tweaking the recipe to make it my own.
This cheesecake is not just a dessert; it’s a celebration of flavors and textures. The chocolate cookie crust provides a crunchy base, while the velvety cheesecake filling is a dream come true for any chocolate lover. Topped with cherry pie filling and a dollop of whipped cream, it’s a feast for the eyes and the palate. Whether you’re hosting a dinner party or simply treating yourself, this cheesecake is sure to impress.
Decadent Black Forest Cheesecake. I’ll share my favorite tips and tricks to ensure your cheesecake turns out perfectly every time. So, grab your apron, and let’s embark on this delicious culinary adventure together!
Ingredients for Decadent Black Forest Cheesecake Recipe
Decadent Black Forest Cheesecake, let’s gather our ingredients. Having everything ready is like setting the stage for a beautiful performance. Each ingredient plays a vital role in creating the symphony of flavors that will dance on your palate. Here’s what you’ll need:
Main Ingredients
- 1 1/2 cups (150 g) chocolate cookie crumbs (I love using Oreos for that extra chocolatey goodness!)
- 1/4 cup (60 g) unsalted butter, melted (This helps bind the crust together, making it rich and delicious.)
- 24 ounces (680 g) cream cheese, softened (Make sure it’s at room temperature for a smooth filling.)
- 1 cup (200 g) granulated sugar (This adds sweetness and balances the flavors.)
- 1/4 cup (25 g) cocoa powder (For that deep chocolate flavor that makes this cheesecake so special.)
- 3 large eggs (These help the cheesecake set perfectly.)
- 8 ounces (225 g) semisweet chocolate, melted and slightly cooled (This is the star of the show, adding richness.)
- 1 teaspoon vanilla extract (A splash of vanilla enhances all the flavors.)
- 1/2 cup (120 ml) heavy cream (This adds a luscious texture to the filling.)
Optional Add-ons
- 1 can (21 oz/600 g) cherry pie filling (This is the cherry on top, quite literally!)
- 1 tablespoon Kirsch (cherry liqueur) or 1 teaspoon almond extract (Optional, but it adds a lovely depth of flavor.)
- For the whipped cream topping: 1 cup (240 ml) heavy cream, cold, 2 tablespoons powdered sugar, and 1/2 teaspoon vanilla extract (This fluffy topping is a must for that perfect finish!)
- Optional garnish: Chocolate shavings or curls and fresh cherries (These make your cheesecake look as good as it tastes!)
When selecting your ingredients, I always recommend going for high-quality chocolate and fresh cherries if you can. The better the ingredients, the more delicious your cheesecake will be. Trust me, it makes a world of difference!
How to Prepare Decadent Black Forest Cheesecake Recipe
Decadent Black Forest Cheesecake. Each step is like a dance, bringing us closer to that moment of sweet satisfaction. Let’s get started!
Step 1: Prepare the Crust
First things first, we need to create a solid foundation for our cheesecake. The crust is where the magic begins!
- Preheat your oven to 325°F (160°C). This is the perfect temperature for baking our crust to perfection.
- Grease a 9-inch springform pan and wrap the bottom with aluminum foil. This little trick prevents any leaks, ensuring our cheesecake stays intact.
- In a bowl, mix the chocolate cookie crumbs with melted butter until well combined. The mixture should resemble wet sand.
- Press the mixture firmly into the bottom of the prepared pan to form an even crust. Use the back of a measuring cup to get it nice and compact.
- Bake for 10 minutes, then set aside to cool. This step helps the crust hold its shape when we add the filling.
Tips for a Perfect Crust
To achieve a crust that’s both crunchy and flavorful, make sure to use fresh cookie crumbs. If you want a little extra flavor, try adding a pinch of salt to the mixture. It enhances the chocolatey goodness!
Step 2: Make the Cheesecake Filling
With the crust cooling, let’s whip up the creamy filling that will make our cheesecake truly decadent.
- In a large mixing bowl, beat the softened cream cheese and sugar until smooth and creamy. This is where the magic starts!
- Add the cocoa powder and mix until fully incorporated. The chocolate aroma will fill your kitchen, and trust me, it’s heavenly.
- Beat in the eggs, one at a time, on low speed to avoid overmixing. This helps keep our cheesecake light and fluffy.
- Stir in the melted chocolate, vanilla extract, and heavy cream, mixing until smooth. The filling should be rich and velvety.
- Pour the cheesecake batter over the prepared crust and smooth the top with a spatula.
Tips for Creamy Filling
For a super creamy filling, ensure all your ingredients are at room temperature. This helps them blend together seamlessly. Also, be careful not to overmix after adding the eggs; we want a smooth texture, not a dense one!
Step 3: Assemble the Cheesecake
Now that we have our crust and filling ready, it’s time to bring everything together!
- Place the springform pan in a large roasting pan. This will create a water bath, which helps the cheesecake bake evenly.
- Pour hot water into the roasting pan until it comes halfway up the sides of the springform pan. This step is crucial for preventing cracks.
- Bake for 60–70 minutes, or until the edges are set and the center has a slight jiggle. It’s like watching a beautiful dance unfold in the oven!
- Turn off the oven, crack the oven door slightly, and let the cheesecake cool in the oven for 1 hour. This gentle cooling helps prevent cracking.
Tips for Layering
When pouring the filling over the crust, do it slowly to avoid disturbing the crust. A smooth pour will help keep everything in place. And remember, a little jiggle in the center is perfectly fine; it will set as it cools!
Step 4: Chill the Cheesecake
After baking, patience is key! We need to let our cheesecake chill to achieve that perfect texture.
- Remove the cheesecake from the water bath and let it cool to room temperature. This step is essential before refrigerating.
- Once cooled, refrigerate for at least 4 hours or overnight. The longer it chills, the better the flavors meld together.
Tips for Proper Chilling
For the best results, cover the cheesecake with plastic wrap while it chills. This prevents any unwanted odors from the fridge from seeping in. Plus, it keeps your cheesecake looking pristine!
Equipment Needed for Decadent Black Forest Cheesecake Recipe
Decadent Black Forest Cheesecake. Having the right equipment is like having the perfect set of paintbrushes for an artist; it makes all the difference in the final masterpiece!
- 9-inch Springform Pan: This is crucial for our cheesecake. It allows for easy removal and presentation. If you don’t have one, a regular cake pan will work, but be prepared for a bit of a challenge when it comes to serving.
- Mixing Bowls: A couple of large mixing bowls will be handy for combining our ingredients. I recommend using glass or stainless steel for easy cleaning.
- Electric Mixer: A hand mixer or stand mixer will make whipping the cream cheese and heavy cream a breeze. If you don’t have one, a whisk can work, but it’ll take a bit more elbow grease!
- Spatula: A rubber spatula is perfect for scraping down the sides of the bowl and smoothing the cheesecake filling.
- Roasting Pan: This is needed for the water bath. If you don’t have a roasting pan, any large, deep baking dish will do.
- Aluminum Foil: This will help prevent leaks from the springform pan. Make sure to wrap it tightly around the bottom!
- Whisk: A whisk is essential for mixing the whipped cream and ensuring it reaches those lovely stiff peaks.
With these tools in hand, you’re all set to embark on your cheesecake-making adventure! Remember, the right equipment not only makes the process smoother but also adds to the joy of creating something delicious. Let’s get baking!
Variations of Decadent Black Forest Cheesecake Recipe
Decadent Black Forest Cheesecake is no exception! Here are a few delightful variations that can add a twist to this classic dessert:
- White Chocolate Raspberry Cheesecake: Swap out the semisweet chocolate for white chocolate and add fresh raspberries to the filling. The sweet and tart combination is simply divine!
- Nutty Chocolate Cheesecake: Incorporate crushed nuts, like walnuts or hazelnuts, into the crust for an added crunch. You can also sprinkle some on top for a beautiful finish.
- Mint Chocolate Cheesecake: Add a few drops of peppermint extract to the filling for a refreshing minty flavor. Top with crushed mint candies for a festive touch!
- Vegan Black Forest Cheesecake: Use cashew cream or silken tofu instead of cream cheese, and coconut cream for the whipped topping. This variation is just as creamy and delicious!
- Chocolate Orange Cheesecake: Add a splash of orange juice and some zest to the filling for a bright citrus twist that pairs beautifully with chocolate.
Decadent Black Forest Cheesecake, making it a versatile dessert for any occasion. So, don’t hesitate to get creative and make this recipe your own!
Cooking Notes for Decadent Black Forest Cheesecake Recipe
Decadent Black Forest Cheesecake. Here are some tips that I always keep in mind to ensure my cheesecake turns out perfectly every time:
- Room Temperature Ingredients: Make sure your cream cheese, eggs, and heavy cream are at room temperature. This helps them blend smoothly, resulting in a creamy filling without lumps.
- Don’t Overmix: When adding the eggs, mix just until combined. Overmixing can lead to a dense cheesecake, and we want it to be light and fluffy!
- Water Bath Importance: The water bath is crucial for even baking. It helps maintain moisture and prevents cracks. Don’t skip this step!
- Cooling Time: Allow the cheesecake to cool gradually in the oven after baking. This gentle cooling helps prevent cracks and ensures a smooth surface.
- Chill Overnight: For the best flavor and texture, I recommend chilling the cheesecake overnight. This allows the flavors to meld beautifully.
- Garnishing: Get creative with your toppings! Fresh cherries, chocolate shavings, or even a drizzle of chocolate sauce can elevate your cheesecake to a whole new level.
Decadent Black Forest Cheesecake that will impress your family and friends. Happy baking!
Serving Suggestions for Decadent Black Forest Cheesecake Recipe
Decadent Black Forest Cheesecake, I like to think of it as the grand finale of a meal. Presentation is key, and there are so many delightful ways to serve this luscious dessert that can elevate the experience for your guests.
- Chilled Slices: Serve each slice cold, straight from the fridge. The coolness enhances the creamy texture and makes each bite refreshing.
- Garnish with Fresh Fruits: Top each slice with a few fresh cherries or raspberries. Their vibrant color adds a pop of freshness that contrasts beautifully with the rich cheesecake.
- Chocolate Drizzle: A drizzle of melted chocolate or chocolate sauce over the top can add an extra layer of indulgence. It’s like a cherry on top, but even more decadent!
- Whipped Cream Clouds: Pipe or dollop extra whipped cream on the side of the plate. It not only looks beautiful but also adds a lightness that balances the richness of the cheesecake.
- Pair with Coffee or Tea: Serve slices alongside a cup of freshly brewed coffee or a fragrant herbal tea. The warm beverage complements the flavors and makes for a cozy dessert experience.
Decadent Black Forest Cheesecake can make it feel even more special. Enjoy every moment of sharing this delicious creation!
Tips for Making Decadent Black Forest Cheesecake Recipe
Decadent Black Forest Cheesecake to new heights. Here are some of my favorite nuggets of wisdom to ensure your cheesecake turns out perfectly every time:
- Prep Ahead: If you can, prepare the cheesecake a day in advance. This allows the flavors to deepen and the texture to set beautifully.
- Use Quality Ingredients: Invest in good-quality chocolate and fresh cherries. The better the ingredients, the more delicious your cheesecake will be!
- Keep It Cool: Always chill your cheesecake thoroughly before serving. This not only enhances the flavor but also makes slicing easier.
- Experiment with Flavors: Don’t hesitate to add your twist! A hint of espresso powder or a splash of orange zest can add a delightful surprise to the filling.
- Check for Doneness: Remember, the cheesecake is done when the edges are set, and the center has a slight jiggle. It will continue to firm up as it cools.
- Be Patient: Resist the urge to rush the cooling and chilling process. Patience is key to achieving that perfect creamy texture!
Decadent Black Forest Cheesecake that will leave everyone asking for seconds. Happy baking!
Breakdown of Time for Decadent Black Forest Cheesecake Recipe
Decadent Black Forest Cheesecake, it’s essential to plan ahead. Here’s a quick breakdown of the time you’ll need to create this delightful dessert:
- Prep Time: Approximately 30 minutes. This includes gathering your ingredients, preparing the crust, and mixing the cheesecake filling.
- Cooking Time: 60–70 minutes. This is the time spent baking the cheesecake in the oven, ensuring it sets perfectly.
- Cooling Time: 1 hour in the oven and at least 4 hours in the refrigerator. For the best results, I recommend chilling it overnight to let the flavors meld beautifully.
- Total Time: About 6 hours and 30 minutes (including cooling time). While it may seem like a long process, most of it is hands-off, allowing you to relax while your cheesecake comes to life!
By keeping this timeline in mind, you can plan your baking day accordingly. Trust me, the wait will be worth it when you finally slice into that creamy, chocolatey goodness!
Nutritional Information for Decadent Black Forest Cheesecake Recipe
Decadent Black Forest Cheesecake can be part of a balanced lifestyle. While this cheesecake is undeniably rich and indulgent, it’s nice to know what we’re savoring. Here’s a general breakdown of the nutritional information per slice (assuming 12 slices total):
- Calories: Approximately 350 calories
- Fat: 25 grams (of which saturated fat is about 15 grams)
- Carbohydrates: 30 grams (including around 20 grams of sugar)
- Protein: 5 grams
- Fiber: 1 gram
Keep in mind that these values can vary based on the specific ingredients you use and portion sizes. If you’re looking to lighten things up a bit, consider using lower-fat cream cheese or reducing the sugar slightly. However, I always say that moderation is key! Enjoying a slice of this cheesecake is a delightful treat that can be savored on special occasions or whenever you need a little sweetness in your life.
Frequently Asked Questions about Decadent Black Forest Cheesecake Recipe
Decadent Black Forest Cheesecake, I often get questions from fellow home cooks eager to try their hand at this delightful dessert. Here are some of the most common queries I’ve encountered, along with my answers to help you on your cheesecake journey!
Can I use a different type of cookie for the crust?
Absolutely! While I adore using chocolate cookie crumbs, you can experiment with other options like graham crackers or even vanilla wafers. Just keep in mind that the flavor will change slightly, but it can still be delicious!
How do I know when the cheesecake is done baking?
The key is to look for the edges to be set while the center has a slight jiggle. It’s like a gentle wave in the ocean! Remember, it will continue to firm up as it cools, so don’t worry if it seems a bit soft in the middle.
Can I make this cheesecake ahead of time?
Yes, you can! In fact, I recommend making it a day in advance. This allows the flavors to meld beautifully and gives you one less thing to worry about on the day of your gathering. Just be sure to cover it well while it chills in the fridge!
What can I use instead of Kirsch in the cherry topping?
If you prefer not to use Kirsch, almond extract is a fantastic alternative. It adds a lovely nutty flavor that complements the cherries beautifully. You can also skip it altogether if you want a simpler topping!
How should I store leftovers?
Leftovers can be stored in the refrigerator for up to 5 days. Just make sure to cover the cheesecake with plastic wrap to keep it fresh. If you want to keep it longer, you can freeze it for up to 2 months. Just remember to thaw it in the fridge before serving!
Can I make a gluten-free version of this cheesecake?
Definitely! You can use gluten-free chocolate cookies for the crust. Just check the labels to ensure they’re certified gluten-free. The rest of the ingredients are naturally gluten-free, so you’re good to go!
Decadent Black Forest Cheesecake your own!
Conclusion on Decadent Black Forest Cheesecake Recipe
Decadent Black Forest Cheesecake, I can’t help but feel a sense of joy and accomplishment. This dessert is more than just a treat; it’s a celebration of flavors that brings people together. The rich chocolate, creamy filling, and tart cherries create a harmonious blend that delights the senses.
Whether you’re making it for a special occasion or simply to indulge yourself, this cheesecake is sure to impress. It’s a recipe that invites creativity, allowing you to add your personal touch with variations and toppings. Plus, the satisfaction of serving a homemade dessert that looks as good as it tastes is truly rewarding.
Decadent Black Forest Cheesecake will be met with smiles and happy sighs. Happy baking, and may your culinary adventures be filled with sweetness!
Print
Decadent Black Forest Cheesecake
- Total Time: 6 hours and 30 minutes
- Yield: 12 slices 1x
- Diet: Vegetarian
Description
A rich and creamy cheesecake that combines chocolate and cherries, perfect for any occasion.
Ingredients
- 1 1/2 cups (150 g) chocolate cookie crumbs
- 1/4 cup (60 g) unsalted butter, melted
- 24 ounces (680 g) cream cheese, softened
- 1 cup (200 g) granulated sugar
- 1/4 cup (25 g) cocoa powder
- 3 large eggs
- 8 ounces (225 g) semisweet chocolate, melted and slightly cooled
- 1 teaspoon vanilla extract
- 1/2 cup (120 ml) heavy cream
- 1 can (21 oz/600 g) cherry pie filling (optional)
- 1 tablespoon Kirsch or 1 teaspoon almond extract (optional)
- For whipped cream topping: 1 cup (240 ml) heavy cream, cold, 2 tablespoons powdered sugar, and 1/2 teaspoon vanilla extract
- Optional garnish: Chocolate shavings or curls and fresh cherries
Instructions
- Preheat your oven to 325°F (160°C) and prepare a 9-inch springform pan.
- Mix chocolate cookie crumbs with melted butter and press into the bottom of the pan.
- Bake the crust for 10 minutes and let it cool.
- In a mixing bowl, beat cream cheese and sugar until smooth, then add cocoa powder and mix.
- Add eggs one at a time, then stir in melted chocolate, vanilla extract, and heavy cream.
- Pour the cheesecake batter over the cooled crust and smooth the top.
- Place the springform pan in a roasting pan and add hot water to create a water bath.
- Bake for 60–70 minutes until the edges are set and the center has a slight jiggle.
- Turn off the oven, crack the door, and let the cheesecake cool for 1 hour.
- Remove from the water bath and let cool to room temperature, then refrigerate for at least 4 hours or overnight.
Notes
- Use room temperature ingredients for a smooth filling.
- Don’t overmix after adding eggs to keep the cheesecake light.
- Chill overnight for the best flavor and texture.
- Garnish with fresh fruits or chocolate shavings for presentation.
- Prep Time: 30 minutes
- Cook Time: 60-70 minutes
- Category: Dessert
- Method: Baking
- Cuisine: German
Nutrition
- Serving Size: 1 slice
- Calories: 350
- Sugar: 20 grams
- Fat: 25 grams
- Saturated Fat: 15 grams
- Carbohydrates: 30 grams
- Fiber: 1 gram
- Protein: 5 grams


It would be nice if the directions for making the cherry topping and whipped cream were included. Not everyone is an expert baker.
The picture does not seem to match the directions. Is it covered with ganache?
Thank you so much for pointing that out—I really appreciate your eye for detail! You’re absolutely right, adding step-by-step directions for the cherry topping and whipped cream would make the recipe easier to follow, especially for newer bakers. And yes, the photo does have a glossy ganache finish for that extra touch of indulgence.
Out of curiosity, when you’re baking, do you usually like to make your toppings from scratch, or do you prefer quick shortcuts like canned cherry pie filling or ready-made whipped cream? I’d love to hear your go-to approach in the kitchen—it might inspire me to include some alternative ingredient options in future recipes!