DIY Cotton Candy Glow Jars: Create Magical Home Decor!

Introduction to DIY Cotton Candy Glow Jars
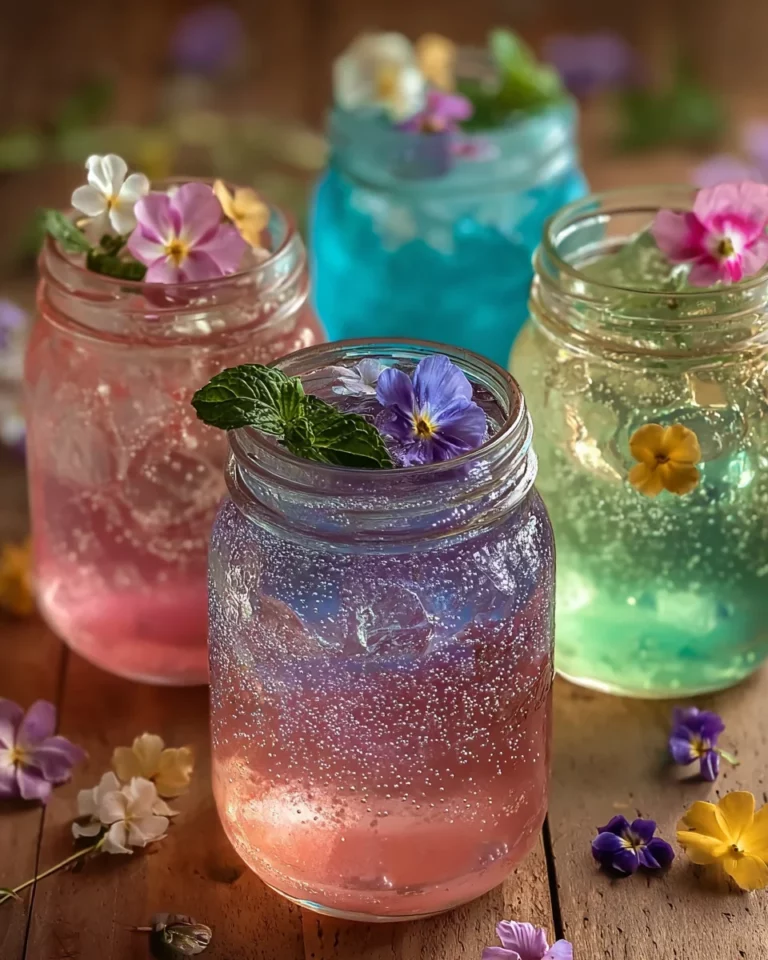
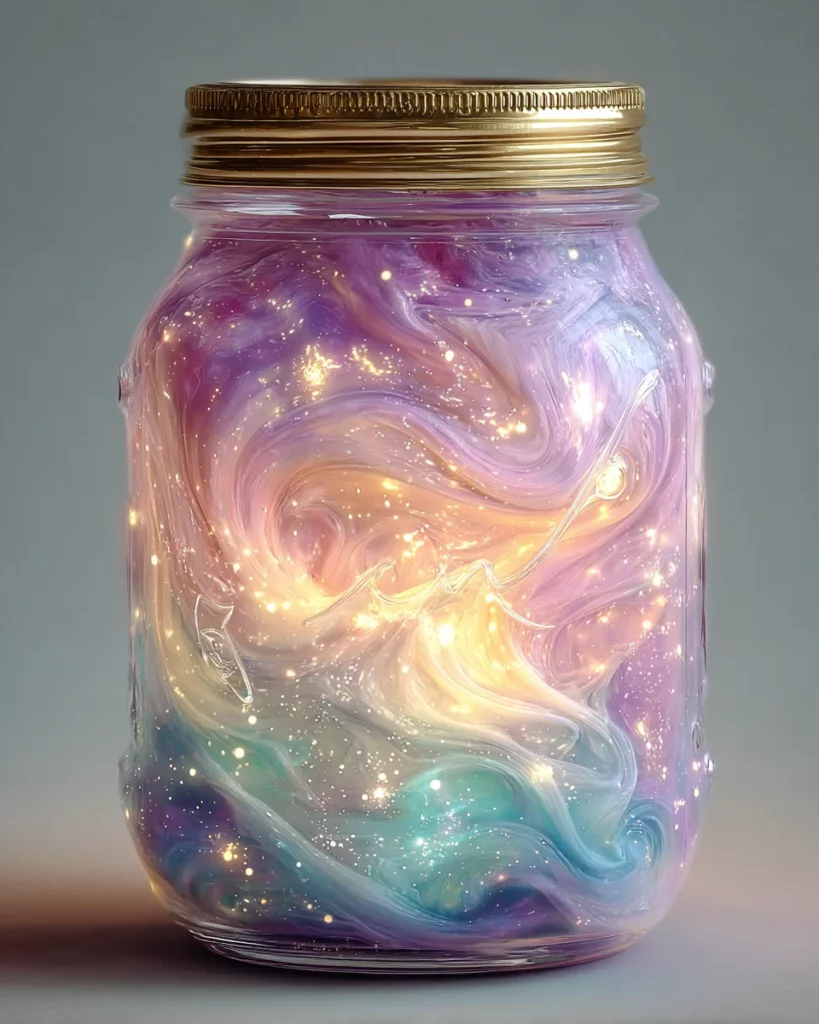
Welcome to the enchanting world of DIY Cotton Candy Glow Jars!
These mesmerizing jars are not just beautiful decor pieces; they’re a delightful burst of color and creativity that can transform any room into a whimsical haven.
As a busy mom, I often find myself searching for simple, fulfilling activities that allow me to express my creative side while enjoying some precious ‘me-time.’
Crafting these glow jars is a perfect way to unwind and unleash your inner artist.
The best part? They’ll light up your home, filling it with warmth, charm, and a touch of magic!
Why You’ll Love This DIY Cotton Candy Glow Jars
Creating DIY Cotton Candy Glow Jars is not just an enjoyable craft; it’s incredibly easy and stress-free!
With vibrant colors dancing together, these jars will sprinkle your space with a cozy atmosphere that’s simply enchanting.
Whether you’re hosting a family gathering, a movie night, or simply want to brighten your day, these jars are perfect for every occasion.
Plus, they make whimsical gifts that are sure to bring smiles!
Ingredients for DIY Cotton Candy Glow Jars
Gathering your materials is part of the fun! Here’s what you’ll need to create your enchanting DIY Cotton Candy Glow Jars:
- Clear glass jars: Mason jars work great, but feel free to utilize any recycled glass jars you have at home. They’ll become the canvas for your creativity!
- Cotton balls or pillow stuffing: These create that fluffy cotton candy effect inside the jars, giving them a soft, ethereal look.
- Acrylic paint: Pastel pink, purple, blue, teal, and white will bring your jars to life. For an extra glow, use glow-in-the-dark pigment if you like!
- Water: This will mix with your acrylic paint, helping you achieve the right consistency for a beautiful color distribution.
- Glitter: Use fine and chunky glitter in coordinating colors to add sparkle and charm to your jars.
- Battery-operated LED fairy lights: These lights will illuminate your creation, making them magical, especially at night.
- Spray adhesive or Mod Podge: Optional, but they add an outer sparkle that can take your jars to the next level!
Don’t worry about the specific quantities just yet; they can be found at the end of the article for your convenience!
How to Make DIY Cotton Candy Glow Jars
Creating these magical DIY Cotton Candy Glow Jars is as easy as pie! Follow these simple steps, and you’ll transform your space into a dreamy wonderland. Let’s roll up our sleeves and get crafting!
Prepare Your Paint-Water Mix
Start by gathering your disposable cups.
Pour a bit of water into each cup and then add a few drops of your chosen acrylic paint.
Make sure to stick to one color per cup. I love the vibrant pastels; they remind me of cotton candy clouds!
If you’re feeling adventurous, mix in some glow-in-the-dark pigment for extra magic!
Stir well until you have a smooth, colorful concoction that looks good enough to dive into!
Stretch and Stuff the Cotton
Next up, take your cotton balls or pillow stuffing.
Carefully pull them apart to create wispy clouds that will fill your jar.
Layer a handful into the bottom of each jar. Don’t worry about being perfect; those imperfect puffs of fluff will only add to the charm!
Pour in Color
Time to bring your jars to life with color!
Drizzle a small amount of your first paint mixture over the cotton.
Grab your wooden skewer and gently press and mix it in. This is where the creativity flows—as you blend colors, it can resemble a dreamy nebula!
To enhance the sparkle, sprinkle in some glitter!
Repeat Layering
Here comes the fun part! Continue alternating layers of cotton, different paint mixtures, and glitter.
With each layer, you’ll build up those lovely pastel hues.
Feel free to mix and match colors. I love how a gradient effect adds depth to my jars. Remember, the more layers, the more enchanting the result!
Glow-Up Time
Now, for the grand reveal!
Insert your battery-operated fairy lights into the jar. It’s like adding a sprinkle of starlight!
If you want to boost the glow, you can also coat the inside of the lid or the walls with glow-in-the-dark paint.
Now you’re ready to dazzle! You can hardly wait to see them twinkling in the twilight!
Optional: Outer Sparkle
If you’re aiming for that extra touch of glamour, consider adding an outer sparkle.
Lightly coat the outside of your jar with spray adhesive or Mod Podge.
Then, roll the jar in glitter for a stardust shimmer that will have everyone asking, “Where did you get this?”
It’s like putting a cherry on top of a sundae!
Seal Your Jar and Display It
Finally, seal your jar tightly. Ideally, use a lid that matches the charm of your creation.
Now it’s time to shine! Find the perfect spot to display your beautiful creation.
Wherever you place your jars, they’ll add a splash of joy and enchantment to your home decor.
Tips for Success
- Keep your workspace organized to avoid a crafting mess! A clean area helps spark creativity.
- Make sure your paints are fully mixed for even colors. Nothing is worse than streaky jars!
- Don’t rush the layering; take your time to create stunning effects. Enjoy the process!
- Experiment with different glitter combinations for unique sparkles.
- Involve your kids! It’s a fun way to bond while being crafty.
Equipment Needed
- Disposable cups: Use any small cups you have on hand—recycled yogurt cups work great!
- Wooden skewer or stick: A chopstick can do the trick if you don’t have skewers.
- Spray adhesive or Mod Podge: White school glue can act as a substitute for attaching glitter.
- Battery-operated LED fairy lights: String lights or small LED candles can create a similar glowing effect!
Variations
- Experiment with color palettes! Try using vibrant neons or relaxing shades of green for a different vibe.
- Switch up the lids! Use colorful or patterned lids to add an extra design element to your jars.
- Personalize your jars by attaching small photos or messages inside, making them perfect keepsakes!
- Add seasonal elements, like small faux flowers or themed decorations, to match holidays or occasions.
- For a unique twist, incorporate scented oils into the cotton for a fragrant glow experience!
Serving Suggestions
- Place the jars on your dining table for a whimsical centerpiece that sparks joy during meals.
- Scatter them along your window sill, creating a magical glow that brightens your evenings.
- Use them as nightlights in children’s rooms for a soft, comforting ambiance.
- Gift them as personalized decor for friends, perfect for housewarmings or birthdays!
- Integrate them into seasonal displays, pairing with flowers or pinecones for added cheer.
FAQs about DIY Cotton Candy Glow Jars
Curious about the crafting process, or have questions? You’re not alone! Let’s dive into some common queries about these charming DIY Cotton Candy Glow Jars.
Can I use different types of jars?
Absolutely! While mason jars are popular, feel free to repurpose any clear glass jars you have at home for a unique touch.
How do I clean the jars?
Use warm, soapy water to clean your jars. Avoid scrubbing too hard to preserve the layers inside!
Can I change the colors after making them?
Once you’ve layered the cotton and paint, it’s best to keep the color scheme as is. However, you can create new jars with different color palettes at any time!
Are the materials safe?
Yes, the supplies used are non-toxic, but always ensure good ventilation while working with paints.
How long do the glow-in-the-dark elements last?
The glow will fade with time, especially after exposure to light. Simply recharge them by exposing them again to light for brighter glow effects!
Final Thoughts
Making DIY Cotton Candy Glow Jars is an adventure filled with joy and creativity. It’s not just about crafting; it’s about personalizing your home with whimsy and warmth.
When you share these enchanting creations with family and friends, it sparks joy and ignites imagination! Whether you’re showcasing them in your living room or gifting them, they bring smiles and cozy vibes.
So grab your materials, unleash your inner artist, and let your creativity shine! I can’t wait to hear about your glowing masterpieces!
Print
DIY Cotton Candy Glow Jars
- Total Time: 30 minutes plus drying time
- Yield: Varies based on jar size
- Diet: Non-Dietary
Description
Create magical home decor with these DIY Cotton Candy Glow Jars that combine vibrant colors and glowing effects.
Ingredients
- Clear glass jars (mason jars or any recycled glass jars)
- Cotton balls or pillow stuffing
- Acrylic paint (pastel pink, purple, blue, teal, white)
- Water
- Glitter (fine & chunky in coordinating colors)
- Glow-in-the-dark paint or glow pigment (optional)
- Wooden skewer or stick
- Battery-operated LED fairy lights (warm or cool tones)
- Disposable cups & stirrers
- Spray adhesive or Mod Podge (optional for outer jar sparkle)
Instructions
- Prepare your paint-water mix: In disposable cups, mix water with a few drops of acrylic paint—one color per cup. Stir well. (You can also add a tiny bit of glow-in-the-dark pigment to each color if desired.)
- Stretch and stuff the cotton: Pull apart cotton balls/stretch pillow stuffing and layer a bit into the bottom of your jar.
- Pour in color: Drizzle a small amount of your first paint mixture over the cotton. Use a skewer to press and mix gently. Sprinkle in some glitter.
- Repeat layering: Alternate cotton, colored paint mixtures, and glitter until you fill the jar with pastel blues, purples, pinks, and whites for a nebula-like effect.
- Glow-up time: Insert battery-operated fairy lights into the jar for a dreamy lit-up look at night. Optionally, coat the inside of the lid or inside wall with glow-in-the-dark paint.
- Optional: Outer sparkle: Use spray adhesive or Mod Podge to lightly coat the outside of the jar and roll in glitter for a stardust shimmer.
- Seal your jar and display it!
Notes
- Ensure the paints are fully mixed before application for even color distribution.
- Experiment with different glitter colors to achieve your desired effect.
- Adjust the number of layers based on jar size and personal preference.
- Prep Time: 30 minutes
- Cook Time: 0 minutes
- Category: Crafts
- Method: DIY
- Cuisine: N/A
Nutrition
- Serving Size: N/A
- Calories: N/A
- Sugar: N/A
- Sodium: N/A
- Fat: N/A
- Saturated Fat: N/A
- Unsaturated Fat: N/A
- Trans Fat: N/A
- Carbohydrates: N/A
- Fiber: N/A
- Protein: N/A
- Cholesterol: N/A