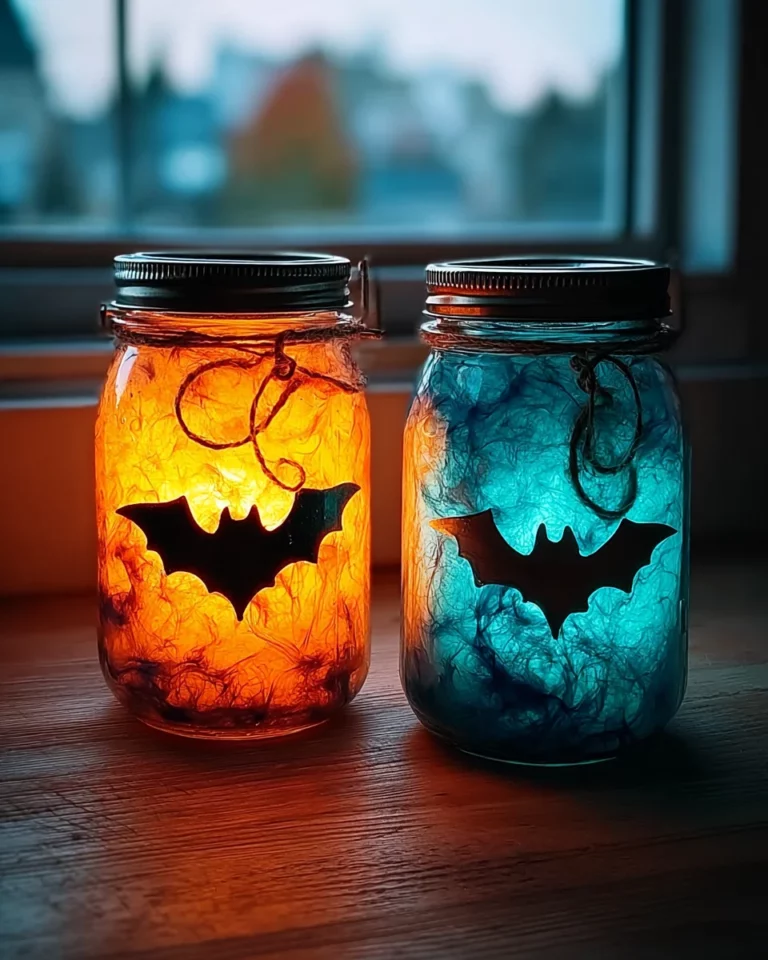
DIY Glow-in-the-Dark Pumpkin Jars for Spooky Decor!

Introduction to DIY Glow-in-the-Dark Pumpkin Jars
With the leaves turning and Halloween on the horizon, I’ve really been getting into the season in the coziest ways. One of the best crafts for doing that, in my opinion, is making these DIY glow-in-the-dark pumpkin jars. It’s so quick that it does not only keep the kids busy but also gives them something exciting to do. Even the most over-scheduled mom can surely fit two minutes of painting mason jars in her ‘free’ time! The decorations are super cute during the day, and even more magical when they light up at night. Let us brighten up spooky season a little more!
Why You’ll Love This DIY Glow-in-the-Dark Pumpkin Jars
Fun and stylish. These glowing pumpkin jars do not take hours to make – they are ready in about an hour. As a parent, you will not have to throw yourself into cleaning up after the children because the project is so mess-free. It is also an excellent way to involve kids in craft making. So here is double the return with single investment. Let’s face it.
Ingredients for DIY Glow-in-the-Dark Pumpkin Jars
Gathering your supplies is key before diving into this fun project! Here’s what you’ll need:
- 1 clear mason jar with lid: Any size will do! A smaller jar is cute for a nightstand; a bigger one makes a bold statement.
- Glow-in-the-dark paint: Choose from orange, green, purple, or white. This paint makes your pumpkin jars shine like little beacons at night.
- Black acrylic paint or permanent marker: Perfect for adding those spooky pumpkin faces. Use acrylic paint for a classic look or markers for quick designs.
- Paintbrushes: You’ll want a flat brush for the jar and fine tips for details. Think of these as your tools for creating pumpkin magic!
- LED tea lights or fairy lights: The safest way to light up your jars. They add a warm glow and a touch of charm without the fire risk.
- Optional: glitter: If you’re feeling festive, a sprinkle of glitter can add some sparkle and extra pizzazz to your jars!
- Paper towels: For easy cleanup. Trust me, the fewer messes we have to deal with, the better!
For exact quantities, you can check it out at the bottom of the article for printing convenience.
How to Make DIY Glow-in-the-Dark Pumpkin Jars
Now that you’ve gathered your ingredients, let’s dive into the fun part—making your spooky creations! Follow these simple steps to unleash your inner pumpkin artist. Each stage is a delight, and I promise, it’s easier than you think!
Gather Your Materials
Before starting, make sure you have everything within reach. It sounds simple, but trust me, it makes a world of difference! You won’t want to be running around looking for your paintbrushes when creativity strikes. Lay out your mason jar, paints, lights, and everything else on a tray. Working on a designated surface ensures an organized vibe and makes cleanup a breeze later.
Paint the Jar
Let’s get those jars glowing! Using the glow-in-the-dark paint, apply a smooth, even coat to your mason jar. You may want to start with a lighter shade, like orange or white, and let it dry fully. I suggest allowing a good 30–60 minutes for each coat. This helps build up that magical glow! Rest assured, the process may seem tedious, but patience pays off with vibrant results.
Create the Pumpkin Face
Here comes the fun part! Using black acrylic paint or a permanent marker, draw on your pumpkin face. Choose classic expressions like grinning mouths or eerie eyes. If you’re unsure about freehanding, you can trace designs using paper stencils. Just place the stencil against the jar and outline it with your marker before filling it in. Get creative—there’s no wrong way to express your pumpkin personality!
Add Lighting
Now that your jar is all dressed up, it’s time to light it up! If you’re using LED tea lights, simply place them inside the jar. They’re safe and provide that warm, inviting glow without the risk of fire. Alternatively, fairy lights can be twirled around inside, offering a sparkly effect that’s sure to charm. Make sure to switch on the lights and watch your creations come to life!
Display and Clean Up
Find a perfect spot to showcase your fabulous DIY glow-in-the-dark pumpkin jars. They could adorn your front porch or brighten up your home’s entryway. Just remember to charge the glow paint by placing your jars in sunlight or under bright indoor lights for a bit before showing them off.
As for cleanup, a damp paper towel will usually do the trick. With that organized tray, you’ll have everything in one neat package, making tidying up effortless. And that’s the beauty of crafting—unleashing your creativity while keeping the chaos in check!
Tips for Success
- Let each coat of paint dry thoroughly to avoid smudging.
- Use a well-ventilated area when painting for safety.
- Experiment with glow paint colors for unique effects.
- Mix in glitter with paint for extra sparkle.
- Involve your kids in the design process for added fun.
- Make multiple jars in different sizes for a stunning display.
Equipment Needed
- Mason jar: Any clear jar works well; repurpose old jars for an eco-friendly twist.
- Paintbrushes: Basic brushes are great, but makeup sponges can create a fun texture.
- Tray: A simple baking tray keeps your workspace neat; even a newspaper can do the trick!
Variations
- Use different colored glow-in-the-dark paints to create a unique theme, like a rainbow of pumpkins.
- Add metallic paints on top for a shimmering effect that glimmers under moonlight.
- For a non-Halloween vibe, paint designs like flowers or stars for summer evening decor.
- Try using mason jars with patterned designs for added texture to your spooky creations.
- Incorporate decals or stickers for fun characters that the kids will love!
Serving Suggestions for DIY Glow-in-the-Dark Pumpkin Jars
- Pair these jars with homemade pumpkin spice cookies for a festive treat.
- Serve them at your Halloween party as fun centerpieces.
- Add a few in your garden to create an enchanting nighttime atmosphere.
- Include them as part of a cozy movie night setup for spooky vibes.
- For a playful touch, make a glowing jar for each guest to take home!
FAQs about DIY Glow-in-the-Dark Pumpkin Jars
What kind of glow-in-the-dark paint should I use?
I recommend using non-toxic glow-in-the-dark paint that’s suitable for crafts. There are various colors available, so pick your favorites to add some spooky flair!
Can I use other types of containers instead of mason jars?
Absolutely! Any clear glass or plastic container works wonders. Just ensure they are safe for the type of lights you plan to use.
Will the glow-in-the-dark effect fade over time?
The glow can diminish with time, especially if the jars aren’t regularly exposed to light. Revitalize them by charging the paint under bright light before showcasing.
Can kids help with this project?
Definitely! This project is perfect for involving kids. Just supervise them during painting to ensure safety, especially while using paintbrushes.
How do I clean up after making these jars?
Since paint can get messy, having paper towels nearby for quick clean-up is ideal. Most paint comes off surfaces easily with soap and water if dealt with promptly.
Final Thoughts on DIY Glow-in-the-Dark Pumpkin Jars
Creating DIY glow-in-the-dark pumpkin jars is more than just a craft; it’s a joyful bonding experience. Each stroke of paint carries laughter and creativity, transforming simple mason jars into enchanting decorations. Watching them magically illuminate at night fills my heart with delight. Whether you’re crafting solo or with family, the satisfaction of seeing your spooky creations shine bright is unmatched. So, gather your loved ones, unleash your creativity, and embrace the spirit of Halloween together! This is a project that will not only light up your home but also create cherished memories that shine even brighter.
Print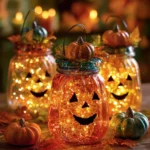
DIY Glow-in-the-Dark Pumpkin Jars for Spooky Decor!
- Total Time: 1 hour (including drying time)
- Yield: 1 jar 1x
- Diet: Vegan
Description
Create spooky DIY glow-in-the-dark pumpkin jars perfect for Halloween decor with simple materials.
Ingredients
- 1 clear mason jar with lid (any size)
- Glow-in-the-dark paint (orange, green, purple, or white)
- Black acrylic paint or permanent marker
- Paintbrushes (flat and fine tips)
- LED tea lights or fairy lights
- Optional: glitter
- Paper towels for cleanup
Instructions
- Gather Your Materials
- Paint the Jar
- Create the Pumpkin Face
- Add Lighting
- Display and Clean Up
Notes
- Work on a tray to make cleanup easier.
- Let each coat of paint dry for 30–60 minutes.
- Experiment with different pumpkin faces.
- Charge the glow paint by exposing it to light before displaying.
- Prep Time: 10 minutes
- Cook Time: 0 minutes
- Category: Craft
- Method: DIY
- Cuisine: N/A
Nutrition
- Serving Size: N/A
- Calories: N/A
- Sugar: N/A
- Sodium: N/A
- Fat: N/A
- Saturated Fat: N/A
- Unsaturated Fat: N/A
- Trans Fat: N/A
- Carbohydrates: N/A
- Fiber: N/A
- Protein: N/A
- Cholesterol: N/A