DIY Moon Rocks: Create Glittery Cosmic Crafts Today!

Introduction to DIY Moon Rocks
Hey there, fellow cosmic crafters! If you’re looking for a fun, glittery escape that will light up your family’s day, then DIY Moon Rocks are just what you need. This project is not only a great way to get creative but also a quick solution for busy afternoons with the kids. Picture the joy on their faces as they mold and shape their own sparkling space creations! Making these moon rocks is perfect for anyone, especially if you’re juggling work and family life. So, let’s hop on this crafting adventure and unleash some cosmic magic!
Why You’ll Love This DIY Moon Rocks
Creating these DIY Moon Rocks is a breezy activity that sparks imagination and creativity. You can whip them up in just 10 minutes, making it a perfect pick-me-up for those busy weekends. Plus, this craft is a delightful way to spend quality time with your kids! It encourages hands-on fun, allowing everyone to get involved in a unique and glittery experience that’s both memorable and rewarding.
Ingredients for DIY Moon Rocks
Gathering the right ingredients for your cosmic adventure is like packing your spaceship for intergalactic travel! Here’s what you’ll need:
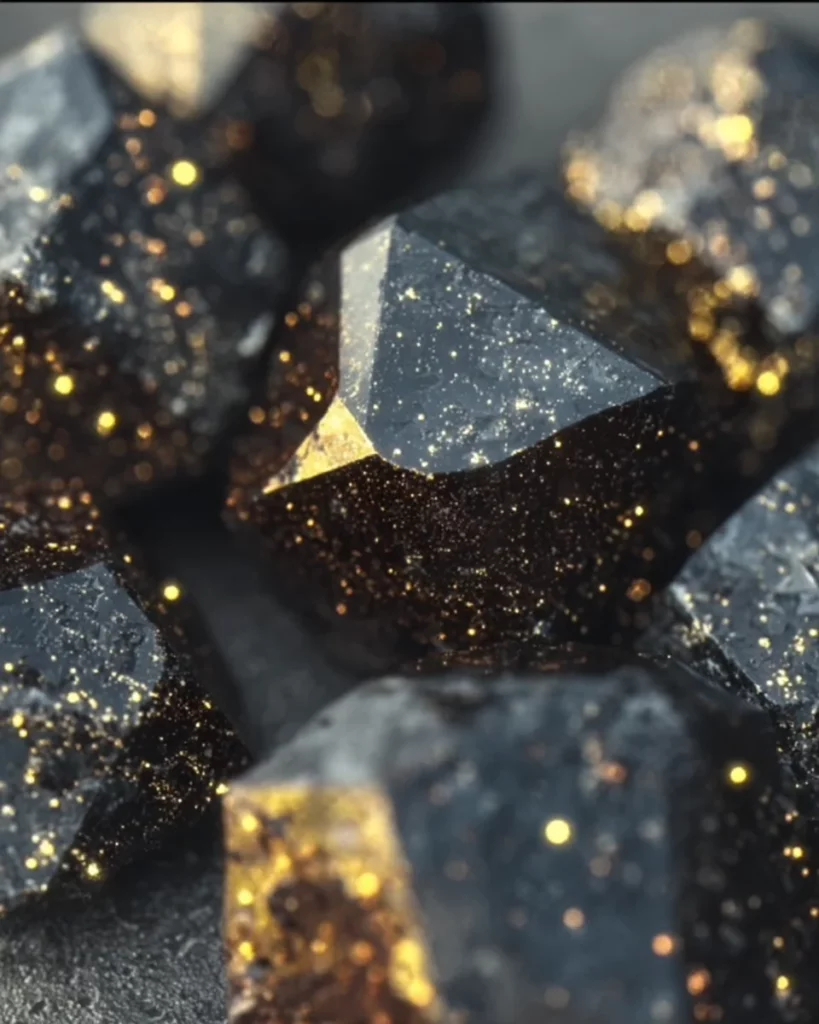
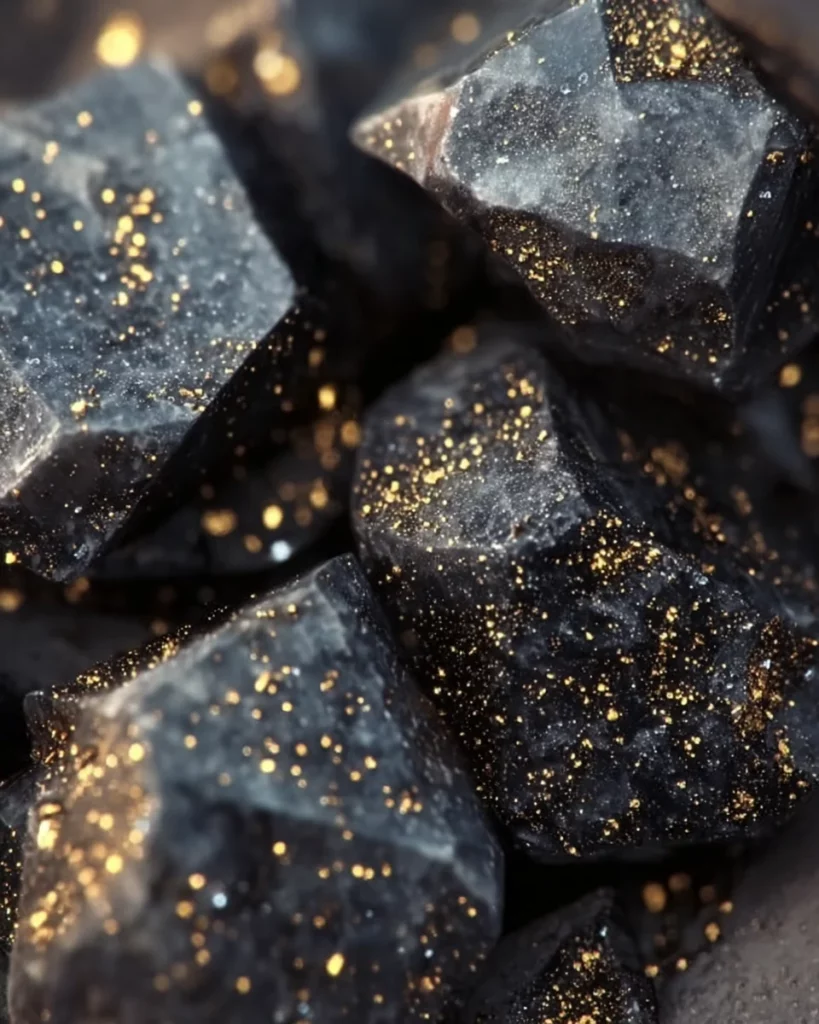
- Baking Soda: This is the base of your moon rocks. It helps create a nice, fluffy texture similar to soft soil from the moon’s surface.
- Water: Just a little to activate the magic of baking soda. It brings everything together, allowing you to mold your creations.
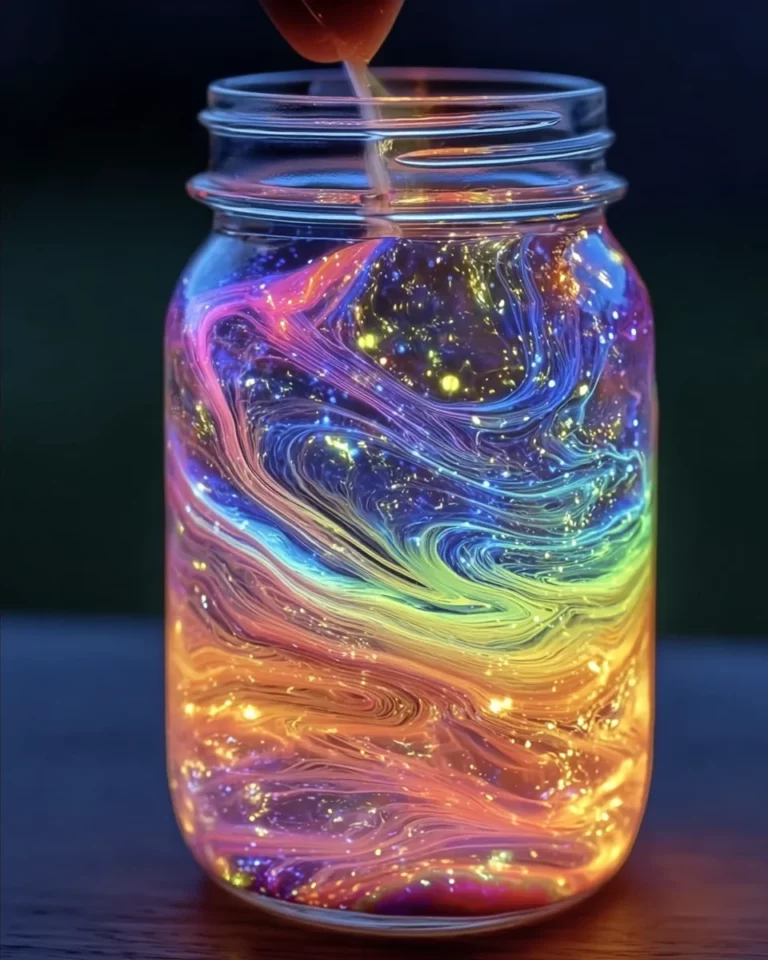
- Gold Glitter: For that dazzling cosmic sparkle! Gold adds a touch of luxury and brightness, making your moon rocks truly shine.
- Silver Glitter: Complementing the gold, silver brings a cool, shimmering effect, reminding us of starlight against the vastness of space.
- Black Food Coloring: This will give your moon rocks that deep, mysterious hue, resembling the surface of other celestial bodies. If you’re feeling adventurous, try gel for a bolder shade!
Feel free to let your creativity run wild! You can experiment with various glitter types and colors to create unique designs. Want to make your moon rocks extra special? Consider adding a sprinkle of cornstarch for a different texture!
Don’t worry; the exact measurements are at the bottom of the article for your convenience. Just make sure to have fun creating your own piece of the galaxy!
How to Make DIY Moon Rocks
Now that you have your ingredients ready, it’s time to unleash your inner cosmic artist! Follow these simple steps to create your own mesmerizing DIY Moon Rocks. Each step invites you to be creative, so let’s embark on this glittery journey!
Step 1: Prepare Your Base
Start by grabbing a large plastic bin. Pour in the baking soda and add the water. Mix them together until you achieve a smooth, fluffy texture. Imagine you’re creating a miniature moon surface as you blend!
Step 2: Add Some Sparkle
Next, it’s time to bring out the bling! Sprinkle in a generous amount of gold and silver glitter. As you stir, watch as the sparkles dance together. This dazzling effect will make your DIY Moon Rocks truly shine like stars in the night sky!
Step 3: Color Your Mixture
Now, let’s add some cosmic flair with black food coloring. Start with a few drops, and remember, it’s easier to add more than to take it away! If you’re using gel food coloring, you’ll get a richer hue—perfect for adding depth to your rocks.
Step 4: Combine Thoroughly
Take your time to mix everything together until the color is evenly distributed. This step ensures that each moon rock will be vibrantly colored. Don’t rush it; the result is worth the little extra effort!
Step 5: Shape Your Moon Rocks
Here comes the fun part! Get your hands into the mixture and mold it into rock shapes. Embrace your creativity! Press your fingers in to create craters and textures, just like real moon rocks. No two rocks need to look alike!
Step 6: Let Them Dry
Now that your beautiful moon rocks are ready, let them dry overnight. Find a cozy spot, and resist the temptation to touch them. When you come back the next day, you’ll be amazed by the captivating results of your crafting adventures!
Tips for Success
- Always wear an apron—things can get a bit messy with glitter and food coloring.
- If possible, work outside or on a easily cleanable surface. A plastic tablecloth works wonders!
- For a firmer texture, consider adding a bit of cornstarch to the baking soda mixture.
- Encourage your kids to experiment with shapes and textures to make each rock unique.
- Store any leftover mixture in an airtight container for your next crafting adventure.
Equipment Needed for DIY Moon Rocks
- Large Plastic Bin: Great for mixing! A shallow box or even a large bowl could work too.
- Spoon or Mixing Tool: Use any sturdy spoon, or get creative with a spatula!
- Measuring Cups: Helpful for precise amounts; a kitchen scale is an alternative.
- Apron: Protect your clothes from glitter and color splatters.
- Paper Towels: Perfect for quick clean-ups when the cosmic creativity gets a little messy!
Variations of DIY Moon Rocks
- Colorful Cosmic Creations: Use different food coloring shades to create vibrant rainbow moon rocks. Let your imagination take flight!
- Sparkly Stardust: Experiment with different types of glitter, like holographic or neon, to make your moon rocks extra dazzling.
- Textured Moons: Incorporate a mix of cornstarch and baking soda for a different texture, creating rocks that feel more celestial.
- Glow-in-the-Dark Moon Rocks: Add a touch of glow-in-the-dark paint to the mixture for a magical nighttime effect!
- Seasonal Themes: Customize your moon rocks for holidays by using themed glitter colors or shapes that match the festivities!
Serving Suggestions for DIY Moon Rocks
- Cosmic Centerpiece: Display your moon rocks in a shallow bowl or on a decorative plate to create a stunning table centerpiece.
- Galactic Fun: Pair the activity with a space-themed movie for a cozy family night.
- Space Snack Time: Serve up popcorn with star-shaped sprinkles to complement your cosmic craft!
FAQs about DIY Moon Rocks
Ready to dive deeper into your cosmic crafting journey? Here are some common questions I’ve encountered while making these glittery wonders!
Can I use different types of glitter for my DIY Moon Rocks?
Absolutely! You can experiment with any glitter type, like holographic or chunky. Just remember to mix it well for that dazzling cosmic effect!
How long do the moon rocks take to dry?
Your moon rocks will need to dry overnight. Patience is key here. When you return, the transformation will be truly mesmerizing!
What if my kids are allergic to certain ingredients?
If allergies are a concern, you can skip the glitter or substitute it with safe alternatives. The basic baking soda and water mixture will still create a fun experience!
Can I store leftover moon rock mixture for later use?
Definitely! Just store any leftover mixture in an airtight container and let your creativity soar again next time!
Is this craft suitable for older kids and adults too?
Yes! This DIY project offers fun for all ages. It’s not just for kids; adults will enjoy the hands-on creativity and relaxation that comes with crafting!
Final Thoughts
Engaging in the delightful craft of DIY Moon Rocks is more than just a fun activity—it’s an opportunity to create lasting memories with your loved ones. I can’t tell you how often I hear laughter echoing through the house during these glittery sessions! Watching my kids’ faces light up as they shape their creations is pure joy. This simple project transforms ordinary moments into extraordinary experiences. Whether you’re crafting on a rainy day or celebrating a special occasion, these cosmic creations will add a sprinkle of glitter and joy to your life, brightening up even the busiest days!
Print
DIY Moon Rocks
- Total Time: Overnight drying
- Yield: Variable, depending on size of moon rocks made
- Diet: Vegan
Description
A fun and creative DIY activity to make glittery moon rocks using simple ingredients, perfect for crafts with kids or as a cosmic decoration.
Ingredients
- 4 cups baking soda
- 1/4 cup water
- Gold glitter
- Silver glitter
- Black food coloring
Instructions
- Grab a large plastic bin and mix the baking soda with water. This will be the base of your moon rocks!
- Now, it’s time to add some sparkle! Sprinkle in a generous amount of gold and silver glitter, then stir until it’s beautifully blended.
- Next, add a few drops of black food coloring. If you’re using gel, you’ll get a bolder color. With water-based coloring, start with a small amount to ensure your moon rocks aren’t just plain gray!
- Mix it all together thoroughly, making sure every bit of food coloring is incorporated into the mixture. It should look vibrant!
- Now comes the fun part: mold the mixture with your hands to shape it into rocks. Feel free to press your fingers in to create craters—just like real moon rocks!
- Lastly, let your creations dry overnight, and enjoy the mesmerizing results of your hard work.
Notes
- Feel free to experiment with different colors and glitter types for unique designs!
- This craft is best done in an area that can get messy, so cover surfaces with newspapers or use a plastic tablecloth.
- If you want a different texture, you can add a bit of cornstarch to the mixture.
- Prep Time: 10 minutes
- Cook Time: 0 minutes
- Category: Crafts
- Method: Mixing and molding
- Cuisine: N/A
Nutrition
- Serving Size: N/A
- Calories: N/A
- Sugar: N/A
- Sodium: N/A
- Fat: N/A
- Saturated Fat: N/A
- Unsaturated Fat: N/A
- Trans Fat: N/A
- Carbohydrates: N/A
- Fiber: N/A
- Protein: N/A
- Cholesterol: N/A