DIY Paper Plate Ghosts – Adorable Hanging Halloween Décor

First off—thank you for being here! Whether you’re a crafty parent, a creative teacher, or someone who just lives for Halloween vibes, you’re going to adore these little floating friends. 🎃 These DIY Paper Plate Ghosts are fun, fast, and oh-so-festive—made with materials you probably already have lying around.
They’re perfect for classrooms, porches, bedrooms, or Halloween parties. The best part? Kids LOVE making them, and you’ll love how budget-friendly they are!
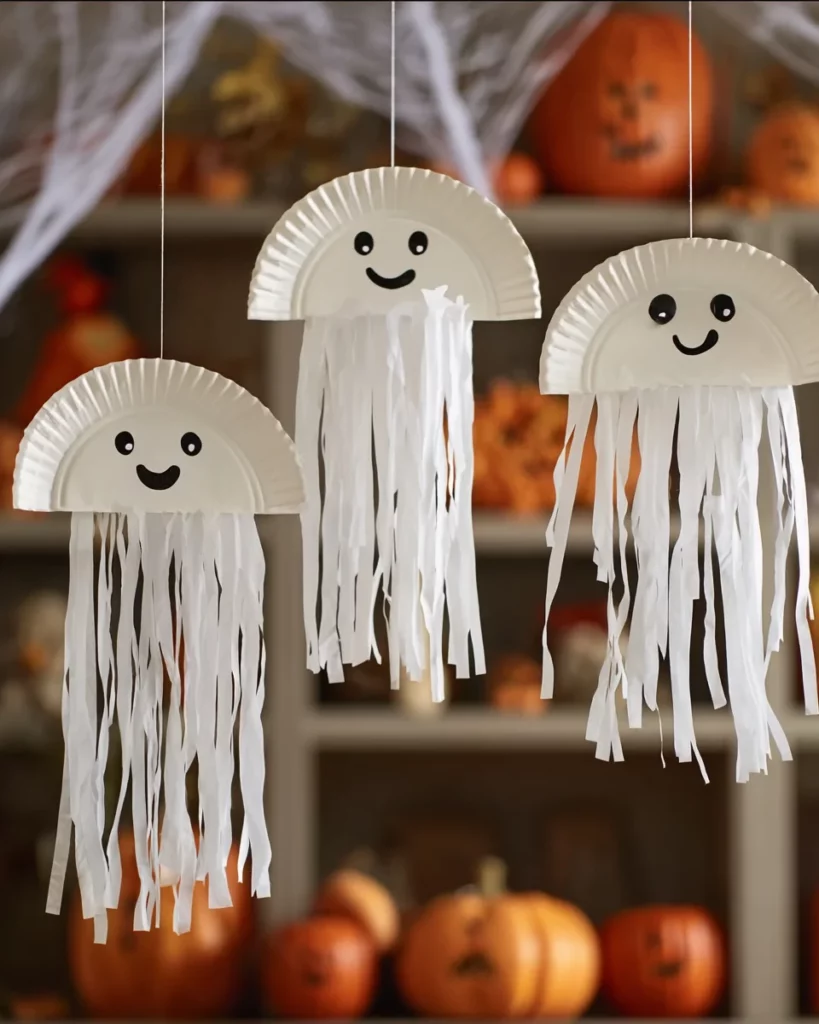
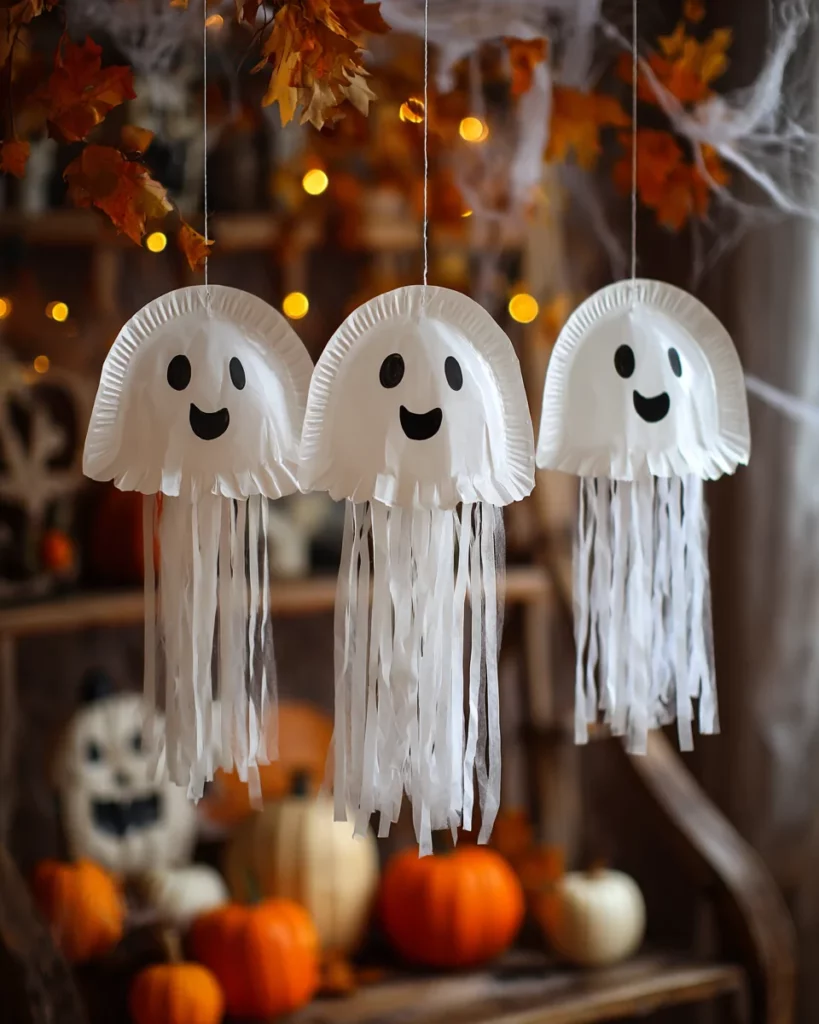
These hanging ghost decorations are made from white paper plates, streamers, and a bit of imagination. They’re lightweight, breezy, and designed to sway gently like real little spirits. Not spooky—just sweetly eerie and full of Halloween charm!
What You’ll Need: DIY Paper Plate Ghosts
- White paper plates (regular or dessert size)
- Black construction paper (for eyes and mouth)
- White streamers or tissue paper (for ghost “tails”)
- Scissors
- Glue stick or tape
- String or yarn (for hanging)
- Hole punch (optional but helpful!)
Step-by-Step: DIY Paper Plate Ghosts
1️⃣ Make the Face
Cut out two oval eyes and a round mouth from black construction paper. Glue them onto the plate to create your ghost’s face.
2️⃣ Add the Ghost’s Body
Cut 5–6 long strips of white tissue or streamers. Attach them to the bottom rim of the plate using glue or tape. These will flutter like the ghost’s floating tail!
3️⃣ Create a Hanging Loop
Punch a hole near the top of the plate or tape a loop of string/yarn to the back. This will let your ghost float from ceilings, porches, or windows!
4️⃣ Display with Pride
Hang your ghosts and watch them dance in the breeze! Perfect for creating a friendly haunted house vibe.
Notes
- Great as a classroom craft, especially for younger kids.
- Customize the expressions—try sleepy eyes, surprised mouths, or even vampire fangs!
- You can totally make these in batches—they’re quick to assemble.
Helpful Tips DIY Paper Plate Ghosts
- Pre-cut shapes for younger kids so they can focus on gluing and decorating.
- Use googly eyes if you want an even more playful look.
- Layer multiple tissue strips for a fuller, more dramatic ghost tail.
- Don’t stress about perfection—wonky faces make them even cuter!
Conservation and Storage
- Indoors: These ghosts will last all season long!
- Outdoors: Hang under cover—avoid rain or heavy wind.
- Reusing: Carefully remove the streamers and store plates flat in a large envelope or craft folder.
- Wrinkled tissue? Just run a warm iron over it with a towel on top.
Substitutions and Variations
| Instead of… | Try This… |
|---|---|
| Black paper | Black markers or felt |
| Tissue/streamers | Strips of white printer paper or fabric |
| String | Fishing line for an invisible hang |
| Classic ghost | Add witch hats, bows, or vampire teeth for themed ghosts! |
Feeling creative? Let the kids name their ghosts—”Floaty”, “Boo Boo”, and “Sir Spooks-a-Lot” are always favorites in our house. 😂👻
Storage Instructions
Once Halloween is over:
- Remove streamers if you want to replace them next year.
- Store the faces flat in a craft box or envelope.
- Keep away from moisture to avoid wrinkling or tearing.
These are great to reuse or remake annually—especially if you turn it into a fun family tradition!
Frequently Asked Questions
Can I use plastic plates?
Yes, though it’s trickier to glue on plastic. Use hot glue or double-sided tape for better hold.
How long do these take to make?
About 10–15 minutes each—faster once you get in the rhythm!
What age is this craft best for?
Great for ages 3 and up. Just supervise the scissor work for younger kiddos.
Are they safe for classrooms?
Totally! No small choking hazards, and they’re easy to hang on bulletin boards, ceilings, or classroom doors.
Conclusion
These DIY Paper Plate Ghosts are a perfect little Halloween win—adorable, easy, and full of festive fun. They’re the kind of project that turns a regular afternoon into a memory-making moment.
So grab those plates, fire up the glue stick, and get your ghost on! And hey—if you make these, I’d LOVE to see them! Share your photos on Pinterest or tag me on socials with your spooky squad.
🎃 Want more craft ideas and cozy recipes? Be sure to [subscribe] to get my Halloween favorites straight to your inbox!
Looking for More Spooky Fun?
Here are more Halloween crafts and treats your whole crew will love:
- Mini Monster Pretzels – No-Bake Halloween Snack
- Tissue Paper Pumpkins – Easy Fall Centerpieces
- Peach Hand Pies Shaped Like Ghosts
Nutritional Information
Just kidding—these ghosts are 100% craft, 0% calories! But they do pair great with candy corn. 😉
Now it’s your turn!
Try this craft? Leave a comment, rate the project, or pin it to your Halloween board. I love seeing your creations and ideas!
Happy Haunting, friends! 🎃👻✨
Print
DIY Paper Plate Ghosts
Description
First off—thank you for being here! Whether you’re a crafty parent, a creative teacher, or someone who just lives for Halloween vibes, you’re going to adore these little floating friends. 🎃 These DIY Paper Plate Ghosts are fun, fast, and oh-so-festive—made with materials you probably already have lying around.
Ingredients
-
-
White paper plates (regular or dessert size)
-
Black construction paper (for eyes and mouth)
-
White streamers or tissue paper (for ghost “tails”)
-
Scissors
-
Glue stick or tape
-
String or yarn (for hanging)
-
Hole punch (optional but helpful!)
-
Instructions
Cut out two oval eyes and a round mouth from black construction paper. Glue them onto the plate to create your ghost’s face.
Cut 5–6 long strips of white tissue or streamers. Attach them to the bottom rim of the plate using glue or tape. These will flutter like the ghost’s floating tail!
Punch a hole near the top of the plate or tape a loop of string/yarn to the back. This will let your ghost float from ceilings, porches, or windows!
Hang your ghosts and watch them dance in the breeze! Perfect for creating a friendly haunted house vibe
Notes
Great as a classroom craft, especially for younger kids.
Customize the expressions—try sleepy eyes, surprised mouths, or even vampire fangs!
You can totally make these in batches—they’re quick to assemble.