DIY Popsicle Stick Ghosts – Fun Halloween Craft for Kids
Why DIY Popsicle Stick Ghosts – Fun Halloween Craft for Kids Wins Every Time
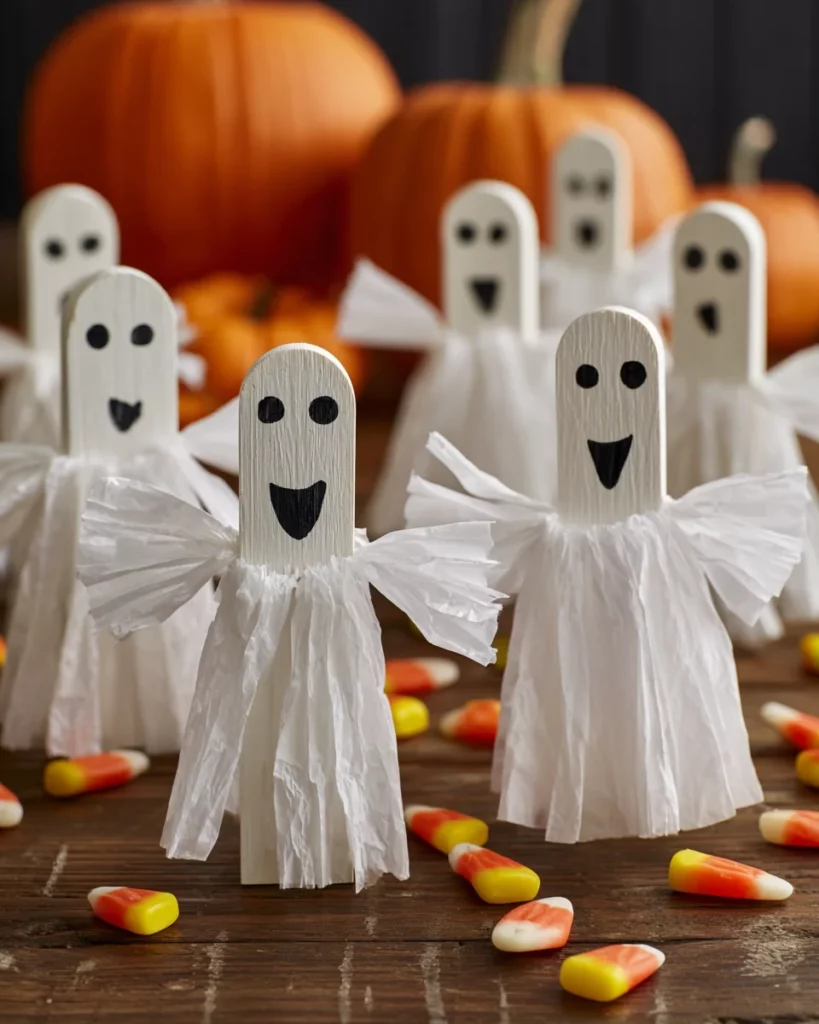
A fast craft that transforms basic ingredients into eerie-cute decor in minutes. Popsicle Stick Ghosts – Fun Halloween Craft for Kids These are inexpensive, can be scaled to any group size, and use the materials you probably already have on hand. Children can develop their precision skills in creating facial expressions of a scary 👻 or smiley 😊 and take delight in the outcome. That’s the beauty: table decorations, hanging as garlands due to the flexible stringing together; nice touches for party favors, or even adorning a classroom bulletin board.
Fast to set up, little mess, big smiles
Once dry, glue 5–6 sticks side by side. Paint them white, add a face, and finish with a twist of tissue or gauze “tails.” That’s all there is to it. Dry time is short, and any cleaning up is child’s play with a single wet wipe per crafter.
For homes, classrooms, and parties
Everything is flat and light so you can batch-make them for a whole class or birthday group. Add string to hang them, or stand them up in small plant pots filled with beans or rice.
Materials & Budget Swaps
Core supplies
- Popsicle (craft) sticks
- White paint (tempera or acrylic)
- Glue (school glue, tacky glue, or hot glue for adults)
- Black marker or googly eyes
- White tissue paper or gauze/cheesecloth
- Optional: string or ribbon for hanging; magnets or clothespins for displays
Budget & accessibility swaps
- No paint? Use white cardstock or white duct tape to wrap sticks.
- No googly eyes? Draw eyes with marker or cut circles from black paper.
- Sensitive to scents? Choose low-odor, water-based paints and glues labeled non-toxic.
- Younger groups: Glue sticks and peel-and-stick foam shapes keep mess down.
Step-by-Step Instructions (Base Project)
1) Build the ghost body
Line up 5–6 popsicle sticks vertically. Glue one stick horizontally across the back (top third) to secure. For extra sturdiness, add a second cross-stick near the bottom. Let set 2–3 minutes.
2) Paint the front
Brush on white paint; one coat usually works. For brighter coverage, add a quick second coat. Let dry (about 5–10 minutes for tempera on wood).
3) Add the face
Draw eyes and a mouth with a black marker or glue on googly eyes. Kids can choose spooky ovals, wavy smiles, or surprised “O” mouths.
4) Create the flowing “tail”
Cut strips of white tissue paper or gauze and glue them along the bottom edge on the back so they dangle. Layer shorter pieces over longer ones for dimension.
5) Display or hang
Leave freestanding against books or pumpkins, or add string to the back to hang on doors, branches, or bulletin boards.
Speedy Classroom Workflow (15–25 Minutes)
- Prep ahead: Pre-bundle 6 sticks with a rubber band; pre-cut tissue/gauze strips; pour paint into yogurt lids.
- Stations: 1) Assemble & glue, 2) Paint, 3) Face, 4) Tail & string.
- Drying: Use cooling racks or tray lids labeled with student names.
- Name tags: Write names on the back cross-stick with pencil before painting.
Age-by-Age Modifications
- Preschool (3–4): Adult adds cross-stick; kids paint and place precut eyes/mouths. Use glue sticks.
- Grades 1–3: Students glue bodies themselves, paint, and design custom faces. Introduce simple patterns in the tails.
- Grades 4–6: Let kids vary shapes (rounded top vs. pointy), add shading, or write mini messages (“Boo!” “Eek!”).
Design Variations & Themes
- Scary vs. smiley: Change mouth shapes and eyebrow angles for mood.
- Glitter or glow: Brush a thin line of glue and sprinkle biodegradable glitter or use glow-in-the-dark paint accents.
- Rainbow ghosts: Pastel or neon backgrounds for party décor.
- Patchwork ghosts: Collage scraps of white paper, lace, or fabric for texture.
- Mini banner: String 6–8 mini ghosts on twine for a mantel garland.
- Photo props: Glue a craft stick handle behind for a “boo-selfie” prop.
No-Paint & Low-Mess Alternatives
- White duct/washi tape wrap: Wrap sticks instead of painting—instant dry.
- Cardstock overlay: Glue a white paper “ghost” cutout over the stick base.
- Sticker faces: Foam stickers or vinyl dots replace markers.
Hanging & Display Ideas
- Garlands: Alternate ghosts and paper bats on twine.
- Door décor: Hang one large ghost with a name plate.
- Centerpieces: Stand ghosts in rice-filled jars with battery tea lights.
- Place cards: Write names on the front and set at each seat.
Safety, Cleanup & Storage
- Choose AP-certified non-toxic paints and glues. Keep hot glue use to adults.
- Cover tables with kraft paper; keep wipes and scrap cloth nearby.
- Dry flat so faces don’t smudge. Store finished ghosts in a shallow box with tissue between layers.
For general classroom craft safety guidance, see this helpful overview from the National Art Education Association (reference resource): www.arteducators.org (navigate to safety resources).
Printable Face Templates & Tracing Tips
Create a quick sheet with three sizes of eyes and mouths (round, oval, smile, frown, “O”). Kids can trace or cut and glue. Aim for simple shapes so younger crafters succeed quickly. Tip: Trace with pencil first, then outline with marker.
Cross-Curriculum Extensions
- Math: Count sticks, compare lengths, make AB patterns in tails.
- ELA: Write a 3-sentence “ghost biography” (name, favorite haunt, best friend).
- Art: Explore contrast (black/white), shape, and texture (gauze vs. tissue).
- SEL: “Scary or smiley?” Discuss feelings and how facial features show emotion.
FAQs DIY Popsicle Stick Ghosts
1) What glue works best on wood sticks?
Tacky glue or school glue works great; hot glue is fastest for adult assembly.
2) How can I speed up drying?
Use thin paint layers and set projects near a fan on low.
3) Can we skip paint?
Yes—wrap with white tape or cover with white cardstock.
4) How do I hang them without showing the string?
Glue a loop of fishing line or dental floss to the back cross-stick.
5) Any alternatives to tissue/gauze tails?
Try coffee filters, paper towels, or fabric strips.
6) How do I make them durable for storage?
Brush a light coat of mod podge or diluted glue over the painted surface once dry.
7) Classroom tip for zero spills?
Use paint sticks/solid tempera bars or white stamp pads instead of liquid paint.
Conclusion & Next Crafts
DIY Popsicle Stick Ghosts – Fun Halloween Craft for Kids delivers maximum charm with minimal prep. Whether you go scary, smiley, glittery, or glow-in-the-dark, these lightweight little spirits are perfect for classrooms, playdates, and party décor. Set up simple stations, keep supplies kid-safe, and let creativity float—your hallway or mantel will look hauntingly adorable in no time.
Print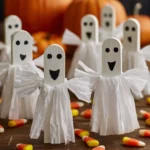
DIY Popsicle Stick Ghosts – Fun Halloween Craft for Kids
Description
DIY Popsicle Stick Ghosts – Fun Halloween Craft for Kids — Step-by-step instructions, supply swaps, age-by-age tips,
Ingredients
Materials & Budget Swaps
Core supplies
-
Popsicle (craft) sticks
-
White paint (tempera or acrylic)
-
Glue (school glue, tacky glue, or hot glue for adults)
-
Black marker or googly eyes
-
White tissue paper or gauze/cheesecloth
-
Optional: string or ribbon for hanging; magnets or clothespins for displays
Budget & accessibility swaps
-
No paint? Use white cardstock or white duct tape to wrap sticks.
-
No googly eyes? Draw eyes with marker or cut circles from black paper.
-
Sensitive to scents? Choose low-odor, water-based paints and glues labeled non-toxic.
-
Younger groups: Glue sticks and peel-and-stick foam shapes keep mess down
Instructions
1) Build the ghost body
Line up 5–6 popsicle sticks vertically. Glue one stick horizontally across the back (top third) to secure. For extra sturdiness, add a second cross-stick near the bottom. Let set 2–3 minutes.
2) Paint the front
Brush on white paint; one coat usually works. For brighter coverage, add a quick second coat. Let dry (about 5–10 minutes for tempera on wood).
3) Add the face
Draw eyes and a mouth with a black marker or glue on googly eyes. Kids can choose spooky ovals, wavy smiles, or surprised “O” mouths.
4) Create the flowing “tail”
Cut strips of white tissue paper or gauze and glue them along the bottom edge on the back so they dangle. Layer shorter pieces over longer ones for dimension.
5) Display or hang
Leave freestanding against books or pumpkins, or add string to the back to hang on doors, branches, or bulletin boards.

