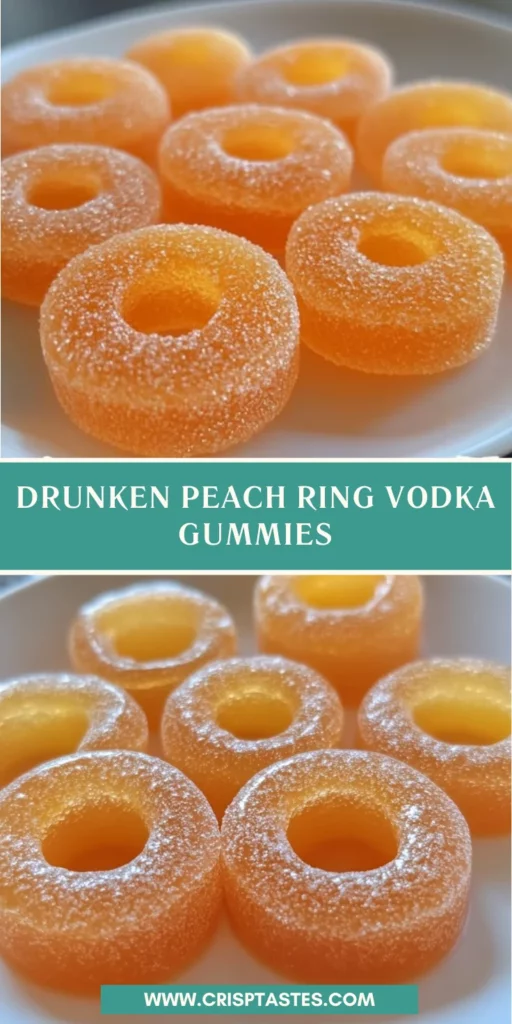
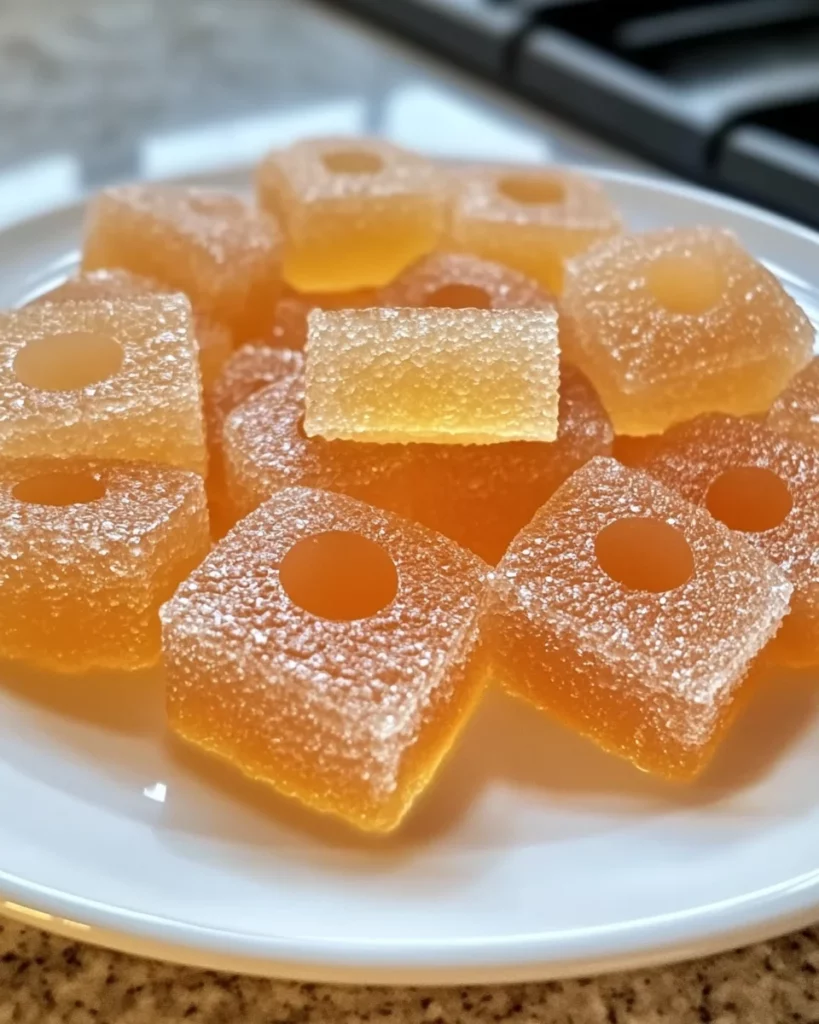
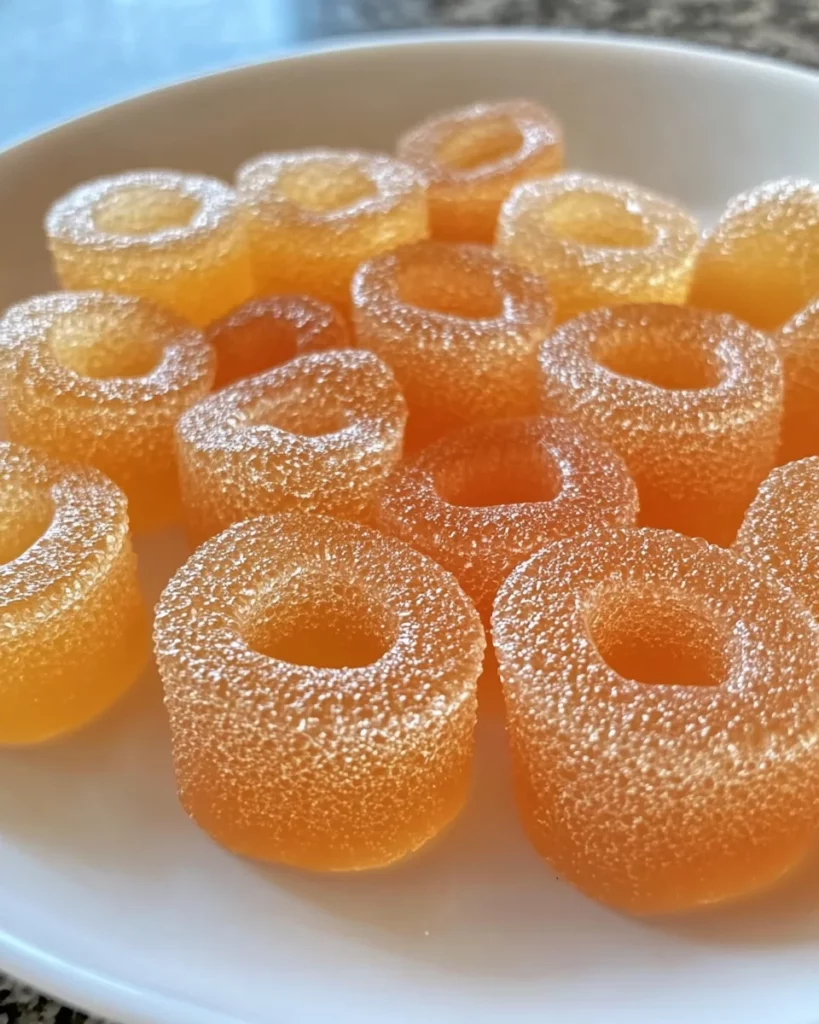
Drunken Peach Ring Vodka Gummies

Introduction to Drunken Peach Ring Vodka Gummies
Hey there, fellow kitchen adventurers! If you’re looking for a fun and delicious treat to impress your friends at the next gathering, look no further than these delightful Drunken Peach Ring Vodka Gummies. They’re not just gummies; they’re a boozy twist on a childhood favorite that will take you on a fruity flavor ride.
Whether you’re juggling a busy schedule or planning a cozy get-together, these gummies are a quick solution that promises laughter and joy. Trust me, your loved ones will be begging for more after the first bite!
Why You’ll Love This Drunken Peach Ring Vodka Gummies
Let’s be real—who wouldn’t love a delightful treat that’s easy to whip up? These Drunken Peach Ring Vodka Gummies are a breeze to make, requiring just a handful of ingredients and minimal effort. Plus, they deliver on flavor, combining the sweetness of peaches with a kick of vodka. Perfect for those busy days when you crave something fun, these gummies transform any ordinary gathering into a memorable affair!
Ingredients for Drunken Peach Ring Vodka Gummies
Now, let’s dive into what you’ll need to create these tantalizing Drunken Peach Ring Vodka Gummies. Here’s a list of the star players:
- Peach-flavored vodka: This will be your alcohol base, adding that delicious peachy flavor. Choose a quality vodka for the best taste.
- Water: Essential for mixing with the vodka. It helps dilute the alcohol slightly while keeping that sweet peach flavor alive.
- Peach gelatin: This gives our gummies that classic peach flavor and vibrant hue. Feel free to adjust the flavor intensity based on your preference.
- Unflavored gelatin: The secret ingredient that gives your gummies their chewy texture. It works in harmony with the peach gelatin to create that perfect bite.
- Granulated sugar: Sweetens the deal! Adjust the amount based on your personal sweetness preference to get it just right.
- Corn syrup: This adds a silky texture and shine to the gummies, making them look as good as they taste.
- Fresh peach puree (optional): For those who want an extra peachy punch, puree some fresh peaches and mix them in. It amps up the flavor beautifully!
- Salt: Just a pinch to enhance all those fantastic flavors. Believe it or not, it makes everything tastier!
- Cooking spray or oil: A light greasing of your gummy molds is crucial to prevent sticking. You can use vegetable oil or any cooking spray you have on hand.
You’ll find the specific quantities for these ingredients at the bottom of the article, so go ahead and print it out! Happy gummy-making!
How to Make Drunken Peach Ring Vodka Gummies
Ready to make your own Drunken Peach Ring Vodka Gummies? Let’s get into it! Follow these step-by-step instructions, and soon you’ll be tasting these delightful treats. Trust me, the process is just as enjoyable as the final product.
Step 1: Prepare Your Gummy Mold
First things first—let’s get your gummy mold ready! Greasing it is an essential step to prevent those delicious gummies from sticking.
I like using cooking spray, as it’s quick and easy. But if you prefer alternatives, a little vegetable oil on a paper towel works wonders too. Just make sure to cover every nook and cranny!
Step 2: Warm the Liquids
Next, combine your peach-flavored vodka and water in a medium saucepan. Place it over medium heat and warm it up. Remember, we’re not looking to bring it to a boil. Just warm it enough to dissolve the gelatin.
This gentle heating helps to release the flavors of the vodka and prepare the mixture for the star ingredients—ganache and unflavored gelatin.
Step 3: Dissolve the Gelatin
Once your liquids are warm, it’s time to get whisking! Gradually add in the peach gelatin and unflavored gelatin. Be sure to whisk continuously to avoid lumps.
You want the mixture to be smooth and velvety. If you spot any lumps, keep whisking until everything is well combined.
Step 4: Add Sweetness
Now it’s time to make these gummies truly divine! Add the granulated sugar and corn syrup to the mixture.
Mix well until both are fully dissolved. This part is crucial because evenly mixing the sweetness ensures every gummy is bursting with flavor!
Step 5: Cool Down
After mixing, remove the saucepan from the heat and let the mixture cool for a few minutes. This brief cooling period is important. It prevents the hot liquid from melting your molds when you pour it in.
Take your time here; patience pays off!
Step 6: Fill the Molds
Let’s move on to filling the molds! Carefully pour the gummy mixture into each cavity. If you want to be precise, a dropper works wonders!
Be cautious and pour slowly to avoid spills. You want each gummy to be equally filled for tasty bites all around!
Step 7: Set the Gummies
Now, pop those filled molds into the refrigerator. Allow them to chill for at least four hours, or until they’re fully set.
A good test for doneness? They should easily pull away from the sides of the molds. If they’re still sticky, give them a little more time in the fridge.
Step 8: Store and Enjoy
Once your gummies are set, gently remove them from the molds. Store them in an airtight container in the fridge.
For the best texture and flavor, try to enjoy them within a week. But let’s be honest—these treat will likely disappear long before that!
Tips for Success
- Make sure to whisk continuously while adding the gelatin to avoid lumps.
- Don’t skip the cooling step; it keeps your gummy molds in shape!
- Experiment with flavors by adding different fruit purees for a unique twist.
- Label your storage container to keep track of that delicious peach goodness.
- Enjoy responsibly—these gummies pack a flavorful punch!
Equipment Needed
- Medium saucepan: Essential for heating the mixture. Any good pot will do!
- Gummy mold: Though a silicone mold is ideal, you can use plastic molds or even ice cube trays in a pinch.
- Whisk: A sturdy whisk for mixing. A fork can also work if you’re in a bind.
- Dropper: Handy for filling molds precisely. A ladle can also do the trick!
- Airtight container: To store your gummies and keep them fresh.
Variations
- Tropical Twist: Swap the peach vodka for coconut or pineapple-flavored vodka for a beachy vibe.
- Berry Boost: Use raspberry or strawberry gelatin in place of peach for a berry-flavored gummy.
- Non-Alcoholic Option: Replace the vodka with a mix of peach juice and soda water for a refreshing treat.
- Vegan Gummies: Use agar-agar instead of gelatin for a plant-based version of these gummies.
- Spicy Spin: Add a dash of cayenne pepper or a splash of jalapeño juice for a surprising heat in your gummies!
Serving Suggestions
- Pair your Drunken Peach Ring Vodka Gummies with refreshing lemonade or a peach spritzer for a delightful drink combo.
- Serve on a rustic wooden platter for a charming presentation at parties.
- For added flair, dust the gummies with a little extra sugar right before serving.
- Consider garnishing with fresh peach slices for a colorful touch.
FAQs about Drunken Peach Ring Vodka Gummies
Got questions about these delightful Drunken Peach Ring Vodka Gummies? Don’t worry; I’ve got you covered! Here are some common inquiries and answers to make your gummy-making adventure smooth and enjoyable.
Can I make these gummies without alcohol?
Absolutely! To whip up a non-alcoholic version, simply replace the peach-flavored vodka with a combination of extra water and peach juice. You’ll still get that delicious fruity flavor without the booze!
How do I store my gummies for maximum freshness?
For the best texture, store your gummies in an airtight container in the fridge. They should stay fresh for about a week, but let’s be honest—they might not last that long!
Can I use other fruit flavors?
Of course! Feel free to experiment with different flavored vodkas and gelatin. Strawberry, lemon, or even mixed berry flavors can create fantastic twists on these gummies.
Can I double or halve the recipe?
Yes, you can easily adjust the recipe based on your needs! Just keep the ratios of ingredients consistent to maintain the gummies’ texture and flavor.
What should I do if my gummies won’t come out of the mold?
If you encounter sticky gummies, try gently twisting the mold or running warm water over the outside for a few seconds. Patience is key, so take it slow!
Final Thoughts
Making Drunken Peach Ring Vodka Gummies is more than just kitchen fun; it’s a delightful experience that brings joy and laughter to any gathering. The thrill of watching your loved ones savor each chewy, peachy bite is truly heartwarming. As you experiment with flavors and share them with friends, you create sweet memories that linger long after the last gummy is gone. Whether it’s a casual get-together or a lively party, these gummies are sure to add a splash of color and excitement. Get ready to spread smiles and savor the sweetness of life, one gummy at a time!
Print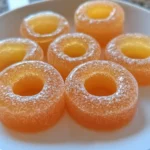
Drunken Peach Ring Vodka Gummies
- Total Time: 4 hours 25 minutes
- Yield: Approximately 20 gummies 1x
- Diet: Vegan
Description
Delicious and boozy Drunken Peach Ring Vodka Gummies that are perfect for parties and gatherings.
Ingredients
- 1 cup peach-flavored vodka
- 1 cup water
- 1 package (3 oz) peach gelatin
- 2 packages (3 oz each) unflavored gelatin
- 1/4 cup granulated sugar
- 1/4 cup corn syrup
- 1/4 cup fresh peach puree (optional)
- 1/4 teaspoon salt
- Cooking spray or oil for greasing the mold
Instructions
- Prepare a gummy candy mold by lightly greasing it with cooking spray or oil to prevent sticking.
- In a medium saucepan, combine the peach-flavored vodka and water. Heat the mixture over medium heat until it is warm but not boiling.
- Gradually whisk in the peach gelatin and unflavored gelatin until completely dissolved. Ensure there are no lumps in the mixture.
- Add the granulated sugar, corn syrup, fresh peach puree (if using), and salt to the saucepan. Stir continuously until the mixture is well combined and the sugar has dissolved.
- Remove the saucepan from heat and allow the mixture to cool for a few minutes.
- Carefully pour the gummy mixture into the prepared molds, filling each cavity equally. Use a dropper for precision if necessary.
- Refrigerate the molds for at least 4 hours or until the gummies are fully set.
- Once set, remove the gummies from the molds and store them in an airtight container in the refrigerator until ready to serve.
Notes
- This recipe is best enjoyed responsibly due to the alcohol content.
- Feel free to adjust the sweetness to taste by modifying the sugar amount.
- For a non-alcoholic version, you can replace the vodka with extra water and peach juice for a fruity treat.
- Prep Time: 15 minutes
- Cook Time: 10 minutes
- Category: Dessert
- Method: Refrigeration
- Cuisine: American
Nutrition
- Serving Size: 2 gummies
- Calories: 50
- Sugar: 5g
- Sodium: 10mg
- Fat: 0g
- Saturated Fat: 0g
- Unsaturated Fat: 0g
- Trans Fat: 0g
- Carbohydrates: 12g
- Fiber: 0g
- Protein: 1g
- Cholesterol: 0mg