Floating Ghost Sensory Jar

First, let me just say — thank you for being here. Whether you’re a parent, teacher, or just a Halloween lover like me, I’m so happy you’re crafting with intention and heart. These Floating Ghost Sensory Jars are proof that simple materials and a little imagination can create true magic.
They’re peaceful, sparkly, and just spooky enough — making them perfect for sensory play, calming jars, party favors, or a hands-on activity for the classroom or home.
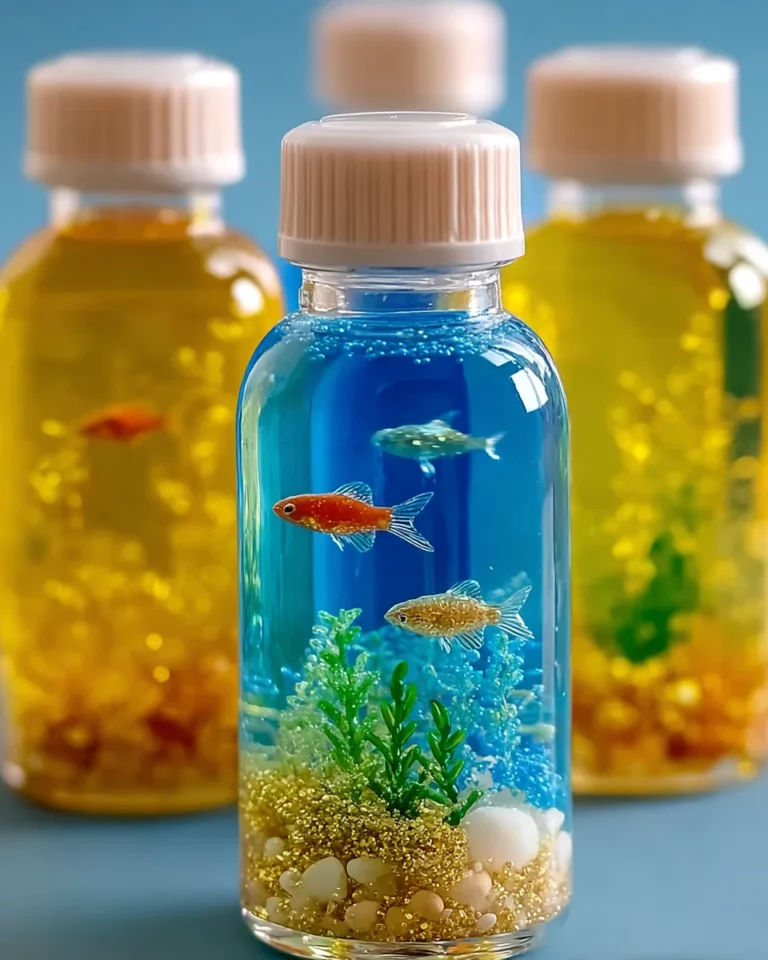
A Floating Ghost Sensory Jar is a clear container filled with swirling glitter, drifting ghost cutouts, and optional spooky color. It’s a mesmerizing mix of sensory calm and Halloween fun — easy to make, soothing to shake, and delightful to watch.
Perfect for kids of all ages, this jar offers visual stimulation, encourages mindfulness, and makes for a beautiful homemade Halloween decoration.
Supplies
You’ll need just a few basic items — many of which you probably already have!
- 1 clear plastic bottle or jar with a tight-fitting lid
- 1/2 cup clear glue or glitter glue
- 1 1/2 cups warm water
- White or iridescent glitter ✨
- Tiny ghost cutouts (foam pieces, sequins, or laminated paper shapes) 👻
- Optional: A drop or two of black or glow-in-the-dark food coloring
- Super glue or hot glue gun (to seal the lid securely)
Instructions
- Add warm water to the jar until it’s about halfway full.
- Mix in glue. Pour in your clear or glitter glue and stir until fully combined. This is what gives the ghosts that dreamy, slow-motion float!
- Add shimmer. Sprinkle in white or iridescent glitter for a ghostly sparkle effect.
- Drop in your ghosts. Gently place the foam or laminated ghosts into the mixture. They should move freely and not sink too fast.
- (Optional): Add a drop of black or glow food coloring to deepen the eerie vibe.
- Top it off. Fill the rest of the jar with water, leaving a little air at the top to allow swirling.
- Seal it shut. Use hot glue or super glue around the lid to make sure it’s spill-proof and child-safe.
- Shake gently and watch. The ghosts swirl, float, and haunt your jar in the most delightful way.
Notes
- Use plastic jars or bottles for younger kids for safety.
- Laminated paper ghosts are great because they’re lightweight but durable.
- If your ghosts clump together, try cutting them smaller or using fewer.
- Want more movement? Add a drop of baby oil to slow down the glitter swirl.
Helpful Tips
- Let your child help pick glitter colors and ghost shapes — creative ownership makes it extra special.
- Add glow-in-the-dark elements or stickers for nighttime fun.
- Use a strong adhesive if gifting or sending to school — nobody wants a glitter spill!
Conservation and Storage
- Storage: Keep the jar upright at room temperature.
- Avoid direct sun: This can cause cloudiness or damage paper ghosts over time.
- Lifespan: With a well-sealed lid, these jars last months or even years!
- Travel-ready: Great for calming kits or busy bags.
Substitutions and Variations
- Theme swap: Make a snowstorm jar (snowflakes + silver glitter) or ocean jar (blue water + fish sequins).
- Color swap: Pink ghosts? Why not! Purple glitter? YES.
- Different shapes: Try bats, pumpkins, or stars for different seasons.
- Liquid swap: Use clear hair gel + water for a thicker texture.
Storage Instructions
- Keep out of direct sunlight.
- Store upright to prevent leaks.
- If separation occurs over time, simply give it a shake.
- Re-glue lid as needed over time to ensure it’s still sealed securely.
Frequently Asked Questions
Can I use regular white glue?
You can, but it may create a cloudy look. Clear or glitter glue is best for maximum sparkle and transparency.
Are these safe for toddlers?
Yes — just make sure to use plastic containers and seal the lid tightly with hot glue or super glue.
Can I use this for classroom sensory time?
Absolutely! These jars are fantastic for classrooms, sensory bins, calming corners, or seasonal crafts.
My ghosts sank! What can I do?
Try using lighter materials (like foam or laminated cardstock), and make sure your ghosts aren’t too large.
Conclusion
These Floating Ghost Sensory Jars are a beautiful, budget-friendly way to celebrate spooky season while creating something peaceful and interactive. Whether you’re calming down, setting the Halloween vibe, or just spending quality time with kids, this DIY will float right into your heart.
👻 Want more crafty ideas like this one? Check out these DIY sensory and seasonal activities:
- 🎃 [Pumpkin Spice Play Dough – Link Recipe 1]
- 🌕 [Glow-in-the-Dark Moon Sand – Link Recipe 2]
- 💫 [Starlight Calming Bottle – Link Recipe 3]
Made your own ghost jar? I’d LOVE to see it!
📸 Tag me on Pinterest or share your photos in the comments — and don’t forget to leave a review or tip if you added your own twist!