Fruity Pebbles Cheesecake Tacos: A Fun Dessert Delight!
Introduction to Fruity Pebbles Cheesecake Tacos
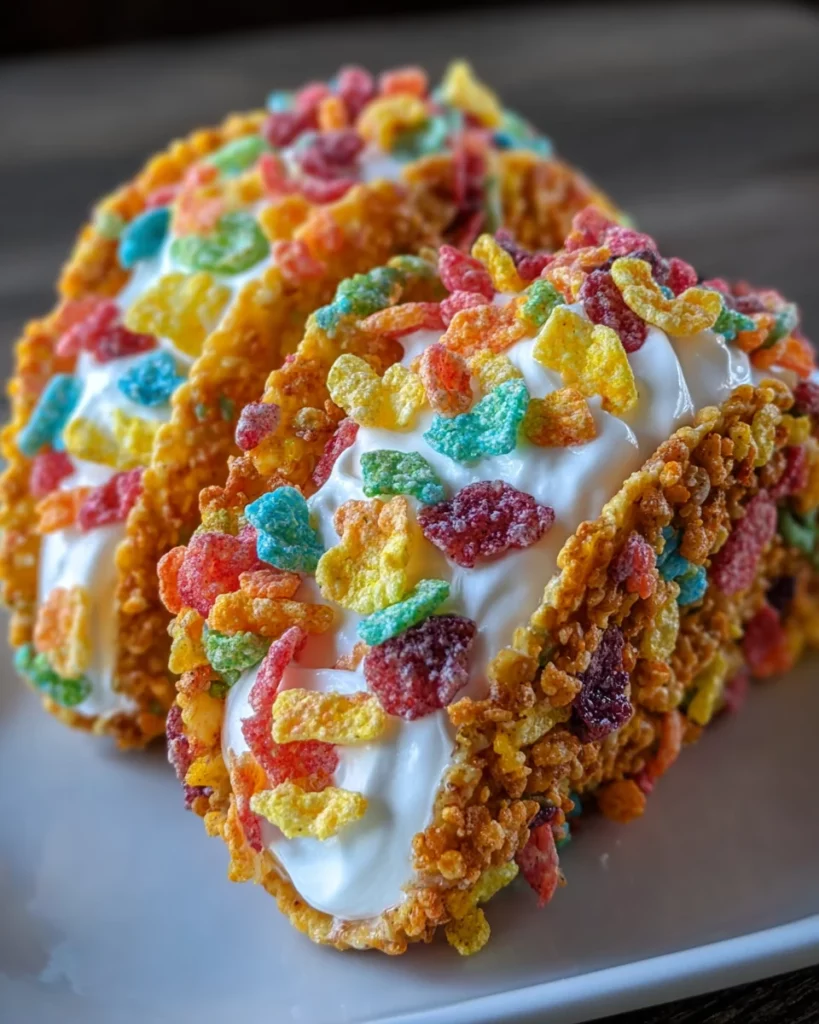
When life gets busy, it’s nice to have a little fun in the kitchen, right? That’s where my Fruity Pebbles Cheesecake Tacos come in! These delightful treats combine the beloved crunch of childhood cereal with the creamy indulgence of cheesecake, all wrapped up in a charming taco shape. They’re perfect for surprising your family on a hectic weeknight or impressing guests at a casual gathering. Trust me, these colorful tacos are a conversation starter—and a delicious way to satisfy that sweet tooth while keeping it quick and simple!
Why You’ll Love This Fruity Pebbles Cheesecake Tacos
Let’s face it: life can be hectic, and we often find ourselves racing against the clock. Fruity Pebbles Cheesecake Tacos are not only easy to whip up, but they also pack a punch of flavor and fun. With no baking required, these delightful tacos come together in a snap. Plus, their vibrant colors bring joy to the table, making them perfect for any occasion—whether it’s a festive party or an everyday treat!
Ingredients for Fruity Pebbles Cheesecake Tacos
Ready to create a dessert that marries nostalgia with indulgence? Here’s what you’ll need for your Fruity Pebbles Cheesecake Tacos:
- Fruity Pebbles cereal: This is the star of the show, bringing that delightful crunch and colorful flair.
- Unsalted butter: It helps bind the cereal together for those taco-shaped shells, adding richness and flavor.
- Cream cheese: A must-have for any cheesecake! It provides the creamy, luscious filling we all crave.
- Powdered sugar: This sweetens the cream cheese and adds that lovely smooth texture.
- Pure vanilla extract: Just a hint elevates the cheesecake filling, giving it warmth and depth.
- Whipped cream: Lightens up the filling, creating a fluffy and airy cheesecake experience.
- Additional Fruity Pebbles cereal: Use this for garnishing—because who can resist that pop of color and flavor?
If you want to get creative, consider using flavored whipped cream for an unexpected twist! As for the quantities of each ingredient, don’t worry—they’re listed at the bottom of the article for easy printing. Just gather your goodies and get ready for a fun kitchen adventure!
How to Make Fruity Pebbles Cheesecake Tacos
Let’s get down to the delicious details! Making these Fruity Pebbles Cheesecake Tacos is as fun as eating them. Follow these simple steps, and you’ll have a sweet treat ready in no time. Ready? Let’s dive in!
Step 1: Prepare the Taco Shells
Start by preheating your oven to 350°F.
In a large mixing bowl, combine Fruity Pebbles cereal with melted unsalted butter, stirring until every colorful piece is coated. The butter acts like glue, bringing that lovely crunch together.
Next, pack the mixture firmly into taco-shaped molds or even muffin tins. It’s essential to press them tightly, so they hold their shape. Once you’ve shaped them, pop them in the refrigerator for about 30 minutes. This will help them firm up nicely.
Step 2: Make the Cheesecake Filling
While the taco shells chill, let’s whip up that creamy filling! In a separate bowl, use a hand mixer to beat your cream cheese until it’s light and fluffy. This is the base of your cheesecake.
Gradually add sifted powdered sugar and a splash of pure vanilla extract, mixing until everything’s smooth and unified. Your kitchen will smell divine right about now!
Finally, gently fold in a cup of whipped cream using a spatula. Be careful not to overmix; you want to keep that airy, light texture that makes cheesecake so enjoyable.
Step 3: Assemble Your Tacos
Once your cereal taco shells are ready, it’s time to fill them up! Spoon the cheesecake mixture generously into each shell. Be creative and make sure to fill ‘em good!
Don’t forget to top your tacos with some more Fruity Pebbles cereal. This little touch not only adds crunch but makes them look irresistibly cheerful!
Step 4: Chill (If Desired)
If you can’t wait to indulge, serve your Fruity Pebbles Cheesecake Tacos immediately for a softer texture. But if you prefer a firmer bite, let them chill in the refrigerator for another hour.
Either way, your dessert will surely be a hit! Now, get ready for compliments as your family digs in.
Tips for Success
- Ensure you pack the cereal mixture tightly into the molds to maintain shape.
- Soften cream cheese properly for easier mixing and a smoother filling.
- For a sweeter flavor, feel free to adjust the powdered sugar to your taste.
- Use colorful sprinkles on top for an extra festive touch!
- Make the taco shells ahead of time and fill them just before serving for the best texture.
Equipment Needed
- Taco-shaped molds or muffin tins (you can also use cupcake liners if needed)
- Mixing bowls (any size will do, as long as it fits your mixing needs)
- Hand mixer (a whisk works too, but be prepared for a workout!)
- Spatula for folding in whipped cream
- Refrigerator for chilling the taco shells
Variations of Fruity Pebbles Cheesecake Tacos
- Chocolate Drizzle: Add a decadent touch by drizzling melted chocolate over the filled tacos for a rich flavor contrast.
- Fruit Additions: Incorporate diced strawberries, bananas, or even blueberries into the cheesecake filling for a fruity surprise!
- Gluten-Free Option: Swap out the regular Fruity Pebbles for a gluten-free version to accommodate dietary needs.
- Vegan Alternative: Use dairy-free cream cheese and a plant-based whipped cream substitute to create a vegan-friendly treat.
- Nutella Filling: Introduce a layer of Nutella beneath the cheesecake filling for an extra chocolatey delight that kids and adults will love!
Serving Suggestions for Fruity Pebbles Cheesecake Tacos
- Pair these delightful tacos with a scoop of vanilla ice cream for an extra creamy treat.
- Serve alongside fresh fruit salad to balance the sweetness.
- For a festive touch, sprinkle some extra Fruity Pebbles on the plate for decoration.
- Offer a chilled glass of milk or a fruity punch to complement the dessert.
- Present tacos on colorful platters for a vibrant table display!
FAQs about Fruity Pebbles Cheesecake Tacos
Can I make Fruity Pebbles Cheesecake Tacos in advance?
Absolutely! You can prepare the taco shells a day ahead and fill them just before serving. This keeps them fresh and crispy, ensuring the best texture for your dessert.
What can I substitute for cream cheese?
If you’re looking for a dairy-free option, try using vegan cream cheese instead! It offers a similar texture and can still be whipped to a fluffy consistency.
How long can I store these tacos?
Store filled tacos in an airtight container in the fridge for up to two days. However, for optimal freshness, it’s recommended to fill them just before serving.
Is this recipe suitable for kids?
<pDefinitely! With their colorful and fun appearance, these Fruity Pebbles Cheesecake Tacos are sure to be a hit with kids. Plus, they can even help assemble them!
Can I use other cereals instead of Fruity Pebbles?
<pYes, feel free to get creative! Other colorful cereals can work well too, though you’ll want to choose those that offer a similar crunch and sweetness.
Final Thoughts
Creating Fruity Pebbles Cheesecake Tacos is more than just making a dessert; it’s about bringing joy to the everyday hustle. The vibrant colors and delightful crunch transport me back to carefree childhood days while tasting indulgently creamy. Whether you’re entertaining guests or sharing a fun treat with your family, these tacos spark laughter and shared moments. I can’t recommend them enough! The smiles they bring are truly priceless, proving that cooking can be simple, fun, and utterly satisfying. So, gather your ingredients and experience the pure happiness that these delightful tacos can deliver!
Print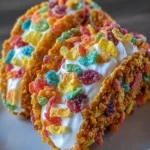
Fruity Pebbles Cheesecake Tacos
- Total Time: 50 minutes
- Yield: 12 tacos 1x
- Diet: Vegetarian
Description
Fruity Pebbles Cheesecake Tacos are a fun and delicious dessert that combines the nostalgic flavor of Fruity Pebbles cereal with a creamy cheesecake filling, all served in a taco-shaped shell made from the cereal.
Ingredients
- 3 cups Fruity Pebbles cereal
- 1/2 cup unsalted butter, melted
- 8 ounces cream cheese, softened
- 1/2 cup powdered sugar, sifted
- 1 teaspoon pure vanilla extract
- 1 cup whipped cream
- Additional Fruity Pebbles cereal for garnish
Instructions
- Combine Fruity Pebbles cereal and melted butter in a large mixing bowl. Stir thoroughly to evenly coat all cereal pieces.
- Press the coated cereal mixture firmly into small taco-shaped molds or muffin tins, compacting tightly. Refrigerate molds for at least 30 minutes to set.
- Using a hand mixer, beat cream cheese until light and fluffy. Gradually incorporate powdered sugar and vanilla extract, blending until smooth and homogenous.
- Gently fold whipped cream into the cream cheese mixture with a spatula, maintaining a light and airy texture.
- Once cereal shells are firm, generously spoon cheesecake filling into each shell. Top with additional Fruity Pebbles cereal as garnish.
- Serve immediately for a soft texture, or refrigerate filled tacos for an additional hour for a firmer bite.
Notes
- For a sweeter touch, add more powdered sugar to the cream cheese mixture.
- Using flavored whipped cream can enhance the overall taste.
- These tacos can be made ahead of time, storing the shells separately until ready to serve.
- Prep Time: 20 minutes
- Cook Time: 30 minutes (including refrigeration)
- Category: Dessert
- Method: No-bake
- Cuisine: American
Nutrition
- Serving Size: 1 taco
- Calories: 180
- Sugar: 10g
- Sodium: 150mg
- Fat: 10g
- Saturated Fat: 6g
- Unsaturated Fat: 2g
- Trans Fat: 0g
- Carbohydrates: 17g
- Fiber: 0g
- Protein: 2g
- Cholesterol: 30mg

