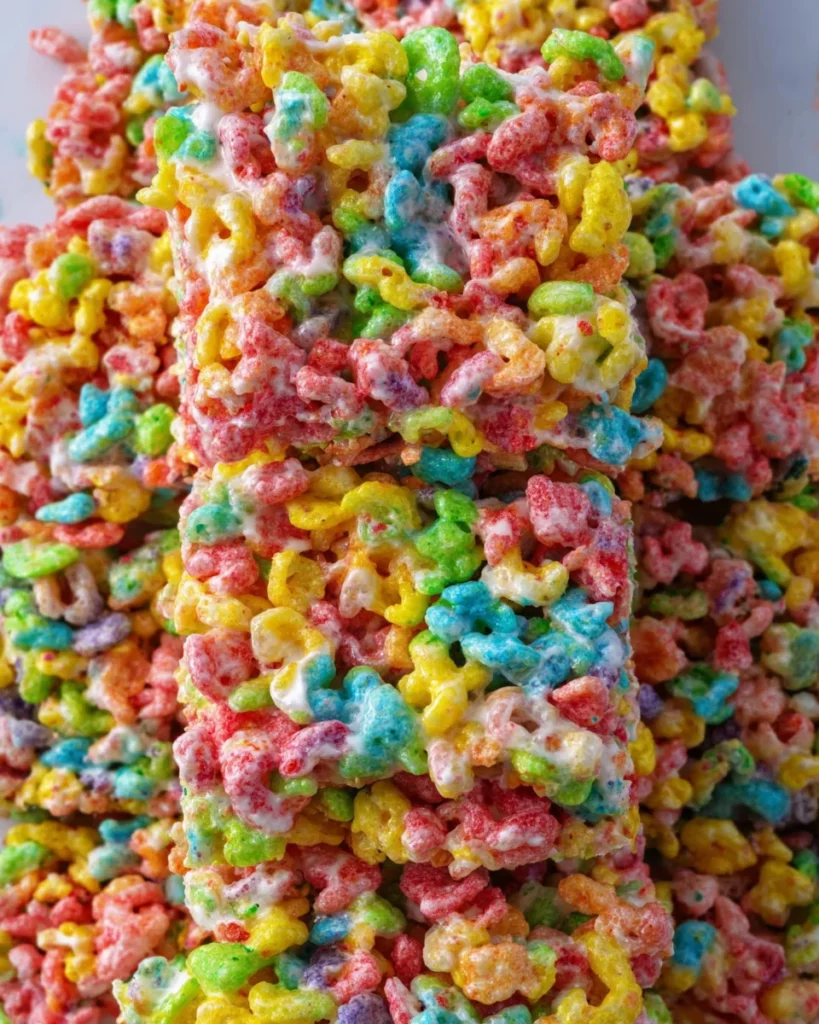
Fruity Pebbles Treats are the perfect quick dessert!

Introduction to Fruity Pebbles Treats
Oh, the joy of quick desserts! As a busy mom, I know how hectic life can get. Sometimes, you need something sweet that brings a smile without taking all your precious time. Enter the delightful Fruity Pebbles Treats! These treats are not just eye-catching with their colorful flair; they’re also incredibly simple to whip up, making them perfect for those moments when your family’s craving a sweet snack. With a mix of childhood nostalgia and a modern twist, Fruity Pebbles Treats are a fun way to indulge while creating memories in the kitchen.
Why You’ll Love This Fruity Pebbles Treats
Fruity Pebbles Treats are a hit in my house, and I’m sure they’ll be in yours too! These treats are incredibly quick to make, requiring just a handful of ingredients and minimal time. They bring a delightful crunch with every bite and the sweetness is simply divine. Plus, they’re perfect for keeping the kids entertained while you breeze through your busy day. Who can resist that colorful goodness?
Ingredients for Fruity Pebbles Treats
Gathering the right ingredients for Fruity Pebbles Treats is half the fun! The core ingredients are simple and easy to find.
- Butter: This creamy goodness melts down to bind everything together. You can use salted or unsalted, depending on your flavor preference.
- Miniature marshmallows: These little puffs are the heart of the treat, providing that deliciously sweet and gooey texture we all love.
- Fruity Pebbles cereal: The star of the show! Their vibrant colors and fruity flavor make the treats sparkle with joy!
For a twist, you can add a pinch of salt to enhance the sweetness. If you’re feeling adventurous, swap out the Fruity Pebbles cereal for another fruity cereal of your choice!
All ingredient measurements are listed at the bottom of the article, so you can easily print the recipe for your next vibrant treat-making session!
How to Make Fruity Pebbles Treats
Step 1: Prepare the Baking Pan
Getting your baking pan ready is the first step in making these Fruity Pebbles Treats. I use a 9×13 pan for the perfect thickness. Simply rub some butter on the bottom and sides. You can even use a stick of butter directly to make it easy! This layer of butter not only keeps the treats from sticking but also adds flavor. Trust me, you want that buttery goodness!
Step 2: Melt the Butter and Marshmallows
In a large pan, melt your butter over medium heat. As the butter starts to foam, add in the miniature marshmallows. Keep stirring until you see that gooey, delightful mixture come together. It’s all about patience here, so don’t rush this step. The ideal texture is smooth and creamy. I always get excited watching those marshmallows transform!
Step 3: Combine Cereal
Once your marshmallows and butter are all melted together, it’s time to add the Fruity Pebbles cereal. Carefully pour the cereal into the pan over the melted mixture. Then, quickly stir it all together. The key here is to combine without crushing the cereal. You want it crunchy and colorful, not mushy. The vibrant colors just make the whole process feel cheerful!
Step 4: Pack the Mixture into the Pan
Now, pour that delightful mixture into your prepped pan. To evenly spread it out, I dampen the flat of my fingers with cool water before pressing down. This helps prevent sticking. Gently pack the mixture into the corners, making sure it’s even throughout. The tighter you pack it, the better the treats will hold together when cut into squares!
Step 5: Let it Set
Patience is key at this stage! Allow your Fruity Pebbles Treats to sit for at least 30 minutes before diving in. This time lets them firm up beautifully. If you cut them too soon, they might fall apart. I recommend finding a cozy spot to sit and admire your colorful creation as it cools. Trust me, it’s worth the wait!
Tips for Success
- Be sure to use fresh marshmallows for the best texture.
- Gently pack the mixture into the pan to prevent crumbling.
- For even easier cleanup, line your pan with parchment paper.
- To make cutting simpler, use a sharp knife dipped in water.
- Try adding sprinkles on top for extra flair before letting it set!
Equipment Needed for Fruity Pebbles Treats
- 9×13 Baking Pan: A great size for even treats. Alternatively, use two smaller pans if you don’t have one.
- Large Mixing Pan: To melt your butter and marshmallows. A heavy-bottomed pan works best.
- Spatula: For mixing everything together. A wooden spoon also does the trick!
- Butter Wrapper: Keep it handy to grease the pan easily.
Variations on Fruity Pebbles Treats
- Chocolate Drizzle: Melt some chocolate and drizzle it over the top for a rich, decadent touch.
- Nutty Crunch: Add chopped nuts for a delightful crunch. Try walnuts or almonds for extra texture!
- Colorful M&Ms: Mix in some colorful M&Ms to add more sweetness and fun to your treats!
- Dairy-Free Option: Substitute butter with coconut oil and use dairy-free marshmallows for a lactose-free version.
- Gluten-Free Version: Ensure your Fruity Pebbles are gluten-free, and you’re all set for a safe treat!
- Fruity Pebbles Ice Cream Sandwiches: Scoop some ice cream between two squares of your treats for a delightful frozen dessert!
Serving Suggestions for Fruity Pebbles Treats
- Milk: Serve these treats with a cold glass of milk for a nostalgic pairing.
- Fruit Salad: A bright, fresh fruit salad complements the sweetness perfectly.
- Presentation: Cut treats into fun shapes using cookie cutters for a playful touch.
- Fun Plates: Use colorful, child-friendly plates to add to the festive vibe.
- Birthday Parties: These treats make a great addition to kids’ birthday party tables!
FAQs about Fruity Pebbles Treats
Can I make Fruity Pebbles Treats ahead of time?
Absolutely! You can prepare these treats a day in advance. Just store them in an airtight container. They stay fresh for up to a week, but I bet they won’t last that long!
Can I substitute Fruity Pebbles with another cereal?
Yes, definitely! While Fruity Pebbles give these treats their vibrancy, you can swap them with other fruity cereals or even your favorite options. The texture and taste might change, but that’s part of the fun!
Are Fruity Pebbles Treats suitable for a gluten-free diet?
Yes, as long as you choose certified gluten-free Fruity Pebbles. This way, you can enjoy a sweet treat without worrying about gluten.
What’s the best way to store any leftovers?
Store your Fruity Pebbles Treats in an airtight container at room temperature. Avoid refrigeration, as it can make them tough and chewy. Enjoy them fresh for the best texture!
Can I add food coloring to the mixture for even more color?
For sure! If you’re feeling adventurous, add a few drops of food coloring when melting the marshmallows to amp up the fun factor. Just remember, a little goes a long way!
Final Thoughts
Creating Fruity Pebbles Treats has been a delightful journey filled with color, fun, and sweet memories. I love how this recipe not only satisfies my family’s sweet tooth but also sparks joy with its vibrant hues. It’s a simple treat that brings everyone together, whether we’re indulging after a long day or celebrating a special moment. Sharing these treats is like sharing little bursts of happiness. So gather your loved ones, whip up a batch, and enjoy the giggles and smiles that come with every gooey, colorful bite. Trust me, you’ll cherish these moments forever!
Print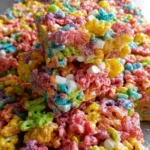
Fruity Pebbles Treats
- Total Time: 45 minutes
- Yield: 12 servings 1x
- Diet: Vegetarian
Description
Fruity Pebbles Treats are a delightful, colorful dessert that combines the fun of cereal with the sweetness of marshmallows and butter.
Ingredients
- 7 tablespoons butter
- 10 ounces miniature marshmallows
- 8 cups Fruity Pebbles cereal
Instructions
- Prepare a 9×13 pan by rubbing the bottom and sides with butter. This can be easily done by using one end of a stick of butter. Set aside.
- Melt butter in a large pan over medium heat. Add marshmallows, stirring until melted.
- Remove the pan from the heat and immediately pour the cereal into the pan on top of the melted marshmallows. Stir as quickly as possible until well combined.
- Pour the mixture into the prepared pan. Dampen the flat of your fingers with cool water and use these to evenly spread the mixture into the pan, packing it down.
- Let the treats sit for at least 30 minutes before cutting into squares.
Notes
- For added flavor, consider adding a pinch of salt.
- You can substitute fruity cereal with other types if desired.
- These treats are best enjoyed fresh but can be stored in an airtight container for up to a week.
- Prep Time: 10 minutes
- Cook Time: 5 minutes
- Category: Dessert
- Method: No-Bake
- Cuisine: American
Nutrition
- Serving Size: 1 square
- Calories: 150
- Sugar: 10g
- Sodium: 70mg
- Fat: 6g
- Saturated Fat: 4g
- Unsaturated Fat: 2g
- Trans Fat: 0g
- Carbohydrates: 23g
- Fiber: 0g
- Protein: 1g
- Cholesterol: 15mg