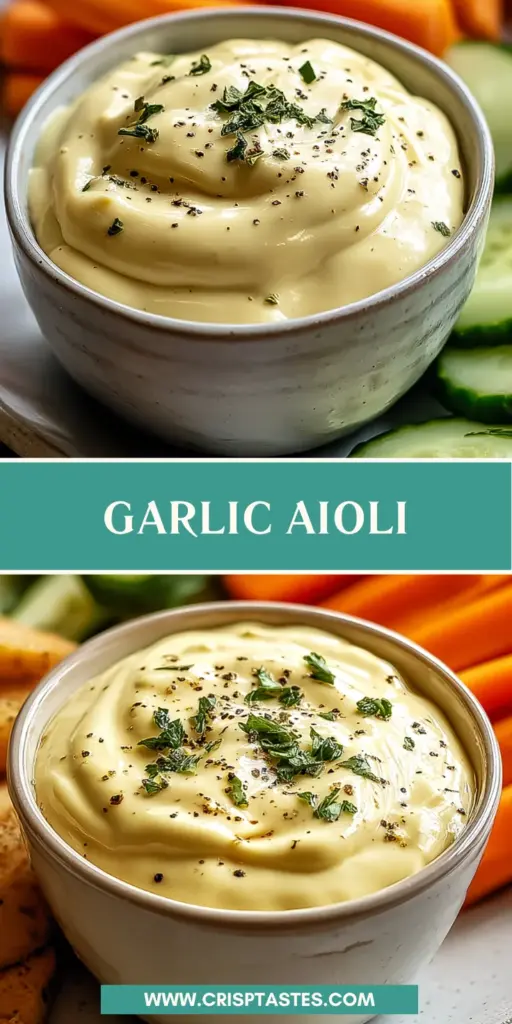
Garlic Aioli: Discover the Secret to Creamy Perfection!

Introduction to Garlic Aioli
As a busy home cook, I know all too well the joy of discovering a simple recipe that can elevate everyday meals. Garlic Aioli is just that! This creamy dip not only adds a burst of flavor but also transforms ordinary dishes into something extraordinary. If you’re juggling family meals, entertaining guests, or just craving a tasty addition to your favorite snacks, this Garlic Aioli will become your secret weapon in the kitchen. Trust me; it’s easier than you think and oh-so-delicious!
Why You’ll Love This Garlic Aioli
This Garlic Aioli is a lifesaver for busy moms and professionals alike! It’s incredibly easy to whip up, taking just 10 minutes of your time. Plus, it’s versatile—perfect for dipping veggies, slathering on sandwiches, or even drizzling over grilled meats. With fresh garlic and tangy lemon, the flavor is a game-changer for any dish. Once you try it, you’ll wonder how you ever cooked without it!
Ingredients for Garlic Aioli
Creating the perfect Garlic Aioli starts with a few simple yet impactful ingredients. First up is mayonnaise, the creamy backbone of this dip, which you can make at home for an extra fresh touch. Next, you’ll need fresh garlic, the star of the show, bringing that bold flavor. Then, fresh lemon juice adds a zesty brightness to balance the richness. Extra virgin olive oil is essential for its deep flavor and smooth texture. Don’t forget salt and freshly ground black pepper for seasoning. If you’re feeling adventurous, fresh herbs like parsley or chives can elevate your aioli even more. Quantities are listed at the bottom for your convenience!
- 1 cup Mayonnaise – Opt for homemade for extra freshness.
- 2-3 cloves Fresh Garlic – Peeled and minced.
- 1-2 tablespoons Lemon Juice – Adjust to taste.
- 1/4 cup Olive Oil – Extra virgin preferred for flavor.
- to taste Salt – Adjust according to personal preference.
- to taste Black Pepper – Use freshly ground for best flavor.
- Fresh Herbs – Such as parsley or chives for added flavor (optional).
How to Make Garlic Aioli
Making Garlic Aioli is not only satisfying, but it’s easier than you can imagine. With just a few steps, you’ll have a dip that can wow your family and friends! Let’s dig into the process.
Step 1 – Prepare Your Garlic
Start by peeling 2-3 cloves of fresh garlic. The aroma alone is enough to get your taste buds dancing! I recommend using a sharp knife for this. Mince the garlic finely or use a garlic press if you want a smoother texture. If you love garlic like I do, feel free to add an extra clove or two!
Step 2 – Mix the Base Ingredients
In a small mixing bowl, it’s time to combine the main ingredients. Add 1 cup of mayonnaise, your freshly minced garlic, and 1-2 tablespoons of lemon juice for a zesty kick. Sprinkle in a pinch of salt and freshly cracked black pepper. The beauty of Garlic Aioli is that it’s very forgiving. You can adjust flavors as you go!
Step 3 – Create the Creaminess
Now, for the magic! While whisking the mixture, slowly drizzle in 1/4 cup of extra virgin olive oil. It’s during this step that the aioli transforms into a creamy delight! Whisk until it achieves a smooth, luxurious texture that makes you want to dive right in. Don’t be afraid to put a little elbow grease into it!
Step 4 – Taste and Adjust
This is my favorite part—taste testing! Grab a spoon and take a small sample of your Garlic Aioli. If it needs a little more zing, add more lemon juice. Want it saltier? Go ahead and sprinkle in a bit more salt or pepper. Remember, you’re making it for YOU, so make it exactly how you like it!
Step 5 – Enhance with Fresh Herbs
If you want to jazz things up, this is where you can shine. Gently fold in finely chopped fresh herbs like parsley or chives to bring an extra layer of flavor. It not only adds delightful taste, but the vibrant green color also makes the aioli look gorgeous! It’s basically a feast for the eyes too!
Step 6 – Chill Before Serving
Finally, transfer your Garlic Aioli into an airtight container. Let it chill in the refrigerator for at least 30 minutes. This step lets the flavors meld and develop into something truly divine! If you can wait, that’s even better, but I won’t judge if you dive in right away!
Tips for Success
- Always use fresh garlic for the best flavor—aged garlic can taste bitter.
- Adjust the lemon juice to suit your taste; it can brighten or overpower.
- For a thicker aioli, use less olive oil or switch to a thicker mayonnaise.
- Let the aioli sit longer in the fridge to enhance its flavors.
- Pair your aioli with fresh, crunchy veggies for a refreshing snack!
Equipment Needed
- Mixing bowl – A medium-sized bowl works wonders, but any bowl will do!
- Whisk – A handheld or electric whisk makes it easier to achieve that creamy texture.
- Sharp knife – For mincing the garlic; a garlic press is a handy alternative.
- Airtight container – This is crucial for chilling and storing your aioli safely.
Variations
- For a spicy twist, add a pinch of cayenne pepper or sriracha for some heat!
- Try roasted garlic instead of fresh for a sweeter, milder flavor.
- Substitute Greek yogurt for mayonnaise to lighten things up while keeping creaminess.
- Add a tablespoon of Dijon mustard for a tangy kick.
- Use avocado oil instead of olive oil for a different flavor and health benefits.
Serving Suggestions
- Serve Garlic Aioli as a dip with fresh, crunchy veggies like cucumbers and bell peppers.
- Spread it on toasted baguette slices for a delightful appetizer.
- Pair with grilled chicken or fish for an added flavor boost.
- Enjoy it with crispy fries or sweet potato wedges for a decadent treat.
FAQs about Garlic Aioli
Have questions about Garlic Aioli? You’re not alone! Here are some common queries I frequently encounter:
Can I use bottled mayonnaise? Absolutely! While homemade adds freshness, store-bought works just fine.
How long does Garlic Aioli last? It typically stays fresh in the fridge for about one week. Just be sure to store it in an airtight container!
Can I freeze Garlic Aioli? I don’t recommend it; the texture may change upon thawing.
What can I add for more flavor? You can try different herbs, spices, or even some grated cheese for an extra kick!
Final Thoughts
Cooking with Garlic Aioli is like adding a sprinkle of sunshine to your dish! The creamy texture and rich flavors can instantly elevate everything from a simple sandwich to a fancy grilled feast. Plus, it’s incredibly versatile—whether you’re hosting a gathering or just enjoying a quiet night with the family, this dip fits right in. Each batch comes together so quickly, leaving you more time to savor those delicious moments. You’ll find yourself reaching for this Garlic Aioli again and again, and trust me, your taste buds will rejoice every time!
Print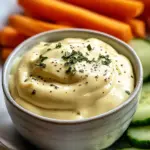
Garlic Aioli: Discover the Secret to Creamy Perfection!
- Total Time: 40 minutes
- Yield: 1 cup 1x
- Diet: Vegetarian
Description
Garlic Aioli is a creamy and flavorful dip that enhances any dish with its rich taste.
Ingredients
- 1 cup Mayonnaise – Opt for homemade for extra freshness.
- 2–3 cloves Fresh Garlic – Peeled and minced.
- 1–2 tablespoons Lemon Juice – Adjust to taste.
- 1/4 cup Olive Oil – Extra virgin preferred for flavor.
- to taste Salt – Adjust according to personal preference.
- to taste Black Pepper – Use freshly ground for best flavor.
- Fresh Herbs – Such as parsley or chives for added flavor (optional).
Instructions
- Start by peeling 2-3 cloves of fresh garlic, finely mince them using a sharp knife or a garlic press.
- In a small mixing bowl, combine 1 cup of mayonnaise with the minced garlic, 1-2 tablespoons of fresh lemon juice, and a pinch of salt and black pepper.
- While continuing to whisk, slowly drizzle in 1/4 cup of extra virgin olive oil until emulsified and creamy.
- Taste your Garlic Aioli and adjust seasoning with more salt, pepper, or lemon juice if necessary.
- If desired, enhance with finely chopped fresh herbs, gently folding them into the mix.
- Transfer the aioli into an airtight container and chill in the refrigerator for at least 30 minutes before serving.
Notes
- For a stronger garlic flavor, add more minced garlic.
- Can be served with vegetables, sandwiches, or as a dip.
- Prep Time: 10 minutes
- Cook Time: 0 minutes
- Category: Condiment
- Method: Mixing
- Cuisine: Mediterranean
Nutrition
- Serving Size: 1 tablespoon
- Calories: 73
- Sugar: 0.1g
- Sodium: 100mg
- Fat: 8g
- Saturated Fat: 1g
- Unsaturated Fat: 6g
- Trans Fat: 0g
- Carbohydrates: 1g
- Fiber: 0g
- Protein: 0g
- Cholesterol: 5mg