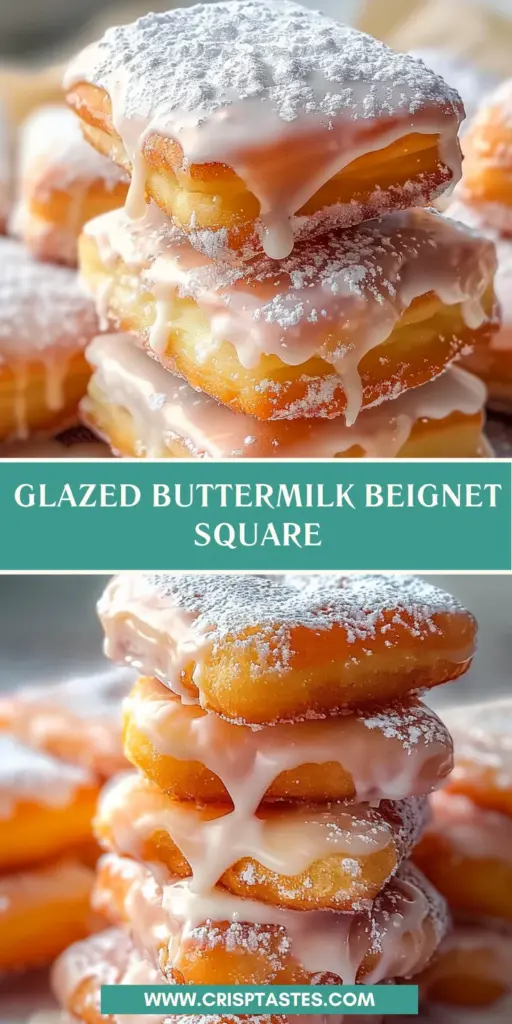
Glazed Buttermilk Beignet Square – A Bakery-Style Treat at Home

There’s something magical about biting into a warm, golden beignet square. That slight crunch when your teeth break through the delicate vanilla glaze… followed by a cloud-soft, pillowy center that practically melts in your mouth. It’s the kind of treat that feels nostalgic, cozy, and just a little indulgent — like a slow Sunday morning wrapped in sugar and warmth.
But here’s the best part: you don’t need a bakery storefront or a trip to New Orleans to enjoy them. You can make these thick, soft, bakery-style glazed buttermilk beignet squares right in your own kitchen.
Unlike traditional round donuts or airy French beignets covered in powdered sugar, these squares are slightly thicker, heartier, and glazed with a smooth vanilla coating that sets into a delicate sugary shell. They’re structured enough to hold their shape, yet tender enough to tear apart with your fingers.
And the secret ingredient? Buttermilk.
Buttermilk adds depth, tenderness, and just the right subtle tang that balances the sweetness of the glaze. It transforms what could be a simple fried dough into something rich, flavorful, and bakery-worthy.
Ready to turn simple pantry ingredients into golden, puffy perfection? Let’s dive in.
The Story Behind Beignets
Beignets have roots that trace back to France. The word “beignet” simply means “fritter” — a piece of fried dough. When French settlers brought their culinary traditions to Louisiana, especially New Orleans, beignets quickly became a staple.
Over time, they evolved. The classic New Orleans beignet is typically square, generously dusted in powdered sugar, and served hot with café au lait. They’re light, airy, and almost hollow inside.
But the beignet square we’re making today leans slightly toward the donut world. It’s thicker. Softer. More structured. And instead of being buried in powdered sugar, it’s finished with a silky vanilla glaze that sets beautifully.
Why squares? Practicality and tradition. Cutting dough into squares means:
- No scraps to re-roll
- Even cooking
- A rustic, homemade look
And honestly, there’s something charming about that simple geometric shape. No perfection needed. Just straight cuts and golden edges.
These glazed buttermilk beignet squares combine the best of both worlds: the cultural charm of a beignet and the comforting familiarity of a glazed donut.
Why Buttermilk Makes These Beignets Extra Special
Let’s talk about the hero ingredient: buttermilk.
You might wonder — does it really make a difference?
Absolutely.
Buttermilk does three powerful things in this dough:
- Tenderizes the crumb – Its natural acidity breaks down gluten just enough to create softness without making the dough weak.
- Adds subtle tang – That slight tang cuts through sweetness beautifully.
- Improves browning – The sugars and proteins encourage a rich golden color when fried.
Here’s a quick comparison:
| Ingredient Base | Texture Result | Flavor Profile |
|---|---|---|
| Regular Milk | Soft but neutral | Mild |
| Water-Based | Chewier | Very light |
| Buttermilk | Tender & pillowy | Rich with subtle tang |
Think of buttermilk as the difference between “good” and “why is this so unbelievably soft?”
It adds complexity without extra effort. No fancy steps. No complicated techniques. Just better flavor and texture from the start.
And when paired with the warm vanilla glaze? That tangy-sweet balance feels intentional — not overly sugary, not flat, just right.
Ingredients Breakdown: Simple Pantry Staples, Big Flavor
One of the best things about this recipe? Nothing complicated. Just real, simple ingredients doing their job beautifully.
For the Dough
- Warm buttermilk
- Active dry yeast
- Granulated sugar
- Egg
- Melted unsalted butter
- All-purpose flour
- Salt
Each one plays a role. Sugar feeds the yeast and lightly sweetens. Butter adds richness. Egg contributes structure and softness. Salt sharpens flavor.
For Frying
- Neutral oil like vegetable or canola
You want something with a high smoke point and no strong flavor.
For the Vanilla Glaze
- Powdered sugar
- Milk or cream
- Vanilla extract
- Pinch of salt
The glaze is simple but powerful. That pinch of salt? It keeps the sweetness from overwhelming your palate.
This is the kind of recipe that proves you don’t need exotic ingredients to create bakery-level magic.
Choosing the Right Flour for Soft, Pillowy Results
Flour might seem like the most basic ingredient in the bowl, but it quietly determines everything about your beignet squares — from how high they rise to how tender they feel when you tear one open. For this recipe, all-purpose flour is the sweet spot. Not bread flour. Not cake flour. Just dependable, balanced all-purpose flour.
Why? It comes down to protein content.
- Bread flour has higher protein (around 12–14%), which creates more gluten. That’s great for chewy artisan loaves, but here it would make your beignets slightly tough.
- Cake flour has lower protein (around 7–9%), which makes baked goods very soft, but too delicate for frying. The dough could become weak and absorb more oil.
- All-purpose flour sits comfortably in the middle (10–12%), giving you structure without sacrificing tenderness.
And here’s something most people overlook: how you measure flour matters just as much as which flour you use. If you scoop directly with the measuring cup, you’re likely packing in too much flour. Too much flour = dense beignets. Instead, fluff the flour in the bag, spoon it into your measuring cup, and level it off gently.
You’re aiming for a dough that feels soft and slightly tacky but not sticky. It should cling lightly to your fingers but release without leaving a mess behind. If it feels stiff, you’ve added too much flour. If it spreads like pancake batter, you need a touch more.
Think of the dough like a soft pillow — structured, but yielding. That’s the texture sweet spot.
Understanding Yeast: The Secret to Perfect Rise
Yeast is alive. Tiny, invisible organisms working behind the scenes to give you that airy, fluffy interior. Treat it right, and it rewards you with lift and softness. Ignore it, and your beignets turn dense.
Since this recipe uses active dry yeast, activation matters. When you whisk warm buttermilk with yeast and sugar, you’re waking it up. The liquid should feel warm but not hot — about 100–110°F (38–43°C). If it’s too hot, you’ll kill the yeast. Too cool, and it won’t activate properly.
Within 5–8 minutes, you should see:
- Foamy bubbles on the surface
- A slightly yeasty aroma
- Visible expansion
No foam? Your yeast may be expired, or the liquid temperature was off.
Sugar plays an important role here too. It gives yeast an immediate food source, encouraging faster activation. That’s why you don’t skip it in the blooming step.
Once mixed into the dough, yeast continues feeding on sugars and producing carbon dioxide. Those tiny gas bubbles stretch the dough, creating air pockets. When fried, those pockets expand further, giving you that beautiful puff and light interior.
Think of yeast as the quiet engine of your beignets. You don’t see it working — but without it, nothing rises.
Step-by-Step Guide to Making the Dough
Making the dough is less intimidating than it sounds. In fact, it’s one of those kitchen moments that feels grounding — mixing, kneading, watching simple ingredients come together.
After activating your yeast mixture, add the egg and melted butter. The egg brings richness and structure, while butter adds softness and flavor. Stir gently until combined. Then gradually incorporate the flour and salt.
Why gradually? Because dumping all the flour in at once makes it harder to control texture. You want to watch the dough transform.
As you mix, it will go through stages:
- Sticky and shaggy
- Slightly cohesive
- Soft and smooth
Knead for about 8–10 minutes. If kneading by hand, use the heel of your palm, pushing the dough forward, folding it back, and turning slightly. Repeat. It’s rhythmic, almost therapeutic.
You’ll know it’s ready when:
- It feels smooth
- It springs back lightly when pressed
- It forms a soft ball
Don’t aim for perfection. Aim for feel. The dough should be tender but elastic — like pressing into a soft cushion that gently pushes back.
This step builds gluten structure while keeping everything soft. And that balance? That’s what gives you bakery-style results.
The Importance of Proper Rising
Now comes the waiting game — but it’s worth every minute.
Place the dough in a lightly greased bowl, cover it, and let it rise in a warm place for about 1 to 1½ hours. You’re looking for it to double in size.
Why does this matter so much?
Because this rise develops:
- Airiness
- Flavor
- Structure
A warm environment (around 75–80°F) is ideal. Too cold, and it rises slowly. Too hot, and the yeast can overwork itself.
How do you know it’s ready? Gently press a finger into the dough. If the indentation stays and doesn’t spring back quickly, it’s perfectly proofed.
Underproofed dough results in dense interiors. Overproofed dough may collapse during frying.
This rise is like letting a story develop. You can’t rush it. The dough needs time to build character, flavor, and strength.
And when you uncover the bowl and see that soft, puffy mass doubled in size? That’s when you know magic is happening.
Rolling and Cutting: Getting That Thick Bakery Look
Once risen, gently punch down the dough — not aggressively, just enough to release excess air.
Turn it onto a lightly floured surface and roll it to about ½-inch thickness. This thickness is key. Too thin, and they’ll cook too quickly and lack that soft center. Too thick, and they may brown before cooking through.
Using a sharp knife or pizza cutter, slice into neat squares. The beauty of squares? No waste. No rerolling scraps. Every piece fries evenly.
Try to keep sizes uniform so they cook at the same rate. Roughly 2 to 3 inches per square works beautifully.
As you cut, you’ll notice the dough feels airy yet structured. That’s exactly what you want.
This step sets the stage for that iconic look — thick, golden edges with a pillowy middle.
Frying Like a Pro: Golden, Crisp, and Puffy
Frying can feel intimidating, but it doesn’t have to be.
Heat neutral oil to 340–350°F (170–175°C). Temperature control is everything. Too hot, and the outside browns before the inside cooks. Too cool, and the dough absorbs excess oil.
Use a thermometer if possible. It removes guesswork.
Fry in small batches. Overcrowding lowers oil temperature and leads to uneven cooking.
Each beignet should:
- Puff up within seconds
- Turn golden in 2–3 minutes per side
- Float easily
Flip once for even browning.
When done, transfer to a wire rack — not paper towels. Paper traps steam underneath, softening that beautiful exterior. A rack keeps airflow circulating, preserving texture.
The aroma at this stage? Buttery, warm, slightly sweet. It fills the kitchen in the most comforting way.
The Vanilla Glaze: Smooth, Shiny, and Perfectly Sweet
The glaze is the finishing touch — simple yet transformative.
Whisk powdered sugar, milk or cream, vanilla extract, and a pinch of salt until smooth. The consistency should be thick but pourable. If it’s too thin, add more powdered sugar. Too thick? A splash of milk fixes it.
Dip or spoon glaze over the tops while the beignets are still warm. The heat helps the glaze spread and set into that signature shiny shell.
As it cools, it forms a delicate sugary crust — not hard like candy, but gently firm.
That contrast between soft interior and lightly crisp glaze? That’s the moment.
Texture and Flavor Profile: What to Expect
Take a bite.
First, a faint crackle from the glaze. Then your teeth sink into a tender, airy center. Slight tang from the buttermilk. Balanced sweetness from the vanilla glaze. A whisper of buttery richness lingering at the end.
They’re not overly sweet. Not heavy. Not greasy.
They’re comforting. Familiar. A little indulgent without being overwhelming.
Each bite feels like something you’d find in a cozy neighborhood bakery — the kind where the air smells like sugar and warmth.
Common Mistakes to Avoid
Even simple recipes have pitfalls. Here’s how to avoid them:
- Skipping yeast activation – Always check for foam.
- Overflouring the dough – Leads to dense texture.
- Wrong oil temperature – Causes greasiness or raw centers.
- Overcrowding the pan – Uneven cooking.
- Glazing cold beignets – The glaze won’t set properly.
Pay attention to texture and temperature, and you’ll avoid nearly every issue.
Storage and Reheating Tips
These are best fresh — no question. But if you have leftovers:
- Store at room temperature in an airtight container for 1–2 days.
- Reheat briefly in a 300°F oven for 5–7 minutes.
- Avoid microwaving too long — it can make them rubbery.
You can also freeze unglazed beignets and warm them later before glazing.
Fresh is best. But warm leftovers still feel like a treat.
Creative Variations to Try
Want to switch things up?
- Chocolate glaze instead of vanilla
- Citrus glaze with orange or lemon zest
- Maple glaze for cozy autumn vibes
- Fill with pastry cream or jam for surprise centers
The base dough is versatile. Once you master it, you can experiment freely.
Serving Suggestions for a Cozy Experience
Pair these beignet squares with:
- Freshly brewed coffee
- Café au lait
- Hot chocolate
- Chai latte
Serve them stacked on a platter, glaze shining under soft light. Perfect for brunch tables, holiday mornings, or quiet weekend breakfasts.
They’re the kind of treat that invites conversation — and second servings.
Nutritional Snapshot
| Component | Approximate Value (Per Beignet) |
|---|---|
| Calories | 220–260 |
| Carbohydrates | 32g |
| Fat | 10–12g |
| Sugar | 14g |
| Protein | 4g |
Portion mindfully — but also enjoy fully.
Conclusion
Glazed buttermilk beignet squares are more than just fried dough. They’re warm, golden comfort wrapped in a delicate vanilla shell. They bring together simple ingredients and transform them into something nostalgic and bakery-worthy.
Soft in the center. Lightly crisp outside. Sweet but balanced. Perfect with coffee. Perfect for sharing.
And once you make them from scratch, you’ll realize — homemade really does taste better.
FAQs
1. Can I use instant yeast instead of active dry yeast?
Yes. Skip the activation step and mix it directly with dry ingredients.
2. What if I don’t have buttermilk?
Mix ¾ cup milk with 2 teaspoons lemon juice or vinegar. Let sit 5 minutes.
3. Can I bake these instead of frying?
You can, but the texture will be more bread-like and less airy.
4. Why are my beignets greasy?
The oil temperature was likely too low. Maintain 340–350°F.
5. Can I make the dough ahead of time?
Yes. Refrigerate after kneading and let it come to room temperature before rolling.
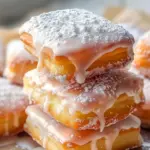
Glazed Buttermilk Beignet Square
Description
There’s something magical about biting into a warm, golden beignet square. That slight crunch when your teeth break through the delicate vanilla glaze… followed by a cloud-soft, pillowy center that practically melts in your mouth. It’s the kind of treat that feels nostalgic, cozy, and just a little indulgent — like a slow Sunday morning wrapped in sugar and warmth.
Ingredients
For the Dough
-
¾ cup warm buttermilk (not hot)
-
2¼ teaspoons active dry yeast (1 packet)
-
¼ cup granulated sugar
-
1 large egg
-
¼ cup unsalted butter, melted
-
3¼ cups all-purpose flour
-
¾ teaspoon salt
For Frying
-
Neutral oil (vegetable or canola), enough for deep frying
For the Vanilla Glaze
-
2 cups powdered sugar
-
3–4 tablespoons milk or cream
-
1 teaspoon vanilla extract
-
Pinch of salt
Instructions
In a large bowl, whisk together warm buttermilk, yeast, and sugar.
Let it sit for 5–8 minutes until foamy and bubbly.
Add the egg and melted butter. Mix well.
Gradually stir in flour and salt until a soft dough forms.
Knead for 8–10 minutes until smooth and slightly tacky but not sticky.
Place the dough in a lightly greased bowl. Cover and let rise in a warm place for 1–1½ hours, or until doubled in size.
Punch down the dough gently.
Roll it out to about ½-inch thickness.
Cut into even squares using a knife or pizza cutter.
Heat oil to 340–350°F (170–175°C).
Fry in batches for 2–3 minutes per side, until golden brown and puffed.
Transfer to a wire rack to drain (not paper towels).
Whisk powdered sugar, milk, vanilla, and salt until smooth and thick but pourable.
While beignets are still warm, dip or spoon glaze over the tops only.
Let sit 5–10 minutes until the glaze sets into a shiny shell.