Glazed Buttermilk Beignet Square

Introduction to Glazed Buttermilk Beignet Square
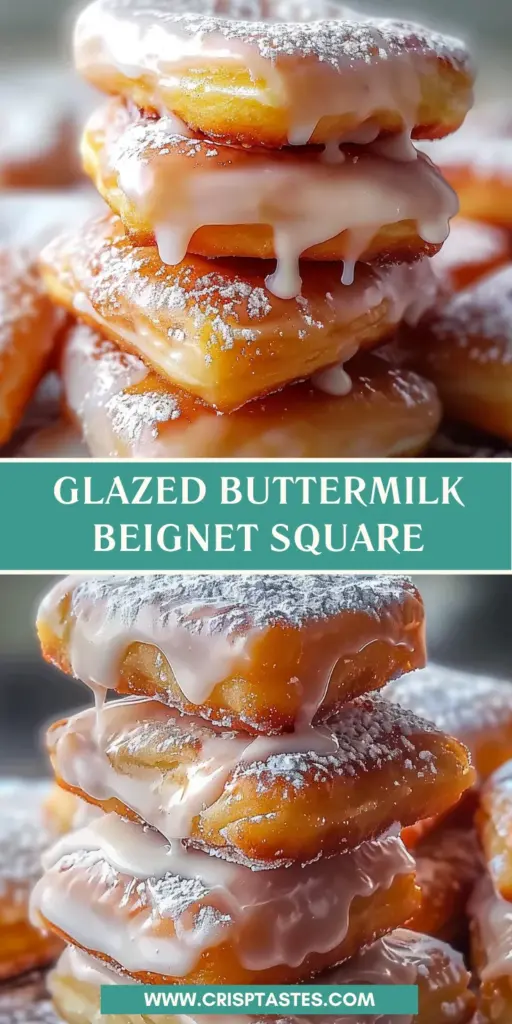
Picture this: a lazy Sunday morning filled with the scent of warm, sugary delights wafting through your kitchen. That’s the magic of the Glazed Buttermilk Beignet Square! Whether you want a quick solution for breakfast or a sweet treat that will charm your guests, these fluffy squares are a game changer. I’ve often found myself spinning through the whirlwind of a busy week, but creating these little bites of joy always brings a smile. Plus, they’re perfect for satisfying even the pickiest of eaters. Let’s dive into this delightful recipe that’s both easy and delicious!
Why You’ll Love This Glazed Buttermilk Beignet Square
What’s not to adore about a Glazed Buttermilk Beignet Square? They are quick to make, requiring just a few simple steps to achieve ultimate deliciousness. The light, fluffy texture paired with that delightful glaze creates a dreamy bite that feels indulgent yet comforting. Plus, this recipe is versatile enough for breakfast, dessert, or even a sweet afternoon pick-me-up. Trust me, you’ll be reaching for seconds!
Ingredients for Glazed Buttermilk Beignet Square
Let’s talk about the stars of our show—the ingredients for these delightful Glazed Buttermilk Beignet Squares! Trust me, you’ll want to keep these on hand for whenever that sweet craving strikes.
- Warm Buttermilk: This creamy liquid gives our beignets that tender texture. Just make sure it’s warm and not hot to keep the yeast happy!
- Active Dry Yeast: This is the magic dust that helps our dough rise and become fluffy. Ensure it’s fresh for the best results.
- Granulated Sugar: It sweetens the dough and helps activate the yeast. A little sprinkle enhances the beignet’s flavor, making each bite a sugary delight.
- Large Egg: An egg adds richness and acts as a binder. It helps create those perfectly tender squares you’ll adore.
- Unsalted Butter: Melted butter gives a lovely flavor and a hint of richness to our beignets. Feel free to use a vegetable oil alternative if dairy is an issue.
- All-Purpose Flour: Our trusty flour is essential for structure. You can substitute with gluten-free flour if you’re avoiding gluten, but be mindful of texture!
- Salt: Just a pinch brings out the sweetness and balances flavors perfectly.
- Neutral Oil: For frying, a neutral oil like canola or vegetable oil works best. It’s essential for achieving that golden, crispy exterior.
- Powdered Sugar: This ingredient is the heart of our glaze, providing a sweet finish like a dreamy cloud.
- Milk or Cream: Adds creaminess to the glaze. Use what you have on hand, but cream will give a richer texture.
- Vanilla Extract: A splash enhances the overall flavor, making each bite feel like a cozy hug.
- Pinch of Salt: A little salt in the glaze balances the sweetness and elevates the flavor.
All the exact quantities you need are at the bottom of this article, ready for your next baking adventure!
How to Make Glazed Buttermilk Beignet Square
Ready to whip up some magic in your kitchen? Let’s break down the steps to create these heavenly Glazed Buttermilk Beignet Squares! Follow along, and I promise you’ll have fluffy squares to share (or keep all to yourself!).
Step 1: Prepare the Dough
In a large bowl, start by whisking together warm buttermilk, active dry yeast, and granulated sugar until well combined.
Let this mixture rest for about 5–8 minutes. You’re looking for a lovely foamy layer to form, which tells you that the yeast is activated and ready to work its magic!
Step 2: Mix Wet and Dry Ingredients
Time to add the fun ingredients—drop in the large egg and melted butter into your yeast mixture.
Gradually stir in the all-purpose flour and salt, mixing until a soft, smooth dough forms. This takes about 8–10 minutes and is such a joy to knead as it transforms from crumbly to velvety!
Step 3: Let the Dough Rise
Cover your bowl with a clean dish towel. Now, place it in a warm spot to rise!
Let the dough expand until it’s doubled in size—this should take around 1 to 1½ hours. I always find this part magical as I watch my dough puff up, ready for its next adventure.
Step 4: Roll and Cut the Dough
Once your dough has risen, gently punch it down to release the air. Now, roll it out on a floured surface to about ½-inch thickness, so we get those thick, bakery-style squares we love.
Cut the dough into neat squares—aim for uniform shapes here. It only takes about 10 minutes, and your kitchen will start smelling heavenly already!
Step 5: Fry the Beignet Squares
Heat up the oil in a deep skillet or pot to 340–350°F (170–175°C). This is where the magic happens!
Carefully fry the dough squares in batches, turning them once until they’re golden and puffed, usually about 2–3 minutes on each side. The excitement of watching them bubble up is one of my favorite kitchen moments!
Step 6: Drain and Glaze
Once fried to perfection, transfer the beignets to a wire rack to drain briefly. Quick tip: skip the paper towels; they can make your glaze runny.
Whisk the powdered sugar, milk, vanilla, and pinch of salt until you get a smooth, pourable glaze. While the beignets are still warm, dip or spoon the glaze over—they’ll absorb that sweetness beautifully!
Step 7: Set the Glaze
Lastly, allow the glaze to set into a shiny shell while your delightful treats cool for about 5–10 minutes.
Such patience pays off when you take that first bite of sweet, fluffy goodness!
Tips for Success
- Use a kitchen thermometer to ensure your oil is at the right temperature for frying, achieving that perfect golden color.
- Don’t overcrowd your frying pan; fry in small batches for easy handling and even cooking.
- Make sure to properly activate your yeast; it should be foamy and bubbly before mixing in the rest of the ingredients.
- Let the glaze set a bit; it makes all the difference in achieving that shiny finish.
- Enjoy these beignets warm for the best flavor and texture!
Equipment Needed
- Large mixing bowl – A sturdy bowl is essential; a stand mixer works well too!
- Whisk – For easy mixing of ingredients; a fork can be a handy substitute.
- Rolling pin – Use a wine bottle if you don’t have one available.
- Deep skillet or pot – A heavy-bottom pot is great for frying, or use a deep fryer if you have one.
- Wire rack – For draining; a plate can be used as an alternative if needed.
Variations of Glazed Buttermilk Beignet Square
- Chocolate Drizzle: Add a rich chocolate drizzle on top of the glaze for a decadent twist that chocolate lovers will adore!
- Cinnamon Sugar Coating: Instead of glazing, toss the warm beignets in a mixture of cinnamon and granulated sugar for a cozy, spiced flavor.
- Fruit-Filled Beignets: Stuff the dough squares with jam or a pastry cream filling before frying for a delightful surprise in every bite.
- Gluten-Free Option: Substitute all-purpose flour with a 1:1 gluten-free baking flour to cater to gluten sensitivities.
- Vegan Variation: Replace egg with a flaxseed egg and use a dairy-free milk alternative along with vegan butter for a completely plant-based treat.
Serving Suggestions for Glazed Buttermilk Beignet Square
- Pair with a hot cup of coffee or chai tea for a comforting breakfast experience.
- Serve alongside fresh fruit, like berries or sliced bananas, for a refreshing contrast.
- Present on a decorative platter, dusted with extra powdered sugar for a beautiful touch.
- Enjoy with a scoop of vanilla ice cream for an indulgent dessert.
- Top with fresh whipped cream and a sprinkle of cinnamon for extra flair.
FAQs about Glazed Buttermilk Beignet Square
Got questions? I’ve got answers! Here are some of the most common inquiries I receive about Glazed Buttermilk Beignet Squares. I hope this helps guide you to make these adorable treats with ease!
Can I prepare the dough in advance?
Absolutely! You can make the dough the night before and let it rise in the refrigerator. Just bring it back to room temperature before frying. This can save you time on a busy morning!
What should I do if my dough isn’t rising?
Don’t panic! If your dough isn’t rising, it might be due to inactive yeast. Always check the expiration date before using, and ensure the buttermilk is warm, not hot. Adjusting the temperature can sometimes do the trick!
Can I bake these instead of frying?
While frying gives that perfect texture, you can bake them as well! Preheat the oven to 375°F (190°C), place on a baking sheet, and bake for around 15-20 minutes until golden brown. They won’t be quite the same, but still delicious!
How do I store leftover beignets?
Store any leftovers in an airtight container at room temperature for up to two days. If they soften, a quick trip to the oven will revive their crispy texture!
Can I freeze Glazed Buttermilk Beignet Squares?
Yes! You can freeze the unglazed beignets after frying. Just let them cool completely, then wrap tightly and freeze. When you’re ready, thaw and glaze them for fresh-tasting treats!
Final Thoughts
Making Glazed Buttermilk Beignet Squares isn’t just about whipping up a delicious treat; it’s about creating moments of happiness. Each fluffy bite, dripping with sweet glaze, brings comfort that warms the soul. Whether you share them with family or indulge by yourself, these delightful squares are sure to be a hit. I find joy in the process—from the scent of dough rising to the satisfying crunch when biting into them. So roll up your sleeves, and let these sweet treasures bring a little more joy into your kitchen and your life!
Print
Glazed Buttermilk Beignet Square
- Total Time: 2 hours
- Yield: 12 squares 1x
- Diet: Vegetarian
Description
Deliciously light and fluffy glazed buttermilk beignet squares that are perfectly sweet and a delightful treat.
Ingredients
- ¾ cup warm buttermilk (not hot)
- 2¼ teaspoons active dry yeast
- ¼ cup granulated sugar
- 1 large egg
- ¼ cup unsalted butter, melted
- 3¼ cups all-purpose flour
- ¾ teaspoon salt
- Neutral oil (for frying)
- 2 cups powdered sugar (for glaze)
- 3–4 tablespoons milk or cream (for glaze)
- 1 teaspoon vanilla extract (for glaze)
- Pinch of salt (for glaze)
Instructions
- In a large bowl, whisk warm buttermilk, yeast, and sugar until combined. Let rest until foamy and activated (5–8 minutes).
- Add the egg and melted butter, then mix gently. Gradually stir in flour and salt until a soft, smooth dough forms — tender but not sticky (8–10 minutes).
- Cover the bowl and let the dough rise in a warm place until doubled in size (1–1½ hours).
- Roll the risen dough to about ½-inch thickness for thick, bakery-style squares. Cut into neat squares (10 minutes).
- Heat oil to 340–350°F (170–175°C). Fry the dough squares in batches, turning once, until evenly golden and puffed (2–3 minutes per side).
- Transfer fried beignets to a wire rack to drain briefly — avoid paper towels to keep the glaze silky (2 minutes).
- Whisk powdered sugar, milk, vanilla, and salt until smooth and pourable but thick. While beignets are still warm, dip or spoon glaze over the tops only (5 minutes).
- Allow the glaze to set into a shiny shell before serving (5–10 minutes).
Notes
- Ensure the buttermilk is warm, not hot, to not kill the yeast.
- Using a thermometer helps to maintain the oil temperature for frying.
- Do not overcrowd the frying pan; fry in batches for best results.
- Prep Time: 30 minutes
- Cook Time: 30 minutes
- Category: Dessert
- Method: Frying
- Cuisine: French
Nutrition
- Serving Size: 1 beignet square
- Calories: 150
- Sugar: 10g
- Sodium: 80mg
- Fat: 5g
- Saturated Fat: 2.5g
- Unsaturated Fat: 2.5g
- Trans Fat: 0g
- Carbohydrates: 22g
- Fiber: 0g
- Protein: 2g
- Cholesterol: 30mg