Halloween Chocolate Bark

Introduction to Halloween Chocolate Bark
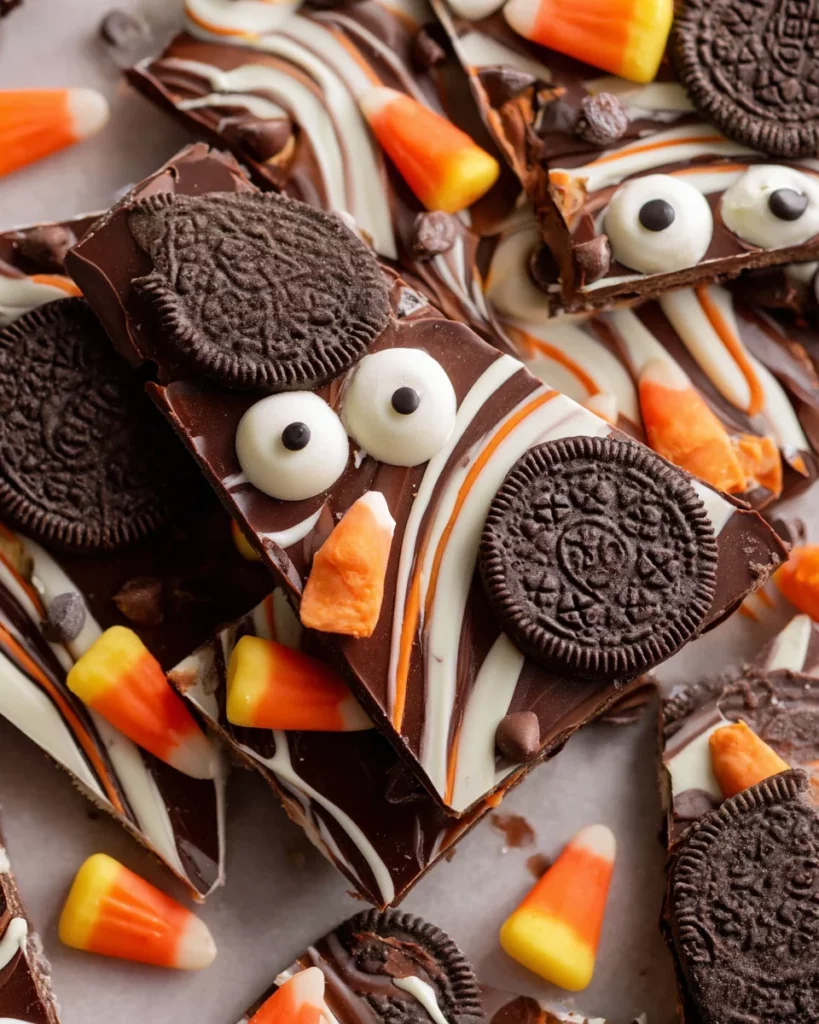
Ah, Halloween! A time when the air is crisp, leaves crunch underfoot, and spookiness lurks around every corner. If you’re looking for a delightful treat to celebrate this fun season, let me introduce you to Halloween Chocolate Bark! This indulgent yet easy-to-make dessert is perfect for busy moms and professionals like us. It’s a quick solution that impresses both friends and family. No long hours in the kitchen needed. Two types of chocolate and a mix of festive snacks come together to create a treat that shines at any Halloween gathering. Let’s get started!
Why You’ll Love This Halloween Chocolate Bark
This Halloween Chocolate Bark is the ultimate answer to our busy lives. It comes together in just 30 minutes, giving you more time to enjoy the festivities. The delightful mix of creamy dark and white chocolate paired with crunchy Oreos and colorful candy corn makes every bite a celebration of taste. Plus, it’s a hit with the kids, making it fun for the whole family. What’s not to love?
Ingredients for Halloween Chocolate Bark
Gathering the right ingredients is the first step to making your Halloween Chocolate Bark a success! Here’s what you’ll need:
- Dark chocolate chips: Rich and smooth, they serve as the base of your bark.
- White chocolate chips: These add a delightful contrast, both in flavor and color.
- Candy corn: A festive touch that brings sweetness and a pop of color.
- Oreo cookies: Classic crunch that complements the smooth chocolate perfectly.
- Mini Oreo cookies: These little guys are adorable and extra fun to include.
- Black icing: Use it to attach candy eyes on the Oreos for a spooky effect.
- Candy eyes: These fun decorations will make your bark extra festive!
Feel free to personalize your bark by swapping ingredients for your favorites! For instance, you can use milk chocolate instead of dark, or even add in nuts for an extra crunch. For the exact quantities, check out the end of the article where they are listed for easy printing.
How to Make Halloween Chocolate Bark
Now that you have your ingredients prepped, let’s dive into making this delightful Halloween Chocolate Bark! Follow these step-by-step instructions, and you’ll have a delicious treat ready in no time. I promise it’s as easy as 1-2-3!
Step 1: Prepare Your Baking Sheet
Start by lining a baking sheet with parchment paper or a silicone mat. This makes removing the bark later a breeze. Just make sure the parchment paper hangs over the sides a bit; it’ll help you lift the bark out when it’s ready.
Step 2: Melt the Dark Chocolate
Next, pour your dark chocolate chips into a microwave-safe bowl. Microwave them for one minute, then stir. If they’re not fully melted, pop them back in for another 30 seconds. Repeat this process until smooth. The key here is to achieve that silky consistency.
Step 3: Spread the Dark Chocolate
Once your chocolate is melted, pour it onto the prepared baking sheet. Use a spatula to spread it into an even layer. Aim for about a quarter-inch thickness. You want it to be thick enough to hold the toppings but not too thick that it doesn’t set properly.
Step 4: Melt the White Chocolate
For the white chocolate, repeat the melting process as you did with the dark chocolate. Use a separate bowl and microwave for one minute, stirring until smooth. You’ll want this chocolate melted but still thick enough to hold its shape when drizzled.
Step 5: Drizzle and Swirl
Now it’s time to get creative! Drizzle the melted white chocolate diagonally across the dark chocolate layer. Then, use a toothpick to swirl it gently. This creates a beautiful marbled effect that’s as fun to look at as it is to eat!
Step 6: Add Toppings
Scatter the candy corn evenly over the chocolate; think of it like a sprinkle party! Then, split the Oreos in half, attach candy eyes with black icing, and press these cuties into your chocolate. They’ll add a spooky touch that kids will adore!
Step 7: Chill the Bark
Now, it’s time for the chilling magic! Pop your baking sheet into the refrigerator and let it sit for at least one hour. This step is crucial as it helps the chocolate firm up perfectly, so you’re left with crisp, easy-to-break pieces.
Step 8: Break and Serve
Once it’s set, pull the bark out and lift it off the baking sheet using the parchment paper. Then, break it into pieces using your hands or a sharp knife. It’s perfect for serving or storing. Enjoy sharing your fantastic Halloween Chocolate Bark!
Tips for Success
- Make sure your microwave is set to medium power to avoid burning the chocolate.
- Let the melted chocolate cool slightly before spreading to maintain thickness.
- Be creative! Add your favorite toppings or candies for a personalized twist.
- Use a sharp knife to break the bark into more uniform pieces for a polished look.
- Store leftovers in an airtight container in the fridge to keep them fresh.
Equipment Needed for Halloween Chocolate Bark
- Baking sheet: A cookie sheet or tray will work if you don’t have one.
- Parchment paper or silicone mat: Aluminum foil can be a good substitute.
- Microwave-safe bowls: Glass or ceramic bowls are perfect alternatives.
- Spatula: A butter knife can do in a pinch for spreading!
- Toothpick: A fork or skewer can work for swirling, too.
Variations of Halloween Chocolate Bark
- Swap dark chocolate for milk chocolate for a sweeter twist that kids will love.
- Try adding nuts like almonds or pecans for a crunchy texture to contrast the chocolate.
- Incorporate dried fruit, such as cranberries or apricots, for a chewy element.
- Use seasonal sprinkles instead of candy corn for a festive flair.
- Opt for gluten-free Oreos if you’re accommodating dietary restrictions.
Serving Suggestions for Halloween Chocolate Bark
- Pair your Halloween Chocolate Bark with a warm cup of apple cider for a cozy treat.
- Serve it on a spooky-themed platter to enhance your Halloween display.
- Wrap pieces in cheerful cellophane bags for delightful party favors.
- Enjoy with a scoop of vanilla ice cream for an extra indulgent dessert.
FAQs about Halloween Chocolate Bark
Got questions about making your Halloween Chocolate Bark? I’ve got you covered! Here are some common queries that might pop up:
Can I use different chocolates for this recipe?
Absolutely! You can swap out dark chocolate for milk or even white chocolate if you prefer a sweeter treat. Just make sure to adjust the melting process if necessary.
How long can I store the Halloween Chocolate Bark?
You can keep your delicious bark in an airtight container in the refrigerator for up to two weeks. However, it’s so tasty that it might not last that long!
What can I substitute for Oreos?
If you want to change things up, feel free to use other cookies like chocolate chip cookies, or even graham crackers for a different texture and flavor.
Can I make the bark ahead of time?
Definitely! Making your Halloween Chocolate Bark a day or two in advance is a great way to save time for your festivities. Just store it in the fridge!
Is this Halloween Chocolate Bark suitable for kids?
<pYes, this treat is kid-friendly and sure to be a hit at your Halloween parties. Just keep an eye on those little fingers because it may disappear quickly!
Final Thoughts
Making Halloween Chocolate Bark is not just about creating a tasty treat; it’s about crafting memories in the kitchen. The joy of melting chocolate, the colorful toppings, and the sweet anticipation as it chills is all part of the fun. Every piece adds a little festivity to gatherings, and it’s sure to elicit smiles. Plus, it’s the perfect project to get the kids involved, sharing both laughter and sticky fingers! So, gather the family, stir up some creativity, and let this delightful recipe bring warmth and joy to your Halloween celebrations. Happy cooking!
Print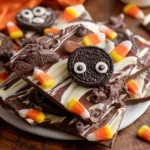
Halloween Chocolate Bark
- Total Time: 1 hour 30 minutes
- Yield: Approximately 12 servings 1x
- Diet: Vegetarian
Description
Halloween Chocolate Bark is a fun and festive treat perfect for celebrating the spooky season. It’s easy to make and features a delightful combination of dark and white chocolate, along with candy corn and Oreos for a crunchy texture.
Ingredients
- 2 cups dark chocolate chips (12oz bag)
- ⅓ cup white chocolate chips
- ¼ cup candy corn
- 3 Oreo cookies
- 10 mini Oreo cookies
- Black icing
- Candy eyes
Instructions
- Line a baking sheet with parchment paper or a silicone mat. Set aside.
- Add the dark chocolate chips to a microwave-safe bowl and microwave for 1 minute. Stir, then microwave for another 30 seconds. Repeat until smooth.
- Spread the melted dark chocolate over the prepared baking sheet in an even layer.
- Melt the white chocolate chips in a separate bowl for 1 minute. Stir until smooth, heating in increments if necessary.
- Drizzle the white chocolate diagonally across the dark chocolate and swirl with a toothpick.
- Evenly place the candy corn pieces over the chocolate.
- Split the Oreos in half, attach candy eyes with black icing, and press them into the chocolate.
- Refrigerate for 1 hour to harden.
- Break the chocolate bark into pieces and serve or chill until ready to enjoy.
Notes
- Ensure the chocolate is fully melted to achieve a smooth texture.
- Feel free to customize toppings based on your preferences.
- Store any leftovers in an airtight container in the refrigerator.
- Prep Time: 20 minutes
- Cook Time: 10 minutes
- Category: Dessert
- Method: Microwave and Refrigerate
- Cuisine: American
Nutrition
- Serving Size: 1 piece
- Calories: 150
- Sugar: 10g
- Sodium: 25mg
- Fat: 8g
- Saturated Fat: 4g
- Unsaturated Fat: 2g
- Trans Fat: 0g
- Carbohydrates: 18g
- Fiber: 1g
- Protein: 2g
- Cholesterol: 0mg