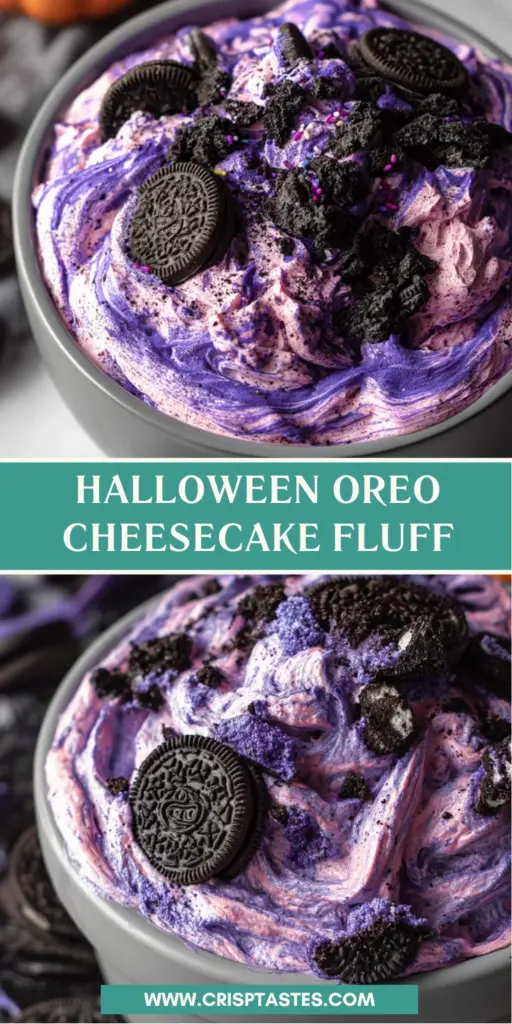
Halloween Oreo Cheesecake Fluff is a spooky delight!

Introduction to Halloween Oreo Cheesecake Fluff
As the leaves begin to turn and the air gets that lovely crispness, it’s time to whip up something fun and festive! Halloween Oreo Cheesecake Fluff is not just a treat; it’s a delightful way to kick off the spooky season. If you’re anything like me, juggling family, work, and a million other things, this no-bake dessert is a lifesaver. With its creamy texture and crushed Halloween Oreos, it’s bound to impress your kids, friends, or anyone who shares a spoonful! Let’s dive into this delicious concoction that’s as quick to make as it is to enjoy.
Why You’ll Love This Halloween Oreo Cheesecake Fluff
This Halloween Oreo Cheesecake Fluff is the perfect solution for busy moms and professionals like me. It’s quick to whip up, taking just 20 minutes, and you don’t even need to turn on the oven! The creamy cheesecake combined with crunchy Oreo bits creates a wonderful flavor explosion that everyone will love. Plus, it’s a playful dessert that adds a festive touch to any gathering.
Ingredients for Halloween Oreo Cheesecake Fluff
Gathering the right ingredients can be a joyful part of the cooking experience, and for this Halloween Oreo Cheesecake Fluff, it’s all about simplicity and flavor!
- Cream cheese: This is the star of the show! Softened cream cheese adds that rich, creamy texture, making your fluff irresistible.
- Powdered sugar: A touch of sweetness is essential. You can adjust the amount based on how sweet you want your dessert.
- Purple food dye: A little spooky flair goes a long way! Food dye gives the fluff that Halloween touch, blending perfectly with the festive spirit.
- Halloween Oreos: These crunchy cookies add the perfect twist! Crush them up for texture, or use them whole for decoration on top.
- Heavy whipping cream: This transforms into homemade whipped topping. It’s light and fluffy, making the fluff airy and delightful.
- Vanilla extract: A splash of vanilla enhances the flavor, providing warmth and richness to your creation.
Don’t forget, specific quantities are at the bottom of the article if you want to print this recipe. Feel free to mix and match ingredients as needed. Enjoy getting creative in the kitchen!
How to Make Halloween Oreo Cheesecake Fluff
Now, let’s roll up our sleeves and dive into making this spooky delight! With just a few steps, you’ll create a delicious Halloween Oreo Cheesecake Fluff that will wow friends and family alike. Trust me; it’s really that easy!
Step 1: Prepare the Homemade Whipped Topping
First, grab a large bowl or your stand mixer. Pour in the heavy whipping cream, powdered sugar, and vanilla extract. Start mixing on low-medium speed to avoid splashes, then ramp it up to high until you see stiff peaks form. When it’s done, the cream should hold its shape beautifully. Set it aside while we tackle the next layer of creamy goodness!
Step 2: Make the Cream Cheese Mixture
In another large bowl, add the softened cream cheese and powdered sugar. Start mixing at a low speed, gradually increasing until the mixture becomes light and fluffy. This should take a few minutes, and the cream cheese should be well-blended with no lumps. This step is crucial for that velvety texture we’re after. Once you achieve that creaminess, you’re ready for the next step!
Step 3: Combine the Mixtures
Now for the fun part! Carefully fold your homemade whipped topping into the creamy cheese mixture. Do this gently to maintain that fantastic fluffiness. Once combined, it’s time to add the purple food dye. Start with a tiny bit and mix until you reach your desired shade. Halloween is all about that creative flair, so don’t be shy—go for vibrant hues!
Step 4: Fold in Halloween Oreos
This is where the magic happens! Gently fold in your crushed Halloween Oreos, ensuring they’re well-distributed throughout the mixture. You’ll want the crunchy bits to be present in every bite. For a festive touch, save a few Oreo pieces to sprinkle on top for decoration. Then, it’s time to chill the fluff in the fridge before serving. Trust me, it will be worth the wait!
Tips for Success
- Ensure your cream cheese is at room temperature for easy mixing.
- Don’t rush the whipped topping; achieve those stiff peaks for the best texture.
- Adjust the sweetness of the fluff to match your taste by controlling powdered sugar amounts.
- Store leftovers in an airtight container in the fridge to keep it fresh.
- For an extra spooky touch, add themed sprinkles on top before serving.
Equipment Needed
- Mixing bowls: Two large bowls are essential. You can use one bowl if you’re washing it in between steps.
- Hand mixer or stand mixer: If you don’t have a mixer, a whisk will work—just be prepared for a workout!
- Spatula: A rubber spatula is perfect for folding ingredients together smoothly.
- Measuring cups and spoons: Accurate measurements are key for a balanced flavor.
- Fridge-safe container: Use this to chill your Halloween Oreo Cheesecake Fluff before serving.
Variations
- Gluten-Free: Swap out Halloween Oreos for gluten-free chocolate sandwich cookies to accommodate gluten sensitivities.
- Dairy-Free: Use dairy-free cream cheese and coconut cream instead of heavy whipping cream for a delicious dairy-free version.
- Add Fruits: Fold in crushed fruit, like raspberries or strawberries, for a burst of color and freshness that compliments the Oreo flavor.
- Other Flavors: Experiment by adding a splash of almond or hazelnut extract for a delightful twist to the cheesecake flavor.
- Layered Dessert: Serve the fluff in individual cups layered with crushed Oreos, adding a festive touch for parties.
Serving Suggestions
- Pair with festive Halloween cookies for a fun dessert platter.
- Add a dollop of whipped cream on top for extra creaminess.
- Serve in clear cups to showcase the colorful layers.
- Accompany with a warm mug of apple cider or hot chocolate.
- For a crunchy contrast, add some nutty bark or pretzels on the side.
FAQs about Halloween Oreo Cheesecake Fluff
Got questions about making your Halloween Oreo Cheesecake Fluff? Don’t worry, I’ve got you covered! Here are some frequently asked questions that can help you along the way.
Can I make this dessert ahead of time?
Absolutely! You can make the Halloween Oreo Cheesecake Fluff a day in advance. Just store it in an airtight container in the fridge. This also helps the flavors meld beautifully!
How long will leftovers last?
If you manage to have leftovers, they can be stored in the fridge for up to three days. Just make sure it’s in a well-sealed container to keep it fresh and delicious.
Can I use regular Oreos instead of Halloween Oreos?
Of course! Regular Oreos will work just as well. However, the Halloween Oreos add a festive touch that is perfect for the season. So, if you have them, go for it!
What if I don’t have purple food dye?
No problem! You can skip the dye or use a different color. If you prefer, deep blue or green can also create a spooky effect. Get creative!
Can I freeze the Halloween Oreo Cheesecake Fluff?
While it’s best enjoyed fresh, you can freeze it. Just be aware that the texture may change once thawed. If freezing, I recommend trying to consume it within a month for the best quality.
Final Thoughts
Making Halloween Oreo Cheesecake Fluff is more than just whipping up a dessert; it’s about creating memories and sharing smiles. This quick and festive treat is perfect for busy days when you want to impress loved ones without hassle. The creamy cheesecake combined with crunchy Halloween Oreos delivers an explosion of delightful flavors that’s hard to resist. Whether you’re hosting a spooky gathering or enjoying a cozy night in, this fluff is sure to be a crowd-pleaser. So, embrace the fun of the season, gather your ingredients, and let the sweetness unfold in your kitchen!
Print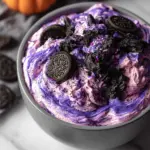
Halloween Oreo Cheesecake Fluff
- Total Time: 20 minutes
- Yield: Serves 6-8 1x
- Diet: Vegetarian
Description
Halloween Oreo Cheesecake Fluff is a spooky delight that combines creamy cheesecake with crushed Halloween Oreos, creating a festive treat perfect for the season.
Ingredients
- 8 oz cream cheese (softened)
- 1/4 to 1/3 cup powdered sugar (depending on your sweetness preferences)
- purple food dye
- 15 Halloween Oreos (crushed, plus more to decorate)
- 1 1/2 cups heavy whipping cream
- 1/3 cup powdered sugar
- 1 1/2 tsp vanilla extract
Instructions
- Begin by making Homemade Whipped Topping in a large bowl or stand mixer by mixing heavy whipping cream, powdered sugar, and vanilla extract.
- Start on low-medium speed, then increase to high until stiff peaks form. Set aside.
- To another large bowl, add cream cheese and powdered sugar. Again, start on low-medium speed, then increase to high until cream cheese is light and fluffy.
- Gently fold the Homemade Whipped Topping into the cream cheese mixture, then use food dye to dye the mixture to your desired shade of purple.
- Gently fold in the crushed Oreos. Add more (crushed or whole) on top to decorate. Serve and enjoy!
Notes
- Adjust the sweetness of the fluff by controlling the amount of powdered sugar used.
- For a more vibrant purple color, gradually add more food dye until desired color is reached.
- This dessert is best served chilled.
- Prep Time: 20 minutes
- Cook Time: 0 minutes
- Category: Dessert
- Method: No-Bake
- Cuisine: American
Nutrition
- Serving Size: 1/2 cup
- Calories: 320
- Sugar: 18g
- Sodium: 150mg
- Fat: 23g
- Saturated Fat: 14g
- Unsaturated Fat: 4g
- Trans Fat: 0g
- Carbohydrates: 26g
- Fiber: 1g
- Protein: 3g
- Cholesterol: 70mg