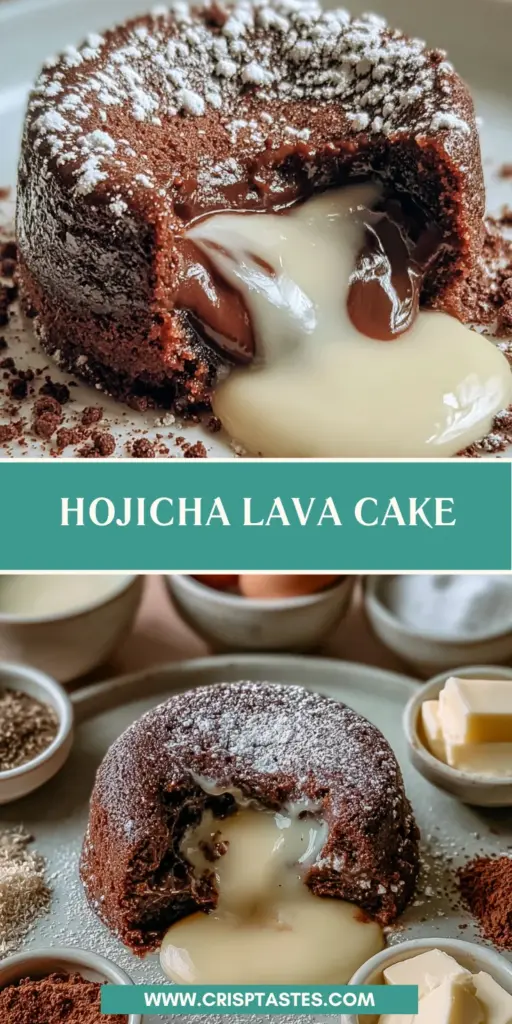
Hojicha Lava Cake: Indulge in This Delightful Dessert!

Introduction to Hojicha Lava Cake
Ah, the sheer joy of dessert! When I think of indulging in something special, Hojicha Lava Cake pops into my mind like the first sip of warm cocoa on a chilly evening. This delightful dessert, with its rich molten center, is exactly what we busy moms and professionals deserve after a long day. It’s quick to prepare, making it the perfect sweet escape when you’re pressed for time. Plus, imagine the delight on your loved ones’ faces as they dive into that gooey, sweet goodness. Trust me, they won’t forget this treat anytime soon!
Why You’ll Love This Hojicha Lava Cake
This Hojicha Lava Cake is not just a dessert; it’s a delightful experience. With a prep time of only 30 minutes, it’s perfect for those of us juggling countless responsibilities. The recipe is simple, allowing even novice bakers to shine. Each bite is a blissful fusion of flavors, featuring the comforting warmth of hojicha, creating a memorable treat that will whisk you and your loved ones away into dessert heaven.
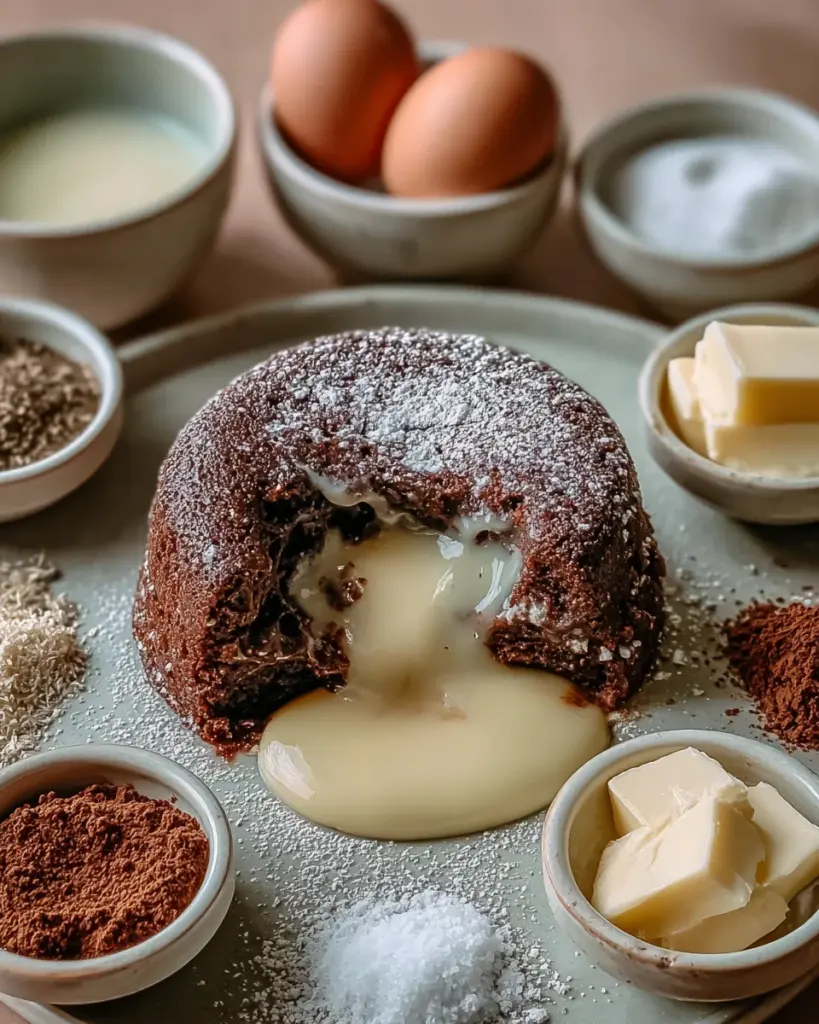
Ingredients for Hojicha Lava Cake
Ready to dive into the delightful world of Hojicha Lava Cake? Here’s a quick rundown of what you’ll need to create this scrumptious dessert. Don’t worry, the exact measurements are tucked away at the bottom of the article for your convenience. Let’s get started!
- Hojicha Ganache Center: This is where the magic happens! The combination of finely chopped white chocolate and hojicha powder gives our ganache its unique flavor profile, creating that luxurious molten center.
- Heavy Cream: Essential for achieving that smooth, silky ganache texture. It adds richness and creaminess to your dessert.
- Unsalted Butter: Balance is key! The unsalted butter keeps the ganache and cake moist and adds a velvety mouthfeel.
- White Chocolate Cake Ingredients: The cake portion also features white chocolate to maintain that harmonious blend of flavors. This is a perfect companion to the hojicha ganache.
- Granulated Sugar: Sweetness is needed to elevate all those flavors. It helps to create a tender crumb in your cake.
- All-Purpose Flour: Classic cake ingredient that provides structure. You can substitute this with gluten-free flour if needed!
- Eggs and Egg Yolk: The true stars of the binding game! They contribute to the overall richness and help our cake rise beautifully.
- Salt: Just a pinch! It enhances the sweetness and flavors, rounding out the overall taste.
- Softened Butter for Ramekins: A must for greasing! This helps ensure your lava cakes slide out effortlessly after baking.
- Cocoa Powder or Flour for Dusting: This prevents sticking and gives a lovely finish to your ramekins.
With these delightful ingredients at your fingertips, you’re already one step closer to creating the ultimate Hojicha Lava Cake! Enjoy the process and let your inner home chef shine.
How to Make Hojicha Lava Cake
Prepare the Hojicha Ganache
Let’s start with the star of our show—the hojicha ganache! Begin by combining finely chopped white chocolate and hojicha powder in a small heatproof bowl. Then, heat heavy cream until it’s just about to simmer. Pour this hot cream over the white chocolate mixture and let it rest for one minute. This is crucial for making a smooth ganache.
After a minute, stir until it’s perfectly smooth. To enhance that rich texture, stir in the unsalted butter until fully melted. Now comes the hardest part—chill this mixture in the refrigerator for about 30 minutes. We want it firm enough to scoop. Once it’s set, roll it into four small balls and keep them chilled for that luscious center!
Prepare the Ramekins
Now that your ganache is ready, let’s move on to the ramekins. This step is super important for ensuring your lava cakes release beautifully after baking. Grease four ramekins with softened butter. Make sure every nook and cranny is covered! Next, dust them with cocoa powder or flour. Tap out any excess powder to avoid clumping. Set these aside while you whip up the cake batter.
Make the Cake Batter
In a heatproof bowl, melt together chopped white chocolate and butter over a gentle simmer. Stir it well until it’s smooth, then allow it to cool slightly. Meanwhile, whisk together eggs, an egg yolk, and granulated sugar in a separate bowl. You’re looking for a pale, thick mixture here. It’s like sunshine in a bowl!
Now, gently fold the warm chocolate mixture into your egg mixture until combined. Sifting in the flour and salt will help create a fluffy texture, so do that next! Carefully fold everything together until just combined. We want a light touch to maintain that airy texture!
Assemble the Cakes
Time to bring all the elements together! Begin by spooning a generous tablespoon of the cake batter into each greased ramekin, just to cover the base. Then, place a chilled hojicha ganache ball right in the center of each ramekin. Top each ball with the remaining cake batter, smoothing it out for an even rise. It shouldn’t be a messy affair—just a thoughtful spread!
Bake
Now comes the moment of truth! Preheat your oven to 390°F (200°C). Place your ramekins on a baking tray, then pop them in the oven for about 11-13 minutes. You want the edges firm but the centers slightly jiggly—trust me, this is key for that molten effect. After baking, let the ramekins rest for 1-2 minutes. Gently run a thin knife around the edges to loosen them. Flip them onto serving plates, and watch that molten goodness ooze out!
Serve
Serving time! Enjoy these heavenly treats while they’re warm. For a little extra flair, dust with powdered sugar or serve them with a scoop of vanilla ice cream. Each bite is sure to transport you and your loved ones to dessert bliss. Don’t forget to savor every molten mouthful—it’s truly a dessert to remember!
Tips for Success
- Use high-quality white chocolate for richer flavor.
- Chill the ganache balls thoroughly. This ensures that molten center stays gooey after baking.
- If you’re new to baking, practice patience when folding ingredients. Don’t over mix!
- Keep an eye on the baking time; every oven is different!
- Consider making the ganache a day ahead for easy assembly later.
Equipment Needed
- 4 ramekins (alternatively, you can use muffin tins for individual servings)
- Heatproof bowl for melting chocolate (a glass or metal bowl works great)
- Whisk for mixing ingredients (a fork can do the trick if you’re in a pinch)
- Spatula for folding the batter (a wooden spoon works too)
- Baking tray to hold the ramekins while baking
Variations
- Dark Chocolate Twist: Substitute half of the white chocolate with dark chocolate for a richer flavor. This will create a delightful contrast with the hojicha!
- Nutty Infusion: Add chopped nuts, like hazelnuts or almonds, to the cake batter for an extra crunch. The nutty flavor pairs beautifully with hojicha.
- Spicy Kick: Sprinkle a pinch of cinnamon or chili powder into the ganache for a surprising twist. This adds warmth and depth to the dessert.
- Vegan Version: Swap the eggs with flaxseed meal and use plant-based butter and chocolate. Coconut cream can replace heavy cream for a dairy-free delight.
- Fruit Surprise: Add a dollop of fruit preserves, like raspberry or apricot, on top of the ganache ball before covering with batter. It adds a lovely fruitiness to each bite!
Serving Suggestions
- Pair your Hojicha Lava Cake with a scoop of creamy vanilla ice cream for delightful contrast.
- Serve it alongside a fresh berry compote to add a burst of fruity freshness.
- For a special touch, dust with powdered sugar and garnish with mint leaves.
- Enjoy with a warm cup of green tea to enhance the hojicha flavor.
- Present on a beautiful plate to make it feel extra special for guests!
FAQs about Hojicha Lava Cake
Can I make Hojicha Lava Cake ahead of time?
Absolutely! You can prepare the ganache and batter a day in advance. Just keep them chilled separately. When ready, assemble and bake for a quick dessert that will impress your loved ones!
What can I substitute for Hojicha powder?
If you can’t find hojicha powder, you might try matcha for a different flavor profile. Keep in mind that it will transform your cake into a vibrant green delight!
How do I know when my Hojicha Lava Cake is done baking?
Look for set edges with a slightly jiggly center. Trust me, this jiggly spot is where all the molten magic happens!
Is Hojicha Lava Cake suitable for gluten-free diets?
Yes, simply swap the all-purpose flour with a gluten-free blend for a deliciously decadent option that everyone can enjoy!
Can I add flavors to the cake batter?
Definitely! Try adding a splash of vanilla extract for an aromatic kick, or some almond extract for a nutty twist that complements the hojicha beautifully.
Final Thoughts
Making Hojicha Lava Cake feels like a warm hug on a busy day. It’s more than just a dessert—it’s an experience that brings joy and satisfaction. Each rich, molten bite melts in your mouth, evoking smiles and happy memories around the table. Sharing this delightful treat with loved ones transforms ordinary moments into extraordinary celebrations. As you savor the flavors, you’ll realize this dessert is a sweet little escape, allowing us all to indulge in life’s delicacies, no matter how hectic our days may become. So go ahead, treat yourself to this delectable adventure—you deserve it!
Print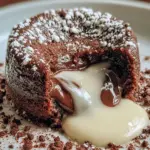
Hojicha Lava Cake
- Total Time: 43 minutes
- Yield: 4 servings 1x
- Diet: Vegetarian
Description
Hojicha Lava Cake is a delightful dessert featuring a rich, molten center of hojicha ganache surrounded by a creamy white chocolate cake.
Ingredients
- Hojicha Ganache Center:
- 2.1 oz white chocolate, finely chopped
- 2 tbsp heavy cream
- 1 tsp hojicha powder
- 0.35 oz unsalted butter, room temperature
- White Chocolate Cake:
- 3.5 oz white chocolate, chopped
- 2.8 oz unsalted butter
- 2 large eggs
- 1 large egg yolk
- 2.1 oz granulated sugar
- 1.4 oz all-purpose flour
- 1/8 tsp salt
- For the Ramekins:
- Softened butter for greasing
- Cocoa powder or flour for dusting
Instructions
- Prepare the Hojicha Ganache: Combine 2.1 oz white chocolate and 1 tsp hojicha powder in a small heatproof bowl. Heat 2 tbsp heavy cream until just simmering and pour over chocolate. Let sit for 1 minute, then stir until smooth. Stir in 0.35 oz unsalted butter until fully incorporated. Chill in refrigerator for approximately 30 minutes until firm enough to scoop. Roll into 4 small balls and keep chilled.
- Prepare the Ramekins: Grease 4 ramekins approximately 2.4-3.1 inches in diameter with butter and dust with cocoa powder or flour. Tap out excess powder to ensure even coating.
- Make the Cake Batter: Melt 3.5 oz white chocolate and 2.8 oz butter together in a heatproof bowl over a pan of barely simmering water, stirring until smooth. Allow to cool slightly. In a separate bowl, whisk together 2 eggs, 1 egg yolk, and 2.1 oz sugar until pale and thick. Fold melted chocolate mixture into egg mixture. Sift in 1.4 oz flour and 1/8 tsp salt, and gently fold until just combined.
- Assemble the Cakes: Spoon a generous tablespoon of batter into each ramekin. Place a chilled hojicha ganache ball in the center of each ramekin. Cover with remaining cake batter, smoothing the tops to ensure even baking.
- Bake: Bake in a preheated oven at 390°F for 11-13 minutes, until edges are set but centers are still slightly jiggly. Remove from oven and let rest 1-2 minutes. Run a thin knife around the edge and invert onto serving plates.
- Serve: Serve immediately while warm to achieve the signature molten lava effect. Optionally dust with powdered sugar or serve with vanilla ice cream.
Notes
- Use high-quality white chocolate for the best flavor.
- Chill the ganache balls thoroughly to maintain the molten center when baking.
- For a gluten-free option, substitute all-purpose flour with a gluten-free flour blend.
- Prep Time: 30 minutes
- Cook Time: 13 minutes
- Category: Dessert
- Method: Baking
- Cuisine: Japanese-Fusion
Nutrition
- Serving Size: 1 cake
- Calories: 350
- Sugar: 20g
- Sodium: 150mg
- Fat: 22g
- Saturated Fat: 12g
- Unsaturated Fat: 8g
- Trans Fat: 0g
- Carbohydrates: 29g
- Fiber: 1g
- Protein: 4g
- Cholesterol: 80mg