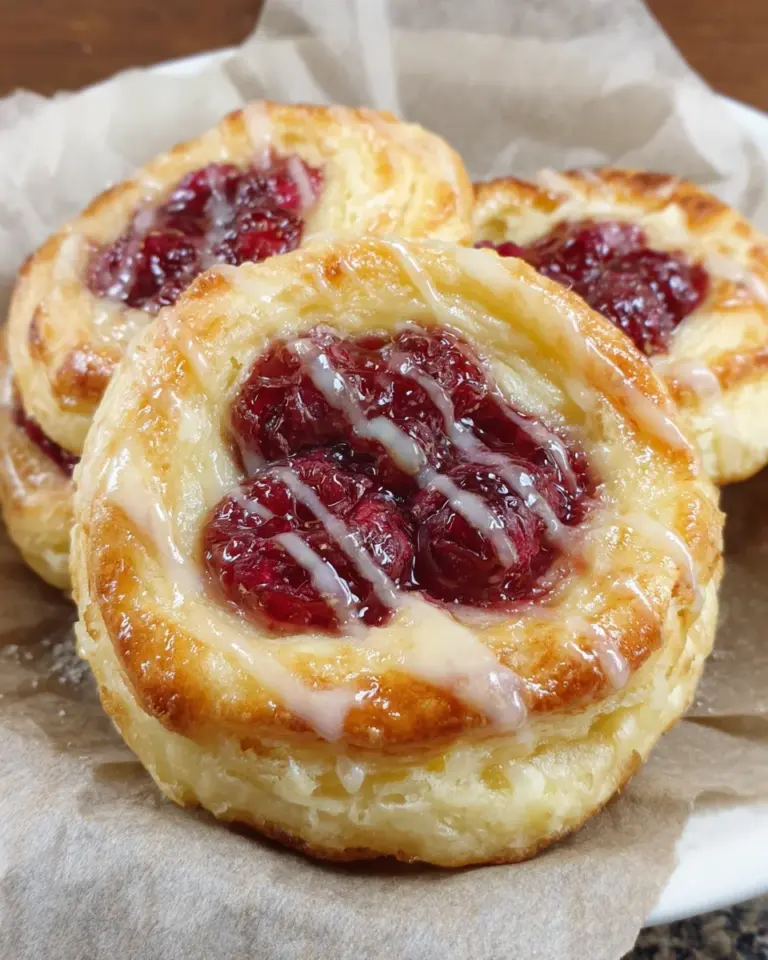
Homemade Blueberry Lemon Danish: A Tasty Delight Awaits!

Introduction to Homemade Blueberry Lemon Danish
Welcome to the world of delightful pastries! There’s something truly magical about a homemade blueberry lemon Danish. The way the sweet blueberries balance perfectly with the zesty lemon is a culinary embrace. Whether you’re looking for a quick solution for a busy day or a dazzling dish to impress your loved ones, this recipe is just what you need! It’s perfect for brunch gatherings or cozy afternoons with a cup of tea. I can already picture the smiles on everyone’s faces as they take their first bite. Let’s dive into this tasty adventure together!
Why You’ll Love This Homemade Blueberry Lemon Danish
This homemade blueberry lemon Danish is a lifesaver for any busy mom or professional. It’s quick to prepare, taking just 30 minutes from start to finish! The flaky layers combined with bursts of blueberry sweetness and refreshing lemon zest create an indulgent flavor experience. Plus, you can easily whip it up for breakfast, snacks, or dessert. Trust me, your family will love it, and you’ll appreciate how little time it takes!
Ingredients for Homemade Blueberry Lemon Danish
Gathering the right ingredients is half the fun of creating these homemade blueberry lemon Danish pastries. Let’s go through the essential elements that make these little delights truly shine!
- Baking mix: This is the base of our pastries, giving them that lovely texture. You can find pre-made mixes at most grocery stores.
- Granulated sugar: Sweetness is key! It helps balance the tartness of the lemon and the blueberries.
- Unsalted butter: Softened butter adds richness and flavor. I always prefer unsalted so I can control the saltiness.
- Milk: Whole milk works best for creating a deliciously tender dough. You can substitute with non-dairy milk for a vegan option.
- Lemon zest: Fresh lemon zest brings a bright, zesty flavor that enhances the overall taste. Don’t skip this one!
- Blueberry pie filling: This is the superstar of the show! You can use store-bought or even homemade filling if time allows.
- Plain flour: This is for creating a crumbly topping that adds texture—my favorite crunch!
- Quick oats: Adding oats enriches the topping with chewiness. They also provide a rustic feel to the pastries.
- Cold butter: This is used in the topping to ensure it gets that delightful crumble.
- Powdered sugar: We’ll whip this into a glaze—sweet and smooth, just like a cloud!
- Lemon juice: This not only adds flavor but also makes the glaze glossy and perfect for drizzling.
For exact measurements of each ingredient, you can refer to the bottom of the article where they are clearly listed for easy printing. Now that we’ve discussed what goes into these pastries, let’s move on to the fun part—making them!

How to Make Homemade Blueberry Lemon Danish
Now that we have all our ingredients lined up, let’s get our hands a little doughy! Making this homemade blueberry lemon Danish is easier than you might think. With a few simple steps, you’ll be on your way to delicious pastries that are sure to brighten anyone’s day.
Step 1: Preheat the Oven and Prepare Baking Sheets
First, we need to set our oven to 230°C. Preheating helps the pastries rise properly and bake evenly. While the oven warms up, line three baking sheets with parchment paper. This prevents sticking and ensures our pastries come off cleanly after baking. Trust me, you’ll want that golden-brown base!
Step 2: Combine the Ingredients
In a large bowl, mix the baking mix, granulated sugar, and softened butter. Use your fingers or a fork to blend until it resembles coarse crumbs. Then, stir in the milk and lemon zest with a fork until you get a sticky dough. The texture should feel moist but hold together. This dough is lively and ready for some pastry magic!
Step 3: Shape the Pastry
Now it’s time to shape our pastries! Using a spoon, drop six spoonfuls of dough onto each prepared baking sheet, leaving space between them. This space allows for spreading during baking. With the back of a spoon, gently press to create a small well in the center of each dough portion. Don’t worry; it’s like giving each pastry a cozy little home!
Step 4: Fill with Blueberry Pie Filling
Here comes the star ingredient! Spoon the blueberry pie filling evenly into each well. Aim for about a tablespoon in each—don’t be shy! This sweet and tangy filling will be the highlight of your pastry. Just make sure it’s evenly distributed so every bite offers that burst of blueberry goodness. Your taste buds will thank you!
Step 5: Prepare the Topping
Let’s make that crumble topping! In a small bowl, combine plain flour, quick oats, cold butter, and lemon zest. Use a fork or pastry blender to mix until it turns crumbly. This crumble adds a delightful texture to your pastries—think of it as the icing on the cake but with a playful crunch. Sprinkle this mixture evenly over each pastry. Yum!
Step 6: Baking the Pastries
Now, pop those pastries into the preheated oven. Bake for about 10 minutes or until they are golden around the edges. You’ll know they’re ready when the aroma dances through your kitchen. Keep an eye on them, as ovens can vary! It’s all about that lovely golden color—both a visual and olfactory cue of deliciousness!
Step 7: Cooling and Glazing
After baking, remove the pastries from the oven and let them cool on the tray for several minutes. This resting time helps them firm up a bit. Next, gently transfer them to a wire rack to cool completely. While they cool, whisk powdered sugar with lemon juice in a small bowl until smooth. Drizzle this delightful glaze over the cooled pastries for a pretty finish. It’s the crowning touch that makes them irresistible!
Tips for Success
- Always preheat your oven for even baking.
- Use room temperature butter for easier mixing.
- Don’t skip the lemon zest; it enhances flavor!
- Ensure your blueberry filling isn’t too runny to prevent sogginess.
- Let the pastries cool completely before glazing for the best presentation.
- Consider using fresh blueberries for a bold burst of flavor.
Equipment Needed
- Baking sheets: You can use any flat baking tray; even a pizza stone works!
- Parchment paper: If you don’t have any, lightly greasing the sheets is an alternative.
- Large bowl: A mixing bowl is essential; a deep pot can substitute in a pinch.
- Fork: A fork is handy for mixing; a whisk will do the job as well.
- Wire rack: This helps cool the pastries; a plate or cutting board can be used instead.
Variations
- Add nuts: Sprinkle chopped walnuts or pecans on top for a crunchy twist.
- Use different fruits: Swap blueberries for raspberries or cherries for a change of flavor.
- Make it vegan: Substitute butter with coconut oil and use plant-based milk for a vegan-friendly option.
- Gluten-free option: Try a gluten-free baking mix to accommodate gluten sensitivities.
- Add spice: Consider mixing in some cinnamon or nutmeg into the dough for an extra layer of warmth.
Serving Suggestions
- Pair with a steaming cup of herbal tea for a perfect afternoon treat.
- Serve alongside fresh fruit salads to add a refreshing touch.
- Consider adding a dollop of whipped cream for an indulgent dessert experience.
- Dress the pastries with fresh mint leaves for a vibrant, Instagram-worthy presentation.
- For brunch, enjoy with mimosas to elevate the celebration!
FAQs about Homemade Blueberry Lemon Danish
Can I use fresh blueberries instead of pie filling? Absolutely! Fresh blueberries can add a delightful burst of flavor. Just toss them with a bit of sugar and lemon juice to enhance their sweetness before filling the pastries.
How should I store leftover pastries? Store the remaining homemade blueberry lemon Danish in a loosely sealed container at room temperature for up to 3 days. For longer freshness, refrigerate in an airtight container for up to 6 days.
Can I freeze these pastries? Yes, you can freeze the pastries either before or after baking! Just make sure to wrap them tightly. When you’re ready to enjoy, simply thaw in the fridge overnight and reheat in the oven.
What variations can I make with this recipe? This recipe is versatile! You can try different fruits like raspberries or cherries, add nuts for crunch, or even make it vegan with plant-based ingredients. The possibilities are endless!
How can I make the glaze thicker? To achieve a thicker glaze, simply add extra powdered sugar until you reach your desired consistency. If it gets too thick, a splash of lemon juice can help bring it back to life!
Final Thoughts
Making homemade blueberry lemon Danish is not just about baking; it’s about creating delightful moments. There’s a special joy that comes from pulling these golden pastries from the oven and watching smiles bloom on the faces of my family and friends. Each bite is a delicious celebration of flavors, evoking warmth and comfort. I hope this recipe becomes a cherished addition to your kitchen routine, bringing joy and delicious memories to your busy days. So roll up your sleeves, embrace the process, and enjoy the wonderful aroma of home baking—it really is a heartfelt treat that everyone will adore!
Print
Homemade Blueberry Lemon Danish
- Total Time: 30 minutes
- Yield: 18 pastries 1x
- Diet: Vegetarian
Description
A delightful combination of blueberries and lemon in a flaky pastry, perfect for any occasion.
Ingredients
- 375 g baking mix
- 38 g granulated sugar
- 85 g unsalted butter, softened
- 240 ml milk
- 2 tablespoons lemon zest
- 595 g blueberry pie filling
- 16 g plain flour
- 16 g quick oats
- 28 g cold butter
- 1 teaspoon lemon zest
- 90 g powdered sugar
- 15 ml lemon juice
Instructions
- Preheat oven to 230°C. Line three baking sheets with parchment paper.
- Combine baking mix, sugar, and softened butter in a large bowl until mixture resembles coarse crumbs. Stir in milk and lemon zest with a fork until a sticky dough forms.
- Drop 6 spoonfuls of dough onto each prepared baking sheet, leaving space between each. Use the back of a spoon to gently press and create a well in the center of each portion.
- Spoon blueberry pie filling evenly into the center of each pastry well.
- In a small bowl, combine flour, oats, cold butter, and lemon zest. Use a fork or pastry blender to mix until crumbly. Sprinkle the topping evenly over each pastry.
- Bake for 10 minutes or until pastries are golden around the edges.
- Remove from oven and allow pastries to cool on the tray for several minutes before transferring gently to a wire rack to cool completely.
- Whisk powdered sugar with lemon juice in a small bowl until smooth.
- Drizzle the lemon glaze over cooled pastries before serving.
Notes
- Store pastries in a loosely sealed container at room temperature for up to 3 days, or refrigerate in an airtight container for up to 6 days.
- Prep Time: 20 minutes
- Cook Time: 10 minutes
- Category: Dessert
- Method: Baking
- Cuisine: American
Nutrition
- Serving Size: 1 pastry
- Calories: 230
- Sugar: 12 g
- Sodium: 180 mg
- Fat: 10 g
- Saturated Fat: 6 g
- Unsaturated Fat: 3 g
- Trans Fat: 0 g
- Carbohydrates: 33 g
- Fiber: 1 g
- Protein: 3 g
- Cholesterol: 20 mg