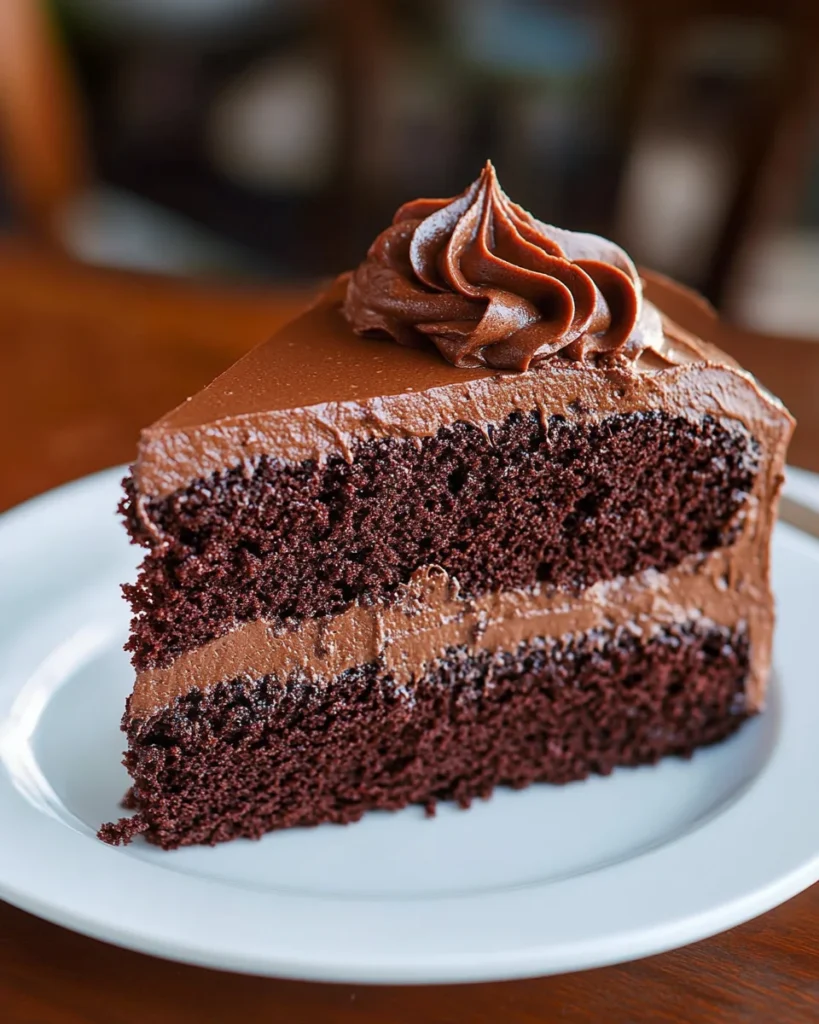
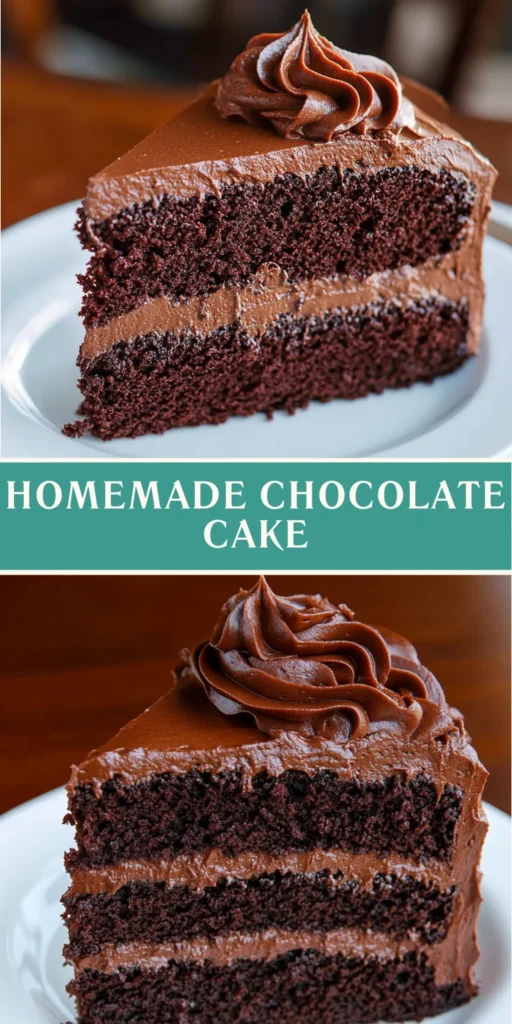
Homemade Chocolate Cake: Enjoy a Delightfully Moist Treat!

Introduction to Homemade Chocolate Cake
There’s something magical about a slice of homemade chocolate cake, isn’t there? It’s like a warm hug on a plate, perfect for those busy days when you need a little pick-me-up. This homemade chocolate cake is not just a dessert; it’s a delightful treat that can turn an ordinary day into a special occasion. Whether you’re celebrating a birthday, hosting a gathering, or simply craving something sweet, this recipe is your go-to solution. Trust me, your loved ones will be asking for seconds, and you’ll feel like a superstar in the kitchen!
Why You’ll Love This Homemade Chocolate Cake
This homemade chocolate cake is a dream come true for busy moms and professionals alike. It’s incredibly easy to whip up, taking just over an hour from start to finish. The rich, moist texture will have your family raving about it for days. Plus, it’s versatile enough for any occasion, whether it’s a cozy family dinner or a festive celebration. You’ll love how it brings everyone together around the table!
Ingredients for Homemade Chocolate Cake
Gathering the right ingredients is the first step to creating your homemade chocolate cake masterpiece. Here’s what you’ll need:
- All-purpose flour: This is the backbone of your cake, providing structure and stability.
- Sugar: Sweetness is key! It not only sweetens but also helps with moisture.
- Cocoa powder: The star of the show! It gives your cake that rich chocolate flavor.
- Baking powder and baking soda: These leavening agents help your cake rise, making it light and fluffy.
- Salt: A pinch enhances all the flavors, balancing the sweetness.
- Milk: Adds moisture and richness to the batter, making it tender.
- Oil: Keeps the cake moist and adds a lovely texture. You can use vegetable or canola oil.
- Eggs: They bind everything together and contribute to the cake’s structure.
- Vanilla extract: A splash of vanilla adds depth and warmth to the flavor.
- Boiling water: This might sound odd, but it helps to bloom the cocoa, intensifying the chocolate flavor.
- Butter: Softened butter is used for the frosting, adding creaminess and richness.
- Powdered sugar: Essential for frosting, it gives that sweet, smooth finish.
- Additional cocoa powder (for frosting): This gives your frosting that deep chocolatey goodness.
- Milk (for frosting): Adjusts the consistency of your frosting to make it spreadable.
- Pinch of salt (for frosting): Just a touch enhances the sweetness of the frosting.
For exact measurements, check the bottom of the article where you can find everything listed for easy printing. Feel free to get creative! You can substitute ingredients based on what you have at home. For instance, if you’re out of eggs, unsweetened applesauce can work as a great alternative. Happy baking!
How to Make Homemade Chocolate Cake
Now that you have your ingredients ready, let’s dive into the fun part: making your homemade chocolate cake! Follow these simple steps, and you’ll be on your way to baking bliss.
Step 1: Prepare Your Pans and Preheat Oven
First things first, let’s get your pans ready. Line two 9-inch round cake pans with parchment paper. This little trick ensures your cakes come out easily without sticking. Then, spray the pans with non-stick spray for extra insurance. Now, preheat your oven to 350°F. This step is crucial because a hot oven helps your cake rise beautifully!
Step 2: Mix Dry Ingredients
In a large mixing bowl, whisk together the all-purpose flour, sugar, cocoa powder, baking powder, baking soda, and salt. This step is vital for achieving a light and fluffy texture. Mixing the dry ingredients evenly ensures that the leavening agents are well-distributed, giving your cake that perfect rise. Trust me, you don’t want any surprises in your cake!
Step 3: Combine Wet Ingredients
Next, it’s time to add the wet ingredients. Pour in the milk, oil, eggs, and vanilla extract. Whisk everything together until the mixture is smooth and well combined. The smoothness of your batter is key to a tender cake. Don’t rush this step; take your time to blend it all together. Then, stir in the boiling water. It may seem unusual, but this helps to bloom the cocoa, enhancing that rich chocolate flavor!
Step 4: Bake the Cakes
Now, divide the batter evenly between the two prepared pans. Pop them into your preheated oven and bake for 30 to 35 minutes. To check for doneness, insert a toothpick into the center of the cakes. If it comes out clean or with just a few crumbs, they’re ready! If not, give them a few more minutes. Remember, overbaking can lead to a dry cake, and we want it moist and delicious!
Step 5: Cool and Frost
Once baked, let the cakes cool in the pans for about 10 minutes. Then, carefully invert them onto cooling racks to cool completely. This step is essential because frosting a warm cake can lead to a melty mess. While the cakes cool, prepare your frosting. Beat together the softened butter, cocoa powder, powdered sugar, vanilla, and milk until smooth. Adjust the milk to achieve your desired consistency. Once the cakes are cool, spread a generous layer of frosting on top of one cake, place the second cake on top, and frost the sides and top. Voila! Your homemade chocolate cake is ready to impress!
Tips for Success
- Always use room temperature ingredients for a smoother batter.
- Don’t skip the parchment paper; it makes cake removal a breeze.
- Let your cakes cool completely before frosting to avoid melting.
- For extra moisture, wrap cooled cakes in plastic wrap and freeze.
- Let the frosted cake sit overnight for enhanced flavor.
Equipment Needed
- 9-inch round cake pans: If you don’t have these, use square pans instead.
- Mixing bowls: Any large bowl will do; just make sure it’s sturdy.
- Whisk: A fork can work in a pinch for mixing ingredients.
- Measuring cups and spoons: Essential for accuracy; you can use a kitchen scale if needed.
- Cooling racks: If you don’t have these, a plate will suffice for cooling the cakes.
Variations of Homemade Chocolate Cake
- Gluten-Free: Substitute all-purpose flour with a gluten-free blend to make this cake suitable for those with gluten sensitivities.
- Vegan: Replace eggs with flaxseed meal or unsweetened applesauce, and use plant-based milk and oil for a delicious vegan version.
- Chocolate Chip Delight: Fold in a cup of chocolate chips into the batter for an extra chocolatey treat that will have everyone swooning.
- Mint Chocolate: Add a teaspoon of peppermint extract to the batter for a refreshing minty twist that pairs beautifully with chocolate.
- Mocha Cake: Mix in a tablespoon of instant coffee granules with the dry ingredients for a delightful coffee flavor that enhances the chocolate.
Serving Suggestions for Homemade Chocolate Cake
- Fresh Berries: Serve with a side of strawberries or raspberries for a pop of color and tartness.
- Ice Cream: A scoop of vanilla or mint chocolate chip ice cream pairs perfectly with warm cake.
- Coffee: Brew a strong cup of coffee to enhance the chocolate flavor.
- Presentation: Dust with powdered sugar or cocoa for an elegant touch.
- Whipped Cream: Top with a dollop of whipped cream for added creaminess.
FAQs about Homemade Chocolate Cake
As a passionate home cook, I often get questions about my beloved homemade chocolate cake. Here are some common queries that might help you on your baking journey!
Can I use cocoa powder instead of chocolate in this homemade chocolate cake?
Absolutely! Cocoa powder is the star ingredient in this recipe, giving your cake that rich chocolate flavor. Just make sure to use high-quality cocoa for the best results.
How can I make my homemade chocolate cake even more moist?
To enhance moisture, try wrapping your cooled cakes in plastic wrap and freezing them for a bit. This helps lock in moisture. Also, using room temperature ingredients can make a big difference!
Can I make this cake ahead of time?
Yes! You can bake the cakes a day in advance. Just store them wrapped in plastic wrap at room temperature. Frosting the cake the next day allows the flavors to meld beautifully.
What’s the best way to store leftover homemade chocolate cake?
Store any leftovers in an airtight container at room temperature for up to three days. If you want to keep it longer, refrigerate it for up to a week. Just remember to let it come to room temperature before serving!
Can I freeze the homemade chocolate cake?
Definitely! This cake freezes well. Just wrap it tightly in plastic wrap and then in aluminum foil. It can last up to three months in the freezer. Thaw it in the fridge overnight before serving.
Final Thoughts
Baking this homemade chocolate cake is more than just a recipe; it’s an experience filled with joy and love. The aroma wafting through your kitchen will bring smiles to your family’s faces, creating memories that last a lifetime. Each slice is a celebration, whether it’s a special occasion or a simple weeknight treat. I hope this cake becomes a cherished part of your family traditions, just as it has in mine. So, roll up your sleeves, embrace the mess, and enjoy the sweet rewards of your hard work. Happy baking, my friends!
Print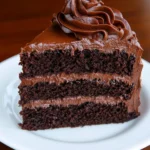
Homemade Chocolate Cake
- Total Time: 55 minutes
- Yield: 12 servings 1x
- Diet: Vegetarian
Description
A deliciously moist homemade chocolate cake topped with rich chocolate frosting.
Ingredients
- 2 cups all purpose flour
- 2 cups sugar
- 3/4 cup cocoa powder
- 2 tsp baking powder
- 1 1/2 tsp baking soda
- 1 tsp salt
- 1 cup milk
- 1/2 cup oil
- 2 eggs
- 2 tsp vanilla
- 1 cup boiling water
- 1/2 cup butter softened
- 1/2 cup cocoa powder (for frosting)
- 4 cups powdered sugar
- 1 tsp vanilla (for frosting)
- 1 pinch salt (for frosting)
- 6–8 Tbsp milk (for frosting)
Instructions
- Line two 9″ round pans with parchment paper and spray with non-stick spray. Preheat oven to 350°.
- Whisk together the flour, sugar, cocoa, baking powder, baking soda, and salt in a large mixing bowl.
- Whisk in the milk, oil, eggs, and vanilla till smooth. Stir in the boiling water, mixing till smooth.
- Divide batter evenly between the two pans. Bake at 350° for 30-35 minutes or till toothpick inserted in the center comes out clean. Cool for 10 minutes in the pans, then invert onto cooling racks.
- Cool completely. (I wrap each cake in plastic wrap and freeze.) Place one cake on a cake stand or serving tray. Spread about a cup of frosting on the top. Place the other cake on top. Frost sides and top of the cake. Serve immediately or cover and let sit overnight.
- For frosting, beat all ingredients in a bowl till smooth, adding enough milk to get a spreadable consistency.
Notes
- For best results, use room temperature ingredients.
- Freezing the cakes can help maintain moisture.
- Let the cake sit overnight for enhanced flavor.
- Prep Time: 20 minutes
- Cook Time: 35 minutes
- Category: Dessert
- Method: Baking
- Cuisine: American
Nutrition
- Serving Size: 1 slice
- Calories: 350
- Sugar: 30g
- Sodium: 200mg
- Fat: 15g
- Saturated Fat: 7g
- Unsaturated Fat: 8g
- Trans Fat: 0g
- Carbohydrates: 50g
- Fiber: 2g
- Protein: 4g
- Cholesterol: 50mg