Homemade Seeded Bread Rolls that Will Wow Your Guests!

Introduction to Homemade Seeded Bread Rolls
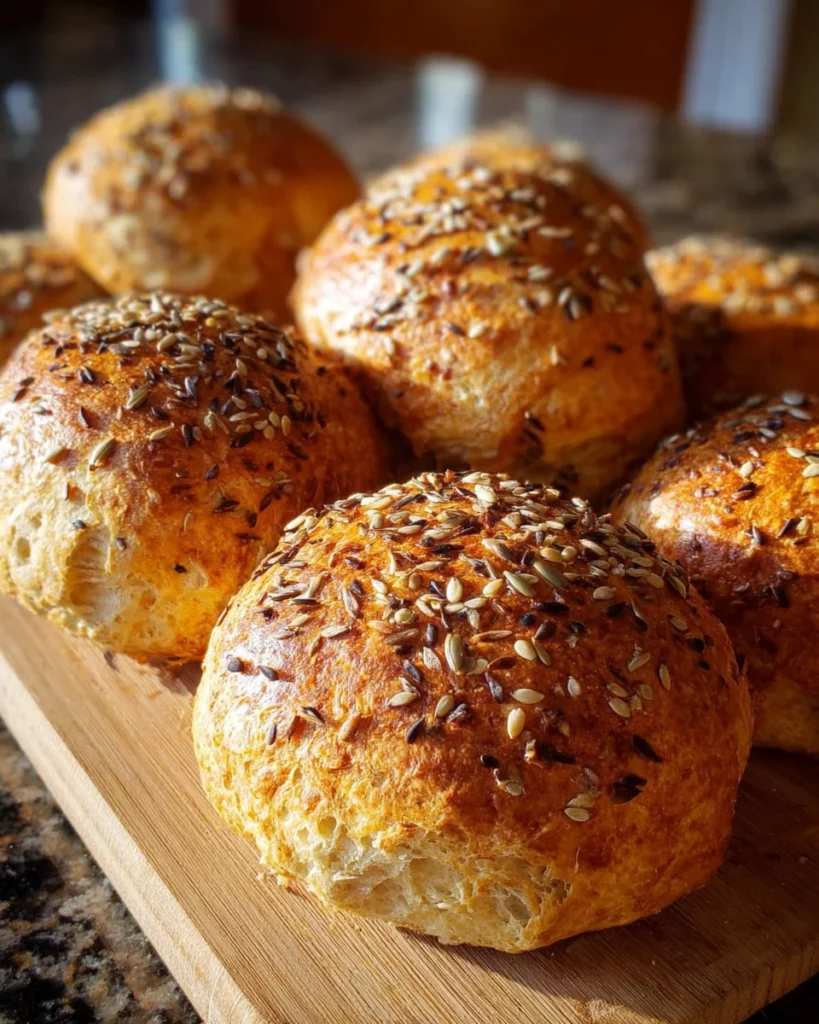
Have you ever wished for a warm, homemade treat that could make any meal feel special? Well, let me introduce you to my favorite delight: homemade seeded bread rolls. These fluffy little wonders are perfect for busy moms and professionals like us, ready to impress our loved ones without spending hours in the kitchen. The aroma of baking bread can instantly lift our spirits and create a cozy atmosphere. Whether you’re hosting friends or just looking to elevate your dinner routine, these rolls are sure to wow everyone at your table!
Why You’ll Love This Homemade Seeded Bread Rolls
It’s no secret that life can get hectic, especially for busy moms and professionals. That’s why I adore these homemade seeded bread rolls. They are incredibly easy to make, taking less than two hours from start to finish. Plus, the delightful taste of freshly baked bread, with a nutty crunch from the seeds, is simply irresistible. Trust me, these rolls will become a staple in your kitchen, impressing everyone with little effort!
Ingredients for Homemade Seeded Bread Rolls
Gathering the right ingredients is fundamental to making homemade seeded bread rolls that oozes warmth and flavor. Here’s what you’ll need:
- All-purpose flour: The foundation of your bread rolls. It provides structure and chewiness. You can substitute it with whole wheat flour for a healthier option.
- Instant dry yeast: This magical ingredient helps your rolls rise beautifully. Using instant yeast makes the process quicker, giving fluffiness without long waits.
- Granulated sugar: A touch of sugar feeds the yeast and adds a slight sweetness. You can use honey or agave syrup as a natural alternative.
- Salt: Essential for flavor, salt balances the sweetness and enhances the bread’s overall taste.
- Warm water: The warmth helps activate the yeast. Make sure it’s around 105°F to 115°F, like a gentle bath for the yeast.
- Vegetable oil: This adds moisture and tenderness to the rolls. You can swap it for olive oil or melted butter for extra flavor.
- Mixed seeds: These add texture and nutrition. I love using sunflower, poppy, sesame, and pumpkin seeds—feel free to mix and match!
- Water for brushing: This creates a lovely sheen on top of the rolls and helps the seeds adhere.
The exact quantities for each ingredient are listed at the end of this article for your convenience, ready for printing. Enjoy making these delightful rolls!
How to Make Homemade Seeded Bread Rolls
Making homemade seeded bread rolls is a delightful journey, and I’m excited to guide you through each step. This process is simple, and as we follow along, you’ll see how each phase builds flavor and texture. Let’s dive in!
Step 1: Prepare the Yeast Mixture
To start, we need to wake up our yeast! In a large mixing bowl, combine the warm water and granulated sugar. That sugar acts as breakfast for the yeast, giving it a boost. Then, sprinkle the instant dry yeast over the top and let it sit for about 5 minutes. You’ll know it’s ready when it becomes foamy, which indicates the yeast is indeed alive and kicking. This simple step is crucial for light, fluffy rolls!
Step 2: Make the Dough
Once your yeast is frothy and ready, it’s time to get everything together. Add the flour and salt directly into the yeast mixture. Pour in the vegetable oil next, which will help keep our rolls tender. Using a wooden spoon or your hands, gently mix everything until a shaggy dough forms. It might look a bit rough at first, but that’s perfectly normal!
Step 3: Kneading the Dough
Now comes the fun part: kneading! Lightly dust a clean surface with flour and turn the shaggy dough out. Knead the dough for about 7 to 10 minutes, pushing and folding it until it feels smooth and elastic. You’ll know you’re done when the dough springs back after being poked. This action develops the gluten, making your rolls soft and wonderful!
Step 4: First Rise
After kneading, it’s time to let the dough rise. Lightly grease a clean large bowl with vegetable oil and place the dough inside, turning it once to coat. Cover it with plastic wrap and let it rise in a warm spot for 1 to 1.5 hours, or until it has doubled in size. This step is essential as it develops the flavors and creates that lovely airy texture we all crave!
Step 5: Shape the Rolls
Once your dough has risen beautifully, gently punch it down to release the air. Now, divide the dough into 8 to 10 equal pieces. Take each piece and shape it into a round roll. This isn’t just a fun shape; it helps create an even bake and a beautiful bread roll presentation!
Step 6: Second Rise
Next up is the second rise! Place your shaped rolls on a lined baking sheet, covering them lightly with a clean kitchen towel. Let them rise again for about 30 to 45 minutes. This step is vital, as it makes the rolls light and fluffy. Patience pays off here—trust me!
Step 7: Prepare for Baking
As the rolls are rising, preheat your oven to 375°F (190°C). In a small bowl, combine a tablespoon of water, and brush the tops of the rolls with this mixture. This not only creates a beautiful sheen but also helps the mixed seeds stick on top. Speaking of seeds, sprinkle them generously over the rolls—your future taste buds will thank you!
Step 8: Bake the Rolls
It’s time to bake those beauties! Slide the baking sheet into your preheated oven. Bake for about 20 to 25 minutes or until the rolls are golden brown and sound hollow when tapped on the bottom. Feel that excitement building? That’s the smell of home-baked goodness wafting through your kitchen!
Step 9: Cool the Rolls
After baking, transfer your rolls to a wire rack to cool completely. This step is essential for maintaining their fluffiness. If you cut into them too soon, you might end up with dense bread rather than the light rolls you deserve. Let them cool, and then enjoy the reward of your hard work!
Tips for Success
- Always check your yeast’s expiration date for the best rise.
- Adjust flour as needed; the dough should be slightly tacky but not overly sticky.
- Let the rolls rise in a warm, draft-free area for best results.
- Be generous with the mixed seeds; they add both flavor and crunch!
- Cool the rolls completely to keep their texture light and airy.
Equipment Needed
- Mixing Bowl: A large bowl is essential. You can use any size, but a bigger one gives room for rising.
- Wooden Spoon: Perfect for mixing. A sturdy spatula can work if you don’t have one.
- Rolling Pin: Optional for shaping but great for ensuring even rolls.
- Baking Sheet: A basic sheet works. If you have a stone, it can give a lovely crust.
- Wire Rack: For cooling the rolls. A plate can suffice in a pinch.
Variations
- Herb-Infused Rolls: Add dried herbs like rosemary or thyme to the dough for a savory twist.
- Cheesy Delight: Mix in shredded cheese, such as cheddar or Parmesan, for a rich flavor.
- Sweet Seeds: Substitute some seeds with chopped dried fruits like cranberries or apricots for a sweeter option.
- Gluten-Free Option: Use a gluten-free all-purpose flour mix, adjusting the liquid as needed for the right consistency.
- Seed Choices: Experiment with different combinations of seeds like flaxseed, chia seeds, or even poppy seeds for a unique flavor.
Serving Suggestions for Homemade Seeded Bread Rolls
- Pair these rolls with a warm bowl of soup, like tomato basil or butternut squash, for a comforting meal.
- Serve alongside a fresh salad drizzled with vinaigrette to balance the hearty bread.
- Try them with a spread of herb-infused butter or your favorite jam for an exquisite treat.
- Present on a rustic wooden board for a beautiful tablescape that will impress your guests.
- Enjoy with a glass of freshly squeezed lemonade or a rich red wine to elevate your dining experience.
FAQs about Homemade Seeded Bread Rolls
As you embark on your baking adventure with homemade seeded bread rolls, you might have a few questions. Here are some common inquiries that can help guide your way:
Can I substitute the all-purpose flour with whole wheat flour?
Absolutely! Whole wheat flour can add a nutty flavor and increase the nutritional value of your rolls. Just remember that this might alter the texture slightly, making the rolls a bit denser.
What if my dough feels too sticky?
No worries! If your dough is sticking to your hands or the counter, simply add a little more flour, a tablespoon at a time, until it reaches the right consistency. It should be tacky but manageable.
How do I store leftover rolls?
To keep them fresh, store the rolls in an airtight container at room temperature for a couple of days. If you want to enjoy them later, freeze them wrapped in plastic wrap and placed in a zip-top bag.
Can I use active dry yeast instead of instant dry yeast?
You can! Just remember to activate it in warm water with a pinch of sugar for about 10 minutes before adding it to your dough mixture.
How can I make these rolls vegan?
Making these rolls vegan is simple; just replace the vegetable oil with olive oil and use plant-based butter for any spreads. They’ll be just as delicious and fluffy!
Final Thoughts
As you can see, making homemade seeded bread rolls is more than just a recipe; it’s an experience filled with warmth and joy. The smell of freshly baked rolls wafts through your home, inviting everyone to gather around the table. With each fluffy bite, you’ll feel fulfilled knowing you created something special from scratch. The joy in sharing these rolls with loved ones is truly unmatched. So, roll up your sleeves, embrace the mess, and enjoy this delightful baking adventure. Trust me, the smiles and satisfaction you’ll receive will be worth every moment spent in the kitchen!
Print
Homemade Seeded Bread Rolls
- Total Time: 1 hour 40 minutes
- Yield: 8–10 rolls 1x
- Diet: Vegetarian
Description
Delicious homemade seeded bread rolls perfect for impressing your guests.
Ingredients
- 3 cups all-purpose flour (plus more for dusting)
- 2 and 1/4 teaspoons instant dry yeast (one standard packet)
- 1 tablespoon granulated sugar
- 1 teaspoon salt
- 1 cup warm water (about 105-115°F)
- 2 tablespoons vegetable oil (plus more for greasing)
- 1/4 cup mixed seeds (such as sunflower, poppy, sesame, pumpkin)
- 1 tablespoon water (for brushing)
Instructions
- In a large mixing bowl, combine the warm water and granulated sugar. Sprinkle the instant dry yeast over the top and let it sit for 5 minutes until it becomes foamy.
- Add the flour and salt to the yeast mixture. Pour in the vegetable oil and mix until a shaggy dough forms.
- Turn the dough out onto a lightly floured surface and knead for 7-10 minutes until smooth and elastic.
- Lightly grease a clean large bowl with vegetable oil. Place the dough in the bowl, turning once to coat. Cover with plastic wrap and let it rise for 1 to 1 and a half hours.
- Gently punch down the risen dough and divide it into 8-10 equal pieces, shaping each piece into a round roll.
- Line a baking sheet with parchment paper and arrange the rolls on it, covering them lightly. Let them rise again for 30-45 minutes.
- Preheat your oven to 375°F (190°C) while the rolls are rising.
- Brush the tops of the rolls with 1 tablespoon of water and sprinkle generously with mixed seeds.
- Bake for 20-25 minutes or until golden brown and hollow-sounding when tapped on the bottom.
- Transfer the rolls to a wire rack to cool completely.
Notes
- Ensure the yeast is fresh for optimal rise.
- Adjust the amount of flour if the dough is too sticky.
- Let the rolls cool completely to maintain a fluffy texture.
- Prep Time: 15 minutes
- Cook Time: 25 minutes
- Category: Bread
- Method: Baking
- Cuisine: Homemade
Nutrition
- Serving Size: 1 roll
- Calories: 150
- Sugar: 1g
- Sodium: 180mg
- Fat: 5g
- Saturated Fat: 0.5g
- Unsaturated Fat: 4g
- Trans Fat: 0g
- Carbohydrates: 23g
- Fiber: 2g
- Protein: 4g
- Cholesterol: 0mg