Homemade Vanilla Custard: Indulge in Creamy Perfection!

Introduction to Homemade Vanilla Custard
There’s something magical about homemade vanilla custard that brings comfort to the heart and warmth to the kitchen. Whenever I whip up this creamy delight, I feel like I’m nurturing both my family and my creative spirit. This homemade vanilla custard is not only rich and luxurious but also a quick solution for busy days when you’re in need of a delightful dessert. Whether you’re treating the family or impressing guests, this dreamy custard is sure to steal the show. Let’s dive into this simple recipe that will transform any occasion into a special celebration!
Why You’ll Love This Homemade Vanilla Custard
This homemade vanilla custard is a dessert that brings joy without the fuss. It’s quick to prepare, taking just 25 minutes from start to finish. The blend of rich flavors creates a delicious taste that dances on your palate. Plus, it’s versatile! You can enjoy it alone, use it as a base for other desserts, or even pair it with fresh fruits. It’s the perfect answer for a sweet craving on a busy day!
Ingredients for Homemade Vanilla Custard
Creating the perfect homemade vanilla custard starts with the right ingredients. Here’s what you’ll need to whip up this creamy goodness:
- Whole milk: The foundation of our custard, it provides that rich creaminess we crave. You can also use 2% milk for a lighter version.
- Granulated sugar: This sweetener adds a touch of indulgence, balancing the flavors beautifully. Feel free to swap it for coconut sugar or a sugar alternative for a healthier twist.
- Egg yolks: The magic ingredient that gives custard its smooth texture and rich taste. They’re loaded with flavor and nutrients!
- Cornstarch: This thickening agent helps achieve that perfect consistency without making lumps. For a gluten-free option, use arrowroot powder instead.
- Unsalted butter: It adds a luscious richness at the end, making the custard shine. You can skip this if you’re looking to reduce fat, but I don’t recommend it!
- Pure vanilla extract: This is where the flavor takes flight! Authentic vanilla extract sets the custard apart. For extra flair, you can use vanilla bean paste or scrape fresh seeds.
- Pinch of salt: Just a smidge enhances the sweetness and rounds out the flavors perfectly.
Remember, the exact quantities for these ingredients are listed at the bottom of the article for easy reference and printing. Let’s gather everything and create some magic in the kitchen!
How to Make Homemade Vanilla Custard
Making homemade vanilla custard may seem daunting, but I promise it’s easier than it looks! Follow these simple steps, and you’ll have a creamy dessert that’s bursting with flavor. Let’s get cooking!
Step 1: Warm the Milk
Start by pouring the whole milk into a heavy-bottomed saucepan. Set your heat to medium. You’ll want to heat the milk until it starts to steam—but don’t let it boil! This step is crucial as it creates the right base for a silky custard.
Step 2: Prepare the Egg Mixture
While your milk is warming, grab a mixing bowl. Whisk together the egg yolks, granulated sugar, cornstarch, and a pinch of salt. Keep whisking until the mixture is a pale yellow and slightly thickened. This helps to create that smooth custard texture that pairs perfectly with desserts.
Step 3: Temper the Eggs
To temper the eggs, slowly pour about half a cup of the warm milk into the egg mixture while whisking constantly. This trick keeps your eggs from scrambling when you combine them with the hot milk. You want a smooth blend without any lumps!
Step 4: Combine and Cook
Now, gradually whisk in the remainder of the warm milk. Pour everything back into the saucepan, and place it over low to medium heat. Stir constantly with a wooden spoon or spatula. You’ll know it’s ready when the custard thickens and can coat the back of the spoon.
Step 5: Final Touches
Once your custard thickens, remove it from the heat. Stir in the unsalted butter and pure vanilla extract, allowing it to melt and mix thoroughly. This step adds richness and enhances the flavor profile—trust me, it’s worth it!
Step 6: Strain and Cool
To ensure your homemade vanilla custard is perfectly smooth, strain it through a fine-mesh sieve into a clean bowl. This will catch any stray lumps. Press some plastic wrap directly onto the surface of the custard to prevent a skin from forming. Let it cool at room temperature before refrigerating. Chill it for at least a couple of hours, and then it’s ready to enjoy!
Tips for Success
- Always whisk continuously while cooking to maintain a smooth consistency.
- Use a heavy-bottomed saucepan to prevent hot spots that could cause lumps.
- For an extra smooth texture, let the custard cool before serving.
- Experiment with different flavorings like nutmeg or cinnamon for a twist.
- Be patient while it thickens; rushing can lead to scrambled eggs.
Equipment Needed for Homemade Vanilla Custard
- Heavy-bottomed saucepan: Essential for even heating. If you don’t have one, a regular saucepan works—just keep an eye on temperature.
- Mixing bowl: Any medium-sized bowl will do for whisking the ingredients. A glass bowl lets you see the color changes.
- Whisk: A regular whisk is perfect; if you have a hand mixer, it can save some elbow grease.
- Fine-mesh sieve: This helps achieve that velvety smooth custard. A cheesecloth can be a good alternative.
- Spatula or wooden spoon: Use these for stirring and scraping the sides. They both work great!
Variations of Homemade Vanilla Custard
- Chocolate Custard: Add 1/2 cup of unsweetened cocoa powder to the egg mixture for a rich chocolate twist.
- Fruit-Infused Custard: Mix in a cup of pureed strawberries, raspberries, or any fruit of your choice after cooking for a vibrant flavor.
- Spiced Custard: Enhance the flavor by adding a pinch of cinnamon or nutmeg to the egg mixture for a warm, cozy note.
- Almond Custard: Substitute almond extract for vanilla for a unique nutty flavor that delights the senses.
- Vegan Custard: Use coconut milk and substitute egg yolks with cornstarch or agar-agar for a plant-based version.
Serving Suggestions for Homemade Vanilla Custard
- Top your custard with freshly sliced strawberries or a sprinkle of cinnamon for a delightful contrast.
- Serve it alongside buttery shortbread cookies for a scrumptious dessert plate.
- Pour it over warm apple pie or chocolate cake for a decadent touch.
- Pair with sweetened whipped cream for that extra indulgence.
- Garnish in elegant dessert glasses for a beautiful presentation at gatherings.
FAQs about Homemade Vanilla Custard
When it comes to homemade vanilla custard, I often find myself answering a few common questions! Here are some FAQs that might help you with your custard journey:
Can I use low-fat milk for this recipe?
While whole milk is ideal for that luscious creaminess, you can certainly use low-fat milk. Just keep in mind that the texture may be less rich.
How do I store homemade vanilla custard?
Homemade vanilla custard can be stored in the refrigerator for up to three days. Just press plastic wrap against the surface to keep it fresh and prevent a skin from forming.
Can I freeze custard for later use?
Freezing is not recommended for homemade vanilla custard, as it may change the texture. However, you can definitely make it ahead of time and keep it in the fridge!
What can I do if my custard turns lumpy?
If your custard ends up lumpy, don’t panic! Simply strain it through a fine-mesh sieve to create that smooth, velvety consistency we all love.
Can I add flavors to my vanilla custard?
Absolutely! Feel free to experiment with flavors. A splash of almond extract, a sprinkle of nutmeg, or even infusing it with citrus are all fantastic options!
Final Thoughts
There’s an undeniable joy in creating something so simple yet so delicious, like homemade vanilla custard. Each spoonful transports me back to my grandmother’s kitchen, filled with laughter and warmth. This creamy delight is not just a dessert; it’s a way to gather loved ones and spark fond memories. Whether enjoyed chilled or warmed, it always feels like a hug in a bowl. So, as you embark on your custard-making adventure, know that every whisk and stir brings you closer to a sweet moment of happiness that will be cherished by you and your family!
Print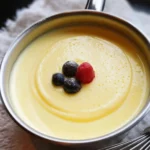
Homemade Vanilla Custard
- Total Time: 25 minutes
- Yield: Serves 4-6 1x
- Diet: Vegetarian
Description
A rich and creamy homemade vanilla custard recipe that’s perfect for desserts or as a base for various pastries.
Ingredients
- 2 cups whole milk
- 1/2 cup granulated sugar
- 4 large egg yolks
- 2 tablespoons cornstarch
- 1 tablespoon unsalted butter
- 1 1/2 teaspoons pure vanilla extract
- 1 pinch salt
Instructions
- In a heavy-bottomed saucepan, warm the milk over medium heat until it begins to steam but does not boil. Remove from heat.
- In a separate bowl, whisk together the egg yolks, sugar, cornstarch, and salt until pale and slightly thickened.
- Slowly pour 1/2 cup of the warm milk into the egg mixture while whisking constantly to temper the eggs.
- Gradually whisk in the remaining warm milk, then pour the entire mixture back into the saucepan.
- Cook over low to medium heat, stirring constantly, until the custard thickens and coats the back of a spoon.
- Remove from heat and stir in the butter and vanilla extract until smooth and glossy.
- Strain the custard through a fine-mesh sieve into a clean bowl to ensure smoothness.
- Press plastic wrap directly onto the surface of the custard and let it cool at room temperature, then refrigerate.
- Serve chilled or slightly warmed, garnished as desired.
Notes
- For a richer custard, consider using 2% or whole milk instead of low-fat milk.
- Make sure to stir constantly while cooking to avoid forming lumps.
- This custard can be stored in the refrigerator for up to 3 days.
- Prep Time: 10 minutes
- Cook Time: 15 minutes
- Category: Dessert
- Method: Stovetop
- Cuisine: French
Nutrition
- Serving Size: 1/2 cup
- Calories: 150
- Sugar: 12g
- Sodium: 70mg
- Fat: 6g
- Saturated Fat: 4g
- Unsaturated Fat: 0g
- Trans Fat: 0g
- Carbohydrates: 20g
- Fiber: 0g
- Protein: 4g
- Cholesterol: 150mg