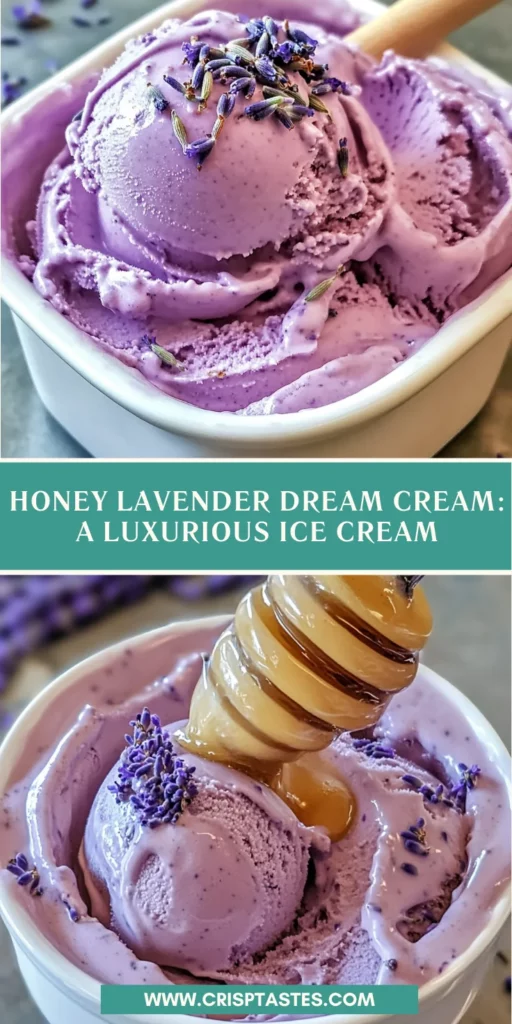
Honey Lavender Dream Cream: A Luxurious Ice Cream

Introduction to Honey Lavender Dream Cream
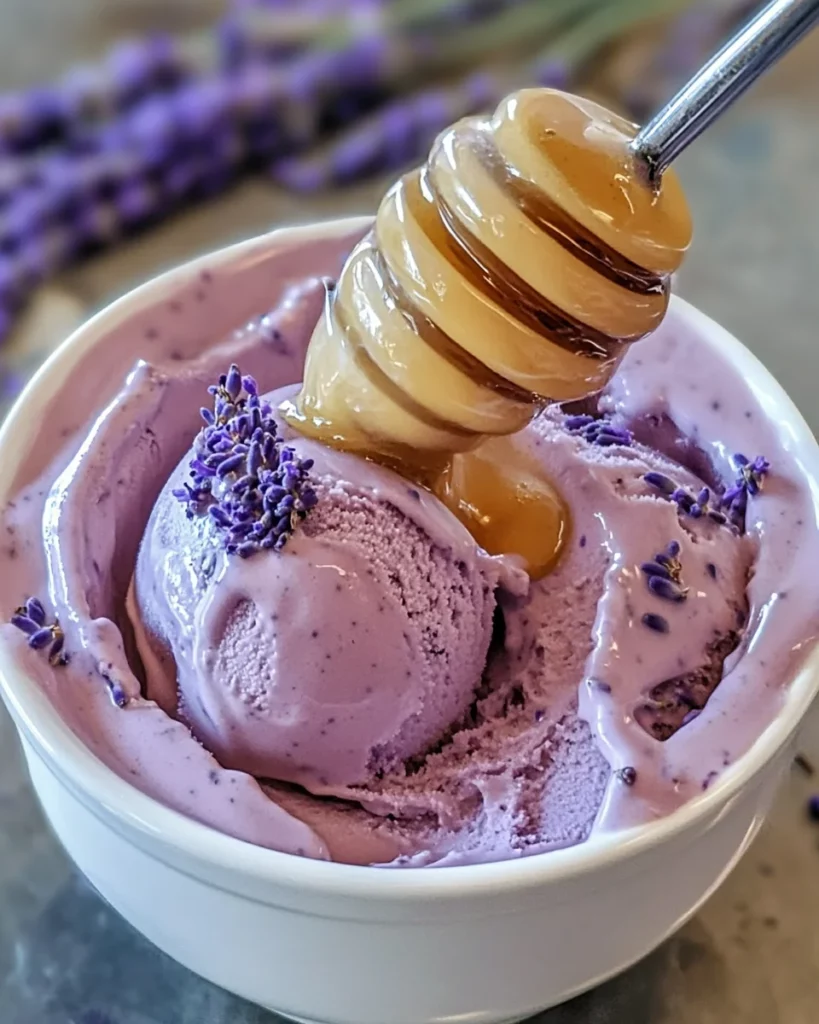
Welcome to a world of sweet indulgence with my Honey Lavender Dream Cream! As a busy mom, I know how precious those moments of relaxation can be. This creamy ice cream is not just a treat; it’s a delightful escape from the daily hustle. Imagine the soothing floral notes of lavender mingling with the rich sweetness of honey, creating a dessert that feels like a warm hug. Whether you’re looking to impress guests or simply want to pamper yourself after a long day, this recipe is your go-to solution. Let’s dive into this dreamy creation together!
Why You’ll Love This Honey Lavender Dream Cream
This Honey Lavender Dream Cream is a delightful blend of simplicity and elegance. It’s easy to whip up, making it perfect for busy days when you crave something special. The floral aroma of lavender paired with the sweetness of honey creates a taste that’s both refreshing and comforting. Plus, it’s a fantastic way to impress your family and friends without spending hours in the kitchen. Trust me, they’ll be asking for seconds!
Ingredients for Honey Lavender Dream Cream
Gathering the right ingredients is the first step to creating your Honey Lavender Dream Cream. Here’s what you’ll need:
- Heavy cream: This is the base of your ice cream, providing that rich, creamy texture we all love.
- Whole milk: It adds a smoothness that balances the richness of the cream, making every scoop delightful.
- Honey: Opt for a mild, floral variety to enhance the sweetness without overpowering the lavender.
- Dried culinary lavender: This is the star of the show! It infuses your ice cream with a lovely floral aroma and flavor.
- Egg yolks: They help create a custard base, giving your ice cream that luxurious creaminess.
- Vanilla extract: A splash of vanilla rounds out the flavors, adding warmth to the overall taste.
- Pinch of salt: Just a tiny bit enhances the sweetness and balances the flavors beautifully.
- Optional natural coloring: A few drops of purple coloring or a pinch of butterfly pea powder can add a lovely hue to your ice cream.
- Extra lavender buds: These are perfect for garnishing, adding a touch of elegance to your presentation.
For exact measurements, check the bottom of the article where you can find everything listed for easy printing. Happy cooking!
How to Make Honey Lavender Dream Cream
Now that you have your ingredients ready, let’s get started on making this dreamy ice cream! Follow these simple steps, and soon you’ll be savoring your own Honey Lavender Dream Cream.
Step 1: Infuse the Milk
Begin by combining the heavy cream, whole milk, and dried culinary lavender in a medium saucepan. Heat the mixture over medium-low until it starts to steam, but don’t let it boil. This gentle heating allows the lavender to release its beautiful floral notes. Once it’s steaming, remove it from the heat, cover it, and let it steep for 15 to 20 minutes. Trust me, the aroma will be heavenly!
Step 2: Strain & Reheat
After steeping, it’s time to strain out the lavender. Use a fine mesh sieve to catch those little buds, leaving you with a smooth, fragrant milk mixture. Return this infused milk back to the saucepan and warm it gently again. This step ensures that the flavors are perfectly blended for your ice cream.
Step 3: Make the Custard
In a separate bowl, whisk together the egg yolks and honey until the mixture is pale and smooth. This is where the magic happens! Slowly pour in some of the warm milk mixture while whisking constantly. This process, called tempering, prevents the eggs from scrambling. It’s a crucial step for achieving that creamy custard base.
Step 4: Cook Until Thick
Now, pour the egg mixture back into the saucepan with the remaining milk. Cook over medium-low heat, stirring constantly. You want to keep an eye on it until the custard thickens and coats the back of a spoon. Aim for a temperature between 170°F and 175°F. Remember, patience is key here—don’t let it boil!
Step 5: Finish the Base
Once thickened, remove the saucepan from the heat. Stir in the vanilla extract and a pinch of salt. If you feel like it, strain the mixture again to ensure it’s silky smooth. Let it cool to room temperature, then refrigerate for at least 4 hours or overnight. This chilling time is essential for the best texture when churning.
Step 6: Churn the Ice Cream
When you’re ready to churn, pour the chilled base into your ice cream maker. Follow the manufacturer’s instructions, usually churning for about 20 to 25 minutes. You’ll see it transform into a creamy, dreamy consistency. It’s like watching a beautiful transformation unfold right before your eyes!
Step 7: Freeze to Set
After churning, transfer your ice cream to a freezer-safe container. Spread it out evenly and cover it tightly. Freeze for 2 to 4 hours until it’s scoopable. This step is crucial for achieving that perfect texture. You’ll want to resist the urge to dig in right away, but trust me, it’ll be worth the wait!
Step 8: Serve and Swoon
Finally, it’s time to serve your Honey Lavender Dream Cream! Scoop it into bowls or cones and garnish with a sprinkle of lavender buds or a drizzle of extra honey. This elegant touch not only looks beautiful but also enhances the flavor. Get ready for the compliments to roll in!
Tips for Success
- Always use culinary-grade lavender to ensure safety and flavor.
- Adjust the honey to your taste; some prefer it sweeter than others.
- For a creamier texture, make sure your base is well-chilled before churning.
- Don’t rush the steeping process; let the lavender infuse fully for the best flavor.
- Experiment with garnishes like fresh berries or a sprig of mint for added flair!
Equipment Needed
- Medium saucepan: A sturdy pot for heating and infusing the milk.
- Fine mesh sieve: Essential for straining out the lavender; a cheesecloth works too.
- Mixing bowls: Use these for whisking the egg yolks and honey.
- Ice cream maker: This is key for churning; a hand-crank model can work in a pinch.
- Freezer-safe container: Perfect for storing your finished ice cream.
Variations
- Lavender Lemonade Swirl: Add a swirl of homemade lemonade to your ice cream base before freezing for a refreshing citrus twist.
- Honey Almond Crunch: Mix in chopped toasted almonds during the churning process for a delightful crunch and nutty flavor.
- Dairy-Free Option: Substitute the heavy cream and whole milk with coconut cream and almond milk for a creamy, dairy-free version.
- Herbal Infusion: Experiment with other herbs like mint or basil alongside lavender for a unique flavor profile.
- Chocolate Drizzle: Drizzle melted dark chocolate over the top before serving for a decadent touch that pairs beautifully with the floral notes.
Serving Suggestions
- Pair your Honey Lavender Dream Cream with a slice of lemon pound cake for a delightful contrast.
- Serve alongside fresh berries like strawberries or blueberries for a pop of color and flavor.
- Enjoy with a cup of chamomile tea to enhance the floral notes.
- For a stunning presentation, use elegant glassware and garnish with mint leaves.
- Drizzle with extra honey just before serving for an extra touch of sweetness.
FAQs about Honey Lavender Dream Cream
As you embark on your journey to create this delightful Honey Lavender Dream Cream, you might have a few questions. Here are some common queries I’ve encountered, along with helpful answers to guide you along the way.
Can I use fresh lavender instead of dried?
Absolutely! If you have fresh lavender on hand, feel free to use it. Just remember that fresh lavender is more potent, so you may want to use a bit less than the dried version. Start with a tablespoon and adjust to your taste.
How long does Honey Lavender Dream Cream last in the freezer?
This creamy ice cream can last up to two weeks in the freezer. However, for the best flavor and texture, I recommend enjoying it within the first week. After that, it may become a bit icy.
Can I make this recipe without an ice cream maker?
Yes, you can! Pour the chilled base into a shallow dish and freeze it. Every 30 minutes, stir it with a fork to break up any ice crystals until it reaches your desired consistency. It’s a bit more work, but totally doable!
What can I substitute for honey if I want a vegan option?
If you’re looking for a vegan alternative, maple syrup works beautifully! It will give your ice cream a different flavor profile, but it’s equally delicious. Just keep in mind that it may alter the sweetness level slightly.
Can I add other flavors to my Honey Lavender Dream Cream?
Definitely! Feel free to experiment with flavors like lemon, almond, or even a hint of vanilla bean. Just remember to balance the flavors so the lavender still shines through. Happy experimenting!
Final Thoughts
Creating your own Honey Lavender Dream Cream is more than just making ice cream; it’s about crafting a moment of joy in your busy life. Each scoop is a reminder to slow down and savor the little things. The delicate floral notes of lavender combined with the sweetness of honey transport you to a serene garden, even on the most hectic days. Whether you’re sharing it with loved ones or enjoying a quiet moment to yourself, this dreamy treat brings a touch of elegance and comfort. So, go ahead, indulge in this delightful experience—you deserve it!
Print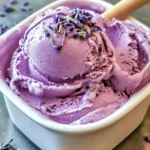
Honey Lavender Dream Cream: Savor a Sweet Delight!
- Total Time: 4 hours 50 minutes
- Yield: Approximately 1 quart 1x
- Diet: Vegetarian
Description
A delightful and creamy ice cream infused with the floral notes of lavender and the sweetness of honey.
Ingredients
- 2 cups heavy cream
- 1 cup whole milk
- 1/2 cup honey (preferably mild and floral)
- 2 tablespoons dried culinary lavender
- 4 large egg yolks
- 1 teaspoon vanilla extract
- Pinch of salt
- Optional: A few drops of natural purple coloring or a tiny pinch of butterfly pea powder (for color)
- Extra lavender buds for garnish
Instructions
- Infuse the Milk: In a medium saucepan, combine milk, cream, and lavender. Heat over medium-low until it just starts to steam (do not boil). Remove from heat, cover, and let steep for 15–20 minutes.
- Strain & Reheat: Strain out the lavender using a fine mesh sieve. Return the infused mixture to the pan and warm it gently.
- Make the Custard: In a separate bowl, whisk egg yolks and honey until pale and smooth. Slowly pour in some of the warm milk mixture, whisking constantly to temper the eggs.
- Cook Until Thick: Pour the egg mixture back into the saucepan. Cook over medium-low heat, stirring constantly, until the custard thickens and coats the back of a spoon (170–175°F). Do not let it boil.
- Finish the Base: Remove from heat, stir in vanilla and a pinch of salt. Strain again if needed. Let cool to room temperature, then refrigerate for at least 4 hours or overnight.
- Churn the Ice Cream: Pour the chilled base into your ice cream maker and churn according to manufacturer instructions (usually 20–25 minutes).
- Freeze to Set: Transfer to a freezer-safe container and freeze for 2–4 hours until scoopable.
- Serve and Swoon: Garnish with a sprinkle of lavender buds or a drizzle of extra honey for that elegant finish.
Notes
- Ensure the lavender used is culinary grade for safety.
- Adjust the amount of honey based on your sweetness preference.
- For a more vibrant color, consider using natural coloring options.
- Prep Time: 20 minutes
- Cook Time: 30 minutes
- Category: Dessert
- Method: Churning
- Cuisine: American
Nutrition
- Serving Size: 1/2 cup
- Calories: 250
- Sugar: 20g
- Sodium: 50mg
- Fat: 15g
- Saturated Fat: 9g
- Unsaturated Fat: 4g
- Trans Fat: 0g
- Carbohydrates: 28g
- Fiber: 0g
- Protein: 4g
- Cholesterol: 150mg