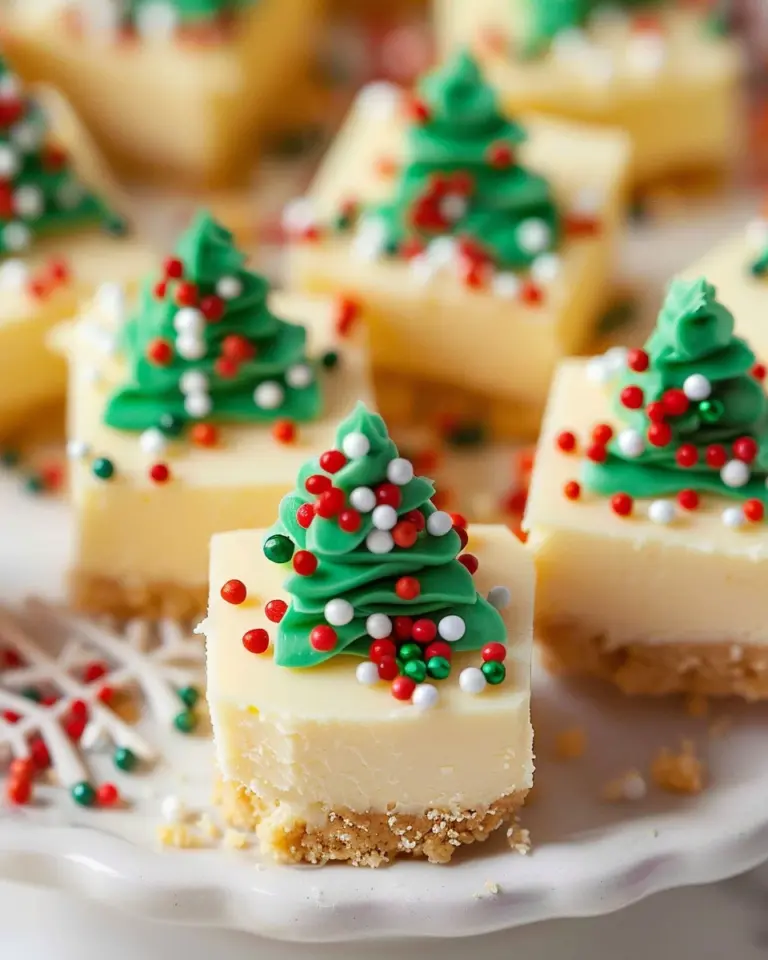
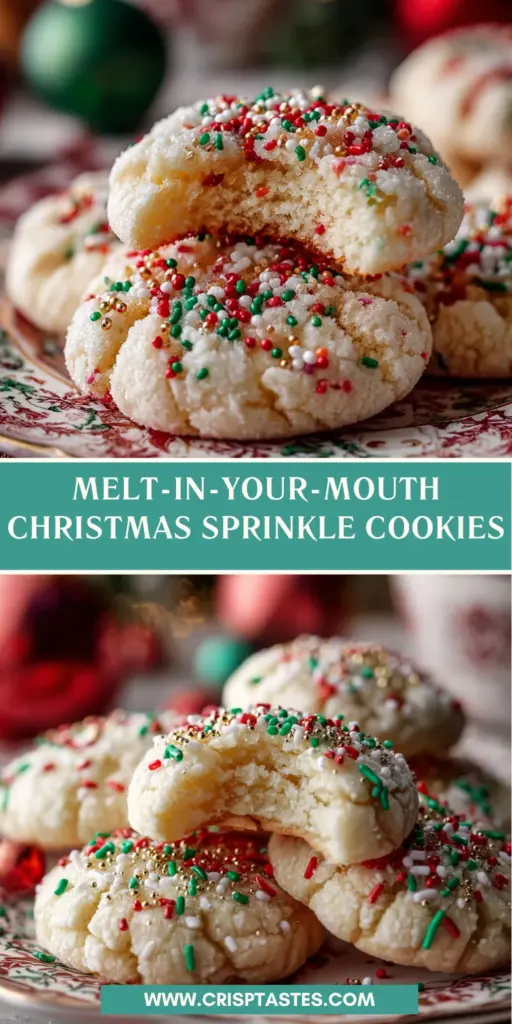
Melt-in-Your-Mouth Christmas Sprinkle Cookies

Introduction to Melt-in-Your-Mouth Christmas Sprinkle Cookies
Ah, the holidays! A time filled with joy, laughter, and, most importantly, delicious treats. If you’re anything like me, you know the challenge of finding time to bake while juggling everything else on your plate. That’s where these Melt-in-Your-Mouth Christmas Sprinkle Cookies come in! They’re not only easy to whip up but also bring a delightful festive flair that will impress your loved ones. With creamy white chocolate and a sprinkle of color, you’ll be the star of any holiday gathering. So, let’s dive into this fun and tasty recipe!
Why You’ll Love This Melt-in-Your-Mouth Christmas Sprinkle Cookies
These cookies are everything you dream of during the busy holiday season. They’re incredibly simple to make, which means less stress and more joy for you! Each bite melts in your mouth, creating a taste sensation that dances with creamy white chocolate. Plus, with vibrant sprinkles, they add a pop of color to your dessert table, making them a hit for both kids and adults alike. What’s not to love?
Ingredients for Melt-in-Your-Mouth Christmas Sprinkle Cookies
Let’s gather our magical ingredients! Making these Melt-in-Your-Mouth Christmas Sprinkle Cookies is a delightful adventure, and you’ll find that many of these items are likely sitting in your pantry already.
- Unsalted Butter: The backbone of our cookies, it ensures a rich flavor and soft texture.
- Cream Cheese: This adds a creamy indulgence that makes these cookies melt in your mouth! It’s a game-changer.
- Powdered Sugar: This gives sweetness without the gritty texture, blending smoothly into the cookie dough.
- All-Purpose Flour: The foundation of our dough, providing structure to the cookies.
- Cornstarch: This secret ingredient softens the cookies, making them melt-in-your-mouth heavenly!
- Salt: Just a pinch enhances the sweetness and balances the flavors perfectly.
- Vanilla Extract: A hint of vanilla adds warmth and depth, inviting you to take a bite.
- White Chocolate Chips: These sweet morsels create delicious little pockets of creaminess in every cookie.
For the colorful sprinkle coating, you’ll need:
- Red, Green, and White Nonpareils: These vibrant sprinkles are crucial for the festive touch. Feel free to mix it up with your favorite colors!
- Granulated Sugar: Added for extra sweetness and helps the sprinkles stick to the cookie’s surface.
Every ingredient brings something special to the table. You’ll find exact measurements at the bottom of this article for easy printing. Trust me; your kitchen will smell like holiday magic!
How to Make Melt-in-Your-Mouth Christmas Sprinkle Cookies
Step 1 – Cream the Butter and Cream Cheese
Let’s kick things off by creaming our butter and cream cheese together! Grab a mixing bowl, and with a hand mixer or stand mixer, blend these two ingredients until they’re smooth and fluffy. You want them to be well combined; trust me, this mixture sets the stage for our dreamy cookie dough. The fluffiness adds air, which keeps your cookies light and melt-in-your-mouth perfect. This step takes about 3–5 minutes, so you’ll be well on your way!
Step 2 – Add Powdered Sugar and Vanilla
Now it’s time to sweeten the deal! Add in the powdered sugar and vanilla extract to your creamy mixture. Mix on medium speed until everything is light and creamy. It’s like magic watching it all come together! The powdered sugar will help remove any graininess, leaving your cookies beautifully smooth. I usually get so excited at this point because the sweet aroma fills the kitchen, making the anticipation of those cookies even sweeter!
Step 3 – Combine Dry Ingredients
In a separate bowl, whisk together the all-purpose flour, cornstarch, and salt. Whisking is key; it helps incorporate air. Next, slowly add the dry mixture into your creamy goodness, mixing on low speed. Don’t rush! You’re aiming for a soft dough, so just gently combine until you see no dry flour. If you rush here, you might end up with tough cookies. And we certainly don’t want that!
Step 4 – Fold in White Chocolate Chips
Ready for the best part? Fold in those white chocolate chips! Using a spatula, gently incorporate them into your dough until they’re evenly mixed. This is where those little pockets of creamy, sweet goodness come from. You can almost taste the joy with each chip. Be careful not to overmix, as you want to keep that soft texture. Each chip is a surprise waiting to melt in your mouth!
Step 5 – Chill the Dough
Chilling the dough is crucial for keeping those beautiful cookie shapes while baking. Wrap the dough in plastic wrap and pop it in the fridge for at least 30 minutes. While you wait, you can catch up on your favorite holiday movie or tidy up the kitchen. Chilling allows the butter to solidify, which means your cookies will have those gorgeous puffy edges we all love. Patience is a virtue here!
Step 6 – Prepare the Sprinkle Coating
While your dough chills, let’s get our sprinkle coating ready! In a mixing bowl, combine the red, green, and white nonpareils with granulated sugar. Stir gently until everything is well mixed, creating a festive rainbow that makes your heart sing. It’s the finishing touch that transforms your cookies into eye-catching holiday treats. Plus, the sugar helps the sprinkles stick to the cookies beautifully!
Step 7 – Form the Cookie Dough Balls
Once your dough is chilled, it’s time to shape those irresistible cookie dough balls. Scoop about 1 to 1.5 tablespoons of dough and roll it into a smooth ball, like creating little edible ornaments. Make sure they’re evenly sized so they bake consistently. Place them on the baking sheet, leaving space between each ball to allow for spreading. I usually aim for about 2 inches apart. Your patience will pay off with lovely, uniform cookies!
Step 8 – Roll in Sprinkles
Get ready for the fun part! Take each dough ball and roll it in your sprinkle mixture until fully coated. Press gently to ensure the sprinkles stick, which adds that gorgeous color when baked. Each cookie will look like a festive celebration waiting to happen! This part always makes me giggle, as it’s like giving each cookie its holiday outfit. Can you picture it? So cute!
Step 9 – Bake the Cookies
Preheat your oven to 350°F (175°C). Line your baking sheet with parchment paper for easy cleanup. Bake those beautifully sprinkled cookies for about 10-12 minutes. You want them puffy, soft, and just lightly cracked on top. It’s essential not to overbake; you want them to remain soft on the inside and melt-in-your-mouth delightful! Your kitchen will smell fantastic, and soon you’ll be on the receiving end of compliments!
Step 10 – Cooling Process
Once they’re out of the oven, let them cool on the baking sheet for a few minutes before transferring them to a wire rack. This step is vital for ensuring they maintain their soft texture. They continue to cook a bit while on the hot baking sheet, so don’t rush the cooling! I recommend giving them about 5 minutes before moving them. Trust me, the patience is worth it when you taste that first cookie!
Tips for Success
- Chill the dough for at least 30 minutes. This helps the cookies hold their shape.
- Use fresh sprinkles for vibrant colors and crunch.
- Ensure not to overmix the dough to maintain softness and texture.
- Bake one tray at a time for even cooking.
- Let cookies cool completely to enhance their melt-in-your-mouth experience!
Equipment Needed
- Mixing Bowl: A large bowl for combining ingredients; any mixing bowl will do!
- Hand Mixer or Stand Mixer: For creaming and mixing; a whisk works in a pinch.
- Spoon or Spatula: For folding in chocolate chips; a wooden spoon is perfect!
- Baking Sheet: A standard sheet pan; line it with parchment paper for easy cleanup.
- Wire Rack: Ideal for cooling; you can use a plate if you don’t have one.
Variations
- Flavor Infusion: Add a pinch of almond extract for a delightful twist!
- Nutty Crunch: Incorporate chopped nuts like walnuts or pecans for added texture.
- Gluten-Free Option: Substitute all-purpose flour with a 1:1 gluten-free flour blend.
- Dark Chocolate Delight: Swap white chocolate chips for dark or milk chocolate for a richer taste.
- Vegan Version: Use plant-based butter and cream cheese, and a flax egg as a binder.
Serving Suggestions for Melt-in-Your-Mouth Christmas Sprinkle Cookies
- Pair with a warm mug of hot cocoa for a delightful treat on chilly evenings.
- Serve alongside peppermint bark for a festive dessert platter.
- Presentation tip: stack them in a festive tin with a holiday ribbon for gifting.
- Add to a cookie exchange – they’re sure to be a standout!
FAQs about Melt-in-Your-Mouth Christmas Sprinkle Cookies
Can I freeze these cookies?
Yes, you can freeze these cookies! After baking, let them cool completely, then store them in an airtight container. They’ll stay fresh and delightful for up to three months. Just thaw them before serving for that perfect melt-in-your-mouth experience.
How do I store the cookies?
To keep your Melt-in-Your-Mouth Christmas Sprinkle Cookies fresh, store them in an airtight container at room temperature. They’ll stay soft for about a week. If you’re worried about them getting stale, you can layer them between sheets of parchment paper in the container.
What can I substitute for cream cheese?
If you’re looking for a cream cheese substitute, you can use mascarpone cheese or Greek yogurt. Both will give you a similar creamy texture. Just remember to adjust the sugar, as Greek yogurt can be tangier. Your cookies will still be delightful!
Can I use different types of sprinkles?
Absolutely! Feel free to customize your sprinkles for a unique look. You can use chocolate sprinkles, pastel colors, or even festive shapes like stars or trees. The goal is to make them yours and add that personal holiday touch!
Why did my cookies flatten while baking?
If your cookies flattened, it could be due to several factors. Make sure your butter is softened but not overly melted, and ensure you chill the dough before baking. These steps help them maintain their shape. Also, be sure to measure your flour correctly. Happy baking!
Final Thoughts
Baking these Melt-in-Your-Mouth Christmas Sprinkle Cookies is more than just following a recipe; it’s about creating joy and sharing warmth during the holiday season. Each cookie is a celebration, a little present bursting with flavor and color, perfect for holiday gatherings or cozy family evenings. Watching friends and family delight in their sweetness lights up my heart. This simple recipe not only brings smiles but also creates lasting memories around the table. So, gather your loved ones, enjoy the process, and make this sweet creation a part of your holiday traditions!
Print
Melt-in-Your-Mouth Christmas Sprinkle Cookies
- Total Time: 40 minutes
- Yield: 24 cookies 1x
- Diet: Vegetarian
Description
These Melt-in-Your-Mouth Christmas Sprinkle Cookies are a delightful treat that combines creamy white chocolate with a colorful sprinkle coating, making them perfect for the holiday season.
Ingredients
- 1 cup (226 g) unsalted butter, softened
- 4 oz (113 g) cream cheese, softened
- 1 cup (120 g) powdered sugar
- 2 ¼ cups (270 g) all-purpose flour
- ½ cup (60 g) cornstarch
- ¼ teaspoon salt
- 1–2 teaspoons vanilla extract
- ¾ cup white chocolate chips or chopped white chocolate
- Coating:
- 1 cup red nonpareils
- 1 cup green nonpareils
- ½ cup white nonpareils
- ¼–½ cup granulated sugar
Instructions
- Cream the butter and cream cheese together until smooth and fluffy.
- Add powdered sugar and vanilla extract, mixing until light and creamy.
- In a separate bowl, whisk flour, cornstarch, and salt. Add to the butter mixture and mix on low until a soft dough forms.
- Fold in white chocolate chips to create creamy pockets inside.
- Chill the dough to help the cookies keep their shape.
- Mix red, green, and white nonpareils with granulated sugar to create the sprinkle coating.
- Scoop dough into balls (1–1½ tablespoons each), rolling until smooth.
- Roll each dough ball firmly into the sprinkle mixture until fully coated.
- Bake at 350°F (175°C) until puffy, soft, and lightly cracked. Do not overbake.
- Cool on the baking sheet before transferring to a rack to finish cooling.
Notes
- For best results, chill the dough for at least 30 minutes.
- Don’t overbake for a soft texture.
- Feel free to customize sprinkles as desired.
- Prep Time: 30 minutes
- Cook Time: 10 minutes
- Category: Dessert
- Method: Baking
- Cuisine: American
Nutrition
- Serving Size: 1 cookie
- Calories: 130
- Sugar: 8g
- Sodium: 50mg
- Fat: 7g
- Saturated Fat: 4g
- Unsaturated Fat: 2g
- Trans Fat: 0g
- Carbohydrates: 15g
- Fiber: 0g
- Protein: 1g
- Cholesterol: 25mg