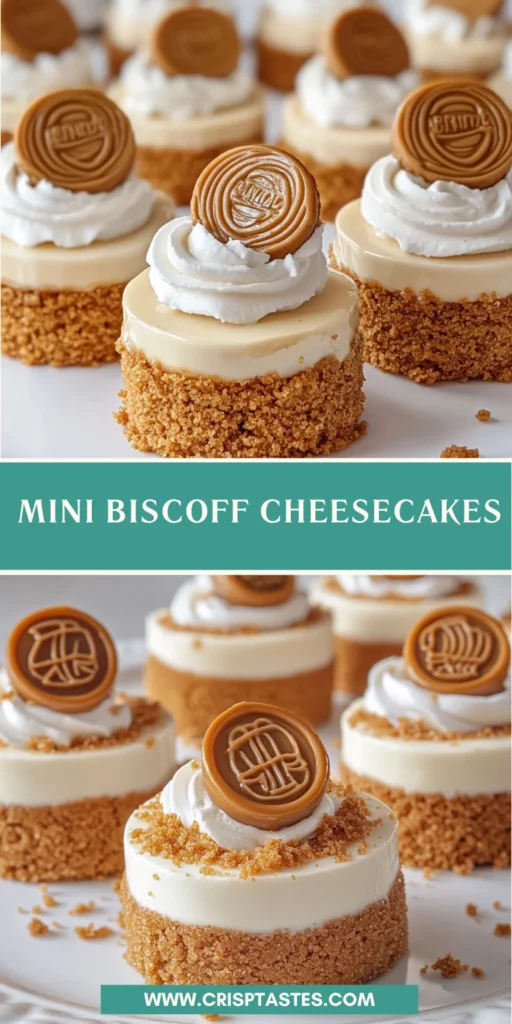
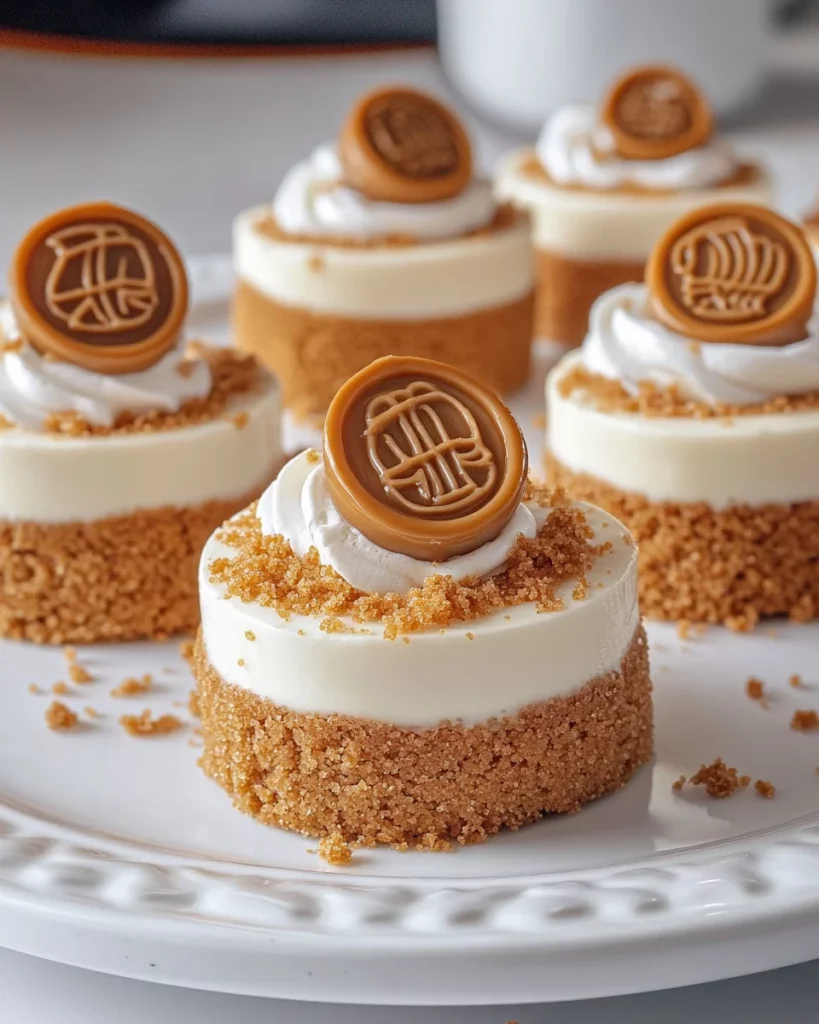
Mini Biscoff cheesecakes that will delight your taste buds!

Introduction to Mini Biscoff Cheesecakes
Hey there, fellow dessert lovers! If you’re anything like me, you know that life can get pretty hectic. Between juggling work, family, and everything in between, finding time to whip up a delightful treat can feel impossible. That’s where these mini Biscoff cheesecakes come in! They’re not just a quick solution for a busy day; they’re a little slice of heaven that will impress your loved ones. With their creamy texture and the irresistible flavor of Biscoff cookies, these mini cheesecakes are sure to become a favorite in your home. Let’s dive in!
Why You’ll Love This Mini Biscoff Cheesecake
These mini Biscoff cheesecakes are a dream come true for busy moms and professionals alike. They’re incredibly easy to make, requiring no baking at all! Just mix, chill, and enjoy. Plus, the rich, creamy filling paired with the crunchy Biscoff crust creates a flavor explosion that will have everyone asking for seconds. Trust me, these little delights are perfect for any occasion, or just because you deserve a treat!
Ingredients for Mini Biscoff Cheesecakes
Gathering the right ingredients is key to making these mini Biscoff cheesecakes a success. Here’s what you’ll need:
- Biscoff cookie crumbs: These form the delicious crust. You can crush whole Biscoff cookies if you can’t find pre-made crumbs.
- Granulated sugar: Just a touch to sweeten the crust. You can use brown sugar for a deeper flavor.
- Salted butter: This adds richness to the crust. Unsalted butter works too; just add a pinch of salt.
- Cream cheese: The star of the filling! Make sure it’s at room temperature for a smooth texture.
- Powdered sugar: This sweetens the cheesecake filling and gives it a lovely, creamy consistency.
- Biscoff spread: This cookie butter adds that signature flavor. You can substitute with any cookie spread you love.
- Vanilla extract: A splash enhances the overall flavor. Pure vanilla is best, but imitation works in a pinch.
- Heavy cream: This is whipped to create a light and fluffy texture in the cheesecake. You can use half-and-half for a lighter version.
- Additional heavy cream: Used for making the whipped cream topping. Again, half-and-half can be a substitute.
- Powdered sugar (for whipped cream): This sweetens the whipped cream, making it a perfect topping.
- Vanilla extract (for whipped cream): Just a hint to elevate the flavor of the whipped cream.
- Biscoff spread (for topping): Melted and drizzled on top for that extra indulgence.
- Biscoff cookie crumbs (for topping): A sprinkle adds a nice crunch and visual appeal.
- Biscoff cookies: Halved for garnishing each cheesecake. They make a lovely finishing touch!
For exact measurements, check the bottom of the article where you can find everything listed for easy printing!
How to Make Mini Biscoff Cheesecakes
Now that you have all your ingredients ready, let’s get started on making these delightful mini Biscoff cheesecakes. Follow these simple steps, and you’ll have a dessert that’s sure to impress!
Step 1: Prepare the Crust
First, grab a mixing bowl and combine the Biscoff cookie crumbs, granulated sugar, and melted salted butter. Stir until everything is well mixed. The mixture should resemble wet sand.
Next, using a small cookie scoop, portion about one tablespoon of the crumb mixture into each cavity of your mini cheesecake pan. Press the crumbs firmly into the bottom to form a solid crust. This step is crucial for a sturdy base!
Step 2: Make the Cheesecake Filling
In a large bowl, beat the room temperature cream cheese with an electric hand mixer until it’s smooth and creamy. Gradually add the powdered sugar, Biscoff spread, and vanilla extract. Mix until everything is well combined.
Now, pour in the heavy cream. Whip the mixture on medium-high speed until it thickens and becomes light and fluffy. This is where the magic happens! The fluffiness will make your cheesecakes irresistible.
Step 3: Pipe the Cheesecake Mixture
Once your cheesecake filling is ready, fill a piping bag with the mixture. If you don’t have a piping bag, a zip-top bag with a corner snipped off works just as well.
Pipe the cheesecake mixture onto the crusts, filling them slightly above the top of the pan. This will give you that lovely, generous look. Now, it’s time to chill! Place the cheesecakes in the refrigerator for at least 12 hours, or overnight if you can wait.
Step 4: Prepare the Whipped Cream
While your cheesecakes are chilling, let’s whip up some delicious whipped cream. In a clean bowl, combine the heavy cream, powdered sugar, and vanilla extract. Using an electric mixer, whip until medium-stiff peaks form. This will create a light and airy topping.
Transfer the whipped cream to a piping bag fitted with a Wilton 1M piping tip for a beautiful swirl on top of your cheesecakes.
Step 5: Assemble the Mini Cheesecakes
After the cheesecakes have chilled, it’s time to assemble! Start by gently removing them from the pan. Place each cheesecake on a serving plate.
Heat the additional Biscoff spread in the microwave for about 30 seconds until it’s slightly melted. Drizzle or spoon the melted Biscoff spread over the top of each cheesecake.
Next, pipe a swirl of whipped cream on top. For the finishing touch, sprinkle with Biscoff cookie crumbs and place half of a Biscoff cookie on each cheesecake. Voilà! Your mini Biscoff cheesecakes are ready to be devoured!
Tips for Success
- Always use room temperature cream cheese for a smooth filling.
- Chill the cheesecakes overnight for the best flavor and texture.
- Don’t skip the whipped cream; it adds a delightful lightness.
- Feel free to adjust the sweetness by varying the powdered sugar.
- Use a piping bag for a professional-looking finish on the whipped cream.
Equipment Needed
- Mini cheesecake pan: Essential for shaping your cheesecakes. A muffin tin can work in a pinch.
- Mixing bowls: Use a large bowl for the filling and a smaller one for the crust.
- Electric hand mixer: This makes whipping the cream cheese and heavy cream a breeze. A whisk can be used, but it’ll take longer.
- Piping bags: Perfect for decorating. Zip-top bags with a corner cut off are a great alternative.
- Measuring cups and spoons: For accurate ingredient measurements.
Variations of Mini Biscoff Cheesecakes
- Chocolate Biscoff Cheesecakes: Add cocoa powder to the cheesecake filling for a rich chocolate twist.
- Nutty Delight: Mix in crushed nuts like pecans or walnuts into the crust for added crunch and flavor.
- Fruit Topping: Top with fresh berries or sliced bananas for a fruity contrast to the creamy cheesecake.
- Gluten-Free Option: Use gluten-free Biscoff cookies or a gluten-free cookie alternative for the crust.
- Vegan Version: Substitute cream cheese with vegan cream cheese and use coconut cream for the whipped topping.
Serving Suggestions for Mini Biscoff Cheesecakes
- Pair with a hot cup of coffee or tea for a delightful afternoon treat.
- Serve alongside fresh fruit like strawberries or raspberries for a pop of color.
- Garnish with a sprig of mint for an elegant touch.
- Present on a beautiful platter for special occasions or gatherings.
- Drizzle with chocolate sauce for an extra indulgent experience.
FAQs about Mini Biscoff Cheesecakes
As you embark on your mini cheesecake adventure, you might have a few questions. Here are some common queries I’ve encountered, along with helpful answers to guide you through the process!
Can I make these mini Biscoff cheesecakes ahead of time?
Absolutely! In fact, making them a day in advance is ideal. The flavors meld beautifully overnight, making them even more delicious.
What can I use instead of Biscoff spread?
If you can’t find Biscoff spread, any cookie butter or even Nutella can work as a substitute. Just keep in mind that the flavor will change slightly.
How do I store leftover mini cheesecakes?
Store any leftovers in an airtight container in the refrigerator. They’ll stay fresh for up to five days, but I doubt they’ll last that long!
Can I freeze mini Biscoff cheesecakes?
Yes, you can freeze them! Just make sure to wrap each cheesecake tightly in plastic wrap and then place them in a freezer-safe container. They’ll keep for about a month.
What’s the best way to serve these cheesecakes?
Serve them chilled, topped with whipped cream and a drizzle of melted Biscoff spread. They’re perfect for parties or a cozy night in!
Final Thoughts
Making these mini Biscoff cheesecakes is more than just a cooking project; it’s a delightful experience that brings joy to your kitchen. The creamy, dreamy filling paired with the crunchy crust creates a symphony of flavors that dance on your taste buds. Whether you’re celebrating a special occasion or simply treating yourself after a long day, these cheesecakes are sure to bring smiles all around. Plus, they’re so easy to whip up, you’ll find yourself making them again and again. So, gather your loved ones, and enjoy every delicious bite together!
Print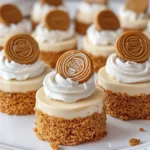
Mini Biscoff cheesecakes that will delight your taste buds!
- Total Time: 12 hours 30 minutes
- Yield: 12 mini cheesecakes 1x
- Diet: Vegetarian
Description
Delicious mini cheesecakes made with Biscoff cookies and spread, perfect for dessert lovers.
Ingredients
- 2 cups Biscoff cookie crumbs
- 2 tbsp granulated sugar
- 6 tbsp salted butter, melted
- 16 oz cream cheese, room temperature
- 1 ¾ cup powdered sugar
- 1 cup Biscoff spread (cookie butter)
- 2 tsp vanilla extract
- 1 cup heavy cream
- ¾ cup heavy cream (for whipped cream)
- 2 tbsp powdered sugar (for whipped cream)
- ½ tsp vanilla extract (for whipped cream)
- ¾ cup Biscoff spread (for topping)
- 2 tbsp Biscoff cookie crumbs (for topping)
- 12 Biscoff cookies, halved (for topping)
Instructions
- In a mixing bowl, stir together the Biscoff cookie crumbs, granulated sugar, and melted salted butter. Portion the crumbs into the mini cheesecake pan using a small cookie scoop (about 1 tablespoon). Firmly press the crumbs into the bottom of the pan to form the crust. Set aside.
- In a large bowl, use an electric hand mixer to cream the cream cheese, powdered sugar, Biscoff spread, and vanilla extract until smooth. Pour in the heavy cream and whip the cheesecake mixture on medium-high speed until the mixture thickens and becomes light and fluffy.
- Fill a piping bag with the Biscoff cheesecake mixture and pipe it onto the Biscoff cookie crusts, slightly above the top of the pan. Chill the cheesecakes in the refrigerator for 12 hours or overnight. After chilling, remove the cheesecakes from the pan.
- To make the whipped cream, in a bowl with an electric mixer, whip the heavy cream, powdered sugar, and vanilla extract until medium-stiff peaks form. Fill a piping bag fitted with a Wilton 1M piping tip with the whipped cream.
- Heat the additional Biscoff spread in the microwave for about 30 seconds to melt slightly. To assemble the cheesecakes, pipe or spoon the melted Biscoff spread on the top of the cheesecakes. Pipe a small swirl of whipped cream on top. Sprinkle the cheesecakes with Biscoff cookie crumbs and top each cheesecake with half of a Biscoff cookie.
Notes
- For best results, chill the cheesecakes overnight.
- Use room temperature cream cheese for a smoother texture.
- Adjust the sweetness by varying the amount of powdered sugar.
- Prep Time: 30 minutes
- Cook Time: 0 minutes
- Category: Dessert
- Method: No-bake
- Cuisine: American
Nutrition
- Serving Size: 1 cheesecake
- Calories: 350
- Sugar: 25g
- Sodium: 200mg
- Fat: 25g
- Saturated Fat: 15g
- Unsaturated Fat: 5g
- Trans Fat: 0g
- Carbohydrates: 30g
- Fiber: 1g
- Protein: 3g
- Cholesterol: 70mg