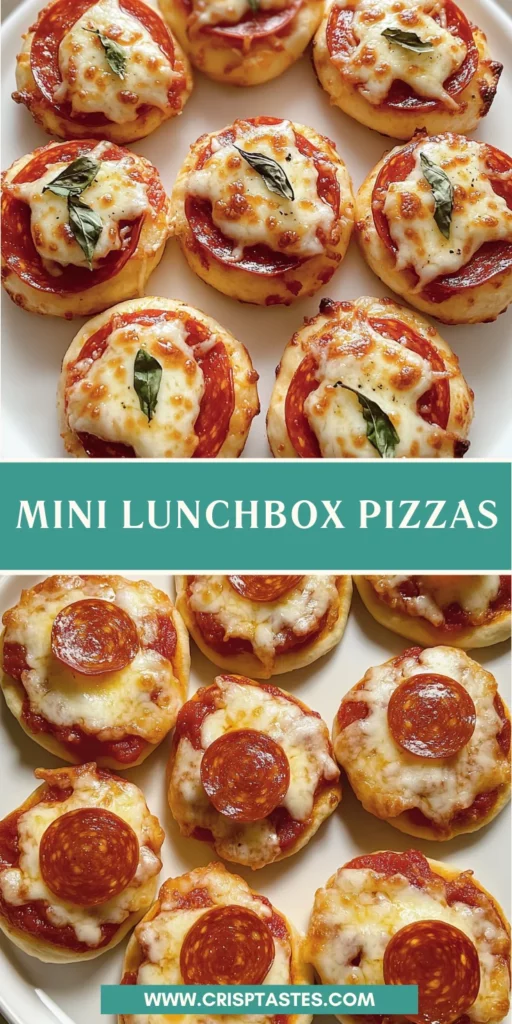
Mini Lunchbox Pizzas

Introduction to Mini Lunchbox Pizzas
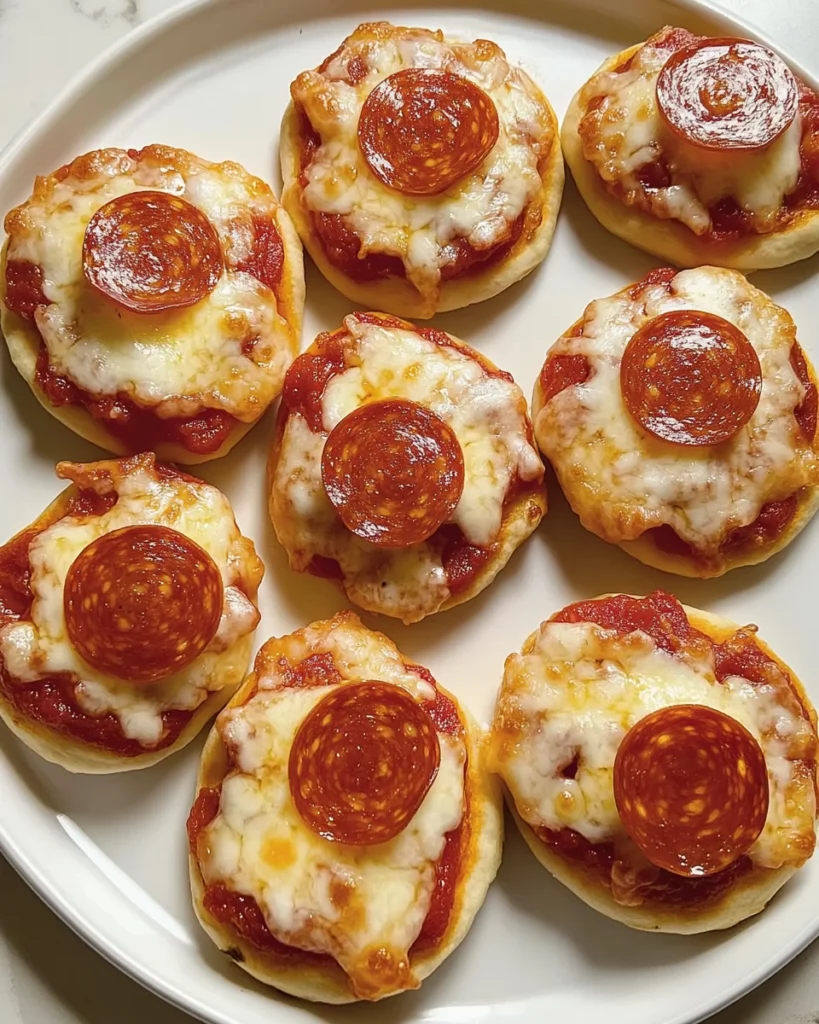
As a busy mom, I know how challenging it can be to whip up something quick yet delicious for our little ones. That’s where these Mini Lunchbox Pizzas come in! They’re not just a meal; they’re a fun culinary adventure that kids adore. With just a handful of simple ingredients, you can create these delightful mini pizzas in no time. Whether it’s a hectic school morning or a weekend snack, this recipe is a lifesaver. Plus, they’re perfect for packing in lunchboxes, making lunchtime a little more exciting for your kids!
Why You’ll Love This Mini Lunchbox Pizzas
These Mini Lunchbox Pizzas are a game-changer for busy families! They’re incredibly easy to make, taking just 25 minutes from start to finish. The kids will love customizing their own pizzas, which means no more mealtime battles. Plus, they’re deliciously cheesy and packed with flavor, making them a hit with even the pickiest eaters. You’ll find yourself making these again and again!
Ingredients for Mini Lunchbox Pizzas
Gathering the right ingredients is the first step to creating these delightful Mini Lunchbox Pizzas. Here’s what you’ll need:
- Self-raising flour: This is the base of your pizza dough. It gives the pizzas a light and fluffy texture without needing extra yeast.
- Full-fat plain Greek yoghurt: This adds moisture and richness to the dough. Plus, it’s a great source of protein!
- Tomato paste: This is your pizza sauce! It’s concentrated and flavorful, providing that classic pizza taste.
- Freshly shredded mozzarella: The star of the show! Melty and gooey, mozzarella is essential for that cheesy goodness.
- Pepperoni: A favorite topping for many kids! It adds a savory kick, but feel free to swap it out for veggies or other meats if your little ones prefer.
For those who want to get creative, consider adding toppings like bell peppers, olives, or even pineapple for a sweet twist. You can also use whole wheat flour for a healthier option. Remember, the exact quantities of these ingredients are listed at the bottom of the article for easy printing!
How to Make Mini Lunchbox Pizzas
Making these Mini Lunchbox Pizzas is a breeze! Follow these simple steps, and you’ll have a delicious meal ready in no time. Let’s dive in!
Step 1: Preheat the Oven
First things first, preheat your oven to 400°F (200°C). Preheating is crucial because it ensures that your pizzas cook evenly. If you skip this step, you might end up with doughy centers or burnt edges. Trust me, a hot oven is your best friend in pizza-making!
Step 2: Make the Dough
In a mixing bowl, combine the self-raising flour and Greek yogurt. Stir until a dough forms. It should be soft but not sticky. If it feels too wet, sprinkle in a bit more flour. Knead it gently for a minute or two. This helps develop the dough’s texture, making it light and fluffy. Remember, we want a dough that’s easy to shape!
Step 3: Shape the Pizza Bases
Now, divide the dough into equal portions. I usually aim for about 12 mini pizzas. Roll each portion into a ball, then flatten it into a mini pizza base on your lined baking tray. Aim for about ¼ inch thick. This thickness allows for a nice crust while still cooking through. Don’t worry about making them perfect; a little rustic charm is part of the fun!
Step 4: Add the Toppings
Spread a generous layer of tomato paste on each pizza base. This is where the flavor starts to build! Next, sprinkle freshly shredded mozzarella over the top. Don’t be shy—more cheese equals more happiness! Finally, add your pepperoni slices. If your kids love veggies, this is the perfect time to sneak in some bell peppers or olives.
Step 5: Bake the Pizzas
Pop your tray into the preheated oven and bake for 12-15 minutes. Keep an eye on them! You’ll know they’re done when the cheese is melted and bubbly, and the edges are golden brown. The aroma will fill your kitchen, making it hard to resist sneaking a bite!
Step 6: Cool and Pack
Once baked, let the mini pizzas cool for a few minutes. This helps the cheese set a bit, making them easier to handle. After cooling, pack them into lunchboxes. They’re perfect for on-the-go meals or after-school snacks. Your kids will love opening their lunchboxes to find these tasty treats!
Tips for Success
- Use parchment paper to prevent sticking and make cleanup a breeze.
- Experiment with different toppings to keep things exciting for your kids.
- Make a double batch and freeze some for quick lunches later.
- Let the kids help with shaping and topping their pizzas for added fun.
- Keep an eye on baking time; ovens can vary, so adjust as needed.
Equipment Needed
- Baking tray: A standard baking sheet works well, but a pizza stone can give you a crispier crust.
- Parchment paper: This helps prevent sticking; aluminum foil can be a substitute if needed.
- Mixing bowl: Any large bowl will do for combining ingredients.
- Rolling pin: If you don’t have one, a clean wine bottle can work in a pinch!
Variations
- Veggie Delight: Swap out pepperoni for a mix of colorful veggies like bell peppers, mushrooms, and spinach for a healthier twist.
- Cheesy Garlic: Add minced garlic and Italian herbs to the dough for a flavorful base, then top with extra cheese.
- BBQ Chicken: Use shredded cooked chicken and BBQ sauce instead of tomato paste for a tangy flavor.
- Gluten-Free Option: Substitute self-raising flour with a gluten-free flour blend to accommodate dietary needs.
- Sweet Treat: For a dessert version, spread Nutella on the base and top with sliced bananas or strawberries before baking.
Serving Suggestions
- Pair your Mini Lunchbox Pizzas with a side of fresh fruit, like apple slices or grapes, for a balanced meal.
- Serve with a small cup of marinara sauce for dipping; it adds a fun twist!
- For drinks, consider juice boxes or flavored water to keep it kid-friendly.
- Present the pizzas on a colorful plate to make lunchtime more exciting!
FAQs about Mini Lunchbox Pizzas
As a fellow busy mom, I know you might have some questions about these Mini Lunchbox Pizzas. Here are some common queries I’ve encountered, along with my answers to help you out!
Can I make Mini Lunchbox Pizzas ahead of time?
Absolutely! You can prepare the dough and shape the pizza bases in advance. Just store them in the fridge for up to a day. When you’re ready, add your toppings and bake!
What if my kids don’t like pepperoni?
No problem at all! These Mini Lunchbox Pizzas are super customizable. You can use any toppings your kids enjoy, like veggies, ham, or even just cheese!
How do I store leftover Mini Lunchbox Pizzas?
Store any leftovers in an airtight container in the fridge for up to three days. They also freeze well, so you can save some for quick lunches later!
Can I use whole wheat flour instead of self-raising flour?
Yes, you can! Just remember to add a bit of baking powder to help the dough rise. Whole wheat flour adds a nice nutty flavor and extra fiber!
Are these Mini Lunchbox Pizzas suitable for a school lunch?
Definitely! They’re perfect for school lunches. Just pack them in a lunchbox with some fruit or veggies, and your kids will have a fun and tasty meal!
Final Thoughts
Creating these Mini Lunchbox Pizzas has been a delightful experience for me, and I hope it will be for you too! They’re not just a meal; they’re a way to bring joy and creativity into lunchtime. Watching my kids customize their pizzas always brings a smile to my face. Plus, knowing I can whip them up in just 25 minutes makes me feel like a superhero in the kitchen. So, gather your ingredients, invite your little ones to help, and enjoy the laughter and deliciousness that these mini pizzas bring to your family’s table!
Print
Mini Lunchbox Pizzas
- Total Time: 25 minutes
- Yield: 12 mini pizzas 1x
- Diet: Vegetarian
Description
Mini Lunchbox Pizzas are a fun and easy recipe perfect for kids’ lunches, combining simple ingredients to create delicious mini pizzas.
Ingredients
- 2 cups (300 g) self-raising flour
- 1 cup (250 g) full-fat plain Greek yoghurt
- 1/3 cup (90 g) tomato paste
- 1 cup (125 g) freshly shredded mozzarella
- 1/2 cup (80 g) pepperoni
Instructions
- Preheat the oven to 400°F (200°C) and line a baking tray with parchment paper.
- In a mixing bowl, combine the self-raising flour and Greek yoghurt until a dough forms.
- Divide the dough into equal portions and shape them into mini pizza bases on the prepared baking tray.
- Spread tomato paste on each pizza base, then sprinkle with mozzarella and top with pepperoni slices.
- Bake in the preheated oven for 12-15 minutes, or until the cheese is melted and bubbly.
- Allow the mini pizzas to cool slightly before packing them into lunchboxes.
Notes
- These mini pizzas can be customized with different toppings such as vegetables or different meats.
- They can be stored in the refrigerator for up to 3 days.
- Great for meal prep or as a fun snack for kids.
- Prep Time: 10 minutes
- Cook Time: 15 minutes
- Category: Lunch
- Method: Baking
- Cuisine: Italian
Nutrition
- Serving Size: 1 mini pizza
- Calories: 180
- Sugar: 2 g
- Sodium: 300 mg
- Fat: 8 g
- Saturated Fat: 3 g
- Unsaturated Fat: 5 g
- Trans Fat: 0 g
- Carbohydrates: 20 g
- Fiber: 1 g
- Protein: 7 g
- Cholesterol: 20 mg