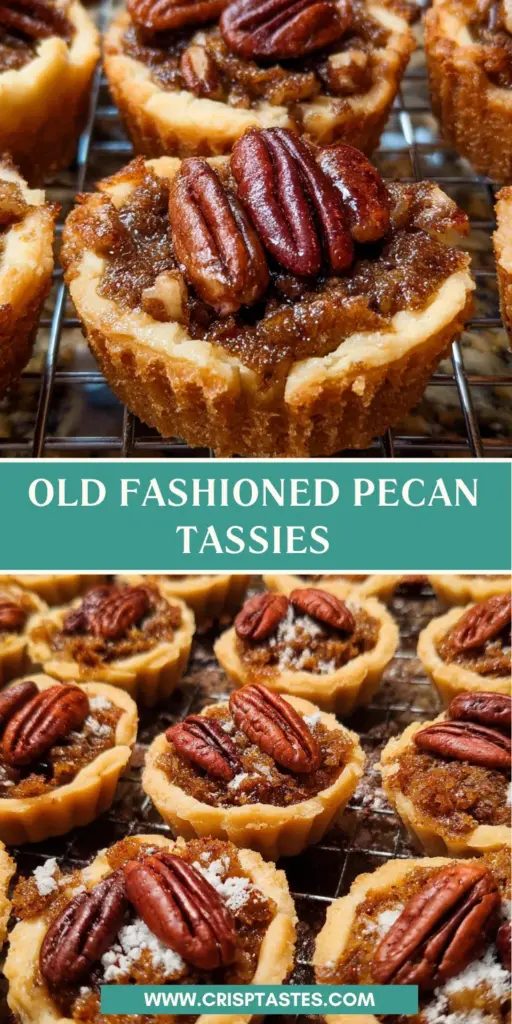
Old Fashioned Pecan Tassies

Introduction to Old Fashioned Pecan Tassies
There’s something incredibly comforting about diving into a plate of Old Fashioned Pecan Tassies, isn’t there? These bite-sized gems are filled with a warm, gooey pecan filling nestled inside a buttery cream cheese crust. If you’re anything like me, life gets busy, and finding a sweet treat that’s quick to prepare and sure to impress is a dream come true. Whether it’s for a spontaneous gathering or just to satisfy your sweet tooth, these tassies make every moment feel special. Let’s bring a bit of nostalgia to your kitchen and whip up this delightful recipe together!
Why You’ll Love This Old Fashioned Pecan Tassies
Old Fashioned Pecan Tassies are a delightful blend of flavors and textures that makes them irresistible. They’re easy to whip up, even on your busiest days. These little bites pack a punch of sweet, nutty goodness in every mouthful, making them perfect for any occasion. Plus, their charming presentation will earn you rave reviews from family and friends. What’s not to love about such a quick and satisfying treat?
Ingredients for Old Fashioned Pecan Tassies
Gathering the ingredients for Old Fashioned Pecan Tassies is part of the fun! Here’s what you’ll need to create these delightful tarts:
- Salted butter: The backbone of any great crust, this ingredient adds richness and flavor.
- Cream cheese: Creamy and smooth, it makes the crust tender and flaky.
- All-purpose flour: The base of your dough; it brings everything together beautifully.
- Dark brown sugar: This sweetener gives the filling its rich, caramel flavor.
- Melted butter: A secret to enhancing the taste of the filling, making it ooey-gooey!
- Large eggs: Eggs bind the filling ingredients and add to that luscious texture.
- Maple extract: A little splash of this brings a warm, inviting flavor reminiscent of the fall.
- Finely chopped pecans: These give your tassies that unmistakable nutty crunch and heartiness.
- Pecan halves: The crowning jewels on top of your tassies, they’re both decorative and delicious!
For those who might be in a pinch, feel free to swap in unsalted butter or use pecan pieces instead of halves for a more rustic look. Also, keep in mind that you can find all ingredient measurements at the bottom of the article. Happy baking!
How to Make Old Fashioned Pecan Tassies
Making Old Fashioned Pecan Tassies is a delightful adventure that brings warm aromas and comforting flavors into your kitchen. Follow these simple steps to create your very own batch of these luscious treats!
Step 1: Cream the Butter and Cream Cheese
Start by taking your salted butter and cream cheese out of the fridge and let them sit until they reach room temperature. This helps them blend effortlessly, creating that lovely, creamy texture you want. With a hand mixer, combine both ingredients in a small bowl until they’re smooth and well-mixed. Trust me, this step sets the foundation for your delicious crust!
Step 2: Prepare the Muffin Pans
Now it’s time to prepare your mini muffin pans. Grab a small cookie scoop and start dividing the dough into 36 even portions. This ensures that all your tassies will bake evenly. Next, spray the pans with a light coat of cooking spray to keep those crusts from sticking. While you’re at it, pop the scooped dough into the fridge for about 15 minutes. This will firm it up, helping it hold its shape during baking.
Step 3: Make the Filling
The rich filling is what makes these tassies so special! In a medium bowl, whisk together the dark brown sugar, melted butter, eggs, maple extract, and finely chopped pecans. Each ingredient contributes deeply to the flavor profile—imagine that sweet and nutty aroma wafting through your kitchen! Mix until everything is well combined and silky smooth.
Step 4: Shape the Dough Cups
Once your dough has chilled, it’s time to shape those little cups! Take one muffin pan out of the fridge and press the dough evenly into the bottom and up the sides of each muffin cavity, creating a “cup.” This allows your filling to nestle inside perfectly. Remember, the dough might need a bit of gentle coaxing to stay in shape, so don’t rush this step!
Step 5: Fill and Decorate
Now for the fun part! Fill each dough cup about two-thirds full with your luscious filling mixture. Make sure not to fill them too high, or you’ll have a pecan overflow situation! Once filled, place a pecan half on top of each tassie for that finishing touch. It not only looks pretty but adds an extra crunch.
Step 6: Bake to Perfection
Preheat your oven to 350ºF. Bake those tassies for about 18 minutes, or until they turn a beautiful golden brown on top. Keep an eye on them, as every oven is a little different! Once they’re done, allow the tarts to cool for a bit, then use a small knife to loosen them from the pans. Carefully lift them out and place them on a cooling rack. The sweet aroma will be hard to resist!
Tips for Success
- Make sure both the butter and cream cheese are softened for easy mixing.
- Chill the dough balls in the fridge; this helps them maintain their shape while baking.
- Don’t overfill the cups with filling to avoid messy spills.
- Use a small knife to loosen the tassies from the pan for easier removal.
- Store leftovers in an airtight container for up to 4 days.
Equipment Needed for Old Fashioned Pecan Tassies
- Mini muffin pans: Essential for those perfect tassie shapes; regular muffin pans can work in a pinch.
- Hand mixer: Makes creaming the butter and cream cheese a breeze; a whisk can also do the job.
- Small cookie scoop: Ensures even dough portions; use a spoon if you don’t have one.
- Mixing bowls: A great set in different sizes can be handy.
- Cooling rack: Helps the tassies cool evenly; an open plate or cutting board can substitute.
Variations on Old Fashioned Pecan Tassies
- Chocolate Chip Pecan Tassies: Add mini chocolate chips to the filling for a delightful chocolatey twist.
- Maple Pecan Tassies: Replace half of the brown sugar with maple syrup for an extra maple flavor kick.
- Gluten-Free Option: Substitute all-purpose flour with a gluten-free blend to accommodate dietary needs.
- Coconut Pecan Tassies: Stir in some shredded coconut for added texture and a tropical flavor.
- Spiced Pecan Tassies: Sprinkle in a pinch of cinnamon or nutmeg to warm up the filling with seasonal spices.
Serving Suggestions for Old Fashioned Pecan Tassies
- Serve warm with a dollop of whipped cream for a decadent touch.
- Pair with a steaming cup of coffee or tea for a cozy afternoon treat.
- Garnish with a sprinkle of powdered sugar for an elegant presentation.
- Display on a beautiful platter for gatherings; they make a lovely centerpiece!
- Offer with a scoop of vanilla ice cream for a delightful contrast of temperatures.
FAQs about Old Fashioned Pecan Tassies
Many of us have questions when trying out a new recipe, especially one as delightful as Old Fashioned Pecan Tassies. Here are a few inquiries I’ve gathered over my cooking adventures that might resonate with you!
Can I make the dough ahead of time?
Absolutely! You can prepare the dough up to two days in advance. Just wrap it tightly in plastic wrap and store it in the fridge. This makes it a handy option for busy days!
How do I store leftover tassies?
For the best flavor and texture, store your tassies in an airtight container at room temperature. They should stay fresh for up to four days, though I doubt they will last that long!
Can I freeze Old Fashioned Pecan Tassies?
Yes! Once baked and cooled, you can freeze them in an airtight container for up to three months. Just reheat them in a warm oven before serving for that fresh-baked feel.
What can I substitute for pecans?
If pecans aren’t your thing, walnuts or hazelnuts work well too! Their flavors will add a nice twist to your tassies, making them uniquely yours.
Are Old Fashioned Pecan Tassies suitable for a gluten-free diet?
You bet! Simply swap the all-purpose flour for a gluten-free blend, and you’ll have a tasty treat that everyone can enjoy without worrying about gluten!
Final Thoughts
Old Fashioned Pecan Tassies truly embody a sense of comfort and nostalgia that warms the heart. Each bite is like a sweet hug, reminding us of cherished moments spent with loved ones. They’re not just a dessert; they’re a way to create memories at gatherings or quiet afternoons at home. The joy of baking these little treats and sharing them with family brings a genuine smile to my face every time. So, roll up your sleeves, gather your ingredients, and let the magic of Old Fashioned Pecan Tassies fill your kitchen with love and warmth!
Print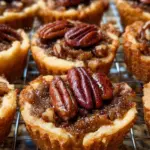
Old Fashioned Pecan Tassies
- Total Time: 48 minutes
- Yield: 36 tarts 1x
- Diet: Vegetarian
Description
Old Fashioned Pecan Tassies are bite-sized treats filled with a rich, gooey pecan filling and baked in a buttery cream cheese crust, perfect for gatherings or a nostalgic dessert.
Ingredients
- 3/4 cup salted butter, room temperature
- 5 ounces cream cheese, room temperature
- 1 1/2 cups all-purpose flour
- 1 ½ cups dark brown sugar
- 2 tablespoons salted butter, melted
- 2 large eggs
- ½ teaspoon maple extract
- ½ cup finely chopped pecans
- 36 pecan halves for topping
Instructions
- In a small bowl, use a hand mixer to cream together the butter and cream cheese until well combined. Add the flour and mix until smooth.
- Spray three mini muffin pans (36 tarts total) with cooking spray. Using a mini cookie scoop, scoop dough balls into the muffin pans, dividing the dough between the 36 cups evenly. Refrigerate the dough while making the filling.
- In a medium bowl, mix together the brown sugar, melted butter, eggs, maple extract, and finely chopped pecans.
- Preheat the oven to 350ºF. After the tarts have refrigerated for about 15 minutes, remove one pan from the fridge. Press the dough on the bottom and up the sides of each muffin cavity to create a “cup” with the dough. After the first pan is done, remove the other pan and do the same.
- Fill the dough shells ⅔ full with the filling. Place a pecan half on top of each cup.
- Bake for 18 minutes or until the tarts are golden brown on top. Allow the tarts to cool, then loosen them with a small knife and remove to a cooling rack.
Notes
- Ensure the cream cheese and butter are at room temperature for easier mixing.
- Refrigerating the dough helps it hold the shape during baking.
- These tarts can be stored in an airtight container at room temperature for several days.
- Prep Time: 30 minutes
- Cook Time: 18 minutes
- Category: Dessert
- Method: Baking
- Cuisine: American
Nutrition
- Serving Size: 1 tart
- Calories: 150
- Sugar: 10g
- Sodium: 90mg
- Fat: 8g
- Saturated Fat: 5g
- Unsaturated Fat: 2g
- Trans Fat: 0g
- Carbohydrates: 20g
- Fiber: 1g
- Protein: 2g
- Cholesterol: 30mg