Oreo Cheesecake Cookie Cups

Introduction to Oreo Cheesecake Cookie Cups
There’s something magical about desserts that combine layers of flavor and texture, don’t you think? That’s why I’m so excited to share my recipe for Oreo Cheesecake Cookie Cups. These scrumptious little treats bring together the creamy goodness of cheesecake and the delightful crunch of Oreo crust in a bite-sized form. As a busy mom myself, I know how precious time is, making this recipe perfect for any occasion, whether it’s a family gathering or a cozy night in. Plus, they’re super fun to make!
Why You’ll Love This Oreo Cheesecake Cookie Cups
These Oreo Cheesecake Cookie Cups are a dream come true for any busy cook. They whip up quickly, allowing you to serve a delightful dessert without spending your whole day in the kitchen. The rich, creamy cheesecake contrasts beautifully with the crunchy Oreo crust, creating a taste sensation that will have everyone coming back for seconds. Plus, they’re portioned perfectly, making them ideal for sharing or enjoying solo.
Ingredients for Oreo Cheesecake Cookie Cups
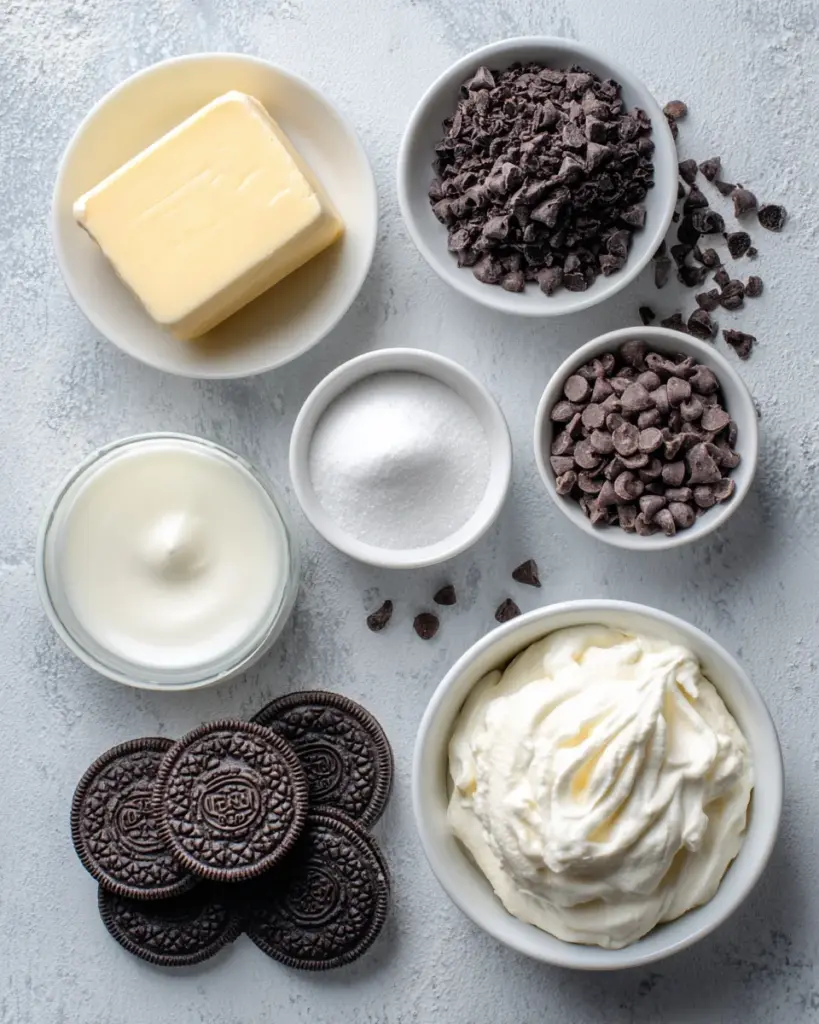
Let’s gather the ingredients for these scrumptious Oreo Cheesecake Cookie Cups! Each component plays a role in crafting the perfect sweet bite. Don’t worry; you’ll find exact measurements at the bottom, ready for printing!
- Oreo Cookies: The star of our crust! They add a rich chocolate flavor and delightful crunch.
- Unsalted Butter: This will help bind the Oreo crumbs together, enhancing the crust’s texture. Use unsalted to control the saltiness.
- Cream Cheese: Softened cream cheese is crucial for achieving that creamy, dreamy filling. Make sure it’s at room temperature for easy blending.
- Granulated Sugar: Sweetness is key! This balances the tanginess of the cream cheese perfectly.
- Sour Cream: It adds a touch of tartness and creaminess, elevating the cheesecake flavor.
- Whipped Cream: Light and fluffy, this will be a delightful topping that adds an extra layer of indulgence.
- Optional Mini Chocolate Chips: For those who want to add a little extra chocolatey goodness into the filling, these are the way to go!
Feel free to substitute the sour cream with Greek yogurt if you’re looking for a healthier twist. You can also use other cookies for the crust, like Peanut Butter Oreos or Golden Oreos, to explore different flavor profiles!
How to Make Oreo Cheesecake Cookie Cups
Now that we have our ingredients ready, it’s time to roll up our sleeves and dive into making these delightful Oreo Cheesecake Cookie Cups! With just a few simple steps, you’ll be well on your way to creating a dessert that looks as good as it tastes.
Step 1: Preheat and Prepare the Crust
First things first, preheat your oven to 350°F (175°C). This is key for our cookie cups baking evenly and perfectly.
Next, grab those 20 Oreo cookies and crush them into fine crumbs. You can use a food processor or just place them in a ziplock bag and smash away with a rolling pin—great stress relief! Once they’re a fine dust, mix the crumbs with the melted unsalted butter in a bowl. This combination will create a rich, chocolatey crust that holds everything together.
Step 2: Form the Cookie Cups
Now, let’s bring that crust to life! Line a muffin tin with cupcake liners. This makes it easier to remove those delicious cookie cups later.
Using about one tablespoon of the Oreo mixture, press it firmly into the bottom of each liner. You want a nice compact base that will hold up to the creamy cheesecake filling. It’s okay if it’s a little messy; that just adds to the homemade charm!
Step 3: Make the Cheesecake Filling
With the crust ready to go, let’s focus on that luscious cheesecake filling. In a mixing bowl, beat the softened cream cheese and granulated sugar together until fluffy.
It’s like creating a dreamy cloud of sweetness! Gradually add in the sour cream and continue mixing until everything is smooth and well combined. If you’re feeling adventurous, fold in those mini chocolate chips for an extra surprise in every bite!
Step 4: Bake the Cookie Cups
Time to bake! Spoon the cheesecake filling onto each crust, filling them almost to the top. Place the muffin tin in the oven and bake for about 15 to 18 minutes.
Keep an eye on them—when the edges look set, but the center is still slightly jiggly, they’re done! This jiggly center ensures that the filling remains creamy and delicious. You’ll want to let your creations cool completely before moving on to the next step.
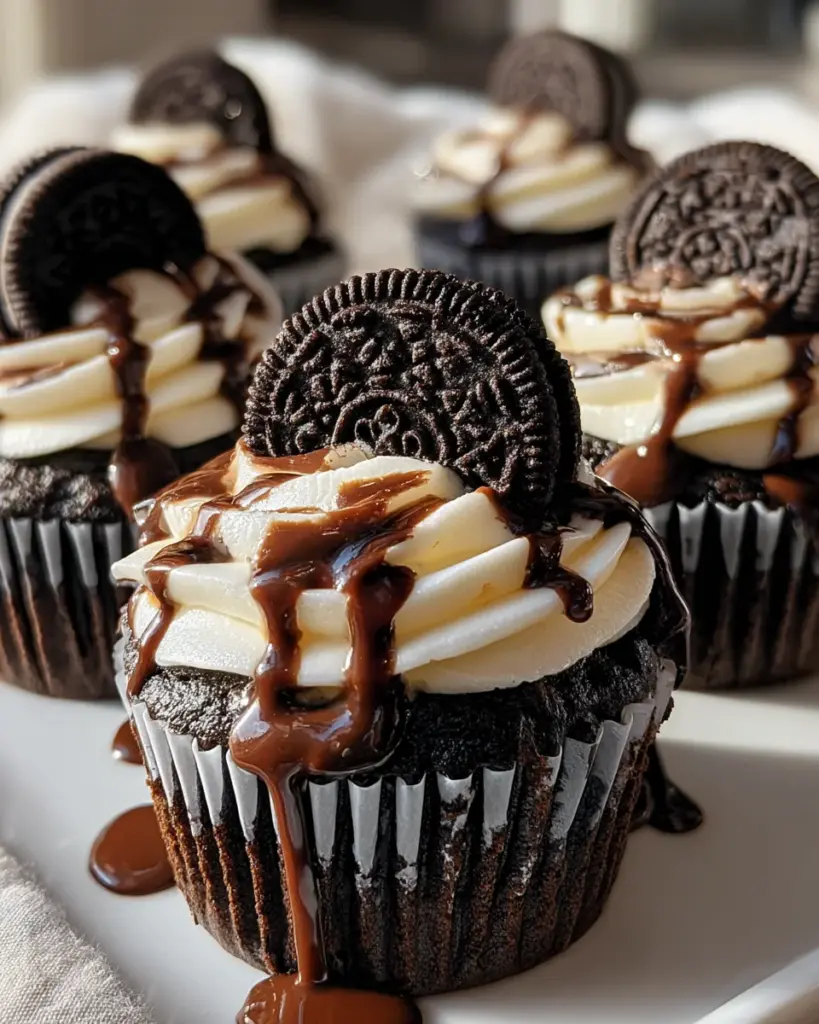
Step 5: Chill and Top
After cooling, transfer the cookie cups to the refrigerator. They need a little chill time—about three hours—to set perfectly. Once they’re nice and cold, it’s topping time!
Add a dollop of whipped cream on each cookie cup and sprinkle with crushed Oreos for that finishing touch. They’re now ready for a delightful bite that is sure to satisfy any sweet tooth!
Tips for Success
- Make sure your cream cheese is softened to avoid lumps in the filling.
- Use a food processor for easy cookie crumbing; it saves time!
- Don’t skip the chill time; it enhances flavor and texture.
- Experiment with different toppings like fresh fruit or chocolate sauce.
- Test the doneness of your cookie cups—remember, a slight jiggle is good!
Equipment Needed
- Muffin tin: Essential for shaping the cookie cups. A regular baking dish can work in a pinch.
- Cupcake liners: These make clean-up easy; you can skip them but trust me, they’re worth it!
- Mixing bowls: Handy for preparing both crust and filling.
- Food processor or rolling pin: To crush those Oreos effortlessly.
- Whisk or electric mixer: Make mixing your filling a breeze!
Variations
- Fruit-Infused: Add a layer of fresh fruit like strawberries or blueberries as a topping for a refreshing twist.
- Nutty Delight: Mix in some chopped nuts like pecans or walnuts into the crust for added crunch and flavor.
- Gluten-Free Option: Use gluten-free cookies for the crust to make it suitable for gluten-sensitive friends or family.
- Cheesecake Swirl: Swirl some fruit puree into the cheesecake filling for a beautiful presentation and fruity flavor.
- Chocolate Lovers: Substitute regular Oreo cookies with double stuff or mint Oreos for an extra chocolatey or minty kick!
Serving Suggestions for Oreo Cheesecake Cookie Cups
- Pair these cookie cups with a scoop of vanilla ice cream for a delightful contrast.
- Serve alongside a fresh fruit salad for a refreshing balance.
- For drinks, consider coffee or a rich hot chocolate to complement the dessert’s sweetness.
- Present them on a colorful platter garnished with mint leaves for an elegant touch.
FAQs about Oreo Cheesecake Cookie Cups
Can I make Oreo Cheesecake Cookie Cups ahead of time?
Absolutely! These delicious cups can be made a day in advance. Just keep them stored in the refrigerator until you’re ready to serve. The flavors only get better with time!
What can I substitute for cream cheese?
If you’re looking to switch things up, mascarpone cheese is a fantastic alternative. It offers a similar creamy texture while adding a different flavor profile to your Oreo Cheesecake Cookie Cups.
How do I store leftover cookie cups?
Keep your leftover Oreo Cheesecake Cookie Cups in an airtight container in the fridge. They will stay fresh for up to three days. Trust me, they will disappear faster than you think!
Can I freeze these cookie cups?
Yes, you can freeze them! Just make sure they are well-wrapped or placed in a freezer-safe container. When you’re ready to enjoy, let them thaw in the fridge overnight.
What other cookie varieties can I use for the crust?
There are endless possibilities! Consider using Nutter Butter cookies for a nutty flavor, or Graham crackers for a classic cheesecake vibe. The only limit is your imagination!
Final Thoughts
Creating these Oreo Cheesecake Cookie Cups is more than just whipping up a dessert; it’s about bringing joy to your loved ones. The thrill of seeing smiles light up as they take that first bite makes all the effort worthwhile. Each decadent morsel, with its creamy filling and crunchy crust, is a little piece of happiness. Whether you’re sharing them during a family gathering or savoring them after a long day, these cookie cups have a way of making moments special. So roll up your sleeves, and let these delightful treats become a new family favorite!
Print
Oreo Cheesecake Cookie Cups
- Total Time: 3 hours (includes chilling time)
- Yield: 12 cookie cups 1x
- Diet: Vegetarian
Description
Oreo Cheesecake Cookie Cups are a delightful combination of creamy cheesecake and chocolatey Oreo crust, perfect for any dessert lover.
Ingredients
- 20 Oreo cookies (for crust)
- 5 tbsp unsalted butter (melted)
- 8 oz cream cheese (softened)
- 1/2 cup granulated sugar
- 1/4 cup sour cream
- 1 cup whipped cream (for topping)
- Optional: 1/4 cup mini chocolate chips
Instructions
- Preheat oven to 350°F (175°C). Crush 20 Oreos into fine crumbs and mix with melted butter.
- Line a muffin tin with cupcake liners and press about one tablespoon of the Oreo mixture into each liner to form the base.
- In a mixing bowl, beat softened cream cheese and sugar until fluffy. Add sour cream and mix until smooth. Optionally fold in mini chocolate chips.
- Spoon cheesecake filling onto each crust until almost full. Bake for 15-18 minutes until set but slightly jiggly in the center. Let cool completely before refrigerating.
- Once chilled, top with whipped cream and sprinkle with crushed Oreos.
Notes
- Make sure the cream cheese is at room temperature for easy mixing.
- These cookie cups can be stored in the fridge for up to 3 days.
- Feel free to experiment with different toppings like chocolate syrup or fresh berries.
- Prep Time: 15 minutes
- Cook Time: 18 minutes
- Category: Dessert
- Method: Baking
- Cuisine: American
Nutrition
- Serving Size: 1 cookie cup
- Calories: 210
- Sugar: 14g
- Sodium: 150mg
- Fat: 13g
- Saturated Fat: 8g
- Unsaturated Fat: 3g
- Trans Fat: 0g
- Carbohydrates: 21g
- Fiber: 1g
- Protein: 2g
- Cholesterol: 30mg