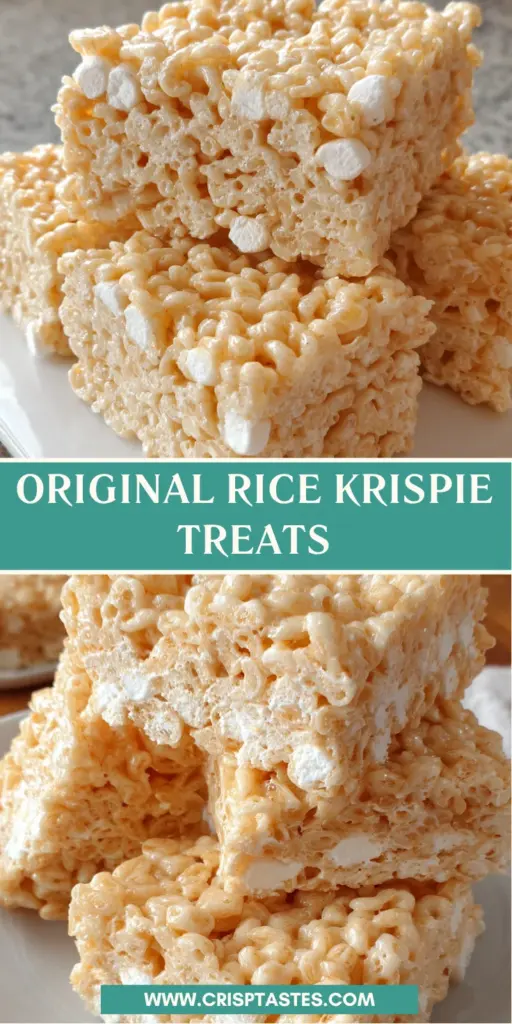
Original Rice Krispie Treats

Introduction to Original Rice Krispie Treats
As a busy mom, I know how precious every minute can be. That’s why I adore making Original Rice Krispie Treats! This simple, delightful recipe whisks together nostalgic flavors and childhood memories, bringing smiles to everyone around. In just 15 minutes, you can transform pantry staples into a sweet treat that satisfies the whole family. Whether it’s after-school snacks or a last-minute dessert for gatherings, these treats are an easy solution that never fails to impress. Plus, they’re a wonderful way to involve the kids in the kitchen—trust me; they’ll love every sticky moment!
Why You’ll Love This Original Rice Krispie Treats
Every busy mom deserves a break, and these Original Rice Krispie Treats offer just that! They’re quick to prepare, taking only 15 minutes from start to finish, making them perfect for those chaotic days. The sweet, chewy goodness is a hit with kids and adults alike, ensuring smiles all around. Plus, they’re versatile enough to play with flavors and fun add-ins, making them your go-to treat for any occasion!
Ingredients for Original Rice Krispie Treats
To whip up these delicious Original Rice Krispie Treats, you’ll need a few simple ingredients that I’m sure you already have on hand! Here’s what you’ll need:
- Unsalted Butter: This adds a rich, creamy flavor to the treats and is essential for that perfect texture.
- Marshmallows: The star ingredient! They give the treats their signature sweetness and chewy consistency. Opt for fresh marshmallows for the best results.
- Puffed Rice Cereal: This gives the treats their crunchy texture. Classic Rice Krispies are perfect, but any puffed cereal works!
If you’re feeling adventurous, you can also consider adding some optional ingredients:
- Food Coloring: Add a pop of color to your treats for special occasions. Kids love colorful snacks!
- Semi-Sweet Chocolate Chips: Toss some in for a rich, chocolatey twist.
- Nuts or Dried Fruit: For an extra crunch or fruity flavor, mix in your favorites!
For specific measurements, check at the bottom of the article where I’ll provide them for easy printing. Happy treating!
How to Make Original Rice Krispie Treats
Making Original Rice Krispie Treats is as easy as pie! Just follow these simple steps, and soon you’ll have delicious squares ready to satisfy your sweet tooth.
Step 1: Prepare Your Pan
First things first, we need to get our pan ready. Grab a 33 x 23 cm rectangular pan and coat it evenly with non-stick spray. This step is crucial! You want to ensure that you can lift out those treats later without any sticky mess. Trust me; you’ll thank yourself later!
Step 2: Melt the Butter
Next up, take a large microwave-safe bowl and pour in your melted butter. Heat it gently in the microwave, starting with about 20 seconds. Keep an eye on it! We want it warm, not bubbling over. The warmth helps to blend everything perfectly!
Step 3: Combine Ingredients
Now it’s time for the marshmallows! Pour those fluffy, sweet marshmallows into the bowl with the melted butter. Give it a good stir to combine. The butter will help the marshmallows melt more smoothly, creating that gooey texture we adore!
Step 4: Melt the Marshmallows
Put the bowl back in the microwave for 45 seconds. Remove it and stir well. You want everything to be evenly melted and smooth, so repeat this step if needed—about 45 seconds more should do the trick. You’re looking for a silky marshmallow mixture!
Step 5: Mix in Cereal
Once your marshmallows are melted and smooth, it’s time to add your puffed rice cereal. Gently fold it into the marshmallow mixture until every puff is coated in that sweet, gooey goodness. Make sure to mix quickly and thoroughly to avoid any dry patches!
Step 6: Press into Pan
Finally, pour your delicious mixture into the prepared pan. Use a spatula or your lightly greased hands to press it into an even layer. Don’t worry if it seems sticky; just keep pressing until it’s nicely packed. This step is key for achieving those perfect, sliceable squares later!
Tips for Success
- Always use fresh marshmallows for the best flavor and texture.
- Don’t overheat the marshmallows; they can become hard if cooked too long.
- Spray your hands or spatula with non-stick spray for easy pressing.
- Let the treats cool completely before cutting for clean squares.
- Store leftovers in an airtight container to keep them fresh and chewy.
Equipment Needed
- Large Microwave-Safe Bowl: A glass or ceramic bowl works well. Just avoid metal!
- Spatula: A silicone spatula is perfect for stirring and pressing.
- 33 x 23 cm Rectangular Pan: Any similar-sized pan will do if you don’t have this exact one.
- Measuring Cups: For precise quantities, unless you’re an expert at eyeballing!
Variations on Original Rice Krispie Treats
- Chocolate Peanut Butter: Drizzle melted chocolate and peanut butter over the top for a decadent twist.
- Funfetti: Add colorful sprinkles to the mixture for a festive and cheerful look that kids love!
- Cocoa Rice Krispies: Swap regular cereal for cocoa-flavored Rice Krispies for a chocolatey version.
- Marshmallow Fluff: Mix in a dollop of marshmallow fluff for an extra gooey treat.
- Healthy Twist: Use brown rice cereal or add nuts and seeds for a more nutritious snack.
Serving Suggestions
- Pair with Milk: A classic pairing! Serve your Original Rice Krispie Treats with a tall glass of cold milk for a nostalgic experience.
- Presentation: Cut them into fun shapes using cookie cutters for parties.
- Pack for Lunch: They make for a delightful sweet treat in lunchboxes!
- Try with Ice Cream: Serve warm treats à la mode with a scoop of vanilla ice cream.
FAQs about Original Rice Krispie Treats
Everyone has questions, especially when making a cherished treat like Original Rice Krispie Treats! Here are answers to some common ones that can help you get the best results.
Can I use any type of marshmallows for this recipe?
Absolutely! While mini marshmallows are great for easy melting, standard-sized marshmallows work just fine too. Just keep in mind that the melting time might vary slightly, so watch closely!
Why are my Rice Krispie Treats hard?
Hard treats often result from overcooking the marshmallows or letting them cool too long before pressing them into the pan. Remember, high and quick heat is key!
How should I store my treats?
Store your Original Rice Krispie Treats in an airtight container at room temperature. They’ll stay fresh for several days—if they last that long!
Can I make these treats in advance?
You sure can! They actually taste even better after resting for a day in an airtight container. Just make sure to let them cool completely before storing.
Can I mix in other ingredients?
Definitely! Feel free to get creative. Adding chocolate chips, nuts, or sprinkles can transform your Original Rice Krispie Treats into something special and unique!
Final Thoughts
Making Original Rice Krispie Treats is like creating a little piece of joy in your kitchen. The laughter shared while mixing and pressing the ingredients together always warms my heart. These treats remind us of simpler times, bringing smiles to faces of all ages. Plus, they are a fantastic way to bond with your kids, creating lasting memories one sticky moment at a time. So go ahead, whip up a batch, and enjoy every chewy, sweet bite. Trust me, you’ll find yourself making them again and again, cherishing the moments they bring to your family!
Print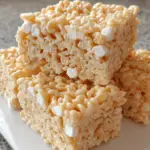
Original Rice Krispie Treats
- Total Time: 15 minutes
- Yield: 12 servings 1x
- Diet: Vegetarian
Description
A simple and irresistible recipe for Original Rice Krispie Treats that are perfect for any occasion.
Ingredients
- 45 grams unsalted butter, melted
- 285 grams marshmallows
- 150 grams puffed rice cereal
Instructions
- Coat a 33 x 23 cm rectangular pan evenly with non-stick spray and set aside.
- In a large microwave-safe bowl, heat the melted butter gently.
- Add the marshmallows to the bowl and stir to combine with butter.
- Microwave the mixture for 45 seconds, remove, and stir thoroughly. Repeat heating for another 45 seconds, then stir until the marshmallows are completely melted and smooth.
- Add the puffed rice cereal to the melted marshmallow mixture. Stir until all cereal is uniformly coated.
- Evenly distribute the mixture into the prepared pan. Press firmly into an even layer using a spatula or lightly greased hands.
Notes
- For best results, make sure to use fresh marshmallows.
- You can add food coloring for a fun twist.
- Store in an airtight container to keep them fresh.
- Prep Time: 10 minutes
- Cook Time: 5 minutes
- Category: Dessert
- Method: Microwave
- Cuisine: American
Nutrition
- Serving Size: 1 square
- Calories: 150
- Sugar: 10g
- Sodium: 50mg
- Fat: 6g
- Saturated Fat: 4g
- Unsaturated Fat: 2g
- Trans Fat: 0g
- Carbohydrates: 22g
- Fiber: 0g
- Protein: 1g
- Cholesterol: 15mg