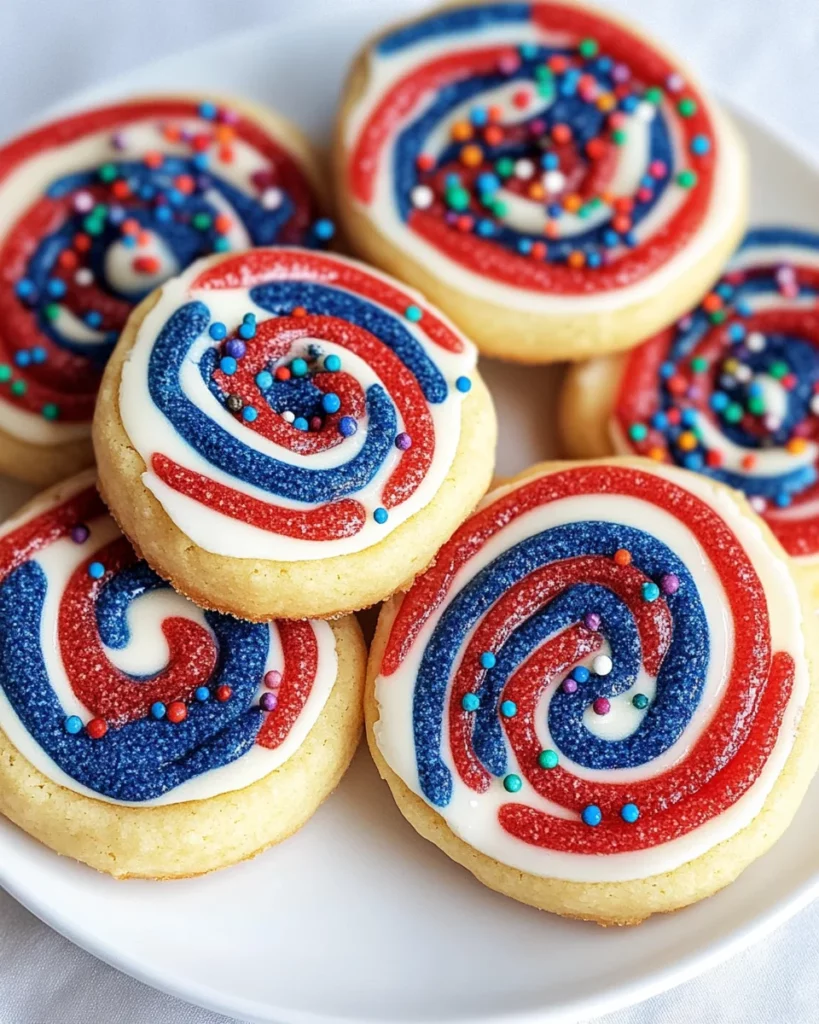
Patriotic Pinwheel Cookies: Bake Fun and Festive Treats!

Introduction to Patriotic Pinwheel Cookies
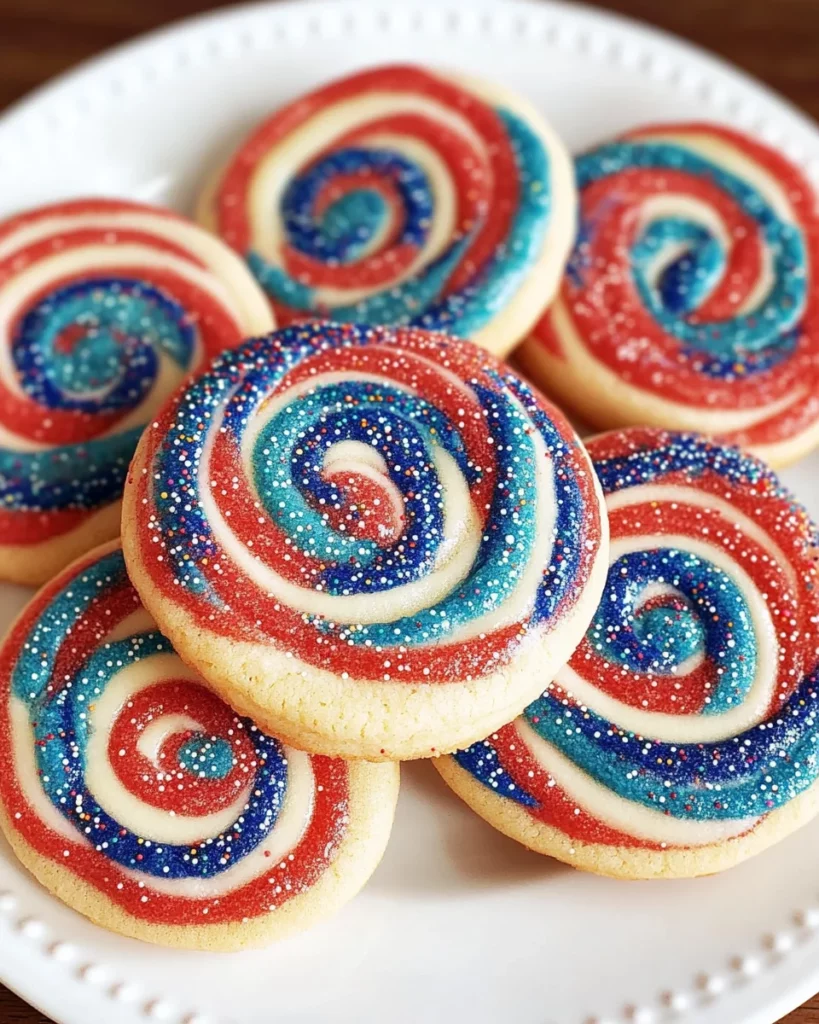
As a busy mom, I know how important it is to find quick and delightful treats that can bring a smile to my family’s faces. That’s where these Patriotic Pinwheel Cookies come in! With their vibrant red, white, and blue colors, they’re perfect for any celebration, from Fourth of July barbecues to Memorial Day picnics. Not only are they fun to make, but they also add a festive touch to any gathering. Plus, they’re a great way to get the kids involved in the kitchen, creating memories while baking together!
Why You’ll Love This Patriotic Pinwheel Cookies
These Patriotic Pinwheel Cookies are not just visually stunning; they’re incredibly easy to whip up! With simple ingredients and straightforward steps, even the busiest of moms can find time to bake them. The delightful combination of buttery sweetness and colorful layers makes them a hit with kids and adults alike. Plus, they’re perfect for any occasion, ensuring your treats stand out at every gathering!

Ingredients for Patriotic Pinwheel Cookies
Gathering the right ingredients is the first step to creating these delightful Patriotic Pinwheel Cookies. Here’s what you’ll need:
- All-purpose flour: This is the base of your cookie dough, providing structure and texture.
- Baking powder: A leavening agent that helps the cookies rise and become fluffy.
- Salt: Just a pinch enhances the sweetness and balances the flavors.
- Unsalted butter: Softened butter adds richness and a creamy texture to the dough.
- Granulated sugar: This sweetener gives the cookies their delightful sweetness and helps them spread.
- Large egg: Acts as a binder, helping to hold the dough together while adding moisture.
- Vanilla extract: A splash of this adds a warm, comforting flavor that complements the sweetness.
- Red gel food coloring: This vibrant color brings the festive spirit to your cookies.
- Blue gel food coloring: Just like the red, this will help create those beautiful layers.
- Sprinkles (optional): These can be added for a fun, decorative touch, especially for celebrations!
For exact measurements, check the bottom of the article where you can find everything listed for easy printing. Feel free to experiment with different colors or even flavors to make these cookies your own!
How to Make Patriotic Pinwheel Cookies
Now that you have your ingredients ready, let’s dive into the fun part: making these delightful Patriotic Pinwheel Cookies! Follow these simple steps, and you’ll have a colorful batch of cookies in no time.
Step 1: Prepare the Dry Ingredients
Start by whisking together the all-purpose flour, baking powder, and salt in a medium bowl. This step is crucial as it ensures that your cookies will rise perfectly. Set this mixture aside for later.
Step 2: Cream the Butter and Sugar
In a large bowl, cream together the softened butter and granulated sugar until the mixture is light and fluffy. This usually takes about 2-3 minutes. Then, beat in the egg and vanilla extract until everything is well combined. The aroma of vanilla will make your kitchen feel like a warm hug!
Step 3: Combine Wet and Dry Ingredients
Gradually add the flour mixture to the wet ingredients. Mix until a soft dough forms. Don’t overmix; just combine until you see no dry flour. This dough is the canvas for your colorful masterpiece!
Step 4: Color the Dough
Divide the dough into three equal portions. Leave one portion plain for the white layer. Color one portion red and the other blue using gel food coloring. Start with a few drops and mix until you achieve your desired shade. It’s like creating your own edible art!
Step 5: Roll and Chill the Dough
Roll each colored dough portion between sheets of parchment paper into rectangles of equal size, about 1/4-inch thick. This helps keep the colors from mixing. Once rolled, chill the dough in the refrigerator for 30 minutes. Chilling is key for clean edges!
Step 6: Stack and Trim the Dough
Once chilled, stack the dough layers in the order of blue, white, and red. Gently press them together. Trim the edges to create a neat rectangle. This step is where the magic happens, as you’ll see the beautiful layers forming!
Step 7: Roll into a Log
Now, roll the layered dough into a tight log, starting from the long edge. Wrap the log in plastic wrap and refrigerate for at least 2 hours or until firm. This will help maintain the shape when you slice the cookies.
Step 8: Preheat and Prepare for Baking
Preheat your oven to 350°F (175°C). While it’s heating, line your baking sheets with parchment paper. This will prevent the cookies from sticking and make cleanup a breeze!
Step 9: Slice and Bake the Cookies
Slice the chilled dough log into 1/4-inch thick cookies. If you like, add sprinkles to the edges for an extra festive touch. Place the cookies on the prepared baking sheets and bake for 9–11 minutes, or until the edges are just set. Let them cool on wire racks, and enjoy the delightful aroma filling your home!
Tips for Success
- Make sure your butter is softened for easy creaming with sugar.
- Chill the dough thoroughly before slicing to ensure clean edges.
- Use gel food coloring for vibrant colors that won’t alter the dough’s consistency.
- Experiment with different shapes or sizes for a fun twist on presentation.
- Store cookies in an airtight container to keep them fresh and delicious!
Equipment Needed
- Mixing bowls: Use any size you have; a large bowl for wet ingredients and a medium one for dry.
- Whisk: A simple whisk works wonders, but a hand mixer can save time.
- Parchment paper: If you don’t have it, greasing the baking sheets will do.
- Plastic wrap: Any food-safe wrap will keep your dough log fresh.
- Rolling pin: A wine bottle can work in a pinch if you don’t have one!
Variations
- Flavor Infusions: Add a teaspoon of almond extract for a nutty twist or lemon zest for a refreshing citrus flavor.
- Gluten-Free Option: Substitute all-purpose flour with a gluten-free blend to make these cookies suitable for gluten-sensitive friends.
- Chocolate Lovers: Incorporate cocoa powder into the red dough for a chocolatey layer that adds depth to the flavor.
- Nutty Crunch: Fold in chopped nuts like walnuts or pecans into the dough for added texture and flavor.
- Vegan Version: Replace the egg with a flax egg (1 tablespoon ground flaxseed mixed with 2.5 tablespoons water) and use vegan butter for a plant-based treat.
Serving Suggestions
- Pair with Milk: A classic glass of cold milk complements the sweetness of these cookies perfectly.
- Festive Platter: Arrange cookies on a colorful platter with fresh fruit for a vibrant display.
- Ice Cream Sandwiches: Use two cookies to sandwich a scoop of vanilla or strawberry ice cream for a delightful treat.
- Decorative Touch: Add a sprinkle of edible glitter for an extra festive flair at parties.
FAQs about Patriotic Pinwheel Cookies
As you embark on your baking adventure with these Patriotic Pinwheel Cookies, you might have a few questions. Here are some common queries that can help you along the way!
Can I use different colors for the dough?
Absolutely! While red, white, and blue are perfect for patriotic celebrations, feel free to experiment with any colors that suit your occasion. Think pastel shades for spring or vibrant hues for a birthday party!
How do I store leftover cookies?
To keep your cookies fresh, store them in an airtight container at room temperature. They should stay delicious for about a week. If you want to keep them longer, consider freezing them!
Can I make the dough ahead of time?
Yes! You can prepare the dough log and refrigerate it for up to 3 days before slicing and baking. Just make sure to wrap it tightly in plastic wrap to prevent it from drying out.
What if my dough is too sticky?
If your dough feels sticky, don’t worry! Just sprinkle a little extra flour on your work surface while rolling it out. This will help you achieve the right consistency without compromising the cookie’s texture.
Can I add nuts or chocolate chips to the dough?
Definitely! Adding chopped nuts or chocolate chips can enhance the flavor and texture of your Patriotic Pinwheel Cookies. Just fold them in gently after combining the wet and dry ingredients.
Final Thoughts
Baking these Patriotic Pinwheel Cookies is more than just a culinary task; it’s a joyful experience that brings families together. The vibrant colors and delightful flavors create a festive atmosphere, perfect for any celebration. I love watching my kids’ faces light up as they help roll the dough and slice the cookies. Each bite is a reminder of the fun we had in the kitchen, making memories that last a lifetime. So, gather your loved ones, roll up your sleeves, and let the baking adventure begin. You’ll be amazed at how these cookies can brighten your day!
Print
Patriotic Pinwheel Cookies
- Total Time: 2 hours 41 minutes
- Yield: 24 cookies 1x
- Diet: Vegetarian
Description
Patriotic Pinwheel Cookies are fun and festive treats perfect for celebrations, featuring vibrant red, white, and blue colors.
Ingredients
- 2 1/2 cups all-purpose flour
- 1/2 tsp baking powder
- 1/2 tsp salt
- 1 cup unsalted butter, softened
- 1 cup granulated sugar
- 1 large egg
- 1 1/2 tsp vanilla extract
- Red gel food coloring
- Blue gel food coloring
- Sprinkles (optional, for decoration)
Instructions
- In a medium bowl, whisk together flour, baking powder, and salt. Set aside.
- In a large bowl, cream together the butter and sugar until light and fluffy. Beat in the egg and vanilla extract until combined.
- Gradually add the flour mixture to the wet ingredients, mixing until a soft dough forms.
- Divide the dough into three equal portions. Leave one plain (white), color one red, and color one blue using gel food coloring.
- Roll each dough portion between parchment paper into rectangles of equal size (about 1/4-inch thick). Chill in the refrigerator for 30 minutes.
- Once chilled, stack the dough layers (blue, white, red) and gently press together. Trim edges to make a neat rectangle.
- Roll the layered dough into a tight log, starting from the long edge. Wrap the log in plastic wrap and refrigerate for at least 2 hours or until firm.
- Preheat oven to 350°F (175°C). Line baking sheets with parchment paper.
- Slice the chilled dough log into 1/4-inch thick cookies. Add sprinkles to the edges if desired.
- Place cookies on baking sheets and bake for 9–11 minutes, or until edges are just set. Cool on wire racks.
Notes
- Ensure the dough is well-chilled before slicing for clean edges.
- Experiment with different colors for various holidays or events.
- Store cookies in an airtight container to maintain freshness.
- Prep Time: 30 minutes
- Cook Time: 11 minutes
- Category: Dessert
- Method: Baking
- Cuisine: American
Nutrition
- Serving Size: 1 cookie
- Calories: 120
- Sugar: 6g
- Sodium: 50mg
- Fat: 7g
- Saturated Fat: 4g
- Unsaturated Fat: 2g
- Trans Fat: 0g
- Carbohydrates: 14g
- Fiber: 0g
- Protein: 1g
- Cholesterol: 20mg