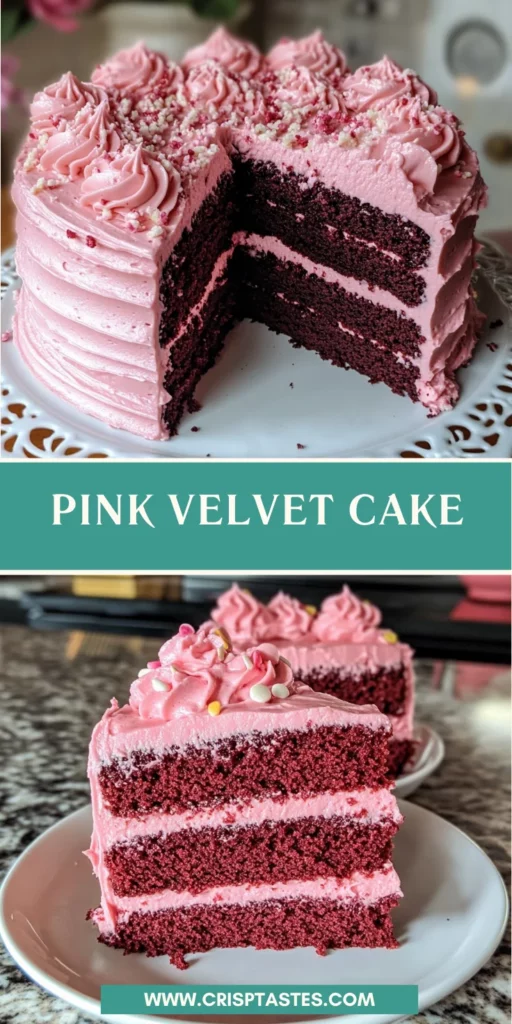
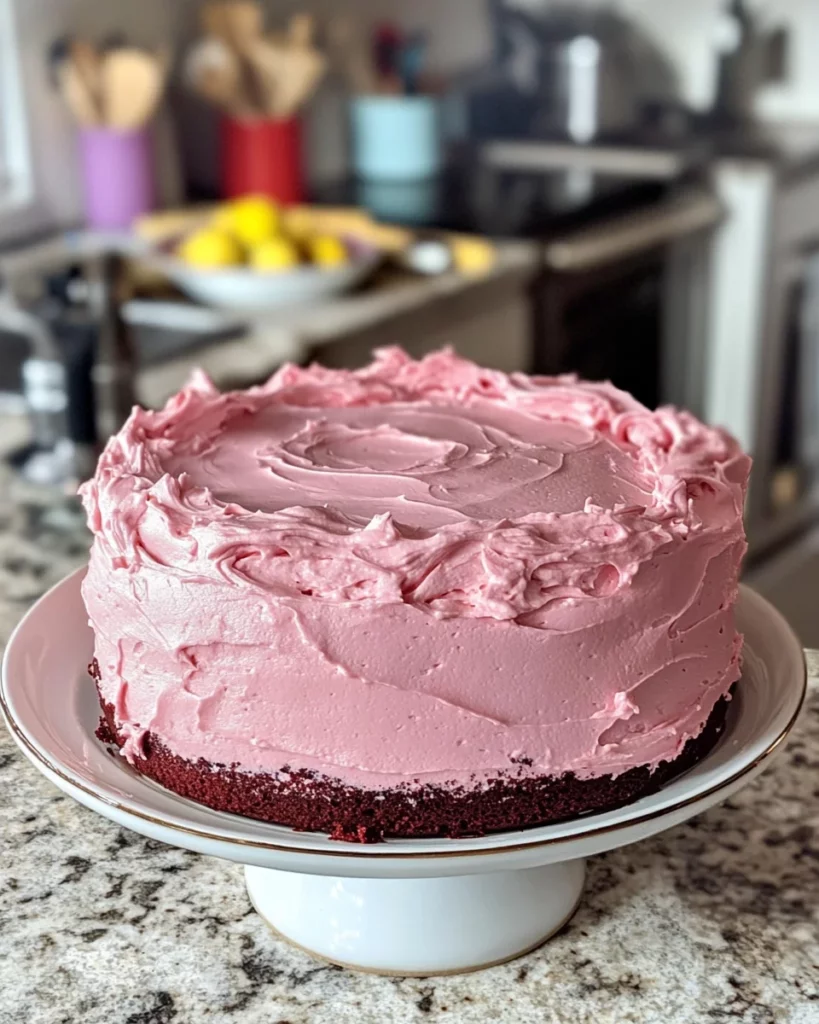
Pink Velvet Cake: Bake a Sweet Showstopper Today!

Introduction to Pink Velvet Cake
Ah, the joy of baking! Whenever I whip up something delightful, it feels like I’m creating a tiny piece of magic. Today, I’m excited to share my recipe for Pink Velvet Cake. This cake is not just a feast for the eyes; its soft, velvety texture makes it a must-have for any celebration. As busy moms or professionals, we all crave simple yet stunning desserts that leave our loved ones in awe. So, join me on this delicious journey, and let’s bake a little happiness into our lives with a beautiful Pink Velvet Cake!
Why You’ll Love This Pink Velvet Cake
This Pink Velvet Cake is not just another dessert; it’s a true showstopper! You’ll love how easy it is to whip up, even on your busiest days. With a tender crumb that melts in your mouth, this cake offers a delightful balance of sweetness and creamy frosting. Plus, it’s perfect for any occasion—birthdays, holidays, or just a sweet treat to brighten your week. Trust me; this cake will steal the spotlight!
Ingredients for Pink Velvet Cake
Gathering your ingredients is like preparing for a little adventure; each component plays a vital role in creating a delicious masterpiece. Here’s what you’ll need to whip up this delightful Pink Velvet Cake:
- All-purpose flour: The backbone of your cake provides structure and tenderness.
- Granulated sugar: Sweetens your cake, giving it that delightful melt-in-the-mouth flavor.
- Baking powder: A leavening agent that helps your cake rise to perfection.
- Baking soda: Works alongside baking powder to enhance the cake’s fluffiness.
- Salt: Just a pinch boosts the flavor of all the other ingredients.
- Unsalted butter: Adds richness and moisture while creating a tender texture.
- Buttermilk: Contributes to the cake’s lovely crumb and provides a bit of tang.
- Eggs: Essential for binding and adding moisture, helping the cake rise beautifully.
- Vanilla extract: A classic flavor that adds depth and aroma to your cake.
- Apple cider vinegar: A secret trick to enhance the red hue while keeping your cake moist.
- Unsweetened cocoa powder: Just a touch for color; it doesn’t make the cake chocolatey but adds depth.
- Pink liquid food coloring: Adjust this to your liking for that perfect blush hue!
To create the creamy frosting, you’ll need:
- Cream cheese: Gives the frosting a rich, tangy flavor that pairs wonderfully with the cake.
- Unsalted butter: Softened for easy mixing, adds extra creaminess to your frosting.
- Confectioners’ sugar: Sweetens and thickens the frosting, making it smooth and delightful.
- Vanilla extract: A splash here ensures flavorful frosting that complements the cake.
- Pinch of salt: Balances out the sweetness and enhances the overall flavor.
For the exact amounts, check out the bottom of the article where you can print this recipe for your next baking adventure!

How to Make Pink Velvet Cake
Preheat and Prepare
First things first! Preheat your oven to 350°F (175°C). While it’s warming up, grab two 9-inch round cake pans. Give them a good greasing with butter or cooking spray, and then line the bottoms with parchment paper. This little step ensures your gorgeous Pink Velvet Cake comes out easily after baking, leaving you less to clean up!
Combine Dry Ingredients
In a large mixing bowl, whisk together your all-purpose flour, granulated sugar, baking powder, baking soda, and salt. This blend provides the foundation for your cake, creating a fluffy texture when it bakes. Make sure there are no lumps—each dry ingredient deserves attention!
Mix Wet Ingredients
Now, it’s time to introduce the wet crew! Add the softened butter, buttermilk, eggs, and vanilla extract to your bowl of dry ingredients. Mix until everything is combined and smooth. You want your cake batter to be like a soft hug, not too thick, and just happy to be mixed together!
Add Color and Flavor
Here comes the fun part! Add the apple cider vinegar and cocoa powder to your batter. This is where the magic begins! Stir in a few drops of pink liquid food coloring until you achieve your desired shade. It’s just like painting, but much tastier when it’s done!
Bake the Cakes
Time to let the oven work its magic! Divide the batter evenly between your two prepared pans and pop them into the oven. Bake for 25-30 minutes. Keep an eye on them! To check for doneness, insert a toothpick into the center; it should come out clean or with a few crumbs clinging to it. That’s how you know you’ve nailed it!
Prepare for Frosting
When your cakes are done, remove them from the oven and let them cool in the pans for about 10 minutes. Then, gently transfer them to a wire rack. Allow them to cool completely before frosting; nobody likes a melty frosting disaster!
Make the Cream Cheese Frosting
While your cakes cool, let’s whip up that luscious cream cheese frosting! In a large bowl, beat together the softened cream cheese and butter until smooth. Gradually add the confectioners’ sugar while mixing, until it reaches a thick, creamy texture. Finally, stir in vanilla extract and a pinch of salt. You want your frosting to be light, fluffy, and oh-so-delicious!
Tips for Success
- Always use room temperature ingredients for a smoother batter and better rise.
- Don’t skip the parchment paper; it makes removing the cakes hassle-free!
- Mix gently; overbeating can lead to a dense cake.
- Store leftovers in an airtight container to keep that soft texture.
- Get creative with toppings—sprinkles, fresh berries, or edible glitter can add a fun twist!
Equipment Needed
- 9-inch round cake pans: You can use any similar-sized pans if needed.
- Parchment paper: Wax paper works in a pinch, but parchment is best for easy release.
- Mixing bowls: Don’t have a fancy set? Any large bowls will do!
- Hand or stand mixer: A whisk can work too, though it’ll require more elbow grease.
- Wire rack: A plate or countertop will suffice if you don’t have one.
Variations of Pink Velvet Cake
There’s always room to get creative in the kitchen! Here are some fun variations of Pink Velvet Cake that you can try:
- Chocolate Chip Pink Velvet: Fold in mini chocolate chips for a sweet surprise in every slice!
- Red Velvet Twist: Substitute red food coloring for pink for a more traditional look, adding cocoa for that signature flavor.
- Gluten-Free Pink Velvet: Use a gluten-free flour blend to make this cake suitable for gluten-sensitive friends!
- Lemon Zest Delight: Add a teaspoon of lemon zest to the batter for a bright, citrusy note.
- Vanilla Bean Frosting: Replace cream cheese with a whipped vanilla bean frosting for a lighter, airier finish.
Serving Suggestions
- Serve slices of Pink Velvet Cake alongside fresh berries for a burst of flavor.
- A scoop of vanilla ice cream pairs wonderfully with the creamy frosting.
- For drinks, consider serving with a refreshing iced tea or sparkling lemonade.
- Garnish the cake with edible flowers or sprinkles for an extra pop of color.
- Presentation can be enhanced by serving on a beautiful cake stand!
FAQs about Pink Velvet Cake
As we dive deeper into the delightful world of Pink Velvet Cake, you might have a few lingering questions. Don’t worry; I’ve got you covered! Here are some common queries that fellow bakers often have:
Can I make Pink Velvet Cake in advance?
Absolutely! You can bake the cakes a day ahead, letting them cool completely. Just wrap them tightly in plastic wrap and store them in the refrigerator. When you’re ready, frost and serve. This way, you can save time for your special celebration!
What can I use instead of buttermilk?
If you don’t have buttermilk on hand, no worries! You can mix one cup of milk with one tablespoon of vinegar or lemon juice. Let it sit for about 5-10 minutes, and voilà—you’ve got a fantastic buttermilk substitute!
How should I store leftover cake?
To keep your Pink Velvet Cake fresh, place any leftover slices in an airtight container. You can also refrigerate it for up to three days. If you need it to last longer, consider wrapping individual slices in plastic wrap and freezing them for up to three months.
Can I use a different frosting?
Of course! While cream cheese frosting is a classic pairing, you can experiment with other frostings too. Try a decadent chocolate ganache or a sweet buttercream for a delightful change that complements the Pink Velvet Cake beautifully!
Why is my cake not as pink as I wanted?
If your cake didn’t achieve that desired pink hue, it might need a little more food coloring. Don’t be shy; just add more drops until you reach the perfect shade! Remember to blend it in well for an even color throughout the batter!
Final Thoughts
Creating a Pink Velvet Cake is more than just baking; it’s about making memories and sharing joy with those you love. Each slice is a celebration of flavor and color, guaranteed to bring smiles around the table. I’ve learned that the simplest ingredients can lead to the most delightful experiences. Whether it’s for a birthday, holiday, or just to brighten a weekday, this cake is your ticket to happiness. So, dust off that apron and start mixing! You won’t just make a cake; you’ll create a sweet story that everyone will cherish. Happy baking!
Print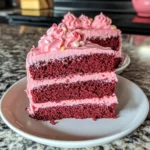
Pink Velvet Cake
- Total Time: 1 hour
- Yield: 12 servings 1x
- Diet: Vegetarian
Description
A delightful and visually stunning Pink Velvet Cake with a creamy frosting that is perfect for any celebration.
Ingredients
- 2 1/2 cups all-purpose flour
- 1 1/2 cups granulated sugar
- 1 teaspoon baking powder
- 1/2 teaspoon baking soda
- 1/2 teaspoon salt
- 1/2 cup unsalted butter, softened
- 1 cup buttermilk, room temperature
- 2 large eggs, room temperature
- 2 teaspoons vanilla extract
- 1 tablespoon apple cider vinegar
- 1 tablespoon unsweetened cocoa powder
- Pink liquid food coloring (to achieve the desired color intensity)
- 8 oz cream cheese, softened
- 1/2 cup unsalted butter, softened
- 4 cups confectioners’ sugar
- 2 teaspoons vanilla extract (for frosting)
- Pinch of salt (for frosting)
Instructions
- Preheat and prepare the pans by preheating your oven to 350°F (175°C). Grease two 9-inch round cake pans and line them with parchment paper.
- In a large bowl, whisk together the flour, sugar, baking powder, baking soda, and salt.
- Add the softened butter, buttermilk, eggs, and vanilla extract to the dry ingredients. Blend until smooth.
- Add the apple cider vinegar and cocoa powder for color and texture.
- Gradually add pink liquid food coloring until you reach your desired shade of pink.
- Divide the batter evenly between the prepared pans and bake for 25-30 minutes, or until a toothpick comes out clean.
- Allow the cakes to cool in their pans for about 10 minutes, then transfer to a wire rack to cool completely before frosting.
- For the cream cheese frosting, beat together the softened cream cheese and butter until smooth, then gradually add powdered sugar until thick and creamy.
- Stir in the vanilla extract and a pinch of salt, then beat until light and fluffy.
Notes
- Ensure all ingredients are at room temperature for best results.
- For a natural pink color, consider using alternatives to food coloring.
- Store the cake in an airtight container to maintain freshness.
- Prep Time: 30 minutes
- Cook Time: 30 minutes
- Category: Dessert
- Method: Baking
- Cuisine: American
Nutrition
- Serving Size: 1 slice
- Calories: 350
- Sugar: 30g
- Sodium: 200mg
- Fat: 18g
- Saturated Fat: 10g
- Unsaturated Fat: 6g
- Trans Fat: 0g
- Carbohydrates: 45g
- Fiber: 1g
- Protein: 3g
- Cholesterol: 70mg