Rain Cloud in a Jar: Create Your Own Weather Fun!

Introduction to Rain Cloud in a Jar
Hey there, fellow busy moms and professionals! Have you ever found yourself staring out the window, wishing for a little sunshine on a cloudy day? If so, I’ve got just the thing to brighten your spirits—making a Rain Cloud in a Jar! This fun science experiment is not only a delightful way to explore the wonders of weather but also an engaging activity to do with your kids. In just 15 minutes, you can create your own tiny weather system right at home. It’s the perfect solution for those days when outdoor play isn’t an option. Let’s dive into this colorful adventure!
Why You’ll Love This Rain Cloud in a Jar
This Rain Cloud in a Jar is a true lifesaver on a dreary day! It’s super easy to whip up, and you’ll only need a handful of ingredients. In just 15 minutes, your kids can enjoy a magical visual experience right before their eyes. Plus, it’s a wonderful way to teach them about nature’s processes while sparking their curiosity. What’s better than having science and fun all in one jar?
Ingredients for Rain Cloud in a Jar
Gathering the right ingredients for your Rain Cloud in a Jar is part of the fun. Here’s what you’ll need:
- 1 large clear glass jar: This is your mini weather station. A clear jar makes it easy to see all the magic happening inside.
- Water: Represents the ocean, lakes, and rivers. You’ll fill your jar mostly with water to create a realistic base for your cloud.
- Shaving cream: The star of the show! This fluffy foam acts as your cloud; its light texture is perfect for simulating what clouds look like up in the sky.
- Food coloring: Bring your rain to life with vibrant hues! Blue is classic for water, but feel free to experiment with any color to make your rainstorm unique.
- A dropper or spoon: Using a dropper allows for precise drops of colored water, ensuring a clear view of how the “rain” falls through the shaving cream.
These ingredients are easy to find, and you might already have them in your kitchen. I love that this learning experience is made from common items; it proves that you don’t need fancy supplies to create fun! If you’re curious about exact quantities, you’ll find them at the bottom of the article for easy printing.
How to Make Rain Cloud in a Jar
Creating your Rain Cloud in a Jar is simple! Follow these steps, and you’ll be on your way to a delightful science experiment. I promise you’ll enjoy every moment!
Step 1: Prepare Your Jar
Start by taking your large clear glass jar. Place it on a stable surface where everyone can see the action unfold. Pour water into the jar until it’s about three-quarters full. This will be the base of your cloud and reservoir for your “rain.”
Step 2: Create the Cloud
Now for the fun part—creating the cloud! Grab your shaving cream and spray a thick layer on the surface of the water. Watch it float and fluff up like a real cloud! As I was doing this with my kids, I couldn’t help but giggle; it looked like a giant scoop of whipped cream!
Step 3: Mix the Colored Water
Next, take a small cup and add a few drops of food coloring to a small amount of water. You can stir it gently, mixing until you achieve the desired color. I’ve had great success with blue and green, but green, pink, or purple can add surprise too! Just think of how pretty your little weather system will look!
Step 4: Bring the Rain
Here’s where you bring that cloud to life! Using your dropper or spoon, gently drop the colored water onto the shaving cream. Try to make them spaced out so you can see how the “rain” starts to accumulate. It may take a few drops before you see rain starting to form. As the cloud gets heavier, you’ll notice it beginning to “rain” into the jar!
Step 5: Watch the Magic
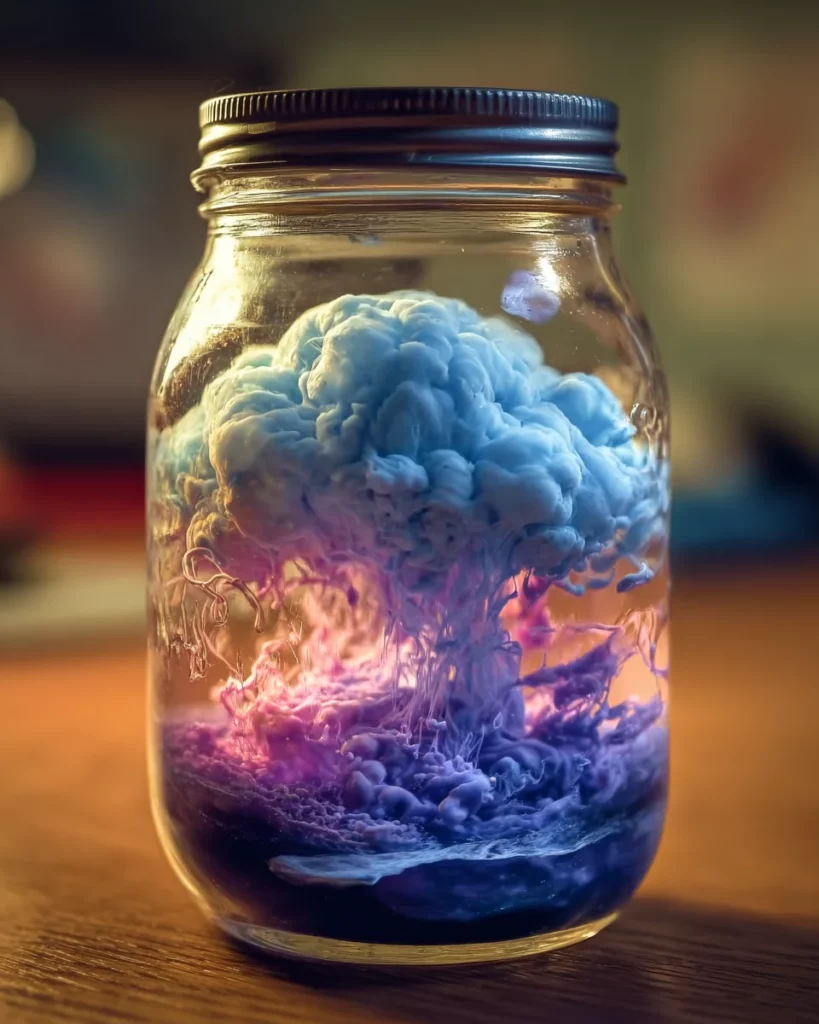
Lastly, sit back and enjoy the spectacle! Watch as colorful rain drifts down and mingles with the water below. It’s a visual treat! Every drop reminds you of real precipitation. You might want to grab your kids and cheer for your mini weather event!
Tips for Success
- Always use a clear jar for the best visibility of your rain cloud.
- Add drops of colored water slowly to let the magic build.
- Experiment with different colors for a vibrant rainbow effect!
- For added fun, use a flashlight behind the jar to illuminate the cloud.
- Don’t forget to involve your kids in the process for a memorable bonding experience!
Equipment Needed
- Large clear glass jar: A mason jar works well, or any transparent container you have on hand.
- Dropper: If you don’t have one, a small spoon will work just fine for adding colored water.
- Mixing cup: A small bowl or any cup will do to mix the colored water.
Variations
- Try using different types of foam, like whipped topping, for a unique texture!
- For a fun twist, add glitter to your water to create a sparkly rain cloud.
- If you’re feeling adventurous, use flavored food coloring to make a fruity rain cloud—think raspberry or lemon!
- Incorporate different types of liquids like juice or soda for a fizzy, colorful effect.
- For educational fun, combine this experiment with a lesson on weather patterns, perhaps using visuals to discuss different cloud types.
Serving Suggestions
- Pair this activity with a cozy indoor picnic featuring finger foods like sandwiches or fruit skewers.
- Enjoy refreshing lemonade or iced tea, making it a delightful weather-themed snack time.
- Set the scene with a weather-related book for a complete educational experience.
FAQs about Rain Cloud in a Jar
Got questions about your Rain Cloud in a Jar? You’re not alone! Here are some common queries I often hear, along with my insights:
Can I use different kinds of jars for this experiment?
Absolutely! While a clear glass jar works best for visibility, you can also use plastic containers. Just make sure they’re see-through to enjoy the beautiful rain effect.
What can I do if the shaving cream doesn’t hold its shape?
If your cloud starts to sink, make sure you’re using enough shaving cream. Apply a thicker layer for better results. And if it happens, don’t worry! Science is all about experimentation.
Can I reuse the ingredients for another experiment?
Yes, you can! Just mix some fresh colored water and replace the shaving cream. It’s a fun way to create rain clouds again without starting completely from scratch.
Is this safe for little kids?
Yes, this is a child-friendly activity! Just keep an eye on them while using the dropper and the food coloring, and make sure they don’t ingest any materials.
Can I include this in a weather-themed lesson?
Absolutely! This hands-on experience is perfect for teaching kids about the water cycle and weather patterns. Ask questions and let them explain what they see to reinforce their learning.
Final Thoughts
Creating a Rain Cloud in a Jar is more than just a fun science experiment; it’s a moment of joy and discovery with your kids. As you watch those colorful drops of rain trickle down, you’ll witness the science of weather come to life right before your eyes. It’s a simple activity that sparks curiosity and fosters learning amid hours of screen time. Plus, it offers a beautiful opportunity for connection and laughter. So the next time the rain clouds roll in, remember—you can bring the sunshine of creativity indoors with just a jar, shaving cream, and a splash of color!
Print
Rain Cloud in a Jar: Create Your Own Weather Fun!
- Total Time: 15 minutes
- Yield: 1 rain cloud in a jar 1x
- Diet: N/A
Description
This fun and visual science experiment shows how clouds hold moisture and create rain. A perfect rainy day activity that brings weather science to life indoors!
Ingredients
- 1 large clear glass jar
- Water
- Shaving cream (for the cloud!)
- Food coloring (blue or any color)
- A dropper or spoon
Instructions
- Pour water into the glass jar until it’s about ¾ full.
- Spray a layer of shaving cream on top of the water. This fluffy foam represents your cloud!
- In a small cup, mix a few drops of food coloring with a little water.
- Use a dropper or spoon to gently drop the colored water onto the shaving cream. When the “cloud” gets full, it will start to “rain” into the jar below!
- Watch how the colorful rain drifts down through the cloud, just like precipitation from real clouds.
Notes
- Try using multiple colors to make a rainbow rainstorm!
- Use a flashlight behind the jar to really light up the cloud and rain.
- Great for teaching about the water cycle or as part of a weather unit.
- A magical mix of science, color, and wonder—right in a jar!
- Prep Time: 5 minutes
- Cook Time: N/A
- Category: Science Experiment
- Method: Demonstration
- Cuisine: N/A
Nutrition
- Serving Size: N/A
- Calories: N/A
- Sugar: N/A
- Sodium: N/A
- Fat: N/A
- Saturated Fat: N/A
- Unsaturated Fat: N/A
- Trans Fat: N/A
- Carbohydrates: N/A
- Fiber: N/A
- Protein: N/A
- Cholesterol: N/A