Rain Cloud in a Jar

Introduction to Rain Cloud in a Jar
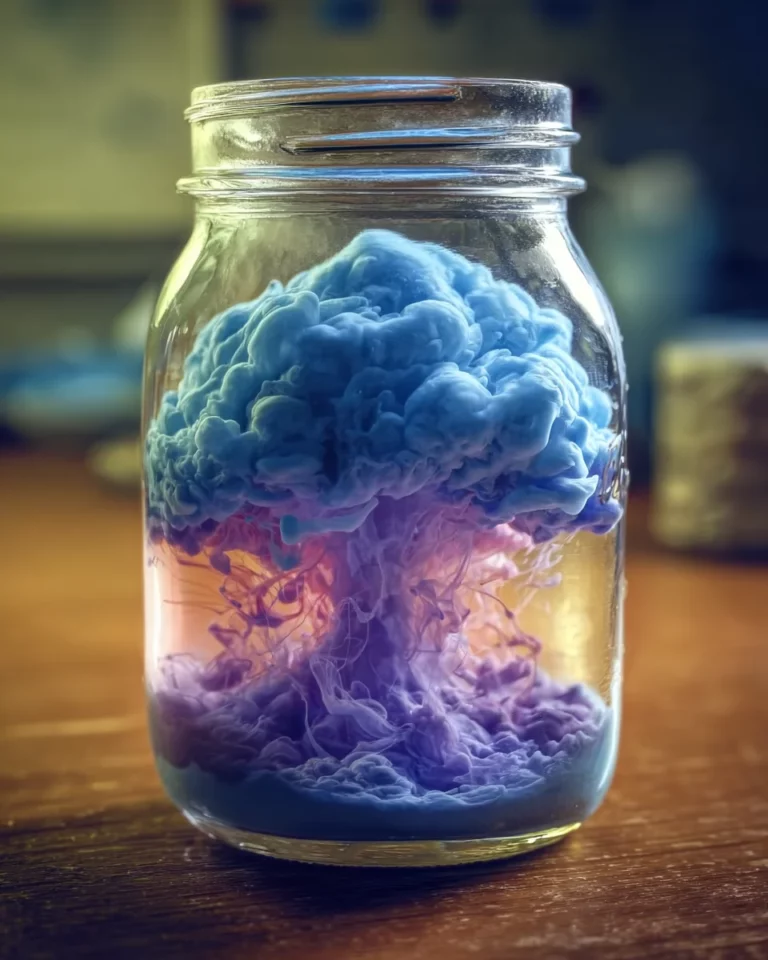
As a busy mom, I know firsthand how chaotic life can get. That’s why I love sharing simple, hands-on activities like the Rain Cloud in a Jar. Not only is it a delightful science experiment, but it’s also a perfect way to spend some quality time with your kids while exploring the wonders of weather. After all, who doesn’t get a kick out of watching colorful ‘rain’ fall from a fluffy cloud? In just a few minutes, you’ll have an engaging activity that sparks curiosity and creativity—no prior experience needed!
Why You’ll Love This Rain Cloud in a Jar
This Rain Cloud in a Jar is an absolute breeze to make, even on the busiest days. With just a few simple ingredients, you can create a captivating visual display that entertains and educates. Plus, it’s the perfect excuse to bond with your little ones over science! You’ll love how quickly it comes together—taking just about 10 minutes. This experiment is not only fun, but it’s also a fantastic way to keep curious minds engaged!
Ingredients for Rain Cloud in a Jar
Gathering the ingredients for your Rain Cloud in a Jar is as easy as pie! Let’s dive into what you’ll need:
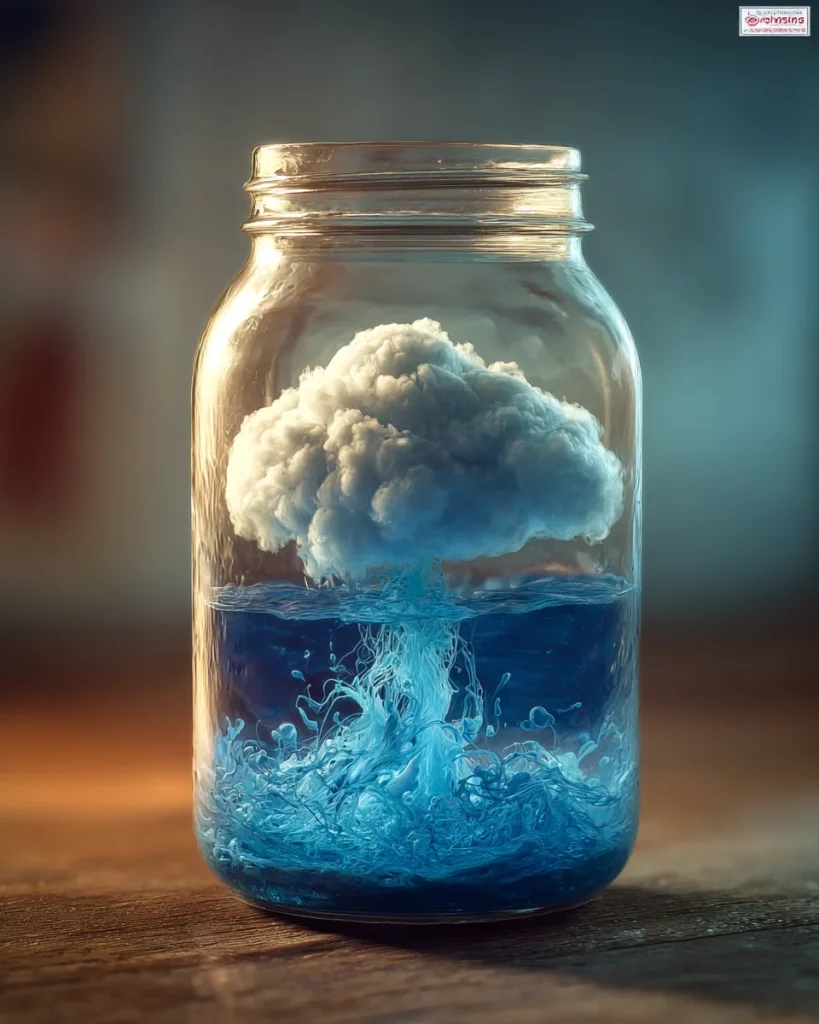
- 1 clear jar or cup: A mason jar works great! It should be see-through, so you can fully enjoy the magic of the experiment.
- 1 can of foamy shaving cream: Avoid gel versions. The foamy kind creates the best cloud-like effect. Plus, it smells nice!
- Water: This represents the atmosphere and fills most of your jar. It’s essential for this weather adventure!
- A few drops of blue food coloring: This special ingredient mimics rainwater. Feel free to mix in other colors for fun variations!
- 1 small cup or bowl: Perfect for mixing your blue rainwater safely before you unleash it on your cloud.
- 1 dropper, straw, or spoon: This tool helps to gently drip your colored water, giving you control over the ‘rain’ effect.
If you’re feeling adventurous, you can swap out the blue food coloring for other shades. Maybe add some red for a sunset cloud or green for a fun twist. The exact quantities for each ingredient are available at the bottom of the article for printing. So, you can recreate this experiment whenever the mood strikes! Just remember, this is all for fun, so don’t stress about being perfect. Enjoy the process!
How to Make Rain Cloud in a Jar
Now, let’s roll up our sleeves and dive into this fun experiment! Each step is simple and allows your kids to explore the magic of weather right from your kitchen table. Ready? Here we go!
Step 1: Prepare Your Jar
First things first, grab that clear jar or cup.
Pour water into the jar until it’s about three-quarters full.
This water represents the atmosphere, making this a crucial step in your Rain Cloud in a Jar.
Careful not to spill—let’s keep this little weather adventure tidy!
Step 2: Create Your Cloud
Next, let’s make our cloud!
Shake your can of foamy shaving cream to get it nice and fluffy.
Then, spray a generous layer over the top of the water.
Keep it light and fluffy—it should resemble a soft, white cloud floating above the blue ‘sky’.
Watch the cream expand and float just like real clouds do!
Step 3: Mix Your Rainwater
Now, let’s stir up some rain!
In your small cup, mix a few drops of blue food coloring with a bit of water.
You want a vibrant blue that will really stand out when it dives into the cloud.
Feel free to get creative! Mix in other colors too, if you’d like.
Step 4: Watch the Rain Fall
Here comes the exciting part!
Using your dropper, straw, or spoon, gently drip the blue mixture right over the shaving cream cloud.
Take your time and watch as the ‘rain’ seeps through the fluffy layer.
This visual spectacle is so magical! It’s like watching a storm brew without any of the mess.
You’ll see how the blue ‘rainwater’ pushes through, just like real rain does!
Tips for Success
- Always use foamy shaving cream for the best cloud effect. Gel won’t give you the same look!
- Let your kids explore mixing different food coloring to create rainbow rain. It’s a fun twist!
- Keep the water clear for better visibility of your experiment’s effects.
- Encourage your little ones to ask questions about weather while doing the activity—it sparks curiosity!
- Don’t rush! Enjoy every moment of this hands-on experience together.
Equipment Needed
- Clear jar or cup: A mason jar is ideal, but any transparent cup will do.
- Dropper, straw, or spoon: Use whatever you have on hand to drizzle that colorful rain.
- Small cup or bowl: Any small container will work for mixing your rainwater.
Variations on Rain Cloud in a Jar
- Colorful Clouds: Experiment with different food coloring shades. Create a sunset effect with oranges and pinks, or even a spooky cloud with greens and blacks for Halloween!
- Smelly Clouds: Add a few drops of essential oils to your shaving cream for a fragrant twist. Imagine a lavender-scented cloud drifting above!
- Electric Clouds: If feeling adventurous, mix in a touch of glitter with your blue food coloring. Watch as sparkles rain down from your glam cloud.
- Gift Idea: Package the ingredients in a decorated jar as a gift for a friend’s child. It’s a great way to share the fun of science!
- Mini Rain Cloud: Use smaller cups or jars to create mini versions of the experiment, perfect for individual kids at a party.
Serving Suggestions
- Pair with Snacks: Serve with popcorn or fruit slices for a fun, interactive science-and-snack combo!
- Weather-Themed Drinks: Whip up some colorful smoothies to match your ‘rain’ colors.
- Display Ideas: Set the jar on a whimsical tablecloth to enhance the weather theme during your experiment!
FAQs about Rain Cloud in a Jar
Curious minds often have questions, and I completely understand! Here are some common queries about the Rain Cloud in a Jar that might help you along your science experiment journey:
Can I use other colors besides blue for the ‘rain’?
Absolutely! Feel free to explore with different colors like pink or purple for a more vibrant experience. It’s a fun way to engage your kids’ creativity and watch how the colors interact!
Is this experiment safe for younger children?
Yes! All the ingredients are safe and non-toxic. Just supervise little ones, especially when using the dropper or spoon, to prevent spills or accidents.
How do I clean up after the experiment?
Cleaning up is a breeze! Simply rinse the jar, and discard the shaving cream and water mixture. If you used food coloring, it’s smart to wash the jar right away to avoid stains.
Can I do this experiment outside?
You bet! Doing it outside can make it even more delightful, especially if you talk about real weather patterns while observing the sky. Just be cautious of the wind!
How can I extend this activity for learning?
After the experiment, discuss how actual clouds form and what weather patterns are like. Maybe even encourage them to create their own weather journal!
Final Thoughts
Engaging in the Rain Cloud in a Jar experiment is more than just a fun activity; it’s a gateway to creativity and learning for both you and your kids. Watching the vibrant blue ‘rain’ fall from a fluffy cloud creates pure wonder, igniting curiosity about the world of weather. This hands-on experience is a delightful way to bond and explore together. Plus, it takes just 10 minutes—perfect for our busy lives. So gather those ingredients, and dive into this thrilling weather adventure! You might just discover a new family favorite!
Print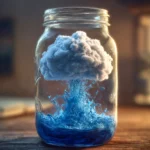
Rain Cloud in a Jar
- Total Time: 10 minutes
- Yield: 1 rain cloud jar 1x
- Diet: N/A
Description
A fun science experiment to demonstrate how rain clouds work using simple materials.
Ingredients
- 1 clear jar or cup (mason jars work great!)
- 1 can of shaving cream (the foamy kind—not gel)
- Water
- A few drops of blue food coloring
- 1 small cup or bowl
- 1 dropper, straw, or spoon
Instructions
- Pour water into the jar until it’s about three-quarters full; this water represents the atmosphere.
- Shake your shaving cream can and spray a fluffy layer over the top of the water; this acts as your cloud layer.
- In a separate small cup, mix a few drops of blue food coloring with a small amount of water to represent rainwater.
- Using a dropper or spoon, gently drip the blue mixture over the shaving cream cloud and watch the ‘rain’ seep through.
Notes
- This experiment is great for teaching children about weather concepts.
- Make sure to use the foamy shaving cream for a better effect.
- Experiment with different colors to see various rain effects.
- Prep Time: 5 minutes
- Cook Time: N/A
- Category: Science Experiment
- Method: Demonstration
- Cuisine: N/A
Nutrition
- Serving Size: N/A
- Calories: N/A
- Sugar: N/A
- Sodium: N/A
- Fat: N/A
- Saturated Fat: N/A
- Unsaturated Fat: N/A
- Trans Fat: N/A
- Carbohydrates: N/A
- Fiber: N/A
- Protein: N/A
- Cholesterol: N/A