Raspberry Bread: Discover This Delightful Recipe Now!

Introduction to Raspberry Bread
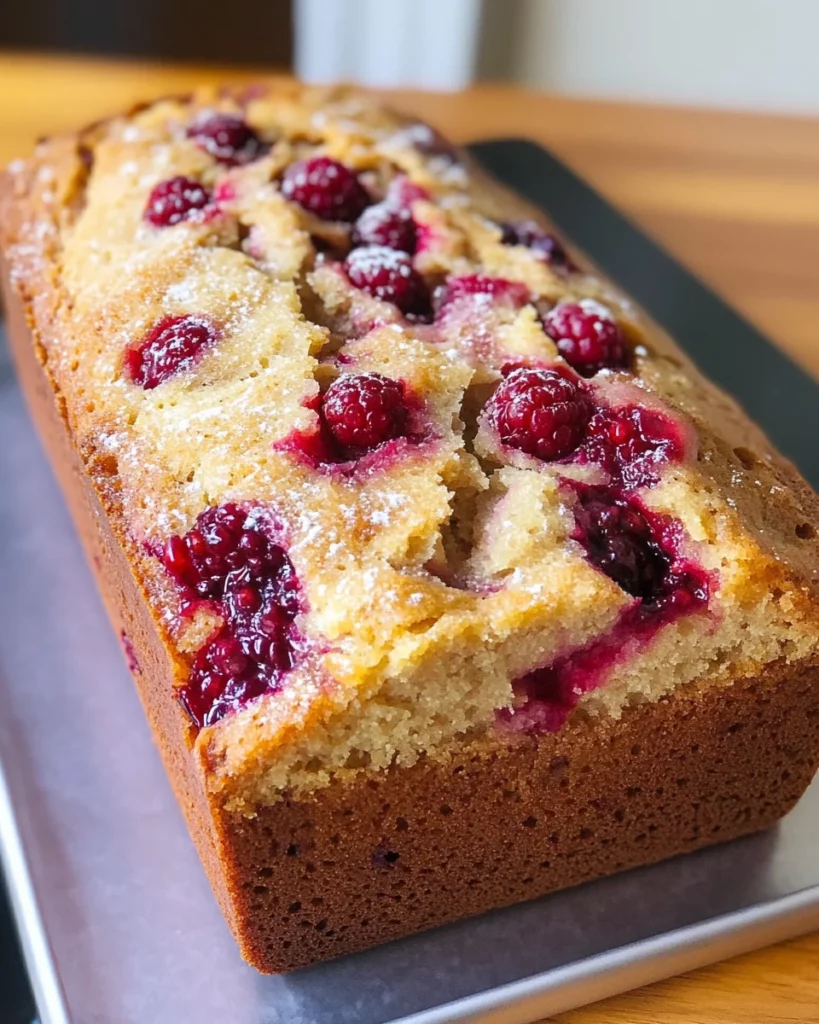
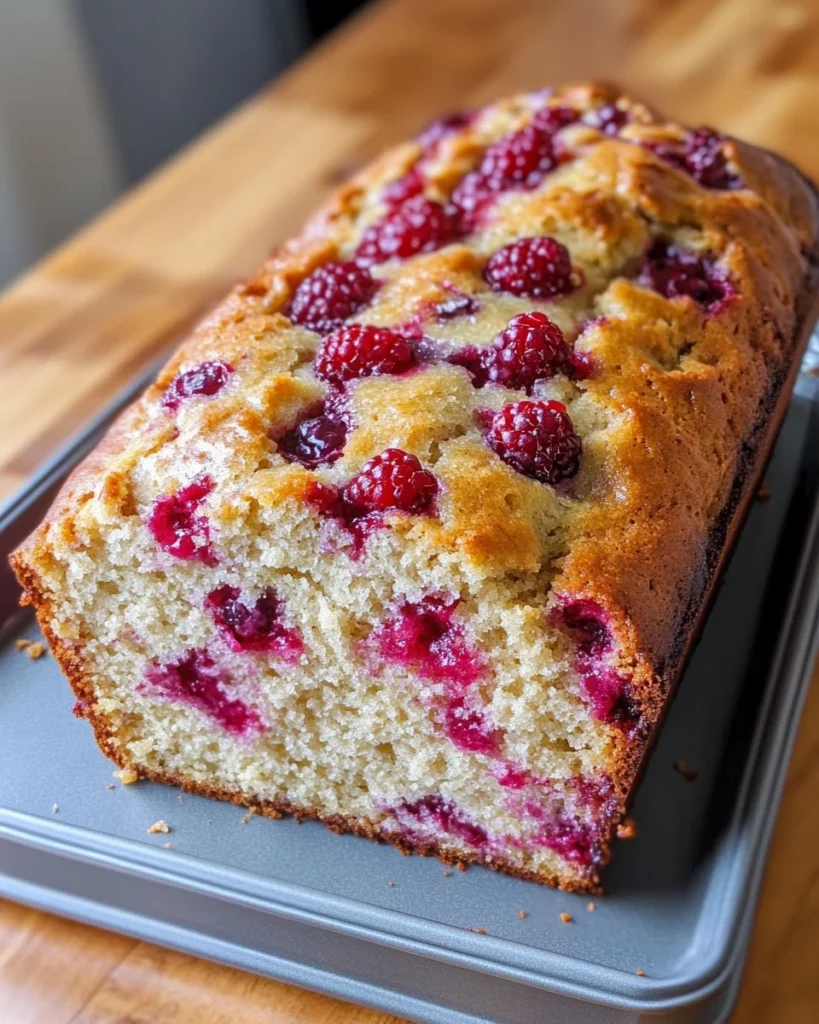
When life gets busy, sometimes we need a little comfort food that doesn’t demand hours in the kitchen. That’s where Raspberry Bread comes in—a delightful treat that marries the sweet, tart flavor of raspberries with a soft, moist texture. Whether it’s a family brunch, a last-minute gift, or just a cozy evening at home, this quick bread is the perfect solution. I can’t tell you how many of my friends have fallen in love with it after just one bite. Trust me, this Raspberry Bread will make your loved ones swoon!
Why You’ll Love This Raspberry Bread
This Raspberry Bread is not just a treat; it’s a treasure for busy lives. It’s incredibly easy to whip up, taking just about 15 minutes of prep time. Plus, it’s a one-bowl wonder, making cleanup a breeze! The joyful burst of raspberries coupled with the fluffy, sweet bread creates a mouthwatering dessert that will impress even the pickiest eaters. Whether enjoyed for breakfast or as a snack, you’ll love how it brightens your day!
Ingredients for Raspberry Bread
To create this delightful Raspberry Bread, you’ll need a mix of common ingredients that come together like a choir of flavors. Here’s a breakdown:
- All-purpose flour: This forms the base of your bread, giving it structure and a soft texture. You can even swap some for whole wheat flour for a healthier twist.
- Light brown sugar: It adds a hint of caramel flavor along with sweetness. If you don’t have it, use regular granulated sugar; your bread will still be delicious!
- Granulated sugar: This enhances the sweetness and complements the raspberries. It’s your classic sweetener here.
- Baking soda: Essential for that lovely rise! Baking soda works wonders with the buttermilk to make your bread soft.
- Salt: Just a pinch enhances all the flavors in the bread. You can skip it if you’re watching your sodium intake.
- Unsalted butter: Using melted butter adds moisture and richness. If you want to eliminate dairy, coconut oil is a great substitute.
- Egg: It binds the ingredients together while contributing to the bread’s fluffiness. For an egg-free version, consider using flaxseed meal mixed with water as a substitute.
- Buttermilk: This gives the bread a wonderful tang and keeps it moist. If you don’t have any, a quick mix of milk and vinegar will do the trick.
- Canola or vegetable oil: This contributes to moisture and tenderness. You could also use melted coconut oil if you prefer a different flavor.
- Vanilla extract: A splash of vanilla elevates your bread with a warm, sweet aroma. Using pure vanilla can make a significant difference in taste.
- Raspberries: The star of this dish! Fresh or even frozen raspberries can be used, creating that fruity burst and a lovely pink hue in your bread.
The specific amounts of these ingredients can be found at the bottom of the article, perfect for printing. Get ready to gather these kitchen staples and create your very own Raspberry Bread!
How to Make Raspberry Bread
Step 1: Preheat the Oven
First, let’s get that oven ready! Preheat it to 350°F. While it warms up, prepare your 9×5-inch loaf pan by spraying it with floured cooking spray. If you don’t have that, greasing and flouring the pan works just as well. This step ensures your Raspberry Bread slides out easily!
Step 2: Combine Dry Ingredients
In a large bowl, combine 2 cups plus 2 tablespoons of all-purpose flour, both sugars, baking soda, and a pinch of salt if you choose to add it. Whisk these dry ingredients together until they are evenly blended. This mix creates the foundation for that soft, fluffy texture we all crave in our quick bread!
Step 3: Prepare Wet Ingredients
Now, let’s melt that butter! Place it in a microwave-safe bowl and heat it for about 45 seconds. Once melted, allow it to cool slightly. Then, whisk in the egg, buttermilk, oil, and vanilla extract until smooth. This magic potion brings flavor and moisture to your Raspberry Bread!
Step 4: Mix Dry and Wet Ingredients
Pour your wet mixture over the dry ingredients. Gently stir until just combined. A few lumps in the batter are perfectly fine—don’t overmix! This keeps your bread light and airy, better than a fluffy cloud on a sunny day!
Step 5: Prepare Raspberries
Next, let’s focus on those beautiful raspberries. In a medium bowl, toss them with 2 tablespoons of flour. This little trick helps prevent the berries from sinking to the bottom while baking. Plus, it creates that gorgeous burst of flavor throughout the bread!
Step 6: Fold in Raspberries
Gently fold the floured raspberries into your batter. Be careful not to crush them! You want those lovely red jewels to remain whole, bringing delightful bursts of fruitiness to each slice of Raspberry Bread.
Step 7: Bake the Bread
Pour the batter into your prepared loaf pan, smoothing the top with a spatula. Bake your Raspberry Bread for 45 to 60 minutes. It’s done when the top is set, slightly domed, and springy to the touch. Test its doneness by inserting a toothpick into the center; it should come out clean or with a few moist crumbs.
Step 8: Cooling and Storing
Once baked, let your bread cool in the pan for about 15 minutes. Then, transfer it to a wire rack to cool completely. Store any leftovers in an airtight container at room temperature for up to a week. Alternatively, you can freeze it for up to six months. Trust me, this bread tastes just as delightful once thawed!
Tips for Success
- Always preheat your oven for even baking.
- Measure flour correctly: spoon it into your measuring cup, then level it off for accuracy.
- Let the melted butter cool a bit to prevent scrambling the egg.
- Be gentle when mixing; lumpy batter ensures a light, fluffy texture.
- Try using a toothpick in more than one spot to check for doneness.
- Experiment with adding nuts or spices for a unique twist!
Equipment Needed
- 9×5-inch loaf pan: Essential for baking. If you don’t have one, a similar-sized round pan works too.
- Mixing bowls: One large and one medium for combining ingredients. Any bowls you have will do!
- Whisk: Perfect for blending; a fork can substitute in a pinch.
- Rubber spatula: Ideal for folding and scraping; a wooden spoon can work as well.
- Measuring cups and spoons: Accuracy is key! If you don’t have a set, use a kitchen scale or your common kitchen cups.
Variations of Raspberry Bread
- Whole Wheat Option: Substitute half of the all-purpose flour with whole wheat flour for a nuttier flavor and added fiber.
- Gluten-Free Version: Use a 1:1 gluten-free baking flour blend to make this Raspberry Bread suitable for gluten-sensitive friends and family.
- Nutty Delight: Add a half cup of chopped nuts like almonds or walnuts for a crunchy texture that complements the softness of the bread.
- Chocolate Twist: Mix in some mini chocolate chips with the raspberries for a decadent dessert that will satisfy any sweet tooth.
- Spiced Version: Add a teaspoon of cinnamon or nutmeg to the dry ingredients for a cozy spice that pairs beautifully with the tartness of raspberries.
Serving Suggestions for Raspberry Bread
- Serve slices warm with a pat of butter for a cozy breakfast treat.
- Pair with a dollop of whipped cream or a scoop of vanilla ice cream for a delightful dessert.
- Enjoy with a cup of herbal tea or a glass of refreshing lemonade.
- Garnish with fresh mint leaves for a burst of color and flavor!
FAQs about Raspberry Bread
Can I use frozen raspberries for this Raspberry Bread?
Yes! Frozen raspberries work wonderfully in this recipe. Just toss them with flour as you would with fresh raspberries. They might release a bit more juice, so expect your bread to be slightly more moist, but it’ll still be just as delicious!
How do I store Raspberry Bread?
To keep your Raspberry Bread fresh, store it in an airtight container at room temperature for up to a week. If you want to enjoy it longer, freeze it for up to six months. Just wrap it tightly in plastic wrap and place it in a freezer bag.
Can I make Raspberry Bread without buttermilk?
Absolutely! If you don’t have buttermilk on hand, you can make a simple substitute. Just mix one cup of milk with one tablespoon of vinegar or lemon juice. Let it sit for about five minutes, and voilà, you have your buttermilk alternative!
Is this Raspberry Bread suitable for breakfast?
Definitely! This Raspberry Bread is a delightful, sweet option for breakfast. Pair it with a cup of coffee or tea, and you’ve got yourself a lovely morning treat. It’s also perfect for brunch gatherings!
What can I add to my Raspberry Bread to make it more nutritious?
You can easily add a tablespoon of chia seeds or flaxseed meal into the batter for an extra boost of nutrients. Incorporating nuts, like walnuts or almonds, is also a great way to add both crunch and healthy fats.
Final Thoughts
Making Raspberry Bread is not just about following a recipe; it’s about creating cherished memories in your kitchen. I’ve seen how a simple slice can brighten someone’s day, whether it’s for breakfast or a sweet afternoon snack. The vibrant raspberries and soft, tender texture invite smiles and create moments of joy. Plus, the ease of preparation means you can whip it up even on your busiest days. So, gather your loved ones, enjoy the process, and share this delightful treat. I promise, each bite will be a celebration of flavor, warmth, and togetherness!
Print
Raspberry Bread: Discover This Delightful Recipe Now!
- Total Time: 1 hour 15-75 minutes
- Yield: 1 loaf 1x
- Diet: Vegetarian
Description
A delightful Raspberry Bread that combines the sweetness of raspberries with a soft and moist texture, perfect for any occasion.
Ingredients
- 2 cups + 4 tablespoons all-purpose flour, divided
- ¾ cup light brown sugar, packed
- ¼ cup granulated sugar
- 1 teaspoon baking soda
- pinch salt, optional and to taste
- ¼ cup unsalted butter, melted
- 1 large egg
- ¾ cup buttermilk
- ¼ cup canola or vegetable oil
- 2 teaspoons vanilla extract
- 10 to 12 ounces raspberries, about 2 cups
Instructions
- Preheat oven to 350F. Spray one 9×5-inch loaf pan with floured cooking spray, or grease and flour the pan; set aside.
- In a large bowl, add 2 cups + 2 tablespoons flour, sugars, baking soda, optional salt, and whisk to combine; set aside.
- In a medium microwave-safe bowl or glass measuring cup, melt the butter, about 45 seconds on high power. Allow butter to cool momentarily so you don’t scramble the egg.
- To the butter, add the egg, buttermilk, oil, vanilla, and whisk to combine.
- Pour wet over dry and stir until just combined; don’t overmix. Batter will be somewhat lumpy and don’t try to stir the lumps smooth or bread will be tough; set aside.
- In a medium bowl, add the raspberries, 2 tablespoons flour, and toss lightly to combine (coating berries in flour helps to reduce sinking while baking).
- Add the raspberries to the batter and fold very lightly to combine.
- Turn batter out into prepared pan, smoothing the top lightly with a spatula and pushing it into corners and sides as necessary.
- Bake bread for 45 minutes to an hour. Bread is done when top is set in the middle, slightly domed, springy to the touch, and a toothpick inserted in the center (if you can find a patch without hitting raspberries) comes out clean or with a few moist crumbs, but no batter.
- Allow bread to cool in pan for about 15 minutes before turning out on a wire rack to cool completely before slicing and serving.
- Bread will keep airtight at room temperature for up to 1 week, or in the freezer for up to 6 months.
Notes
- Ensure the butter is slightly cooled before adding the egg to prevent scrambling.
- Do not overmix the batter to ensure a fluffy texture.
- Coating raspberries in flour helps to keep them from sinking in the batter.
- Store leftover bread in an airtight container at room temperature or freeze for longer shelf life.
- Prep Time: 15 minutes
- Cook Time: 45-60 minutes
- Category: Baking
- Method: Baking
- Cuisine: American
Nutrition
- Serving Size: 1 slice
- Calories: 190
- Sugar: 10g
- Sodium: 150mg
- Fat: 7g
- Saturated Fat: 3g
- Unsaturated Fat: 2g
- Trans Fat: 0g
- Carbohydrates: 26g
- Fiber: 1g
- Protein: 3g
- Cholesterol: 30mg