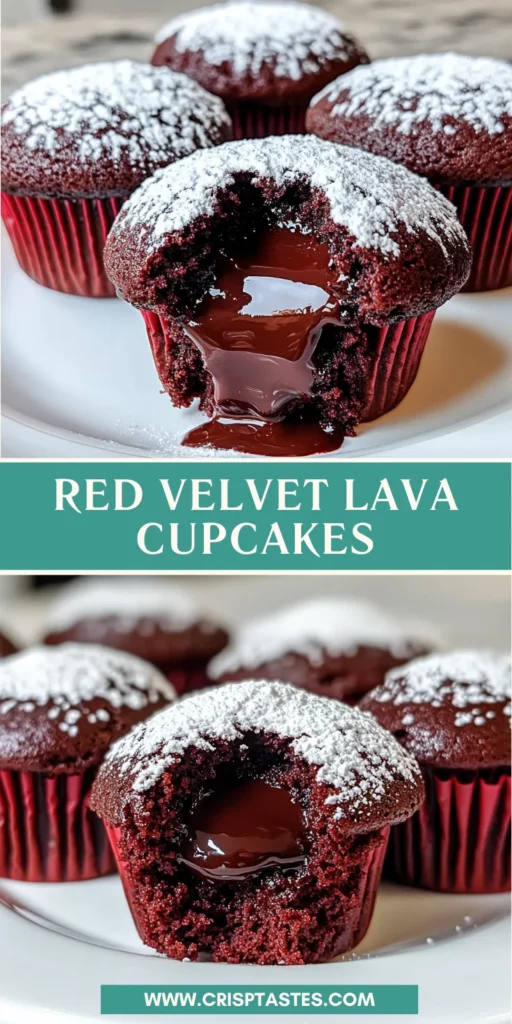
Red Velvet Lava Cupcakes

Introduction to Red Velvet Lava Cupcakes
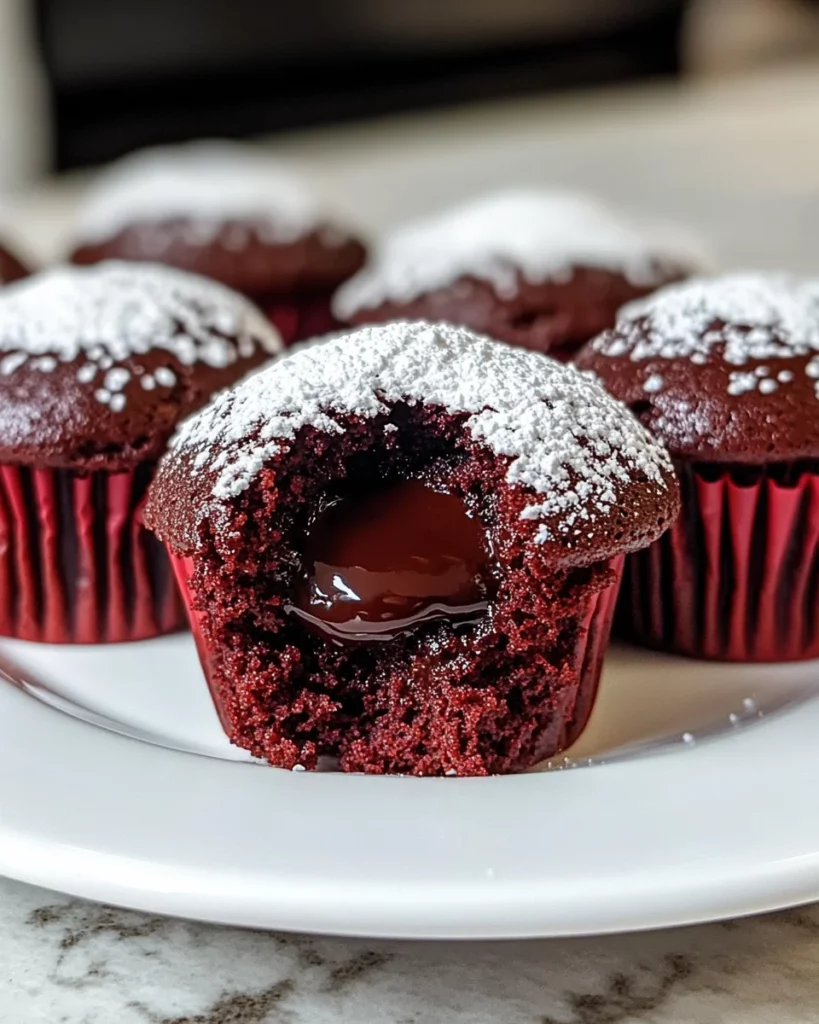
Ah, the joy of baking! There’s something magical about creating a dessert that not only looks stunning but also tastes divine. That’s where my Red Velvet Lava Cupcakes come in. These little gems are perfect for busy moms like us who want to whip up something special without spending hours in the kitchen. Imagine the delight on your loved ones’ faces when they bite into a cupcake and discover that molten chocolate center! It’s a quick solution for a hectic day or a sweet treat to impress at gatherings. Trust me, these cupcakes will become a favorite!
Why You’ll Love This Red Velvet Lava Cupcakes
These Red Velvet Lava Cupcakes are a delightful blend of ease and indulgence. They come together quickly, making them perfect for those busy weeknights when you crave something sweet. The rich, velvety texture paired with a gooey chocolate center is simply irresistible. Plus, they’re a hit with both kids and adults, ensuring smiles all around. Who wouldn’t love a dessert that’s as fun to make as it is to eat?
Ingredients for Red Velvet Lava Cupcakes
Gathering the right ingredients is the first step to creating these delightful Red Velvet Lava Cupcakes. Here’s what you’ll need:
- Red Velvet Cake Mix: This is the star of the show! A box mix saves time and ensures a consistent flavor. You can also use homemade red velvet cake if you’re feeling adventurous.
- Eggs: Essential for binding the ingredients together, eggs add moisture and richness to the cupcakes.
- Water: This helps to hydrate the cake mix, making it fluffy and light.
- Oil: A key ingredient for keeping the cupcakes moist. You can substitute with melted butter for a richer flavor.
- Semi-Sweet Baking Chocolate: This is what creates that luscious molten center. Feel free to experiment with dark chocolate for a more intense flavor.
- Heavy Cream: Used to make the ganache, it adds a silky texture. You can substitute with half-and-half, but the ganache may be less rich.
- Powdered Sugar: A light dusting on top adds a touch of sweetness and a beautiful finish. You can skip this if you prefer a less sweet dessert.
For exact measurements, check the bottom of the article where you can find everything listed for easy printing. Happy baking!
How to Make Red Velvet Lava Cupcakes
Now that we have our ingredients ready, let’s dive into the fun part: making these Red Velvet Lava Cupcakes! Follow these simple steps, and you’ll be on your way to dessert bliss.
Step 1: Prepare the Chocolate Ganache
First things first, let’s get that luscious chocolate ganache ready. Chop or break up the semi-sweet baking chocolate into small pieces. This helps it melt evenly. Place the chocolate in a medium-sized bowl. Next, heat the heavy cream over low heat until it just starts to simmer. You can also do this in the microwave for about 45 seconds. Once the cream is hot, pour it over the chocolate. Stir until it’s melted and smooth. If it’s being stubborn, pop it in the microwave for another 15 seconds. Chill this mixture in the fridge until it hardens, which takes at least 2 hours. Trust me, this step is worth the wait!
Step 2: Preheat the Oven
While the ganache is chilling, it’s time to preheat your oven to 350°F. Preheating is crucial because it ensures even baking. While the oven warms up, line your muffin tins with cupcake liners. This makes for easy cleanup and helps the cupcakes come out perfectly. I always find that a little preparation goes a long way in the kitchen!
Step 3: Mix the Cake Batter
Now, let’s whip up the cake batter! Follow the instructions on the red velvet cake mix box. Usually, this involves mixing the cake mix with eggs, water, and oil. Make sure to mix until everything is well combined, but don’t overdo it. You want a smooth batter that’s light and fluffy. Fill each cupcake liner about halfway with the batter. Remember, don’t fill them too full, or you’ll have a cupcake overflow situation!
Step 4: Add the Ganache
Once your ganache is ready and your batter is in the liners, it’s time for the fun part! Remove the ganache from the fridge. Using a cookie scoop or a tablespoon, scoop out about 1 tablespoon of the ganache. Place one ball of ganache right in the center of each cupcake batter. This is what will create that gooey, molten center we all love. It’s like a little surprise waiting to be discovered!
Step 5: Bake the Cupcakes
Now, it’s time to bake! Pop the muffin tin into the preheated oven and bake for 20 to 23 minutes. To check for doneness, insert a toothpick into the side of a cupcake, not the center. If it comes out clean, they’re ready! Keep an eye on them, as every oven is a bit different. The smell wafting through your kitchen will be heavenly!
Step 6: Cool and Serve
Once baked, let the cupcakes cool in the pan for just a few minutes. Then, carefully remove them from the pan and peel off the liners. For a fun presentation, turn them upside down on a plate. A light dusting of powdered sugar on top adds a lovely touch. These cupcakes are best served warm, so if they cool off, just pop them in the microwave for a few seconds to heat them up. Get ready for the oohs and aahs!
Tips for Success
- Make sure your chocolate ganache is fully chilled before adding it to the cupcakes for the best molten effect.
- Don’t overfill the cupcake liners; filling them halfway ensures they rise perfectly without spilling over.
- Use a toothpick to check for doneness, inserting it into the side of the cupcake for accurate results.
- Serve these cupcakes warm for that delightful gooey center.
- Experiment with different chocolate types for unique flavors!
Equipment Needed
- Muffin Tin: Essential for baking the cupcakes. A silicone muffin pan works great for easy removal.
- Mixing Bowls: Use medium and large bowls for mixing the batter and ganache. Any size will do!
- Whisk or Electric Mixer: A whisk is perfect for mixing by hand, but an electric mixer saves time.
- Cookie Scoop: Ideal for portioning the ganache. A tablespoon works just as well!
- Toothpick: Handy for checking cupcake doneness. A skewer can be a good substitute.
Variations of Red Velvet Lava Cupcakes
- Gluten-Free Option: Use a gluten-free red velvet cake mix to make these cupcakes suitable for those with gluten sensitivities.
- Vegan Twist: Substitute eggs with flaxseed meal and use a plant-based milk and oil to create a vegan version of these delightful cupcakes.
- Different Chocolate Centers: Experiment with white chocolate or caramel ganache for a unique twist on the classic molten center.
- Nutty Addition: Add chopped walnuts or pecans to the batter for a delightful crunch and extra flavor.
- Spiced Variation: Incorporate a pinch of cinnamon or nutmeg into the batter for a warm, spiced flavor that complements the red velvet.
Serving Suggestions for Red Velvet Lava Cupcakes
- Pair with Vanilla Ice Cream: A scoop of creamy vanilla ice cream complements the rich chocolate center beautifully.
- Fresh Berries: Serve with strawberries or raspberries for a refreshing contrast to the sweetness.
- Chocolate Sauce Drizzle: A drizzle of chocolate sauce adds an extra layer of indulgence.
- Presentation: Use decorative plates and garnish with mint leaves for a stunning display.
- Hot Beverage: Enjoy with a cup of coffee or hot cocoa for a cozy treat.
FAQs about Red Velvet Lava Cupcakes
As I’ve shared my love for these Red Velvet Lava Cupcakes, I know you might have a few questions. Here are some common queries that pop up, along with my answers to help you on your baking journey!
Can I make the ganache ahead of time?
Absolutely! You can prepare the ganache a day in advance. Just store it in the fridge until you’re ready to use it. Just remember to let it chill for at least 2 hours for the perfect molten center!
What if I don’t have cupcake liners?
No worries! You can grease the muffin tin with butter or cooking spray instead. Just be sure to let the cupcakes cool a bit before removing them to avoid sticking.
Can I freeze these cupcakes?
Yes, you can freeze them! Just make sure they’re completely cooled. Wrap them tightly in plastic wrap and store in an airtight container. When you’re ready to enjoy, thaw them in the fridge and warm them up in the microwave.
How do I know when the cupcakes are done baking?
To check for doneness, insert a toothpick into the side of a cupcake. If it comes out clean, they’re ready! Just avoid the center, as you want that gooey chocolate surprise!
Can I use a different cake mix flavor?
Of course! While red velvet is a classic, feel free to experiment with other flavors like chocolate or vanilla. Just keep in mind that the ganache will still be the star of the show!
Final Thoughts
Creating these Red Velvet Lava Cupcakes is more than just baking; it’s about crafting moments of joy. The thrill of watching your loved ones’ faces light up as they discover that molten chocolate center is priceless. These cupcakes are perfect for celebrations or a cozy night in. They remind us that even on the busiest days, we can indulge in a little sweetness. So, roll up your sleeves, embrace the mess, and enjoy the delightful process of baking. Trust me, the smiles and satisfied sighs will make it all worthwhile!
Print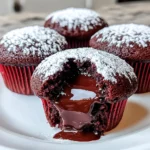
Red Velvet Lava Cupcakes
- Total Time: 2 hours 53 minutes
- Yield: 12 cupcakes 1x
- Diet: Vegetarian
Description
Delicious red velvet cupcakes with a molten chocolate center, perfect for indulgent desserts.
Ingredients
- 1 approximately 15 ounce box red velvet cake mix plus ingredients called for to make the cake (eggs, water, and oil)
- 8 ounces semi-sweet baking chocolate
- ½ cup heavy cream
- Powdered sugar for garnish
Instructions
- Chop or break up baking chocolate and place in a medium sized bowl. Heat the cream over low heat until it just simmers (or in the microwave for about 45 seconds). Pour over the chocolate. Stir until melted and smooth. (If it’s having a hard time melting, place it in the microwave for about 15 seconds.) Chill chocolate mixture until hardened, at least 2 hours.
- Preheat oven to 350 °F. Line muffin tins with cupcake liners.
- Mix up cake batter according to the box directions. Fill each liner about 1/2 full of batter. (You don’t want to fill them as full as 2/3, or they will spill over. A little less than is called for on the box is good.)
- Remove chocolate ganache from the refrigerator. Scoop 1 tablespoon balls (I used a cookie scoop) and place one ball in the center of each cupcake batter.
- Bake 20-23 minutes, until a toothpick inserted in the side of the cupcake (not the center!) comes out clean. Cool for just a few minutes in the pans.
- When ready to serve, remove the cupcakes from the pan and remove the liners. Turn upside down on a plate and sprinkle with powdered sugar.
- These are best served warm. If they cool off, just heat them for a few seconds in the microwave to heat.
Notes
- Ensure the chocolate ganache is fully chilled before adding to the cupcakes.
- For best results, serve immediately after baking.
- Prep Time: 30 minutes
- Cook Time: 23 minutes
- Category: Dessert
- Method: Baking
- Cuisine: American
Nutrition
- Serving Size: 1 cupcake
- Calories: 350
- Sugar: 25g
- Sodium: 200mg
- Fat: 18g
- Saturated Fat: 10g
- Unsaturated Fat: 8g
- Trans Fat: 0g
- Carbohydrates: 40g
- Fiber: 1g
- Protein: 4g
- Cholesterol: 50mg