Red Velvet Oreo Cheesecake Recipe
Introduction to Red Velvet Oreo Cheesecake
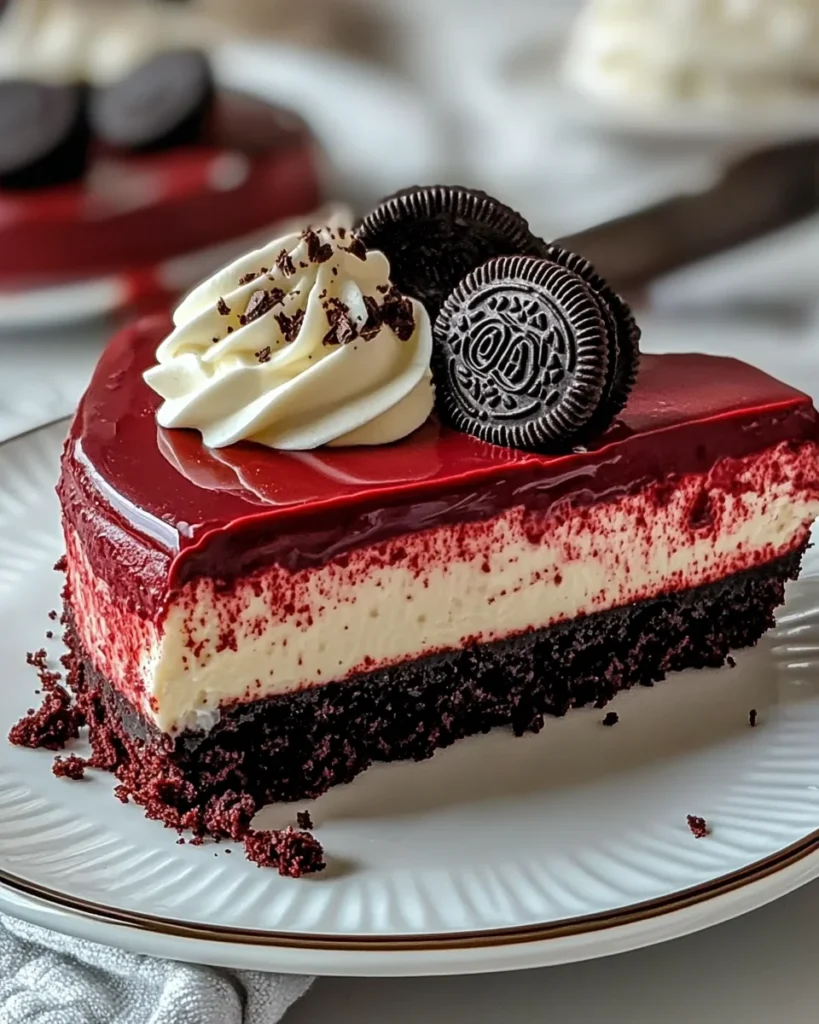
Red Velvet Oreo Cheesecake Recipe. This delightful treat combines the rich, velvety texture of red velvet cake with the creamy goodness of cheesecake, all while adding a playful twist with crunchy Oreo cookies. It’s like a party on a plate!
My love for red velvet cake began during a family gathering. I remember the first time I tasted it; the vibrant red color and the subtle hint of cocoa were simply irresistible. Fast forward to today, and I’ve taken that classic flavor and transformed it into a cheesecake that’s perfect for any occasion. Whether it’s a birthday, holiday, or just a cozy night in, this cheesecake is sure to impress.
What makes this recipe even more special is the way it brings people together. I often whip it up for friends and family, and the smiles on their faces as they take that first bite are priceless. The combination of the creamy cheesecake and the crunchy Oreo crust creates a delightful contrast that keeps everyone coming back for more. Plus, the vibrant red color makes it a stunning centerpiece for any dessert table!
Red Velvet Oreo Cheesecake Recipe. I promise you, it’s a journey worth taking!
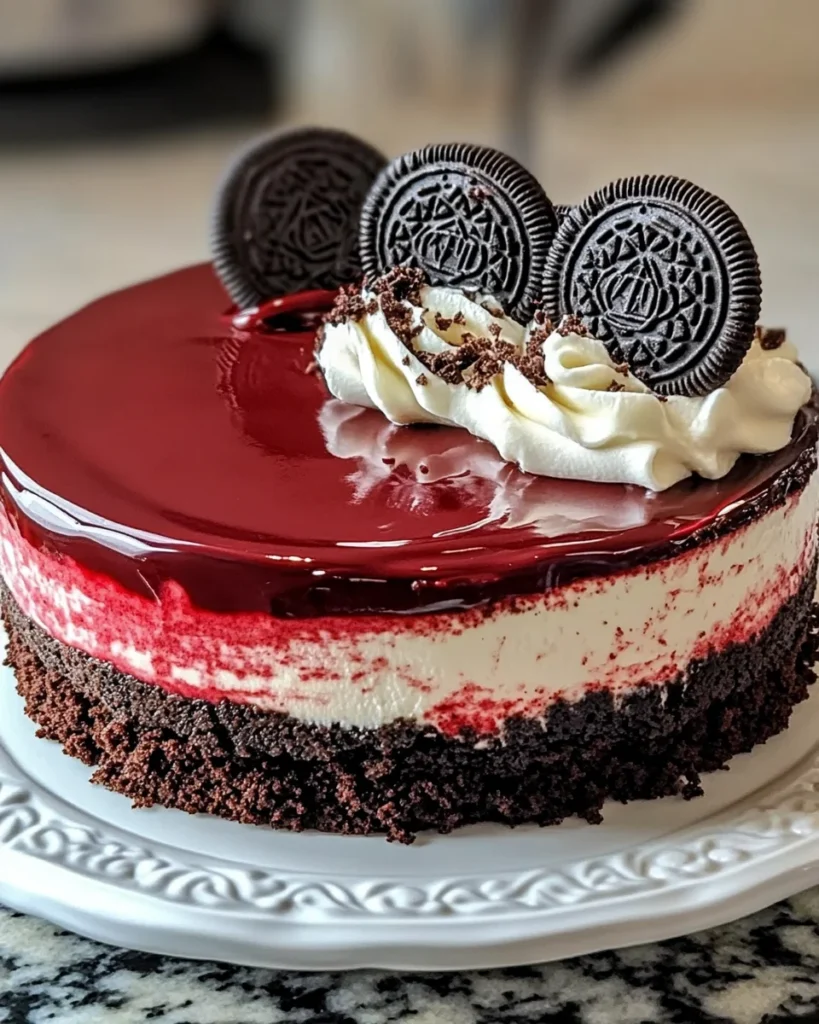
Ingredients for Red Velvet Oreo Cheesecake Recipe
Red Velvet Oreo Cheesecake Recipe. Having everything ready makes the cooking experience smoother and more enjoyable. Trust me, there’s nothing worse than realizing you’re missing a key ingredient halfway through! So, let’s get organized.
Main Ingredients
- All-purpose flour: 1 1/2 cups – This is the backbone of our cake, providing structure.
- Unsweetened cocoa powder: 2 tsp – Just a hint of chocolate flavor to complement the red velvet.
- Salt: 1/2 tsp – A little pinch to enhance all the flavors.
- Unsalted butter: 1/2 cup – Make sure it’s at room temperature for easy mixing.
- Granulated sugar: 1 cup – Sweetness is key in this dessert!
- Sour cream: 1/2 cup – This adds moisture and richness to the cake.
- Vegetable oil: 1/4 cup – Keeps the cake moist and tender.
- Pure vanilla extract: 2 tsp – For that lovely, warm flavor.
- Large eggs: 2 – Room temperature eggs help with the mixing process.
- Red food coloring: 4 tsp – The star of the show, giving that classic red hue.
- Buttermilk: 2/3 cup – This adds tenderness to our cake.
- Baking soda: 1 tsp – Helps the cake rise beautifully.
- White vinegar: 1 tsp – Activates the baking soda for a fluffy texture.
- Oreos (filling removed, wafers crushed): 10 – For the crust, adding that delightful crunch.
- Full-fat cream cheese: 24 oz – The creamy base for our cheesecake filling.
- Oreo filling: From the above 10 Oreos – Enhances the flavor of the cheesecake.
- Granulated sugar: 1 cup – Sweetens the cheesecake perfectly.
- Cornstarch (or all-purpose flour): 1 tbsp – Helps thicken the cheesecake filling.
- Sour cream: 1 cup – Adds creaminess to the filling.
- Pure vanilla extract: 1 tbsp – More flavor for our cheesecake.
- Large eggs + 1 egg yolk: At room temperature – For structure and richness.
- Oreos (chopped): 15 – For added crunch in the filling.
- Dark chocolate chips: 1 cup – For a rich ganache topping.
- Heavy cream: 1/2 cup – To make the ganache smooth and luscious.
- Store-bought cream cheese frosting: 1 can – For decorating, because who doesn’t love frosting?
- Chopped Oreos: 8 – For garnish, adding that final touch of crunch.
Optional Add-ons
- Chopped nuts: Walnuts or pecans can be added for extra texture.
- Chocolate shavings: For a more elegant presentation on top.
- Fresh berries: Strawberries or raspberries can add a pop of color and freshness.
When selecting your ingredients, I always recommend going for high-quality products. Fresh eggs, real vanilla extract, and full-fat cream cheese make a world of difference in flavor. Trust me, your taste buds will thank you!
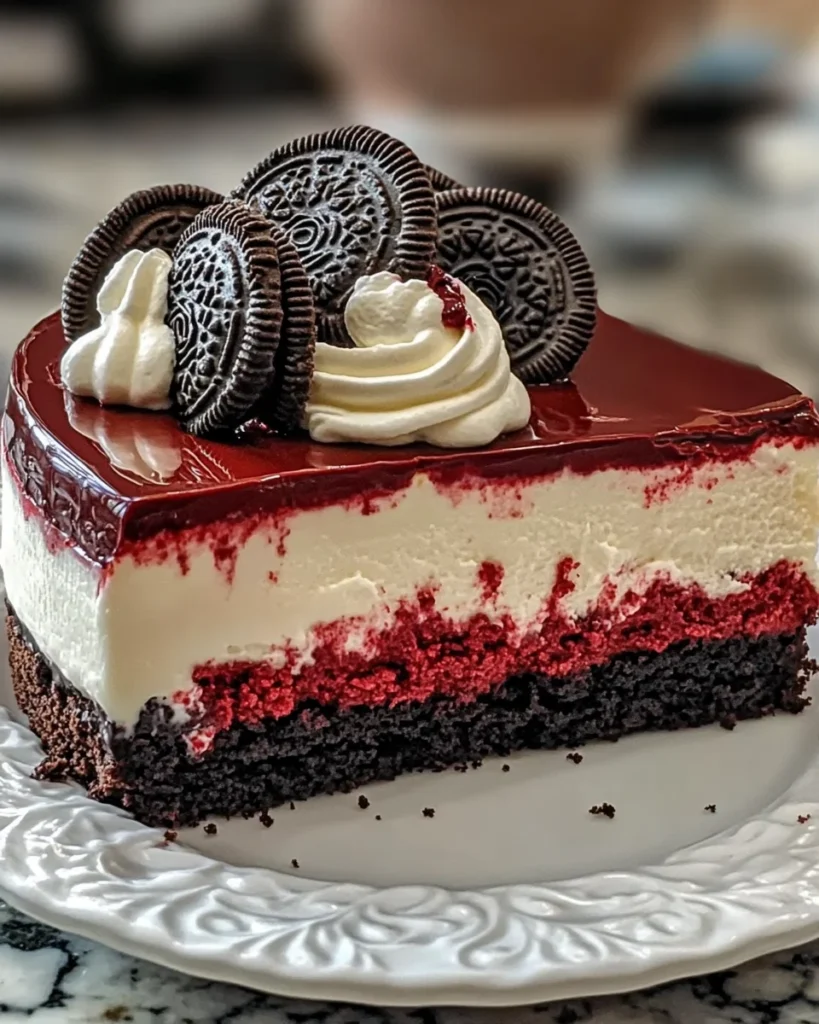
How to Prepare Red Velvet Oreo Cheesecake Recipe
Red Velvet Oreo Cheesecake Recipe. Each step is like a little adventure, and I can’t wait to share it with you. Let’s dive in!
Step 1: Prepare the Crust
First things first, we need to create that delicious Oreo crust. It’s the foundation of our cheesecake, and trust me, it’s worth the effort!
- Start by preheating your oven to 350°F (175°C). This ensures that the crust bakes evenly.
- In a bowl, crush the Oreo wafers into fine crumbs. I find that using a food processor makes this super easy, but you can also place them in a zip-top bag and crush them with a rolling pin.
- Mix the crushed Oreos with melted butter until it resembles wet sand. This mixture will hold together beautifully when pressed into the pan.
- Press the mixture firmly into the bottom of your prepared springform pan. Make sure it’s even and compact for a sturdy base.
- Bake the crust for about 10 minutes, then let it cool while you prepare the cheesecake filling.
Tips for Step 1
To make sure your crust is extra crunchy, don’t skip the baking step! It helps set the crust and adds a lovely texture. Also, if you want a thicker crust, feel free to double the amount of Oreos used.
Step 2: Make the Cheesecake Filling
Now, let’s whip up that creamy cheesecake filling! This is where the magic happens.
- In a large mixing bowl, beat the full-fat cream cheese until it’s smooth and creamy. I like to use a hand mixer for this, but a stand mixer works just as well.
- Add in the Oreo filling, granulated sugar, and cornstarch. Mix until everything is well combined.
- Next, add the sour cream, vanilla extract, eggs, and egg yolk. Mix on low speed until just combined. Be careful not to overmix, as this can lead to cracks in your cheesecake.
- Finally, fold in the chopped Oreos gently. This adds delightful little bites of crunch throughout the filling.
Tips for Step 2
Make sure your cream cheese is at room temperature. This helps it blend smoothly without lumps. Also, don’t rush the mixing process; take your time to ensure everything is well incorporated.
Step 3: Combine and Layer
With the crust and filling ready, it’s time to bring them together!
- Pour the cheesecake filling over the cooled Oreo crust in the springform pan. Use a spatula to spread it evenly.
- Gently tap the pan on the counter to release any air bubbles trapped in the filling. This helps create a smooth surface.
Tips for Step 3
For an even layer, you can use the back of a spoon or an offset spatula to smooth out the top. This will make for a beautiful presentation once it’s baked!
Step 4: Bake the Cheesecake
Now comes the waiting game, but it’s so worth it!
- Prepare a water bath by placing a larger baking dish filled with hot water on the lower rack of your oven. This helps keep the cheesecake moist while it bakes.
- Bake the cheesecake at 300°F (150°C) for about 1 hour and 30 minutes. The edges should be set, but the center will still have a slight jiggle.
Tips for Step 4
Don’t open the oven door while it’s baking! This can cause the temperature to drop and lead to cracks. If you notice the top browning too much, you can cover it loosely with foil.
Step 5: Cool and Chill
Once the cheesecake is done baking, it’s important to cool it properly.
- Turn off the oven and crack the door open, allowing the cheesecake to cool gradually inside for about an hour. This helps prevent cracks.
- After an hour, remove the cheesecake from the oven and let it cool to room temperature before refrigerating it overnight. This chilling time is crucial for the flavors to meld and the texture to set.
Tips for Step 5
Patience is key! I know it’s hard to wait, but letting it chill overnight makes a world of difference in flavor and texture. Plus, it’s a great way to build anticipation for that first slice!
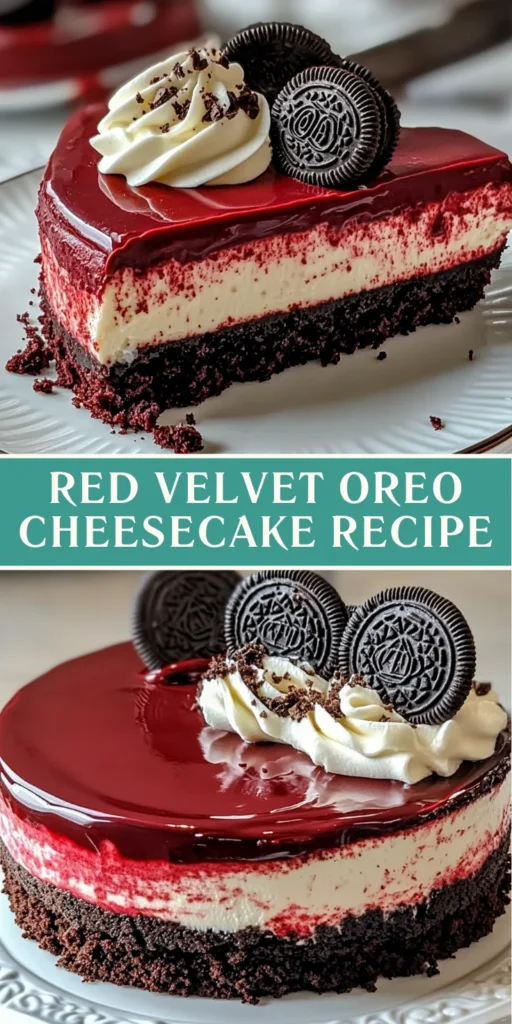
Equipment Needed for Red Velvet Oreo Cheesecake Recipe
Red Velvet Oreo Cheesecake Recipe. Having the right equipment makes the process smoother and more enjoyable. Here’s what you’ll need:
- 9-inch springform pan: This is crucial for easy removal of the cheesecake once it’s baked. If you don’t have one, a regular round cake pan will work, but be careful when serving.
- 8-inch round cake pan: Used for baking the red velvet cake layer. If you don’t have this size, you can use a larger pan, but adjust the baking time accordingly.
- Mixing bowls: A few different sizes will help you keep your ingredients organized. I love using glass bowls because they’re easy to clean and you can see the mixture inside.
- Hand mixer or stand mixer: Either will do the job for mixing the cheesecake filling. A hand mixer is great for smaller tasks, while a stand mixer can save you some elbow grease.
- Spatula: A rubber spatula is perfect for folding in ingredients and scraping down the sides of the bowl.
- Food processor or rolling pin: For crushing the Oreos into fine crumbs. If you don’t have a food processor, a zip-top bag and a rolling pin work just as well!
- Measuring cups and spoons: Accurate measurements are key to baking success, so make sure you have these handy.
- Oven-safe baking dish: This will be used for the water bath to keep the cheesecake moist while baking. Any large, shallow dish will do.
Red Velvet Oreo Cheesecake. Remember, the right equipment can make all the difference in your baking experience!
Variations of Red Velvet Oreo Cheesecake Recipe
Red Velvet Oreo Cheesecake Recipe is no exception! Here are a few fun variations that you can try to put your own spin on this delightful dessert:
- Chocolate Chip Red Velvet Cheesecake: Add a cup of semi-sweet chocolate chips to the cheesecake filling for an extra layer of sweetness and richness. The chocolate pairs beautifully with the red velvet flavor!
- Nutty Red Velvet Cheesecake: Incorporate chopped walnuts or pecans into the crust or filling for a delightful crunch. The nuts add a lovely texture and a hint of earthiness.
- Berry Swirl Red Velvet Cheesecake: Before baking, swirl in some raspberry or strawberry puree into the cheesecake filling. This not only adds a pop of color but also a refreshing fruity flavor that complements the richness of the cheesecake.
- Red Velvet Oreo Cupcakes: Transform the cheesecake into individual servings by baking the red velvet cake batter in cupcake liners and topping them with the cheesecake filling. Bake until set, and you have adorable mini cheesecakes!
- Mint Chocolate Red Velvet Cheesecake: Add a teaspoon of peppermint extract to the cheesecake filling for a refreshing twist. Top with crushed mint Oreos for a delightful minty crunch!
Red Velvet Oreo Cheesecake Recipe to your taste preferences. Each twist brings a new adventure, and I can’t wait for you to try them out!
Cooking Notes for Red Velvet Oreo Cheesecake Recipe
Red Velvet Oreo Cheesecake Recipe. Here are some tips that I’ve gathered over the years to ensure your cheesecake turns out perfectly every time:
- Room Temperature Ingredients: Always use room temperature ingredients, especially cream cheese and eggs. This helps create a smooth and creamy filling without lumps.
- Don’t Overmix: When mixing the cheesecake filling, be careful not to overmix. This can introduce too much air, leading to cracks during baking.
- Water Bath Technique: Using a water bath is essential for a creamy texture. It prevents the cheesecake from drying out and helps it bake evenly.
- Cooling Gradually: Allow the cheesecake to cool gradually in the oven after baking. This helps prevent sudden temperature changes that can cause cracks.
- Chill Overnight: For the best flavor and texture, refrigerate the cheesecake overnight. This allows the flavors to meld beautifully.
Red Velvet Oreo Cheesecake that will impress everyone at your next gathering. Happy baking!
Serving Suggestions for Red Velvet Oreo Cheesecake Recipe
Red Velvet Oreo Cheesecake Recipe, it’s time to think about how to serve it! Presentation can elevate your dessert from delicious to absolutely show-stopping. Here are some of my favorite serving suggestions that will make your cheesecake shine:
- Slice and Serve: Cut the cheesecake into generous slices and serve on elegant dessert plates. A drizzle of chocolate ganache on top adds a touch of decadence.
- Pair with Fresh Berries: Fresh strawberries or raspberries not only add a pop of color but also a refreshing contrast to the rich cheesecake. Place a few on the side of each slice for a beautiful presentation.
- Top with Whipped Cream: A dollop of freshly whipped cream on each slice can enhance the creaminess and add a light touch. You can even sprinkle some crushed Oreos on top for extra crunch!
- Serve with Ice Cream: For an indulgent treat, serve a slice of cheesecake alongside a scoop of vanilla or chocolate ice cream. The combination of warm and cold is simply delightful!
- Garnish with Mint Leaves: A sprig of fresh mint on top of each slice adds a lovely touch of color and a hint of freshness that complements the flavors beautifully.
Red Velvet Oreo Cheesecake but also create a delightful experience for your guests. Remember, the way you present your dessert can make it even more special, so have fun with it!
Tips for Perfecting Red Velvet Oreo Cheesecake Recipe
Red Velvet Oreo Cheesecake Recipe. These little nuggets of wisdom can make a big difference in your final product. Let’s dive into some of my favorite tips!
- Use Quality Ingredients: The flavor of your cheesecake hinges on the quality of your ingredients. Opt for real vanilla extract, full-fat cream cheese, and fresh eggs. It’s worth it!
- Don’t Rush the Cooling: After baking, allow your cheesecake to cool gradually in the oven. This helps prevent cracks and ensures a smooth texture.
- Check for Doneness: The cheesecake is done when the edges are set, but the center still has a slight jiggle. It will firm up as it cools.
- Experiment with Flavors: Don’t hesitate to add your own twist! A splash of almond extract or a sprinkle of cinnamon can add a unique flavor profile.
- Decorate with Love: When it comes to garnishing, let your creativity shine! Use crushed Oreos, fresh berries, or even edible flowers for a stunning finish.
Red Velvet Oreo Cheesecake that will leave everyone asking for seconds. Happy baking!
Breakdown of Time for Red Velvet Oreo Cheesecake Recipe
Red Velvet Oreo Cheesecake Recipe, having a clear breakdown of time can help you plan your baking adventure more effectively. Here’s how the timing breaks down:
- Prep Time: 30 minutes – This includes gathering your ingredients, preparing the crust, and mixing the cheesecake filling. It’s a fun and creative time!
- Cooking Time: 1 hour and 40 minutes – This consists of baking the red velvet cake layers and the cheesecake itself. Patience is key here, but the aroma will be worth the wait!
- Chilling Time: 8 hours (or overnight) – After baking, the cheesecake needs to chill in the refrigerator. This step is crucial for the flavors to meld and the texture to set perfectly.
Total Time: Approximately 10 hours and 10 minutes – While it may seem like a long time, most of it is hands-off chilling time. You can use this time to relax or prepare for your next culinary adventure!
Red Velvet Oreo Cheesecake turns out beautifully, and you’ll be ready to impress your friends and family with your baking skills!
Nutritional Information for Red Velvet Oreo Cheesecake Recipe
Red Velvet Oreo Cheesecake Recipe. While this cheesecake is a treat meant for special occasions, knowing the nutritional information can help you enjoy it in moderation. Here’s a general breakdown per slice (assuming 12 slices):
- Calories: Approximately 450
- Total Fat: 30g
- Saturated Fat: 15g
- Cholesterol: 90mg
- Sodium: 300mg
- Total Carbohydrates: 40g
- Dietary Fiber: 1g
- Sugars: 30g
- Protein: 6g
Keep in mind that these values can vary based on specific ingredients and portion sizes. If you’re looking to lighten things up a bit, consider using reduced-fat cream cheese or a sugar substitute. However, I always say that a little indulgence now and then is part of the joy of cooking and sharing delicious food with loved ones!
Frequently Asked Questions about Red Velvet Oreo Cheesecake Recipe
Red Velvet Oreo Cheesecake Recipe with friends and family, I’ve noticed a few common questions pop up. I love answering these queries because it helps everyone feel more confident in their baking journey. Here are some of the most frequently asked questions, along with my insights:
Can I make this cheesecake ahead of time?
Absolutely! In fact, I recommend making it a day in advance. The flavors deepen and the texture improves after chilling overnight. Just be sure to cover it well in the refrigerator to keep it fresh!
What can I use instead of buttermilk?
If you don’t have buttermilk on hand, don’t worry! You can easily make a substitute by mixing 2/3 cup of milk with 1 tablespoon of vinegar or lemon juice. Let it sit for about 5 minutes, and you’ll have a perfect buttermilk replacement!
How do I prevent cracks in my cheesecake?
Cracks can be a common concern, but there are a few tricks to avoid them. First, make sure to bake your cheesecake in a water bath, as this helps maintain moisture. Also, allow it to cool gradually in the oven after baking. Patience is key!
Can I freeze the cheesecake?
Yes, you can freeze the cheesecake! Just make sure it’s well-wrapped in plastic wrap and then aluminum foil to prevent freezer burn. When you’re ready to enjoy it, let it thaw in the refrigerator overnight for the best texture.
What’s the best way to slice the cheesecake?
To get clean slices, I recommend using a sharp knife dipped in hot water. Wipe the knife clean between cuts for neat slices. This little trick makes a big difference in presentation!
Can I use low-fat cream cheese?
While you can use low-fat cream cheese, keep in mind that it may affect the creaminess and texture of the cheesecake. I always prefer full-fat for the best flavor and richness, but it’s your choice!
Red Velvet Oreo Cheesecake. Remember, baking is all about experimenting and having fun, so don’t hesitate to reach out if you have more questions or need tips along the way!
Conclusion on Red Velvet Oreo Cheesecake Recipe
Red Velvet Oreo Cheesecake Recipe, I can’t help but feel a sense of excitement for you to try it. This dessert is not just a treat; it’s an experience that brings joy and celebration to any occasion. The rich, velvety layers of red velvet cake combined with the creamy, dreamy cheesecake filling create a symphony of flavors that dance on your palate.
What I love most about this recipe is its versatility. Whether you’re celebrating a birthday, hosting a holiday gathering, or simply indulging in a sweet moment at home, this cheesecake is sure to impress. Plus, the vibrant red color makes it a stunning centerpiece that will have everyone reaching for a slice.
Red Velvet Oreo Cheesecake with your loved ones. Trust me, the smiles and compliments you receive will be the sweetest reward of all!
Print
Red Velvet Oreo Cheesecake Recipe
- Total Time: Approximately 10 hours and 10 minutes
- Yield: 12 slices
- Diet: Vegetarian
Description
A delightful dessert that combines the rich texture of red velvet cake with creamy cheesecake and crunchy Oreo cookies.
Ingredients
- All-purpose flour: 1 1/2 cups
- Unsweetened cocoa powder: 2 tsp
- Salt: 1/2 tsp
- Unsalted butter: 1/2 cup
- Granulated sugar: 1 cup
- Sour cream: 1/2 cup
- Vegetable oil: 1/4 cup
- Pure vanilla extract: 2 tsp
- Large eggs: 2
- Red food coloring: 4 tsp
- Buttermilk: 2/3 cup
- Baking soda: 1 tsp
- White vinegar: 1 tsp
- Oreos (filling removed, wafers crushed): 10
- Full-fat cream cheese: 24 oz
- Oreo filling: From the above 10 Oreos
- Granulated sugar: 1 cup
- Cornstarch (or all-purpose flour): 1 tbsp
- Sour cream: 1 cup
- Pure vanilla extract: 1 tbsp
- Large eggs + 1 egg yolk: At room temperature
- Oreos (chopped): 15
- Dark chocolate chips: 1 cup
- Heavy cream: 1/2 cup
- Store-bought cream cheese frosting: 1 can
- Chopped Oreos: 8
Instructions
- Preheat your oven to 350°F (175°C).
- Crush the Oreo wafers into fine crumbs and mix with melted butter.
- Press the mixture into the bottom of a springform pan and bake for 10 minutes.
- In a mixing bowl, beat the cream cheese until smooth, then add Oreo filling, sugar, and cornstarch.
- Add sour cream, vanilla, eggs, and egg yolk, mixing until just combined.
- Fold in chopped Oreos gently.
- Pour the cheesecake filling over the cooled crust and smooth the top.
- Prepare a water bath and bake at 300°F (150°C) for about 1 hour and 30 minutes.
- Cool the cheesecake gradually in the oven for about an hour, then refrigerate overnight.
Notes
- Use room temperature ingredients for a smooth filling.
- Don’t overmix the cheesecake filling to prevent cracks.
- Using a water bath helps maintain moisture during baking.
- Chill overnight for the best flavor and texture.
- Prep Time: 30 minutes
- Cook Time: 1 hour and 40 minutes
- Category: Dessert
- Method: Baking
- Cuisine: American
Nutrition
- Serving Size: 1 slice
- Calories: 450
- Sugar: 30g
- Sodium: 300mg
- Fat: 30g
- Saturated Fat: 15g
- Carbohydrates: 40g
- Fiber: 1g
- Protein: 6g
- Cholesterol: 90mg

