Snowman Cake Pops

Introduction to Snowman Cake Pops
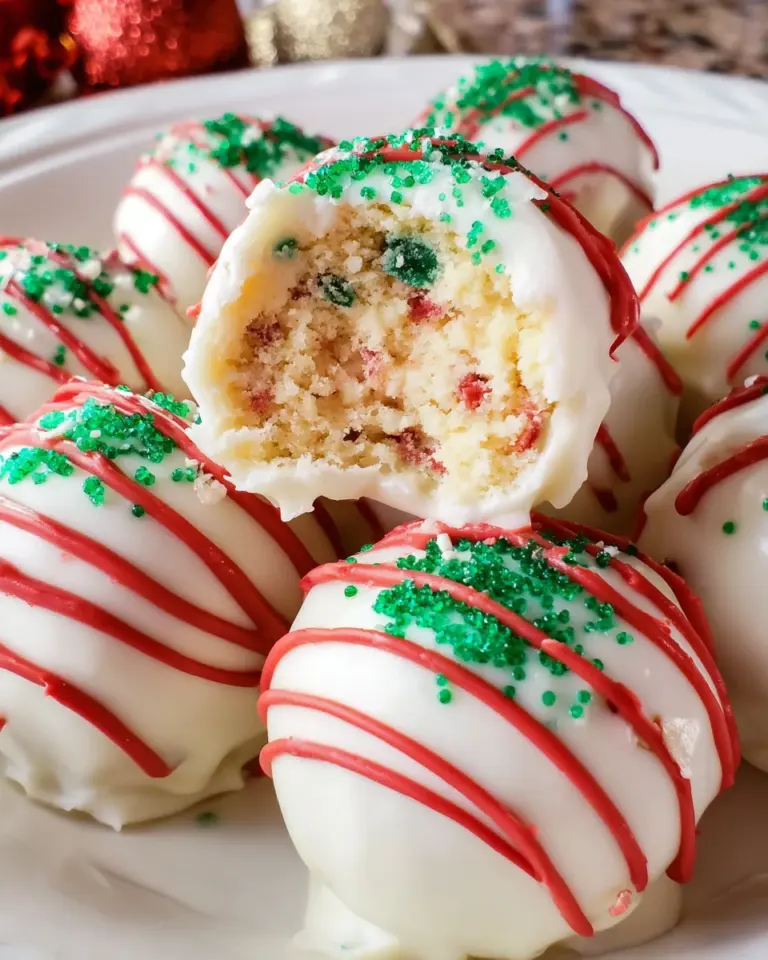
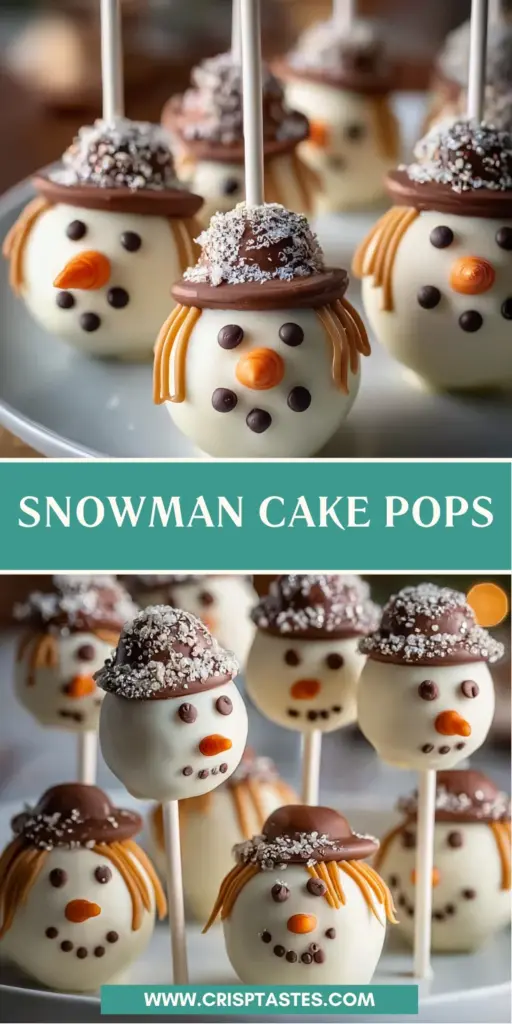
As winter rolls in, I find myself yearning for those delightful little treats that instantly spread cheer. That’s where these Snowman Cake Pops come in! They’re not just cupcakes on a stick; they’re scrumptious little friends that bring a smile to anyone’s face.
Whether you’re a busy mom juggling work, kids, and life, or simply someone looking to pamper your loved ones, this recipe is your golden ticket.
In just over an hour, you can whip up these festive delights and impress everyone at your next gathering. Let’s get started!
Why You’ll Love This Snowman Cake Pops
These Snowman Cake Pops are a delightful way to bring joy into your kitchen without stressing about time. They’re super easy to make, even for the busiest of us!
With just a few ingredients and simple steps, you can create adorable treats that taste heavenly. Plus, the kids love getting involved, making it a heartwarming family activity.
What’s not to love when you can have fun and satisfaction in one delicious bite?
Ingredients for Snowman Cake Pops
Creating these delightful Snowman Cake Pops starts with gathering some essential ingredients. Here’s what you’ll need:
- Cake mix: Choose your favorite flavor, whether it’s classic vanilla for a light bite or rich chocolate for something more decadent.
- Large eggs: These help bind everything together, but if you need an egg-free option, unsweetened applesauce or a flax egg works wonders.
- Frosting: You can use store-bought for convenience, but homemade cream cheese frosting adds a dreamy touch!
- Candy melts: Get the white chocolate or vanilla variety to achieve that snowy appearance—perfect for our little snowmen.
- Lollipop sticks: These help transform your cake bites into pops. If you want a sturdier option, consider using sturdy straws!
- Decorations: Mini chocolate chips make fantastic eyes, while orange candy bits can serve as adorable noses. Sprinkles or decorative sugar add that extra sparkle.
Remember, the exact quantities for these ingredients can be found at the bottom of this article for printing convenience!
How to Make Snowman Cake Pops
Preparing the Cake
To kick off your Snowman Cake Pops, start by preparing the cake mix. Follow the instructions on the box, or use your favorite homemade recipe if you’re feeling creative. Once your cake is baked, let it cool completely on a wire rack. This step is crucial—cool cake crumbles easily. If you try to crumble a warm cake, you’ll end up with a gooey mess instead of delightful cake pops!
Crumbling the Cake
When your cake has cooled, it’s time to crumble it! Place the cake in a large mixing bowl and gently break it apart using your hands or a fork. Aim for fine crumbs—think of it as creating a soft, sandy texture. No big chunks should remain, as they will make shaping the cake pops challenging.
Mixing with Frosting
Now for the fun part—mixing! Add about a cup of frosting to your crumbled cake. I usually start with less and add more if needed. Using your hands, knead the mixture until everything combines nicely. It should feel moist but not overly sticky. This is where the magic happens, giving life to your adorable snowmen!
Shaping the Cake Pops
Time to shape your snowmen! Take a handful of the mixture and roll it into a larger ball for the body. Then, take a smaller portion for the head and roll it into a smaller ball. Balance is key; the ratio should look like a small snowman. It’s okay if they’re slightly imperfect—after all, snowmen come in all shapes!
Inserting Sticks
Once shaped, it’s important to insert lollipop sticks for stability. Grab your sticks and carefully push one into each snowman ball. Make sure it goes in far enough to hold the pieces together, but not so far that it comes through the other side. This step is crucial to keep your cake pops from falling apart later!
Chilling the Cake Pops
Before we coat them, it’s essential to chill the cake pops. Place them in the fridge for about 30 minutes. This helps set the shape and makes dipping easier. Trust me; you want your snowmen to be firm when it’s time for their delicious candy coating!
Melting the Candy Coating
While your cake pops chill, it’s time to prepare the candy melts. Pour your candy melts into a microwave-safe bowl and heat them in short bursts. I usually go for 30 seconds at a time, stirring well after each interval. Continue until it’s completely melted and smooth—this is what gives your snowmen their perfect snowy coating!
Dipping and Decorating
Now comes the fun part—dipping and decorating! Grab your chilled cake pops and dip each one into the melted candy coating. Twirl them gently to ensure they’re fully covered, then let the excess drip off. Quickly add your decorations while the coating is still soft: mini chocolate chips for eyes, orange candy bits for noses, and sprinkles to add that festive flare. Don’t rush, but also don’t linger too long—the coating sets quickly!
Setting the Cake Pops
Finally, it’s time to let your adorable snowmen dry. Place the finished cake pops upright in a styrofoam block or a piece of cardboard. This keeps them sturdy while the coating hardens. Once set, your Snowman Cake Pops are ready to brighten up any winter gathering!
Tips for Success
- Ensure your cake is completely cool before crumbling; this prevents sogginess.
- If you’re short on time, use store-bought frosting for a quick fix.
- Consider using lollipop molds for uniform shapes.
- Use toothpicks to place decorations for more precision, especially with tiny parts.
- These cake pops store well in the fridge, so make them a day ahead!
Equipment Needed
- Mixing bowls: For combining your ingredients; any large bowl will do.
- Wire rack: Essential for cooling your cake; a simple countertop works in a pinch.
- Lollipop sticks: Use sturdy straws if you don’t have these handy.
- Microwave-safe bowl: For melting candy melts; any glass or ceramic bowl works well.
- Styrofoam block or cardboard: To set your cake pops upright; a piece of old box works effectively!
Variations
- Flavor swaps: Experiment with different cake flavors! Red velvet, lemon, or even funfetti can add a delightful twist.
- Dairy-free option: Use almond or coconut milk-based frosting, and choose dairy-free candy melts for a friendly adaptation.
- Gluten-free alternatives: Substitute with your favorite gluten-free cake mix for a delicious version everyone can enjoy.
- Holiday themes: Adapt the decorations to fit other festive occasions like Christmas or winter-themed parties.
Serving Suggestions
- Pair your Snowman Cake Pops with a warm cup of cocoa for a cozy treat!
- Display them on a festive platter, surrounded by fresh pinecones and holiday decorations for a cheerful presentation.
- Include these cute pops as a fun addition to children’s parties or winter gatherings.
- Serve alongside some homemade cookies for a delightful dessert table!
FAQs about Snowman Cake Pops
Can I use any cake flavor for Snowman Cake Pops?
Absolutely! The beauty of Snowman Cake Pops lies in their versatility. Feel free to use any cake mix flavor you love, whether it’s vanilla, chocolate, or even red velvet. It’s all about what delights your taste buds!
How can I make these cake pops egg-free?
No worries if you need an egg-free option! You can substitute the large eggs with unsweetened applesauce or a flax egg. Just mix one tablespoon of ground flaxseed with three tablespoons of water, let it sit for a few minutes, and it’s ready to go!
Can I make Snowman Cake Pops in advance?
You sure can! These adorable treats can be made a day in advance. Just store them in the fridge to keep them fresh for your winter celebrations or parties.
What can I substitute if I don’t have lollipop sticks?
If you’re out of lollipop sticks, sturdy straws are a fantastic alternative! They’ll work just as well to hold your charming snowmen together while adding a fun twist.
What decorations work best for these cake pops?
Get creative! Mini chocolate chips make great eyes, orange candy pieces are perfect for noses, and decorative sugar or sprinkles can create that magical snowy effect. Your imagination is the limit when it comes to decorating!
Final Thoughts
Making Snowman Cake Pops isn’t just about whipping up a tasty treat; it’s about creating memories with your loved ones. There’s something magical about rolling dough, dipping in candy, and decorating these little snowmen together.
They bring a laugh, a smile, and a sprinkle of joy to any occasion.
Whether it’s a winter gathering or a cozy family night, these cake pops make for perfect holiday cheer. So, grab your family and let the fun begin. Remember, it’s not just baking; it’s about spreading love, one cake pop at a time!
Print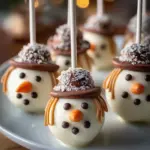
Snowman Cake Pops
- Total Time: 1 hour 15 minutes
- Yield: 12 cake pops 1x
- Diet: Vegetarian
Description
Delightful Snowman Cake Pops are fun and festive treats perfect for winter celebrations. Easy to make, these cake pops mimic adorable snowmen and are sure to bring joy to any gathering.
Ingredients
- 1 box Cake mix (Any flavor you love, vanilla or chocolate are classic choices)
- 2 large Eggs (Can substitute with unsweetened applesauce or a flax egg for egg-free version)
- 1 cup Frosting (Store-bought or homemade, cream cheese frosting is ideal)
- 1 bag Candy melts (White chocolate or vanilla for a snowy look)
- 12 pieces Lollipop sticks (Can use sturdy straws as an alternative)
- 1 cup Decorations (Mini chocolate chips for eyes, orange candy bits for noses, decorative sugar or sprinkles)
Instructions
- Prepare the cake mix according to package instructions or your homemade recipe. Once it’s baked, let it cool completely on a wire rack.
- Once the cake has cooled, crumble it in a large bowl until it resembles fine crumbs.
- Add a generous amount of frosting (about a cup) to the cake crumbs. Mix with your hands until combined. It should be moist but not overly sticky.
- Roll the mixture into small balls, creating a larger bottom ball and a smaller one for the head.
- Place lollipop sticks into the balls to hold them together.
- Chill the cake pops in the fridge for about 30 minutes, or until firm.
- Melt the candy melts in the microwave according to package instructions. Stir until smooth and no lumps remain.
- Take each cake pop, dip it into the melted candy coating, and let the excess drip off.
- Quickly add your decorations before the coating sets: use mini chocolate chips for eyes, orange candy for the carrot nose, and sprinkles for a snowy effect.
- Place the finished cake pops in a styrofoam block or a piece of cardboard to allow them to set completely.
Notes
- Ensure the cake is completely cooled before crumbling to prevent a soggy texture.
- Use toothpicks for smaller decorations if you prefer more control.
- These cake pops can be made a day in advance and stored in the fridge.
- Prep Time: 45 minutes
- Cook Time: 30 minutes
- Category: Dessert
- Method: Baking and Decorating
- Cuisine: American
Nutrition
- Serving Size: 1 cake pop
- Calories: 180
- Sugar: 15g
- Sodium: 100mg
- Fat: 7g
- Saturated Fat: 3.5g
- Unsaturated Fat: 2g
- Trans Fat: 0g
- Carbohydrates: 26g
- Fiber: 1g
- Protein: 2g
- Cholesterol: 30mg