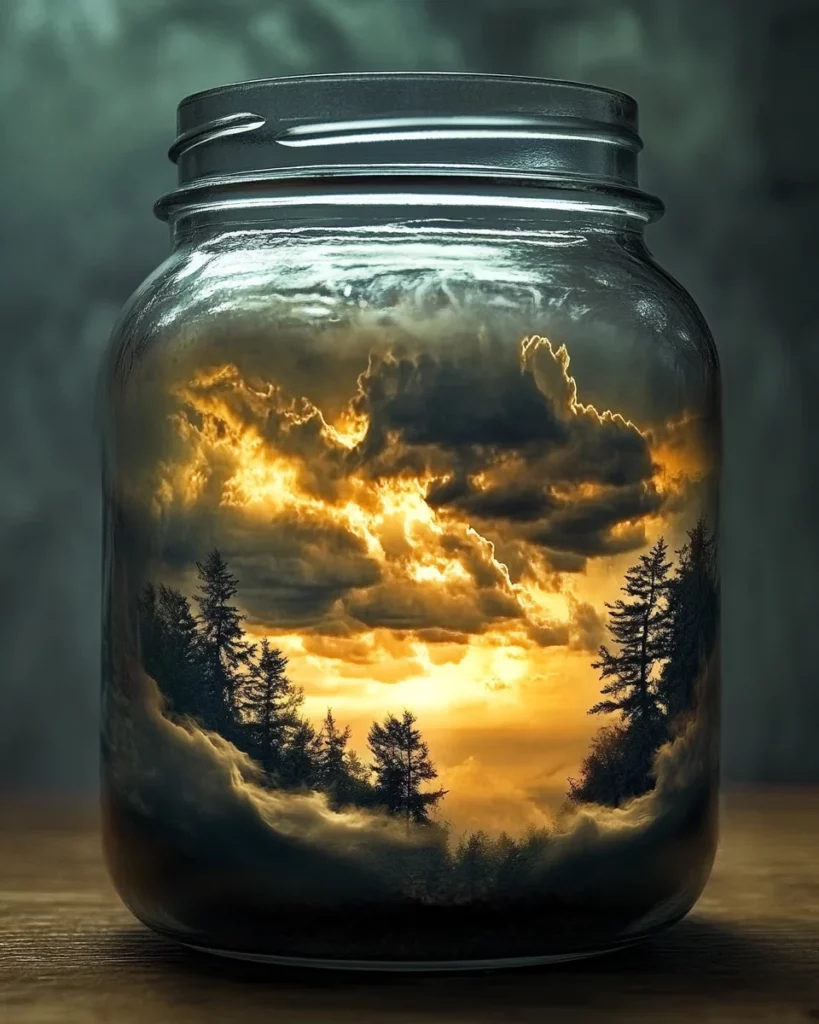
STORMY WEATHER JAR: Create Your Own Magic in Minutes!

Introduction to STORMY WEATHER JAR
Life can often feel a bit stormy, can’t it? Between juggling work, kids, and that endless list of to-dos, I find myself craving creativity and a little magic in my day. That’s where the STORMY WEATHER JAR comes in! This quick and captivating DIY science project is not just a fun activity, but also a delightful way to bring the excitement of a storm into your home. Perfect for busy days, it’s a chance to connect with your loved ones while creating something truly special. Trust me, you don’t need to be a science whiz to enjoy this swirling, colorful adventure!
Why You’ll Love This STORMY WEATHER JAR
This STORMY WEATHER JAR is the perfect blend of simplicity and fun. In just five minutes, you can create a mesmerizing visual experience that will entertain kids and adults alike. It’s a great way to spark conversations about weather, bringing a dash of science into your living room. Plus, the best part? No mess, no fuss! Just pure creativity that wipes away the stress of a busy day.
Ingredients for STORMY WEATHER JAR
Gathering the right ingredients is half the fun of making your own STORMY WEATHER JAR. Here’s what you’ll need:
- Clear glass jar with lid: Choose a jar that’s sturdy and visually appealing. A well-sealed jar captures the magic!
- Water: Plain water serves as the base for your storm. It’s the canvas for all your colorful creativity.
- Shaving cream: This creates the clouds. The fluffiness of the cream mimics cumulus clouds, setting the stage for your storm.
- Blue food coloring: This is essential for representing the sky. It brings depth and vibrancy to your creation.
- Dark food coloring or washable paint (optional): Add a few drops for dramatic storm clouds. This ingredient allows for some experimenting!
- Glitter (optional): Want a bit of sparkle? A sprinkle of glitter adds a magical element that makes the storm truly enchanting.
- Spoon or craft stick for stirring: Use this to mix your colors. A simple tool, yet so effective in creating your masterpiece!
For exact quantities, check the end of the article. Making a STORMY WEATHER JAR is easy, and you’ll find that these common ingredients can lead to extraordinary fun!
How to Make STORMY WEATHER JAR
Now that we have gathered our ingredients, it’s time for the fun part: making your very own STORMY WEATHER JAR. Follow these steps, and let your creativity take flight!
Step 1: Fill the Jar
Start by pouring water into your clear glass jar, filling it about halfway. This creates the foundation for your storm. A tip? Choose a jar that has a wide mouth to make it easier to layer the other ingredients. You’ll want to see all the beauty inside, so a glass jar works wonders!
Step 2: Add Shaving Cream
Next, gently spoon shaving cream on top of the water to create your “cloud layer.” Think of this as crafting fluffy cumulus clouds in our stormy scene. For the best results, use a dollop of shaving cream and let it float peacefully on the surface. It adds a delightful texture while keeping the water hidden below.
Step 3: Add Color
In a small cup, mix your blue food coloring with a few drops of dark food coloring or washable paint. This vibrant color combo creates dramatic storm clouds. Don’t rush! The more you mix, the deeper your colors will be. Aim for a shade that makes you feel the storm!
Step 4: Create the Storm
With the colored water ready, it’s time to create the storm! Slowly drip the colored concoction onto the shaving cream clouds. You’ll see the color seeping through the cream, resembling rain pouring down. Take a moment to watch as it transforms. It’s like magic, right in your hands!
Step 5: Add Glitter (Optional)
If you want to take it up a notch, sprinkle some glitter over the top. This adds a whole new dimension of sparkle to your storm! The glitter dances excitedly in the swirling colors, creating an enchanting effect that kids will absolutely love.
Step 6: Seal and Shake (Optional)
Finally, close the lid tightly and give your jar a gentle shake. Watch the swirling storm come alive! This is where the real magic happens, as different colors and textures intertwine. It’s the perfect finish to your STORMY WEATHER JAR adventure!
Tips for Success
- Use room temperature water for better results when mixing.
- Experiment with different food coloring combinations to create various storm effects.
- Ensure the shaving cream is evenly spread to enhance the cloud effect.
- Encourage kids to observe how the colored water interacts with the shaving cream.
- Seal the jar tightly if you plan to shake it for swirling effects.
Equipment Needed
- Clear glass jar with lid: A mason jar or any sturdy glass jar works well.
- Spoon or craft stick: A regular kitchen spoon will do, or even a popsicle stick!
- Small cup: Use a shot glass or small bowl for mixing your colors.
Variations for STORMY WEATHER JAR
- Colorful Clouds: Use different food coloring shades such as purple or green for a unique twist on your storm.
- Natural Dyes: Try using beet juice or turmeric to create natural colorants, perfect for a healthier approach!
- Textured Storms: Add tiny foam balls or cotton balls to the shaving cream for extra texture and a more dynamic cloud effect.
- Scented Storms: Incorporate a few drops of essential oils into the water for a calming scent. Lavender or eucalyptus works wonderfully!
- Event Themes: Tailor the colors and textures to match seasonal themes, like spooky colors for Halloween or pastel shades for spring!
Serving Suggestions for STORMY WEATHER JAR
- Display: Place your STORMY WEATHER JAR on a sunny windowsill to catch the light.
- Pair with Snacks: Enjoy some popcorn or cookies while making your storm for an added treat.
- Interactive Fun: Let kids take turns shaking the jar and observing the changes together.
- Themed Drinks: Serve a refreshing blue lemonade to complement your stormy creation!
FAQs about STORMY WEATHER JAR
What age is this project suitable for?
The STORMY WEATHER JAR is perfect for children aged three and up! Just make sure to supervise little ones, especially when using food coloring and shaving cream.
Can I use any jar for this project?
Absolutely! Just ensure it’s clear, sturdy, and has a lid. A mason jar works great, but feel free to use any glass jar that appeals to you!
Is the glitter safe for children?
Yes, as long as you opt for non-toxic glitter. It adds a fun sparkle to your STORMY WEATHER JAR and keeps the project engaging and safe.
Can I reuse the jar once I’m done?
If you don’t use ingredients that spoil, yes! Just clean it out, and you can fill it with another colorful creation later.
How do I make the colors more vibrant?
Try adding more drops of food coloring to your water mixture. Mixing it thoroughly will help achieve deeper shades. Experimenting is part of the fun with your STORMY WEATHER JAR!
Final Thoughts
Creating your own STORMY WEATHER JAR is more than just a fun science project; it’s an experience that sparks joy and creativity. Watching the colors swirl and collide brings a delightful surprise to both young and old. It’s an excellent way to connect with family, encouraging conversations about weather while unleashing a bit of imagination. Plus, in a world that often feels chaotic, this simple jar serves as a reminder of the beauty in nature’s storms. So grab your jar, and let the magic unfold—because every storm, big or small, has its own unique charm!
Print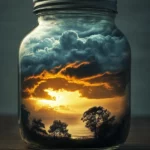
STORMY WEATHER JAR: Create Your Own Magic in Minutes!
- Total Time: 5 minutes
- Yield: 1 jar 1x
- Diet: Vegetarian
Description
A captivating DIY science project that mimics the swirling clouds and rain of a stormy sky inside a jar, great for learning and fun!
Ingredients
- 1 clear glass jar with lid
- 1/2 cup water
- 1/2 cup shaving cream
- Blue food coloring
- A few drops of dark food coloring or washable paint (optional)
- 1 tablespoon glitter (optional)
- 1 spoon or craft stick for stirring
Instructions
- Fill the Jar: Pour water into the jar, filling about halfway.
- Add Shaving Cream: Gently spoon shaving cream on top of the water to create the “cloud layer.”
- Add Color: Mix blue food coloring with a few drops of dark food coloring or washable paint in a small cup.
- Create the Storm: Slowly drip the colored water onto the shaving cream clouds. Watch as the color seeps through, resembling rain.
- Add Glitter (Optional): Sprinkle glitter over the top for a magical storm effect.
- Seal and Shake (Optional): Close the lid and gently shake to see a swirling storm inside.
Notes
- Experiment: Try different food coloring combinations for various storm effects.
- Learning Moment: Use this activity to discuss weather and cloud formation.
- Safety: Use non-toxic ingredients and supervise children during the activity.
- Prep Time: 5 minutes
- Category: DIY Project
- Method: Mixing
- Cuisine: N/A