Sugar Cookie Cheesecake

Introduction to Sugar Cookie Cheesecake
Hey there! If you’re anything like me, life can get pretty hectic. Between work, family, and all those daily tasks, finding time to bake can feel overwhelming. That’s where my Sugar Cookie Cheesecake comes in—a delightful blend of two beloved desserts that’s sure to win your heart! This recipe is not just easy to whip up but also impresses everyone at the table. Trust me, whether you’re hosting a gathering or just wanting to treat your family, this cheesecake will make your day a little sweeter.
Why You’ll Love This Sugar Cookie Cheesecake
This Sugar Cookie Cheesecake is a dream come true for busy moms and professionals like us. It combines the delightful taste of freshly baked sugar cookies with the creamy richness of cheesecake, all wrapped up in one delicious bite. Plus, it’s quick to prepare, making it a perfect dessert for those last-minute gatherings. You’ll love how it caters to both your sweet tooth and your time constraints—what’s not to adore?
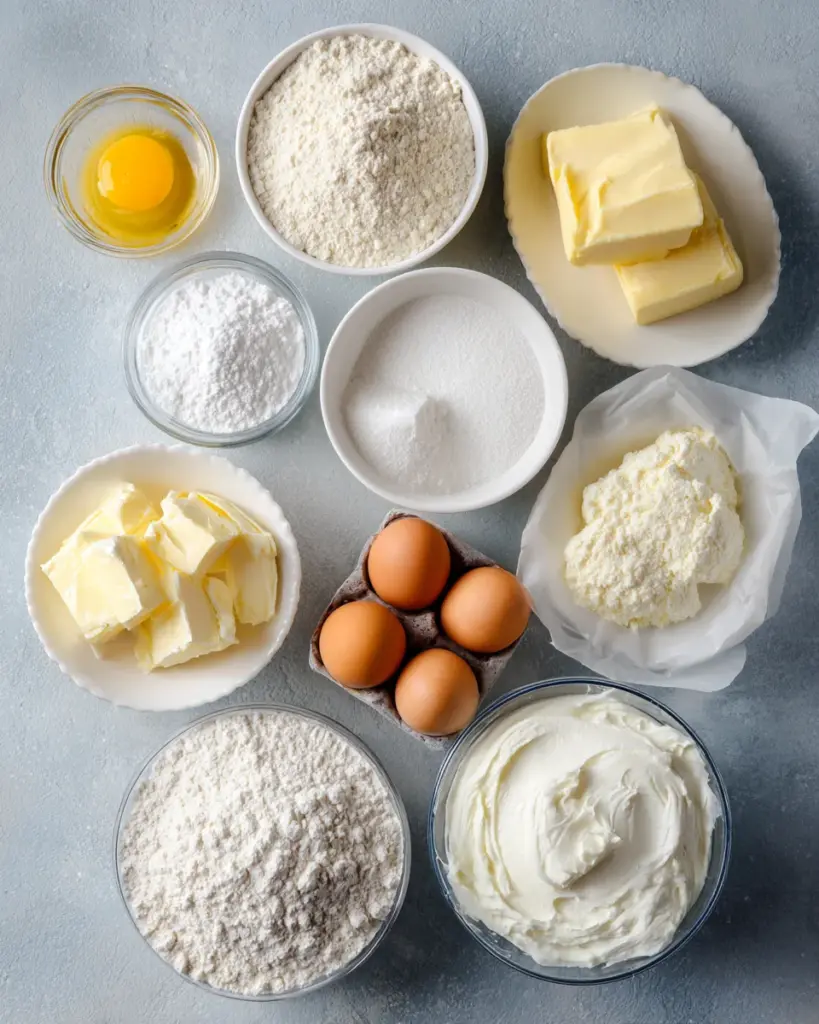
Ingredients for Sugar Cookie Cheesecake
Let’s dive into the tasty elements that make up my Sugar Cookie Cheesecake! You’ll find that each ingredient plays a crucial role in achieving that perfect balance of flavor and texture. I’ll highlight a mix of essentials and a few optional ingredients to get those creative juices flowing. For exact measurements, you can check out the bottom of this article.
- All-purpose flour: This is the backbone of our cookie crust, giving it structure and a delightful chew.
- Unsalted butter: Softened butter adds creaminess to the crust. It’s what helps achieve that melt-in-your-mouth texture.
- Granulated sugar: The sweetener for both the crust and cheesecake, giving that classic sugar cookie flavor.
- Egg: This little powerhouse binds everything together. It’s essential for both the crust and the creamy filling.
- Vanilla extract: The star of the show! It imparts a warm, sweet aroma that elevates the whole dessert.
- Baking powder: This helps the crust rise slightly, ensuring a light and airy texture.
- Salt: Just a pinch enhances the sweetness and balances the flavors.
- Cream cheese: The creamy base for our cheesecake, lending rich, luscious notes that harmonize beautifully with the sugar cookie vibe.
- Sour cream (optional): For a tangy twist and added creaminess, this is a delicious optional ingredient.
- Whipped cream (optional): A fluffy topping that adds volume and decadence to your cheesecake.
- Sugar sprinkles (optional): These little gems make for a festive presentation, especially at celebrations.
- Fresh berries (optional): Think strawberries or blueberries! They add a burst of color and a refreshing tartness to complement the sweetness.
With all these delicious ingredients at your fingertips, you’re well on your way to creating a memorable dessert. Don’t forget, the exact quantities are available for printing at the bottom of this article! Happy baking!
How to Make Sugar Cookie Cheesecake
Step 1: Preheat and Prepare
First things first, let’s get that oven ready! Preheat it to 350°F (175°C) to ensure an even bake for our cheesecake. While that’s warming up, gather your baking utensils. You’ll need a 9-inch springform pan to create that beautiful crust. Don’t forget your mixing bowls, a spatula, and a hand or stand mixer. Having everything in place makes the process smoother and way more enjoyable!
Step 2: Make the Cookie Crust
Now, let’s dive into the cookie crust! In a mixing bowl, cream together the softened butter and granulated sugar until it’s light and fluffy. This step is crucial—trust me, the fluffier, the better. Once combined, beat in the egg and vanilla extract, incorporating them well. In a separate bowl, whisk together the all-purpose flour, baking powder, and salt. Gradually mix the dry ingredients into the wet mixture to form a soft dough, ensuring a rich texture that embodies the essence of classic sugar cookies.
Step 3: Bake the Crust
Time for that crust to shine! Press the cookie dough evenly into the bottom of your prepared springform pan. Bake in the preheated oven for about 10–12 minutes until the edges start to turn a light golden brown. Be sure to keep an eye on it; we want it just cooked, not overdone! A slight jiggle in the middle is perfectly fine, as it will set when we add the cheesecake filling.
Step 4: Prepare the Cheesecake Filling
While the crust cools slightly, let’s whip up the creamy cheesecake filling. Begin by beating the softened cream cheese in a large bowl until it’s smooth and free of lumps. Gradually add the granulated sugar, mixing until well combined. Next, add in the vanilla extract. Beat in the eggs one at a time—this technique helps achieve that silky texture. Finally, if you’re using sour cream, add it in along with the tablespoon of flour. Mix until everything is creamy and luscious.
Step 5: Combine and Bake
Now for the exciting part—combining the crust and filling! Pour the cheesecake mixture over the cooled cookie crust and smooth the top with a spatula. This is where the magic happens! Lower the oven temperature to 325°F (163°C) and bake for 40–50 minutes. Keep an eye on it; cover the edges with foil if they brown too quickly. It’s ready when the center is slightly jiggly—you want that perfect texture!
Step 6: Cooling and Chilling
Once baked, let your cheesecake cool at room temperature for about 30 minutes. This step is essential as it allows it to set properly. After cooling, pop it into the refrigerator and let it chill for at least 3–4 hours—or ideally, overnight. This chilling time not only enhances the flavor but also ensures that your dessert has a wonderfully creamy and firm texture. The wait is worth every second!
Tips for Success
- Make sure all ingredients are at room temperature for a smoother texture.
- Don’t overmix the cheesecake filling; just blend until smooth for best results.
- Use a springform pan for easy removal and a beautiful presentation.
- Cover the edges with foil if they brown too quickly while baking.
- Chilling overnight really enhances the flavors—don’t skip it!
Equipment Needed for Sugar Cookie Cheesecake
- 9-inch springform pan: Perfect for easy removal; a regular baking pan works too but may be trickier to serve.
- Mixing bowls: Just a couple will do, but having extra can help keep things organized.
- Hand or stand mixer: A whisk is great too, but a mixer saves time and muscle!
- Spatula: Ideal for spreading and scraping—don’t skip this handy tool!
- Baking sheet: Useful for guiding heat when baking your crust.
Variations of Sugar Cookie Cheesecake
- Chocolate Chip Sugar Cookie Cheesecake: Add mini chocolate chips to your cookie dough for a delightful twist on the classic flavors.
- Gluten-Free Option: Substitute all-purpose flour with a 1:1 gluten-free baking blend for a similar texture without gluten.
- Fruit-Infused Cheesecake: Mix in pureed fruits like strawberries or raspberries to the cheesecake filling for a fruity burst.
- Reduce Sugar: Swap some of the granulated sugar for a sugar substitute to lighten the dessert without sacrificing taste.
- Nutty Variation: Fold in crushed nuts like walnuts or pecans into the cheesecake filling for added texture and flavor.
- Vegan Adaptation: Use vegan cream cheese and a flax egg to create a plant-based version of this delightful dessert.
Serving Suggestions for Sugar Cookie Cheesecake
- Pair your cheesecake with a dollop of whipped cream for an extra touch of indulgence.
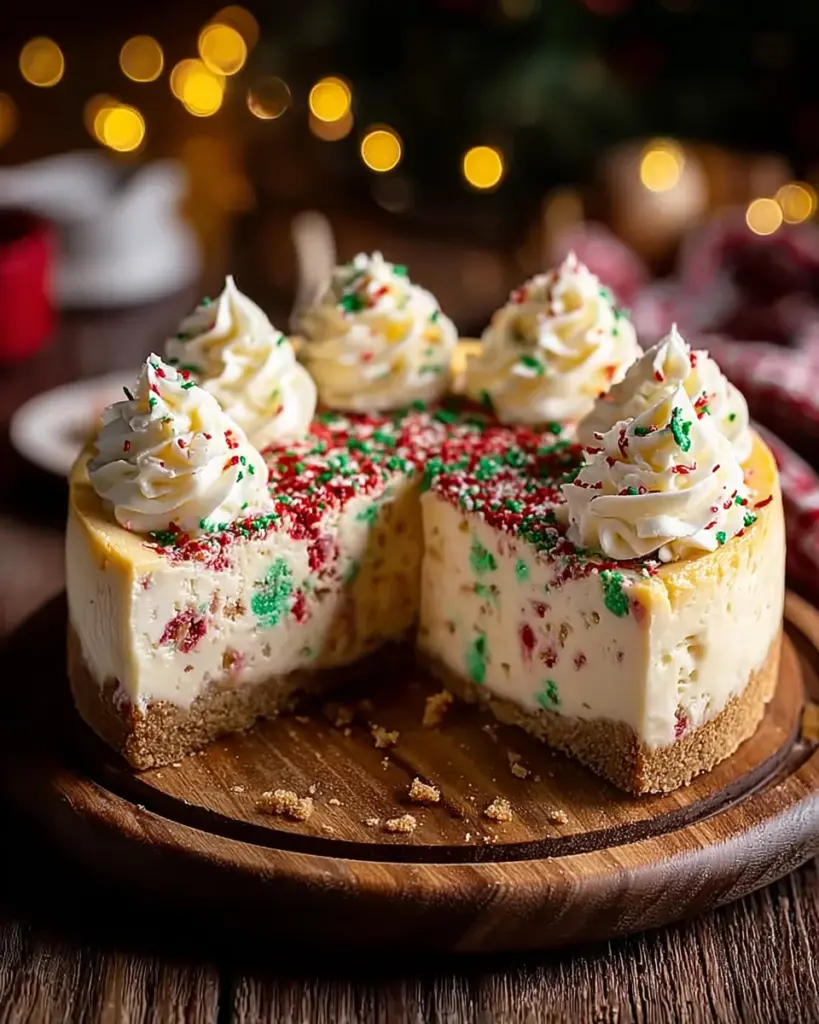
- Add a sprinkle of colorful sugar sprinkles on top for a festive look, especially at celebrations.
- Serve with fresh berries on the side for a refreshing contrast to the sweet cheesecake.
- A glass of cold milk or hot coffee enhances the dessert experience beautifully.
- For an elegant presentation, slice and serve on a beautiful platter, garnished with mint leaves.
FAQs about Sugar Cookie Cheesecake
So, you’re excited to try making my Sugar Cookie Cheesecake, but you might have a few questions. Don’t worry, I’ve got you covered! Here are some of the most common questions people ask about this delicious dessert.
Can I make Sugar Cookie Cheesecake ahead of time?
Absolutely! In fact, I recommend chilling the cheesecake overnight for the best flavor and texture. This makes it a great option for preparing in advance, especially before special occasions.
How do I know when the cheesecake is done baking?
Your cheesecake is perfectly baked when the edges are set, but the center still has a slight jiggle. It will continue to firm up as it cools, so don’t worry if it looks a little wobbly!
Can I customize the toppings for Sugar Cookie Cheesecake?
Of course! Feel free to get creative with toppings. Whether it’s fresh fruit, whipped cream, or colorful sprinkles, the choices are endless and can personalize your cheesecake for any occasion.
What’s the best way to store leftovers?
Store your leftover cheesecake in an airtight container in the fridge to keep it fresh. It usually lasts up to 3-4 days, making it a delightful treat for your family to enjoy later!
Is this recipe suitable for special diets?
It depends! You can easily make adaptations. Try gluten-free flour for a gluten-free version, or use vegan cream cheese for a plant-based delight. Explore the variations I mentioned earlier for more options!
Final Thoughts
There’s something truly special about creating a dessert that brings joy to both you and your loved ones. My Sugar Cookie Cheesecake isn’t just a recipe; it’s an experience that transforms ordinary moments into sweet celebrations. Whether you’re serving it at a family gathering or indulging after a long day, this cheesecake serves up both nostalgia and happiness. The blend of sugar cookie goodness and creamy cheesecake is pure bliss! So, roll up your sleeves, dive into the mixing bowls, and let this delightful dessert sweeten your life one slice at a time. You deserve it!
Print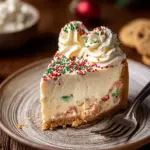
Sugar Cookie Cheesecake: Your New Favorite Dessert!
- Total Time: 3-4 hours (including chilling time)
- Yield: 8 servings 1x
- Diet: Vegetarian
Description
A delightful dessert that combines the flavors of sugar cookies and creamy cheesecake, perfect for any occasion.
Ingredients
- 1 1/2 cups all-purpose flour
- 1/2 cup unsalted butter, softened
- 1/4 cup granulated sugar
- 1 egg
- 1 teaspoon vanilla extract
- 1/2 teaspoon baking powder
- 1/4 teaspoon salt
- 2 (8 oz) packages cream cheese, softened
- 1 cup granulated sugar
- 1 teaspoon vanilla extract
- 2 large eggs
- 1/4 cup sour cream (optional)
- 1 tablespoon all-purpose flour
- Whipped cream (optional)
- Sugar sprinkles (optional)
- Fresh berries (optional)
Instructions
- Preheat oven to 350°F (175°C). Cream butter and sugar until fluffy.
- Beat in egg and vanilla.
- In another bowl, whisk flour, baking powder, and salt.
- Combine wet and dry ingredients to form dough.
- Press into a 9-inch springform pan.
- Bake for 10–12 minutes, then cool slightly.
- Beat cream cheese until smooth.
- Mix in sugar and vanilla.
- Beat in eggs one at a time.
- Add sour cream and flour and beat until creamy.
- Pour filling over crust and smooth the top.
- Tap pan gently to remove air bubbles.
- Reduce oven to 325°F (163°C) and bake for 40–50 minutes until set but slightly jiggly in center.
- Cover edges with foil if they brown too quickly.
- Let cool at room temperature for 30 minutes, then chill in the fridge for at least 3–4 hours or overnight.
- Remove from pan and garnish with whipped cream, sprinkles, and berries if desired.
Notes
- Chilling overnight enhances the flavor and texture of the cheesecake.
- Feel free to customize toppings to your liking.
- Ensure all ingredients are at room temperature for best results.
- Prep Time: 20 minutes
- Cook Time: 50 minutes
- Category: Dessert
- Method: Baking
- Cuisine: American
Nutrition
- Serving Size: 1 slice
- Calories: 350
- Sugar: 20g
- Sodium: 250mg
- Fat: 22g
- Saturated Fat: 13g
- Unsaturated Fat: 8g
- Trans Fat: 0g
- Carbohydrates: 30g
- Fiber: 1g
- Protein: 6g
- Cholesterol: 90mg